November 30, 2025
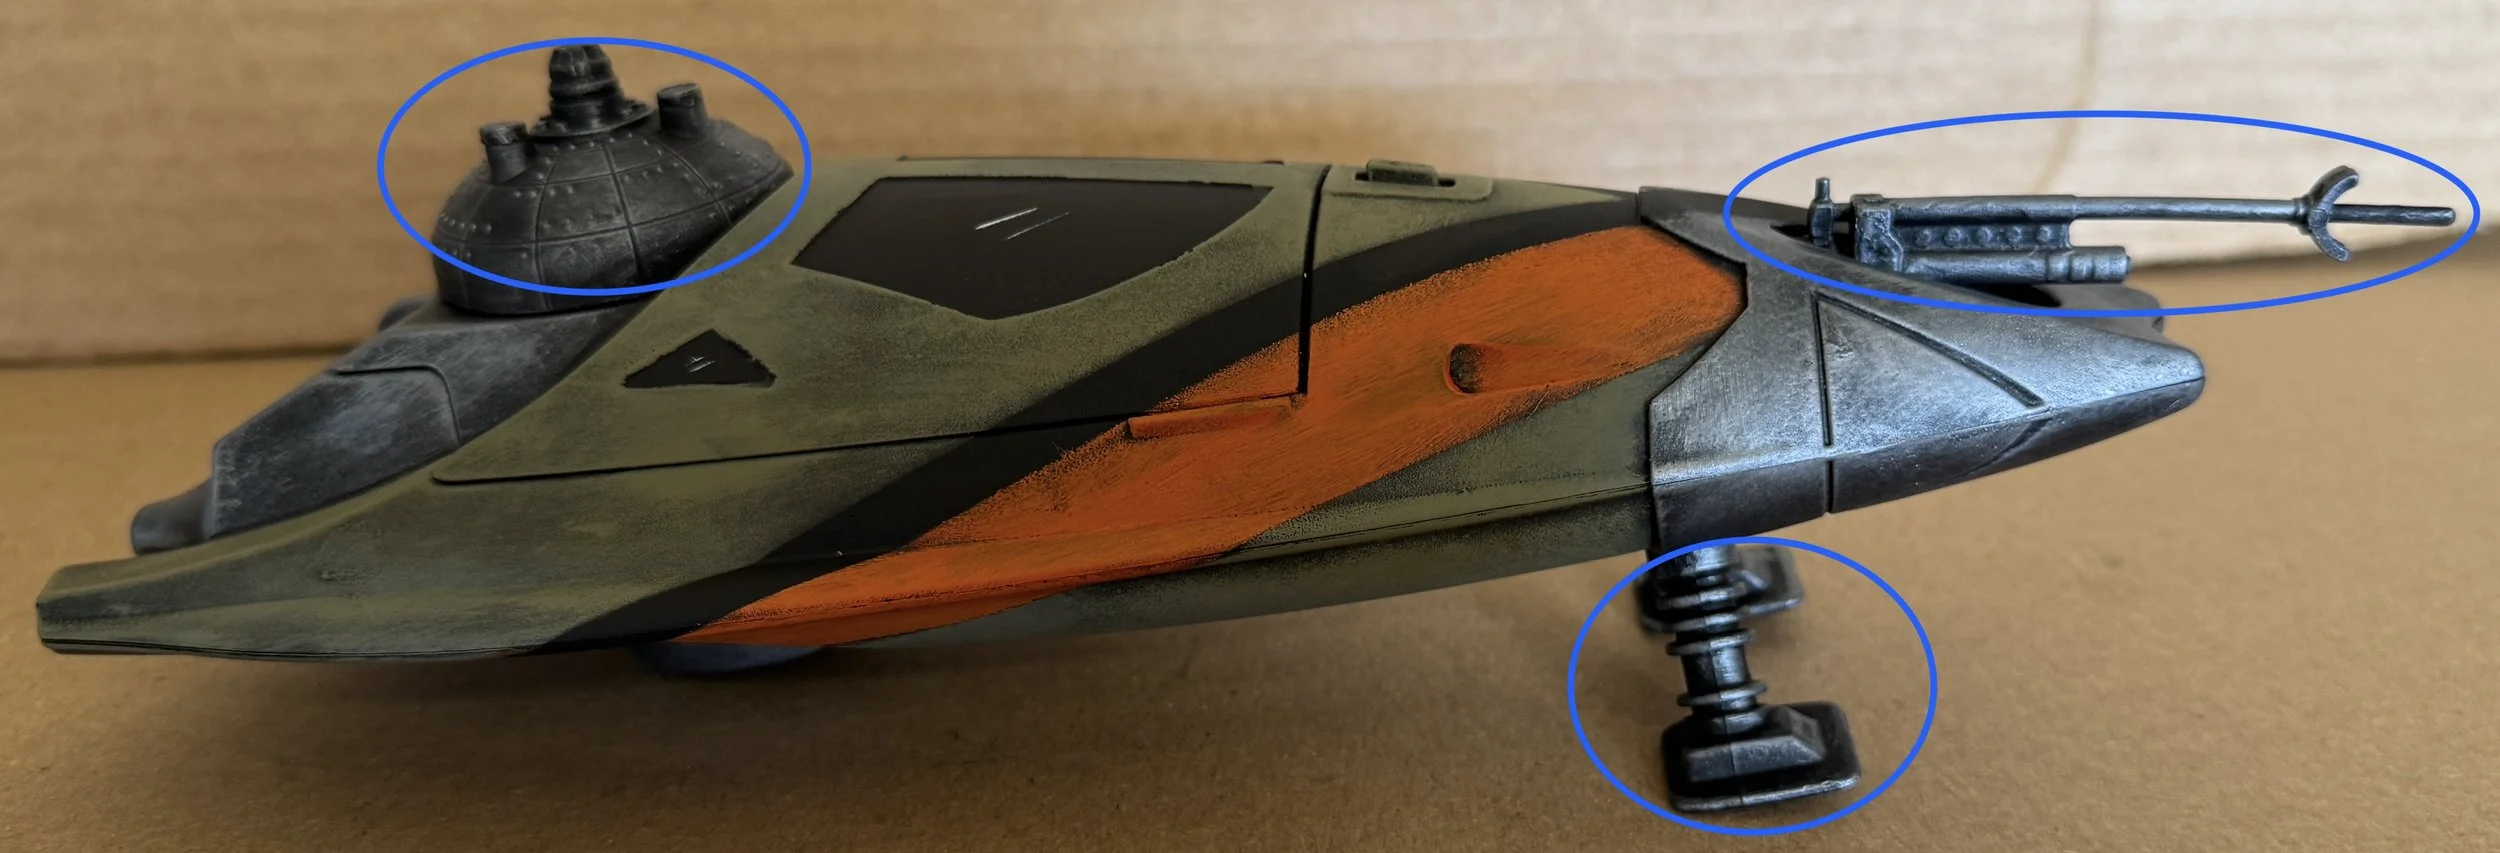
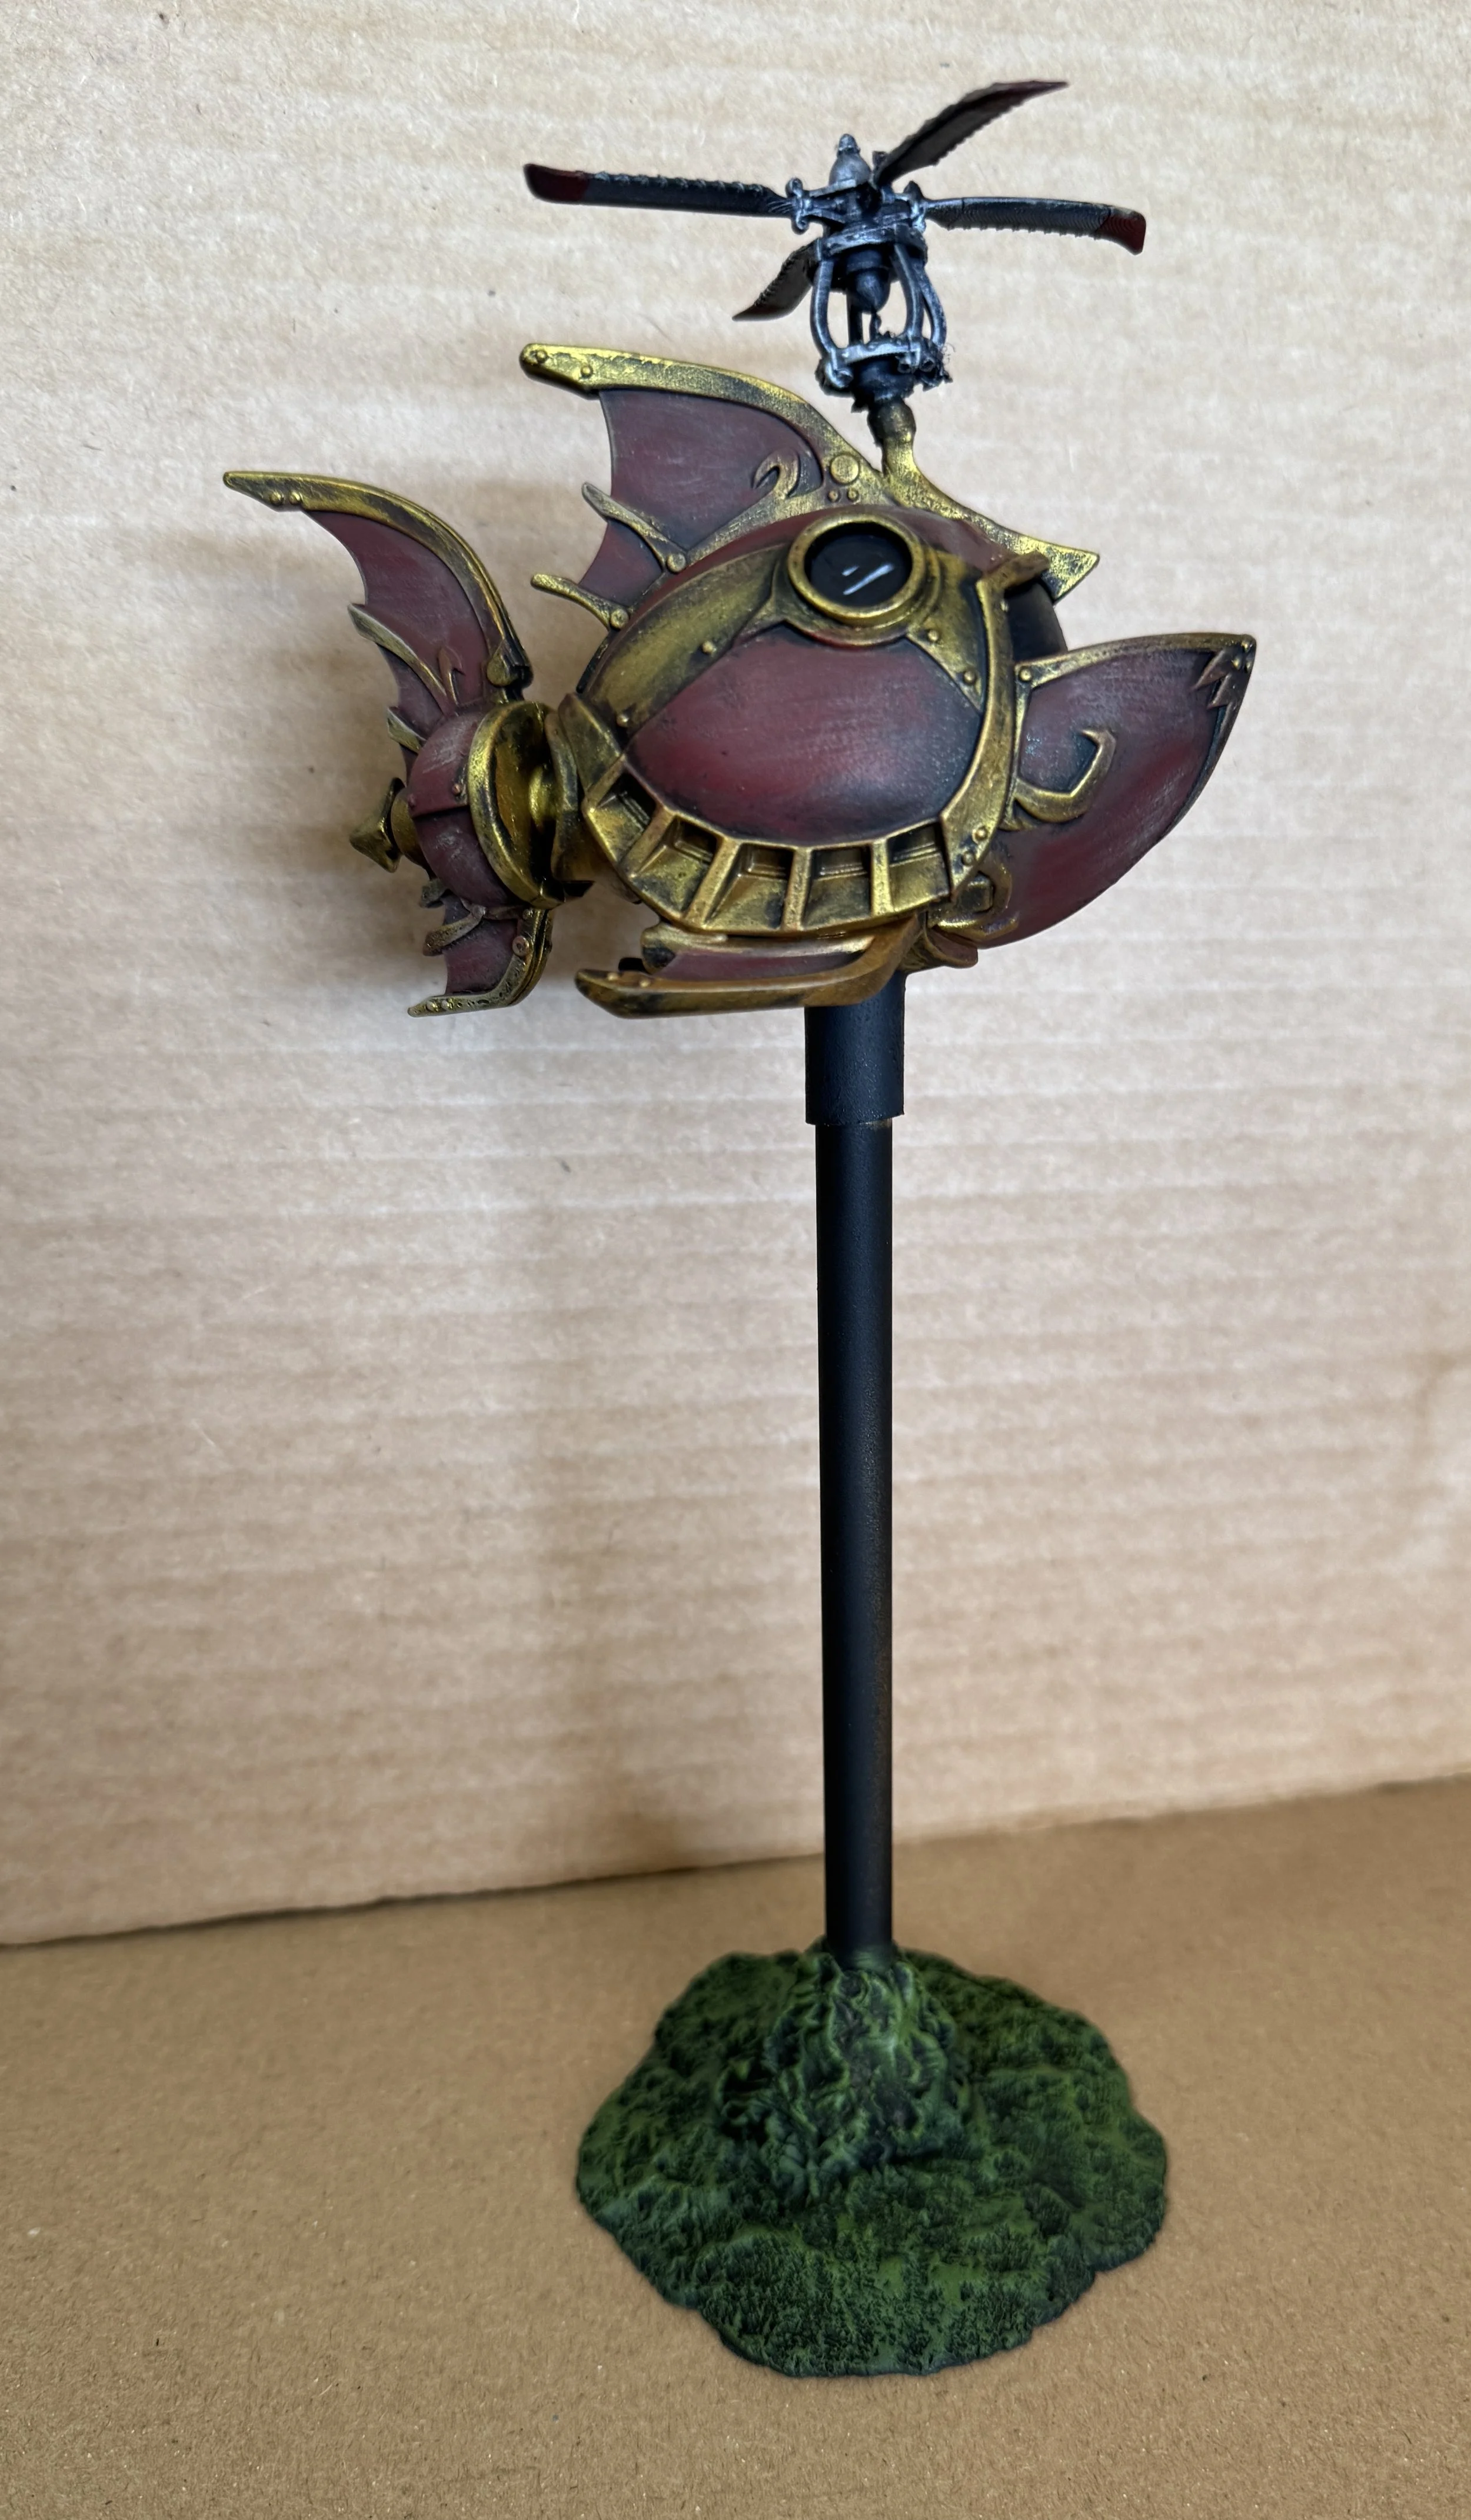
I began and ended the week painting AAT Separatist tanks. Most of mine are transformers (four), but three are the Micro Galaxy Squadron version (only samples shown). Between painting the AATs, I modified and painted the Escape Pod from Queen Amidala’s Royal Star ship. I found the pod at the swap meet. I added the landing gear, nose gun, and rear dome. With the repurposed escape pod done, I decided to create another airship using some chopper blades I had left over from another project and a Skylander Reef Ripper I picked up at the swap meet for $3.


November 23, 2025
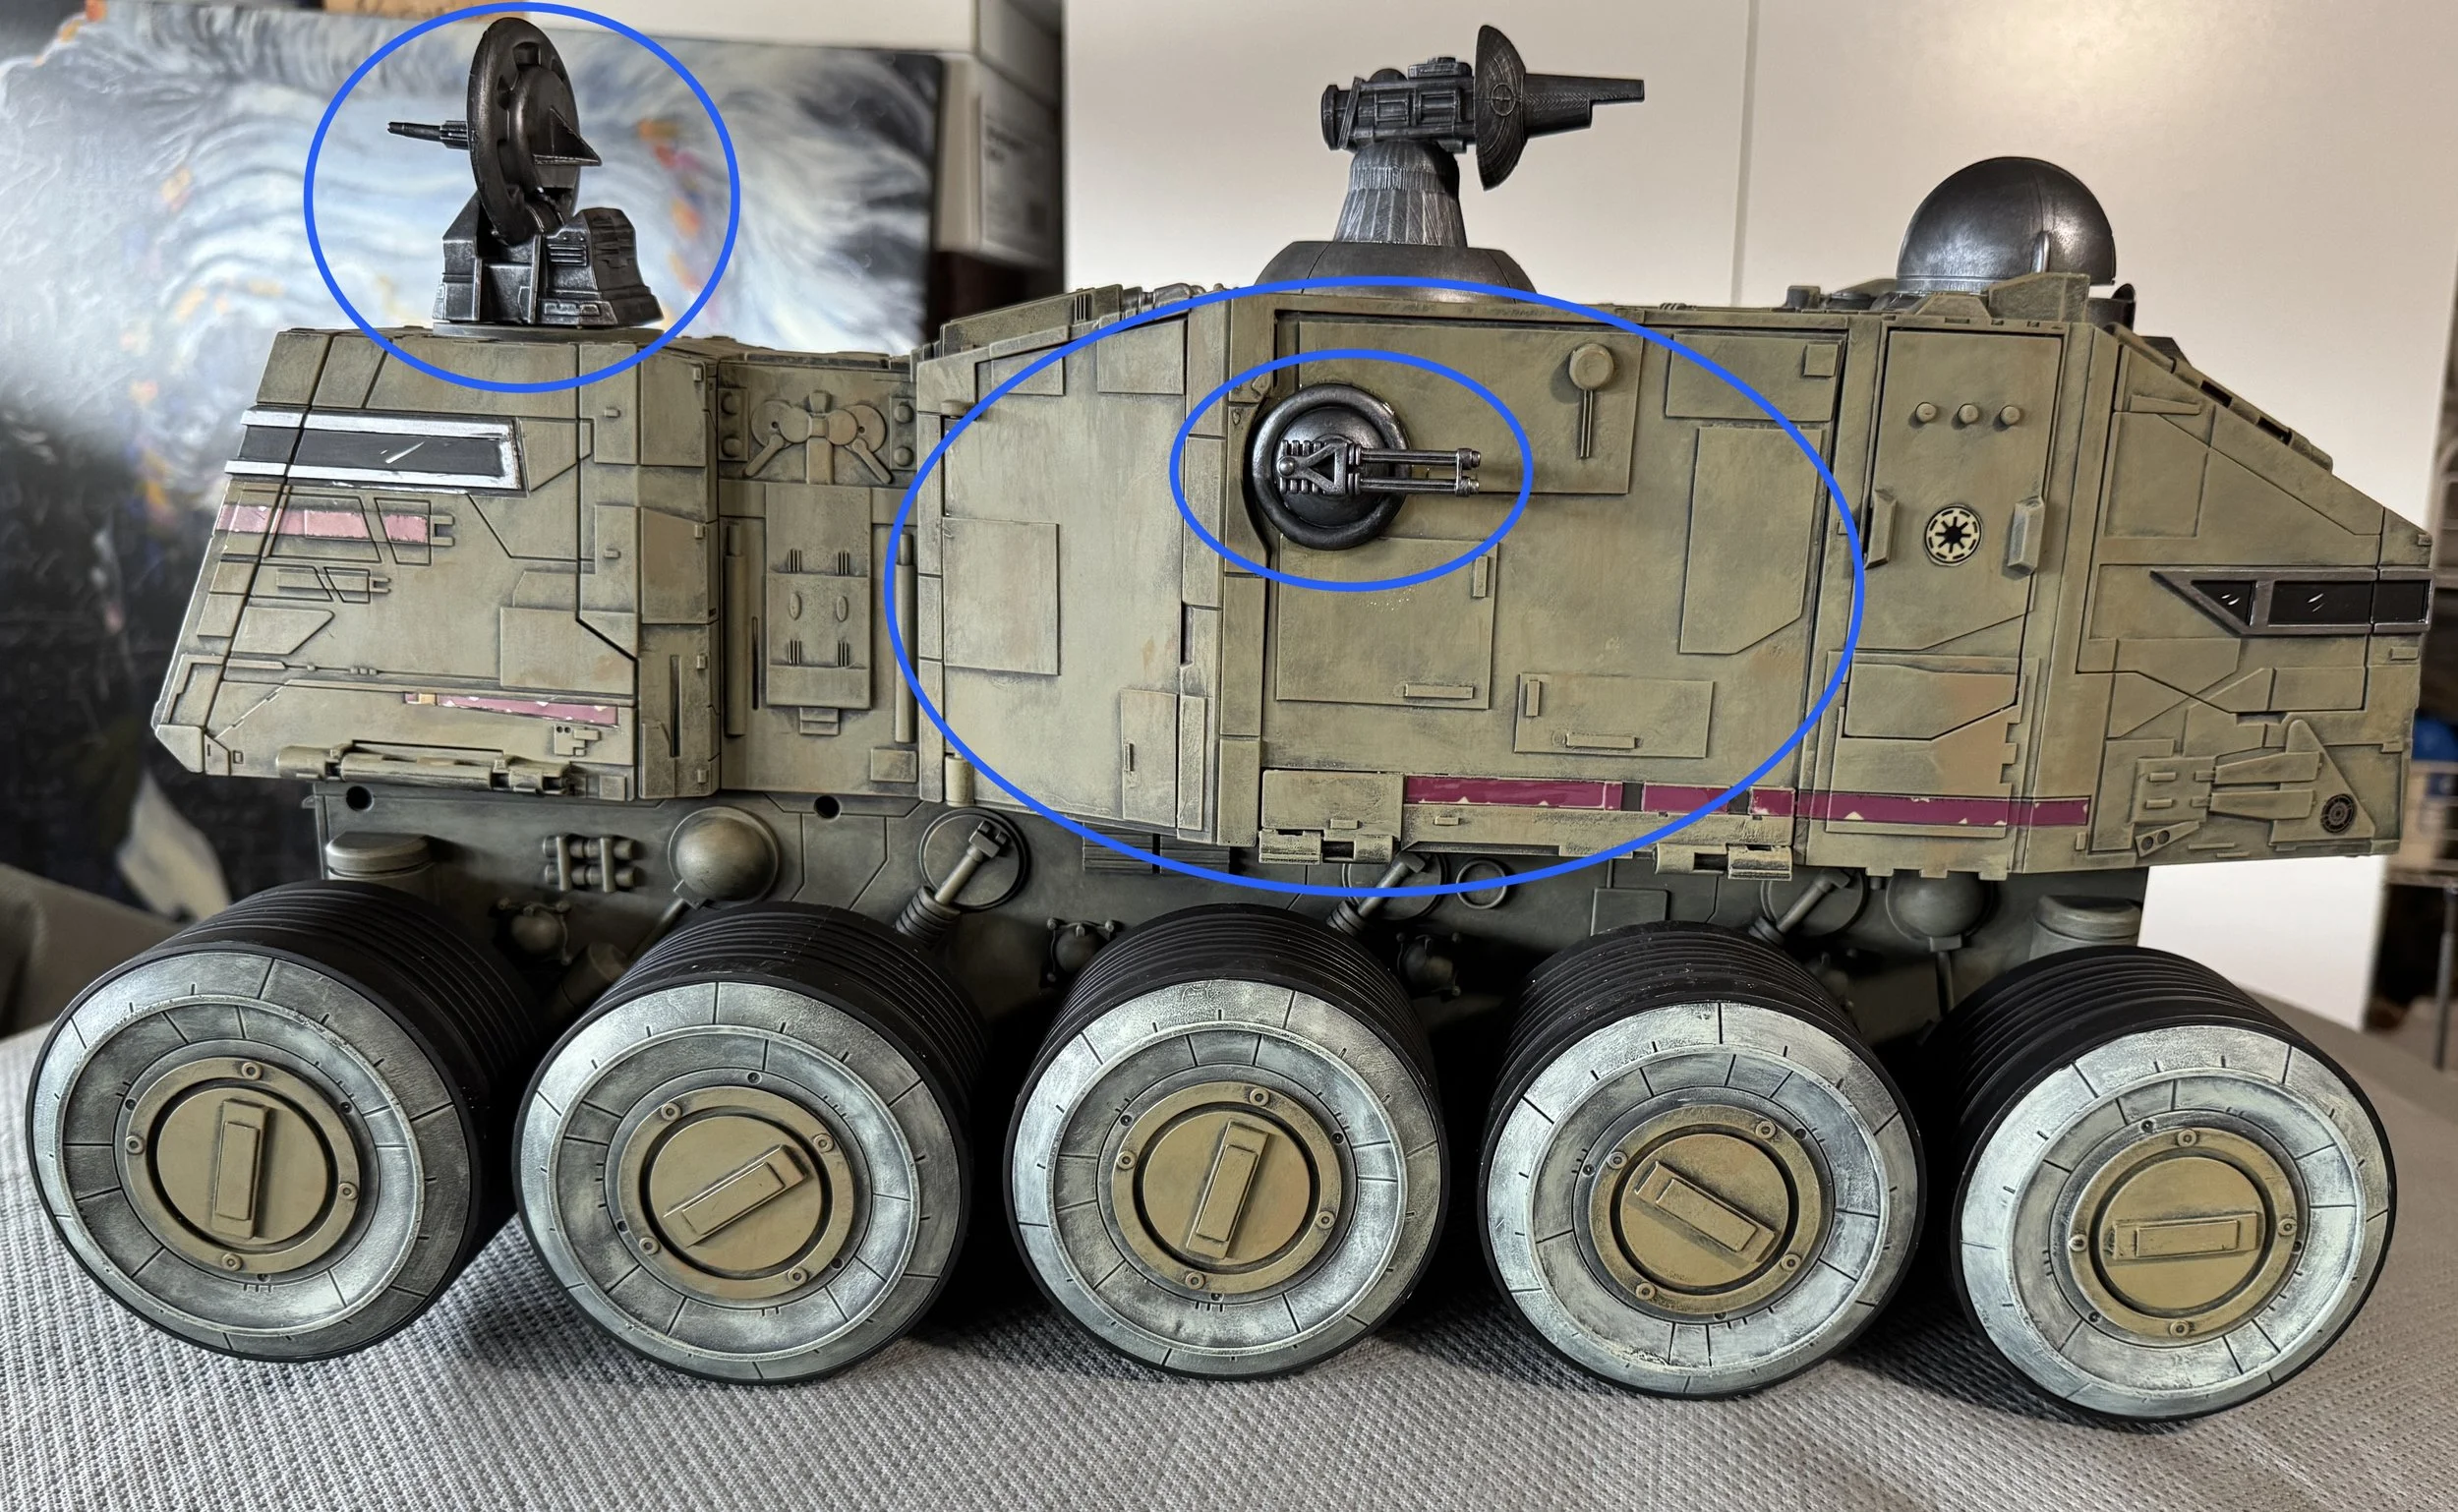
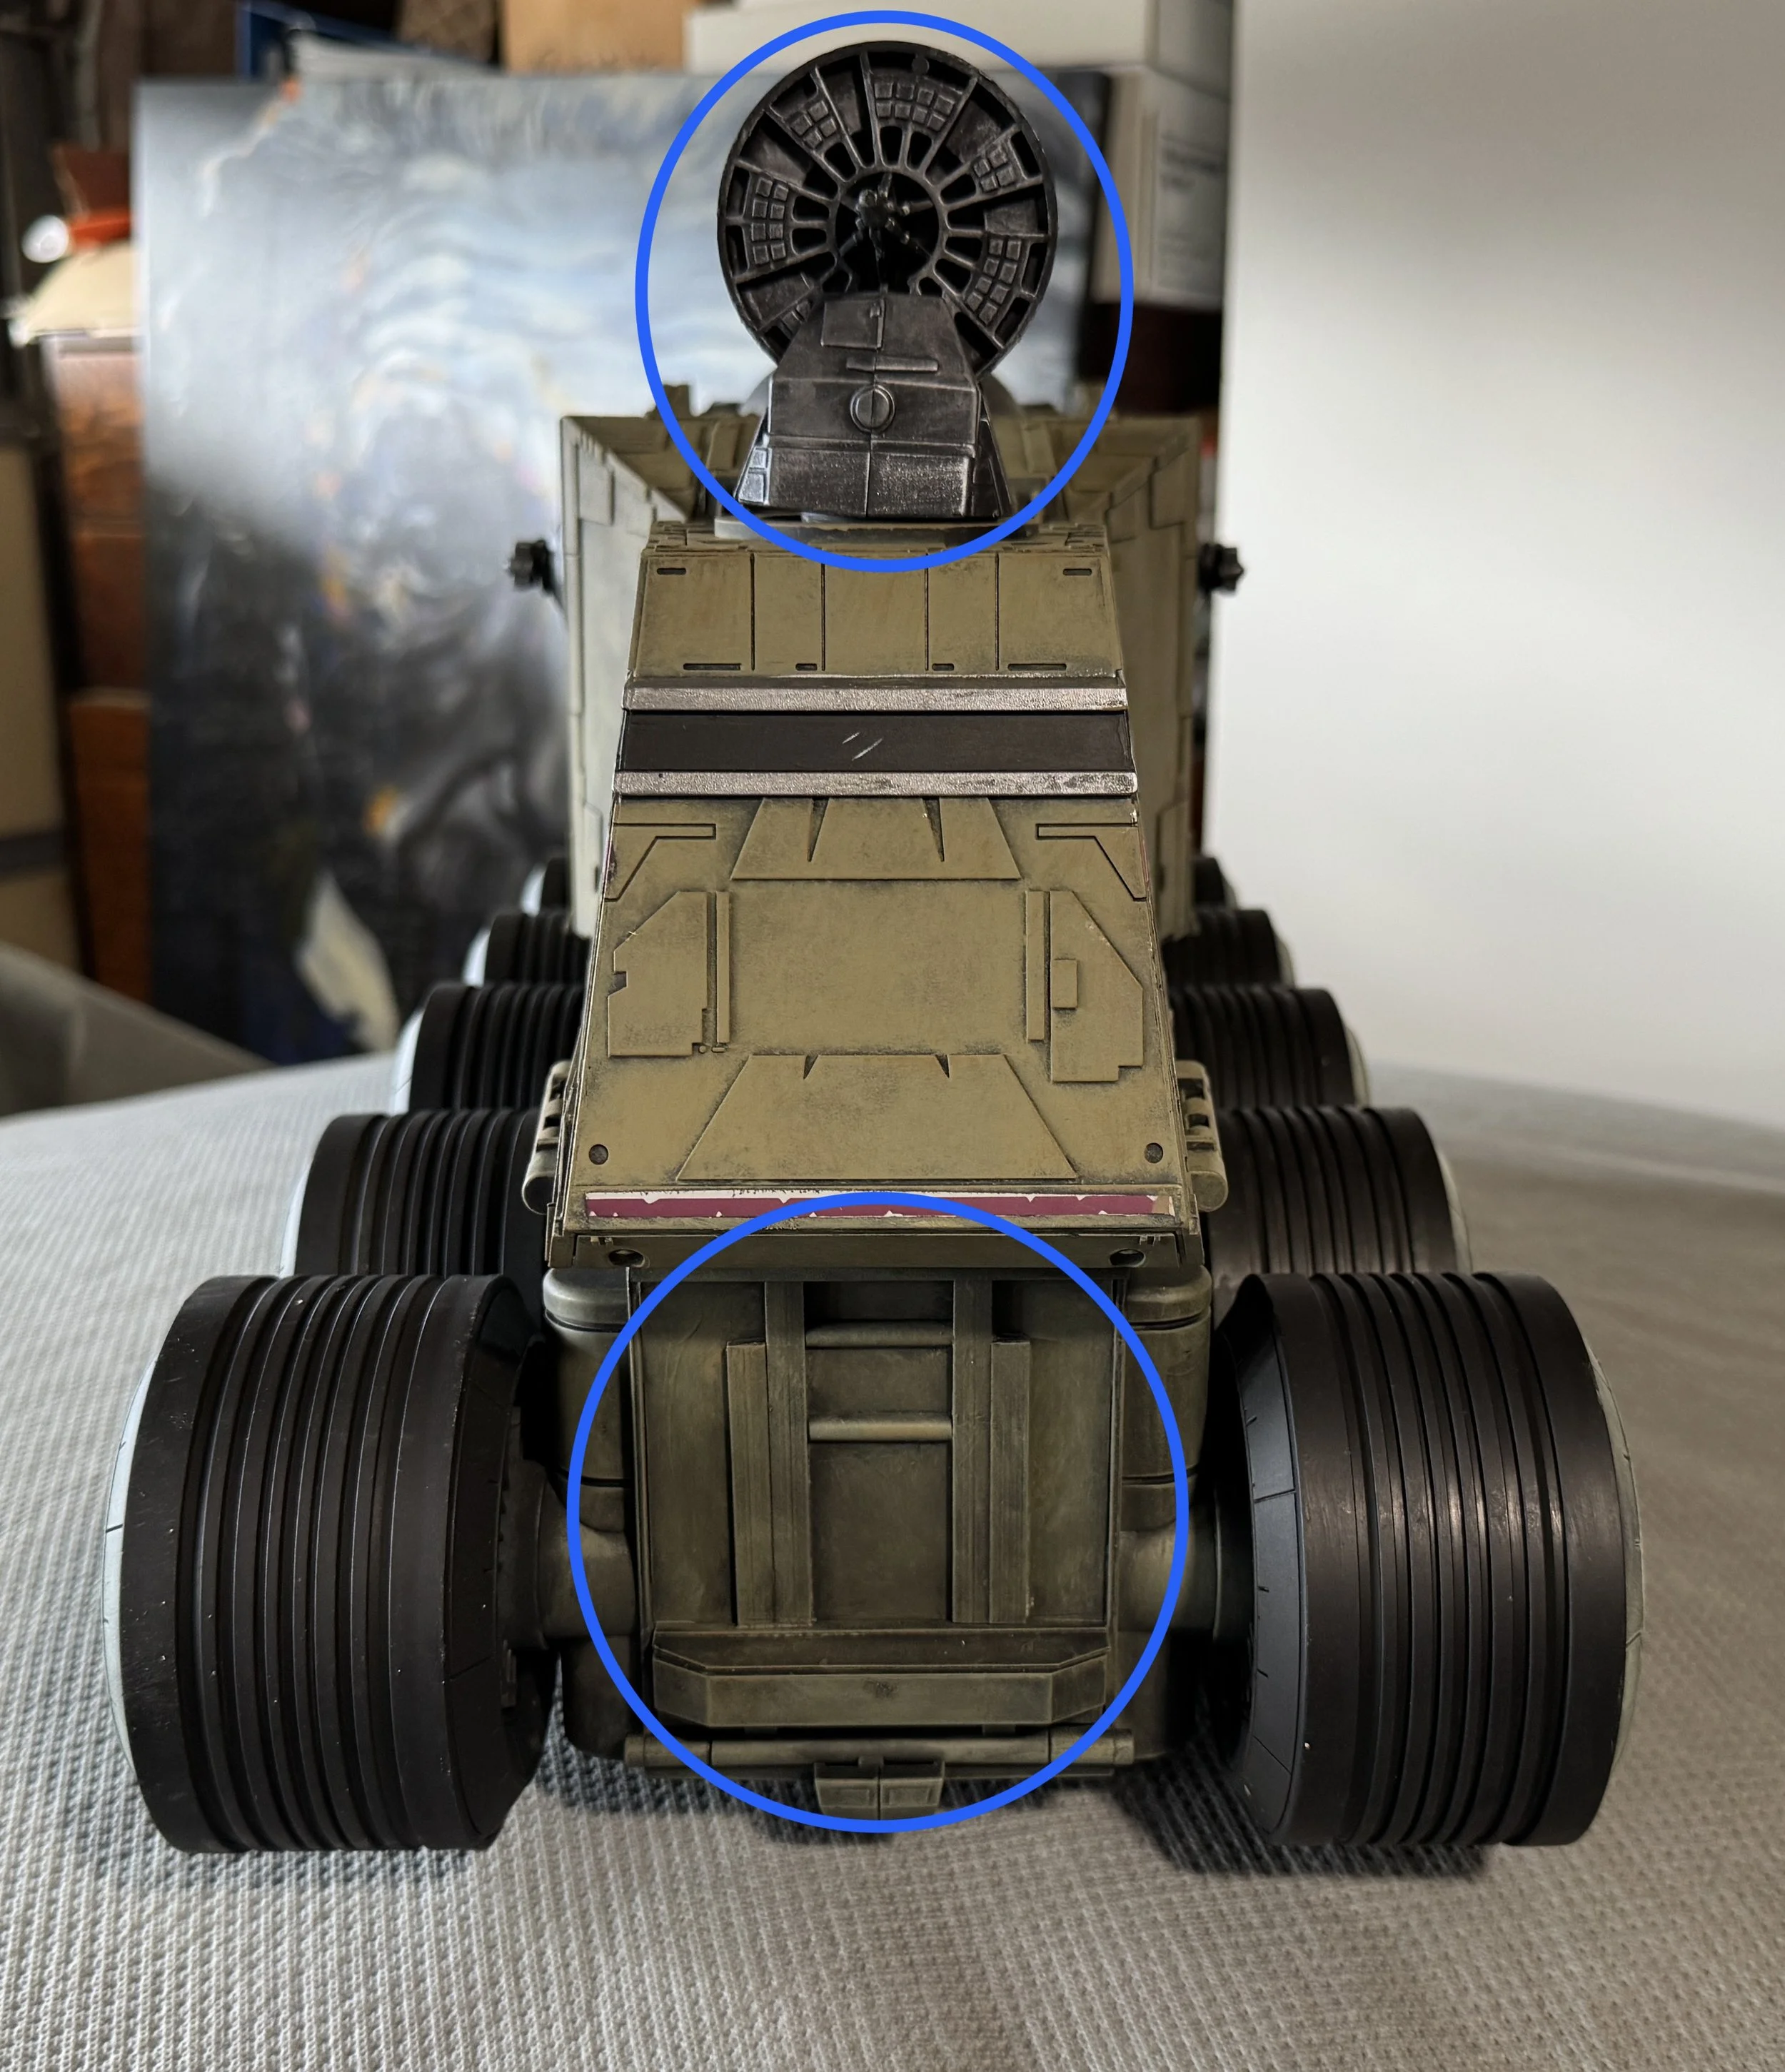
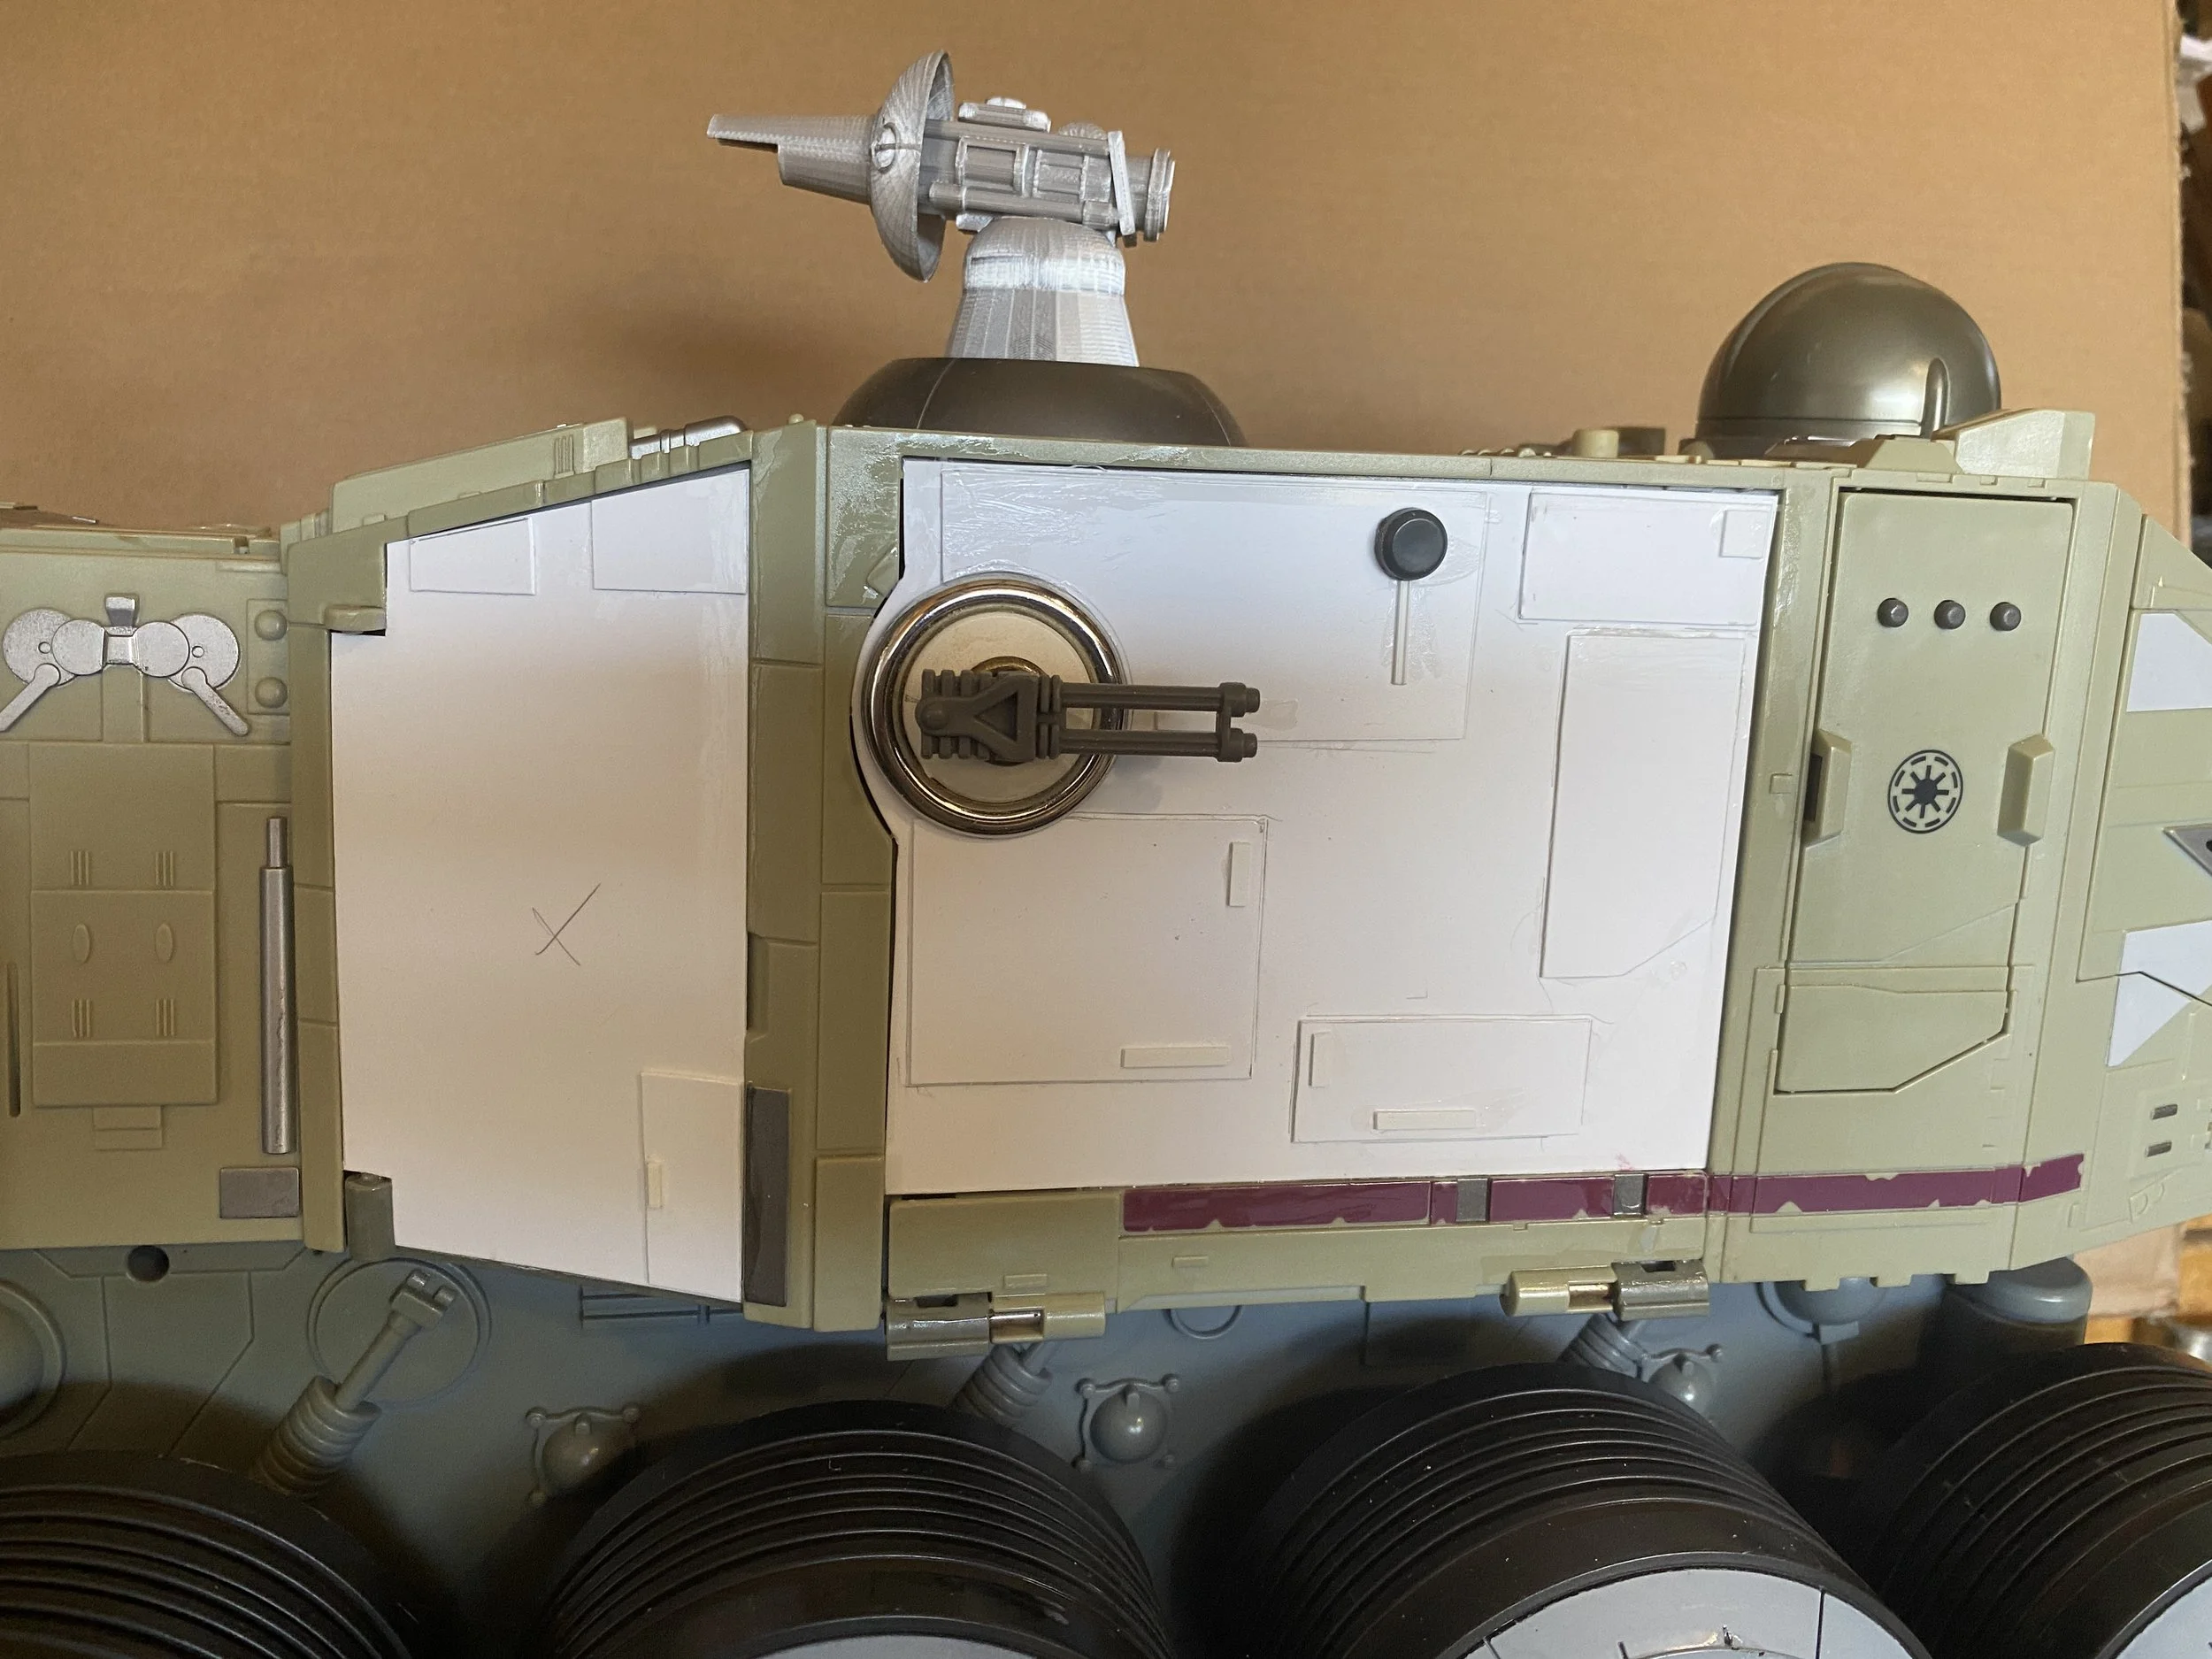
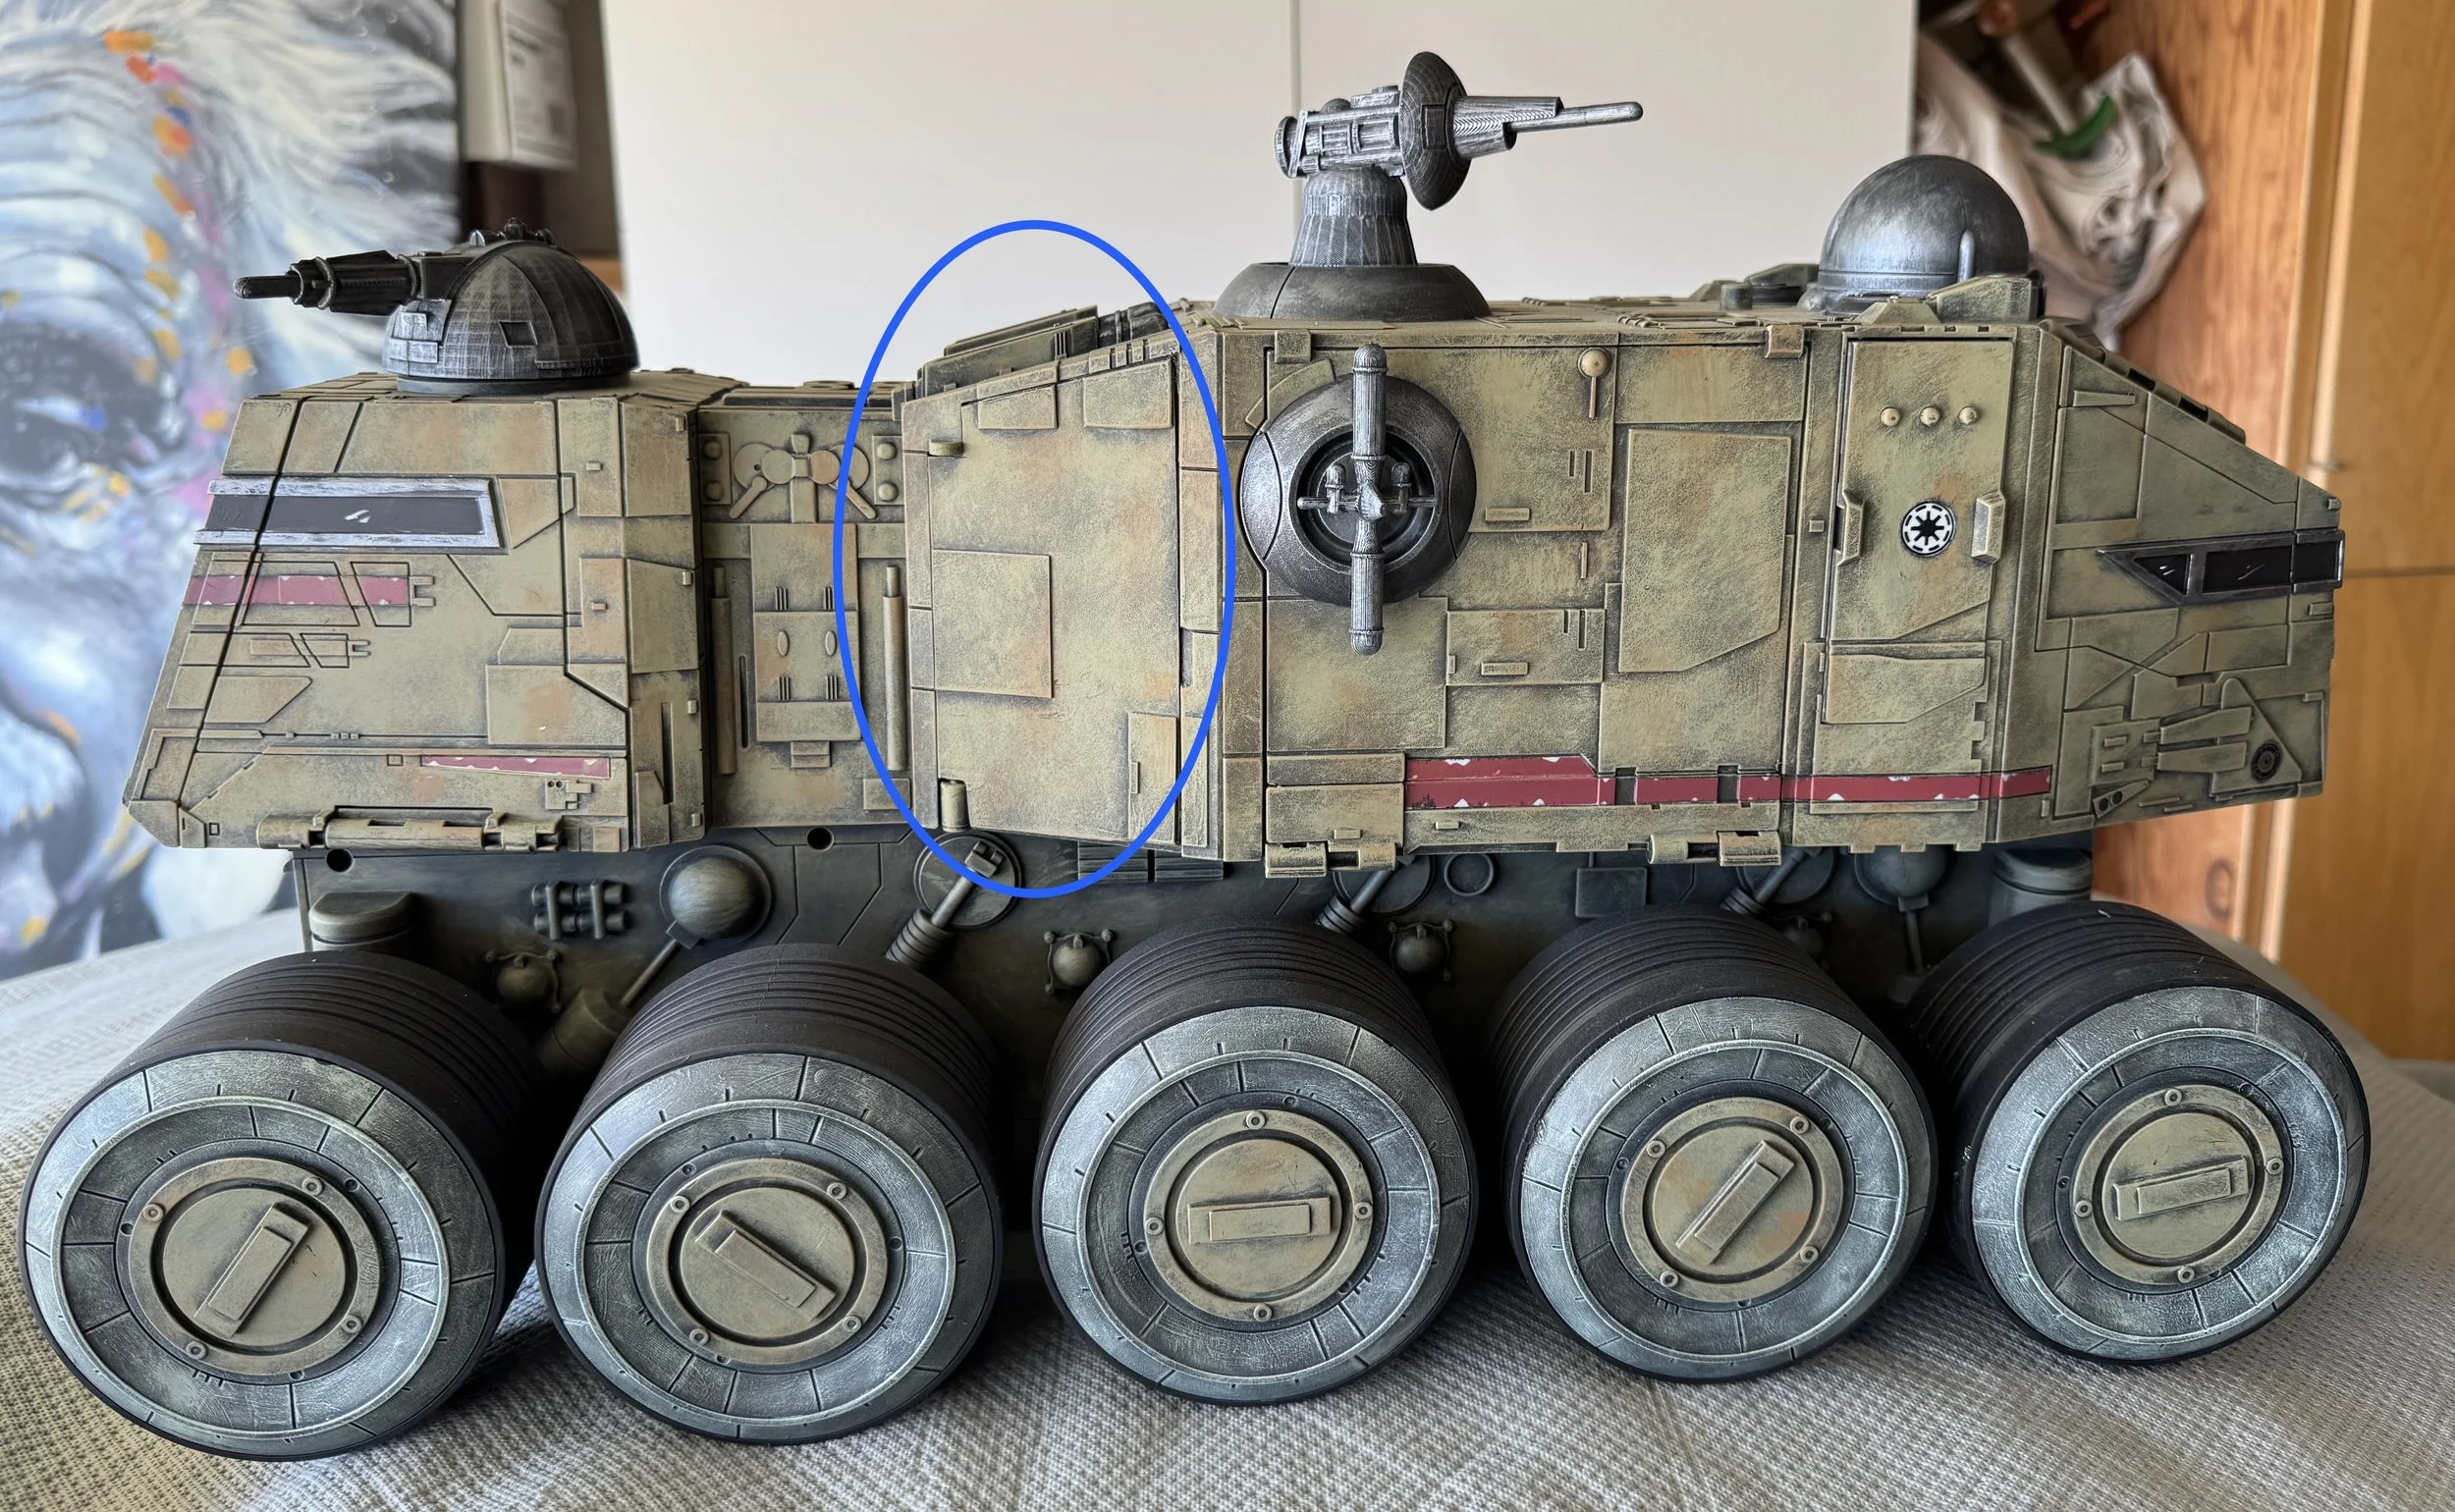
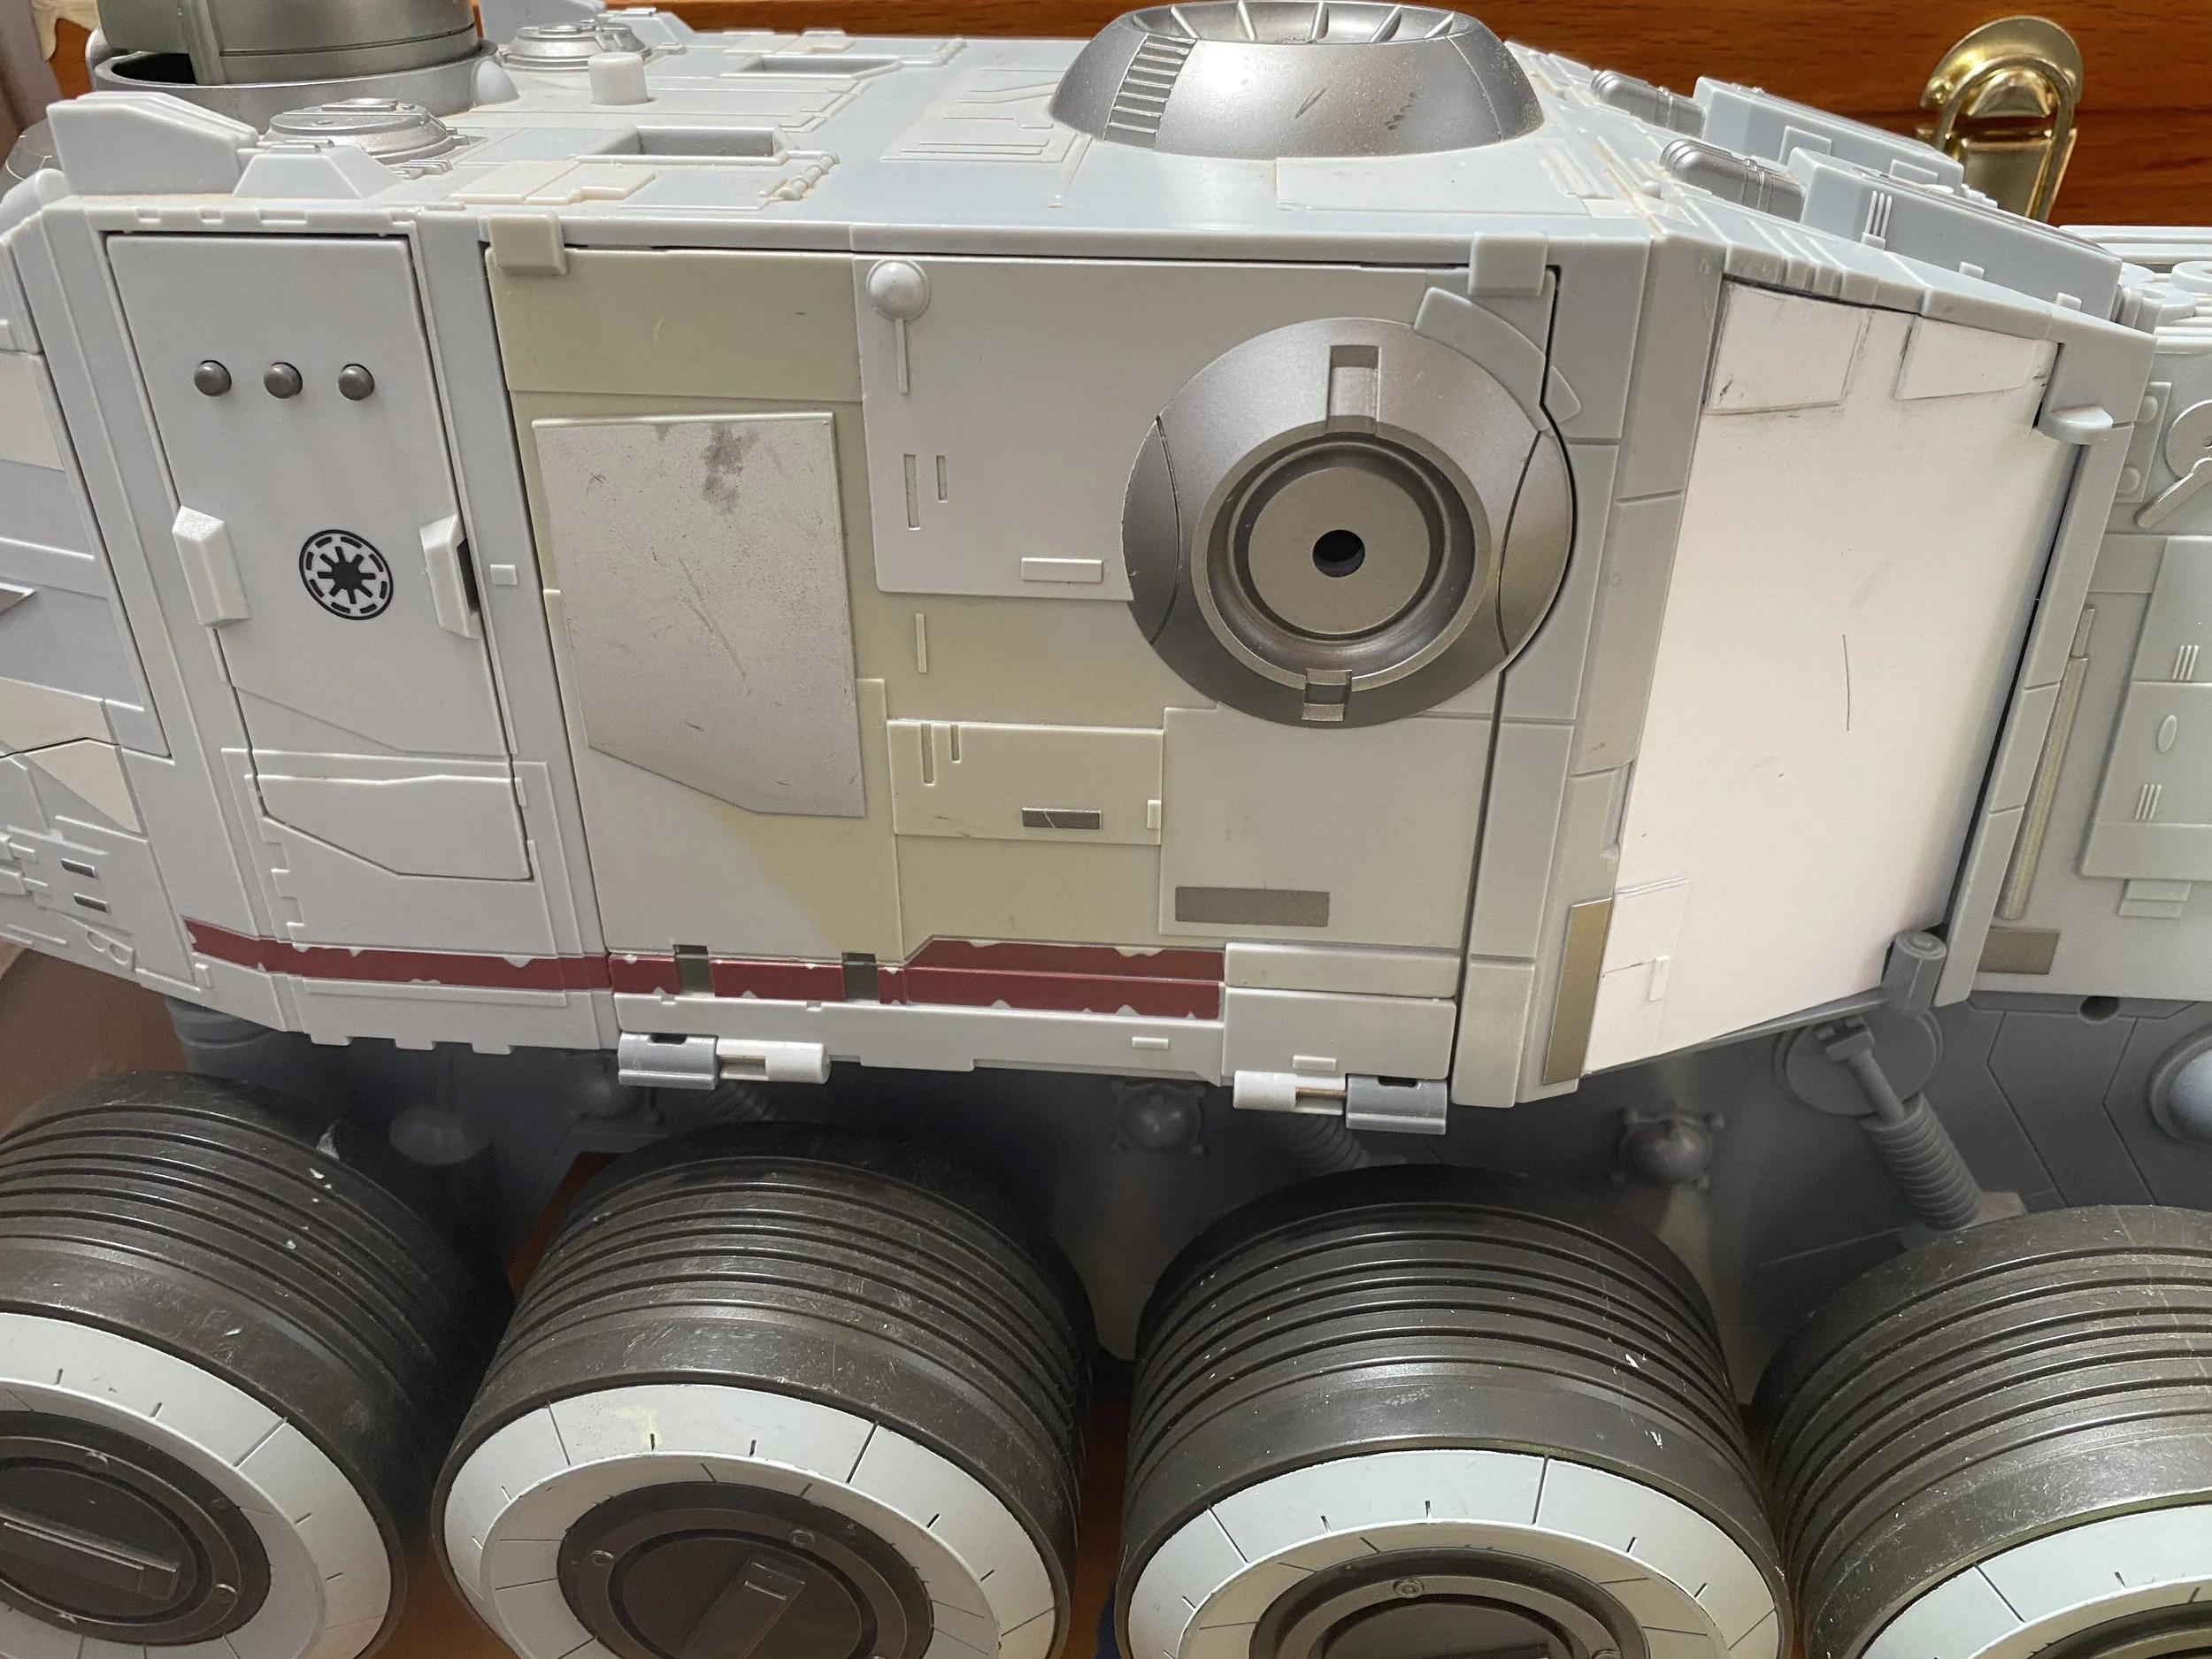
In early 2024 I purchased the Hasbro Clone Turbo Tank on eBay. If you know anything about this vehicle and this toy, you know it is huge… 21 ½” Long, 10 ½” Tall, and 6 ½” Wide). The toy is extremely expensive even in poor condition. I found one for $50 that was missing the side panels on both sides of the center section of the vehicle and the ramp at the rear of the vehicle. I used Evergreen plastic to replace those. It was also missing the weapons and mounts on both sides of the vehicle. I replaced those with big buttons and guns I had from another toy. It was also missing the roof weapons, and I replaced one with an Atgar 1.4 FD P-Tower I found at the swap meet in a pile of broken toys and the center weapon with a 3d-printed medium laser gun that is a copy of the original. It's been months since I put it back together, but it’s so big and heavy (awkward to handle) that I just got around to painting it. The paints used are Vallejo Model Color: US Olive Drab for the undercarriage, Khaki for the upper body high lightered with US Field Drab, and Pastel Green for the wheel sides.
With my first Hasbro Clone Turbo Tank/Juggernaut done, I turned my attention to my second Juggernaut. This one is more complete with only two smaller panels and the loading ramp missing. I used the same color scheme as on the first.
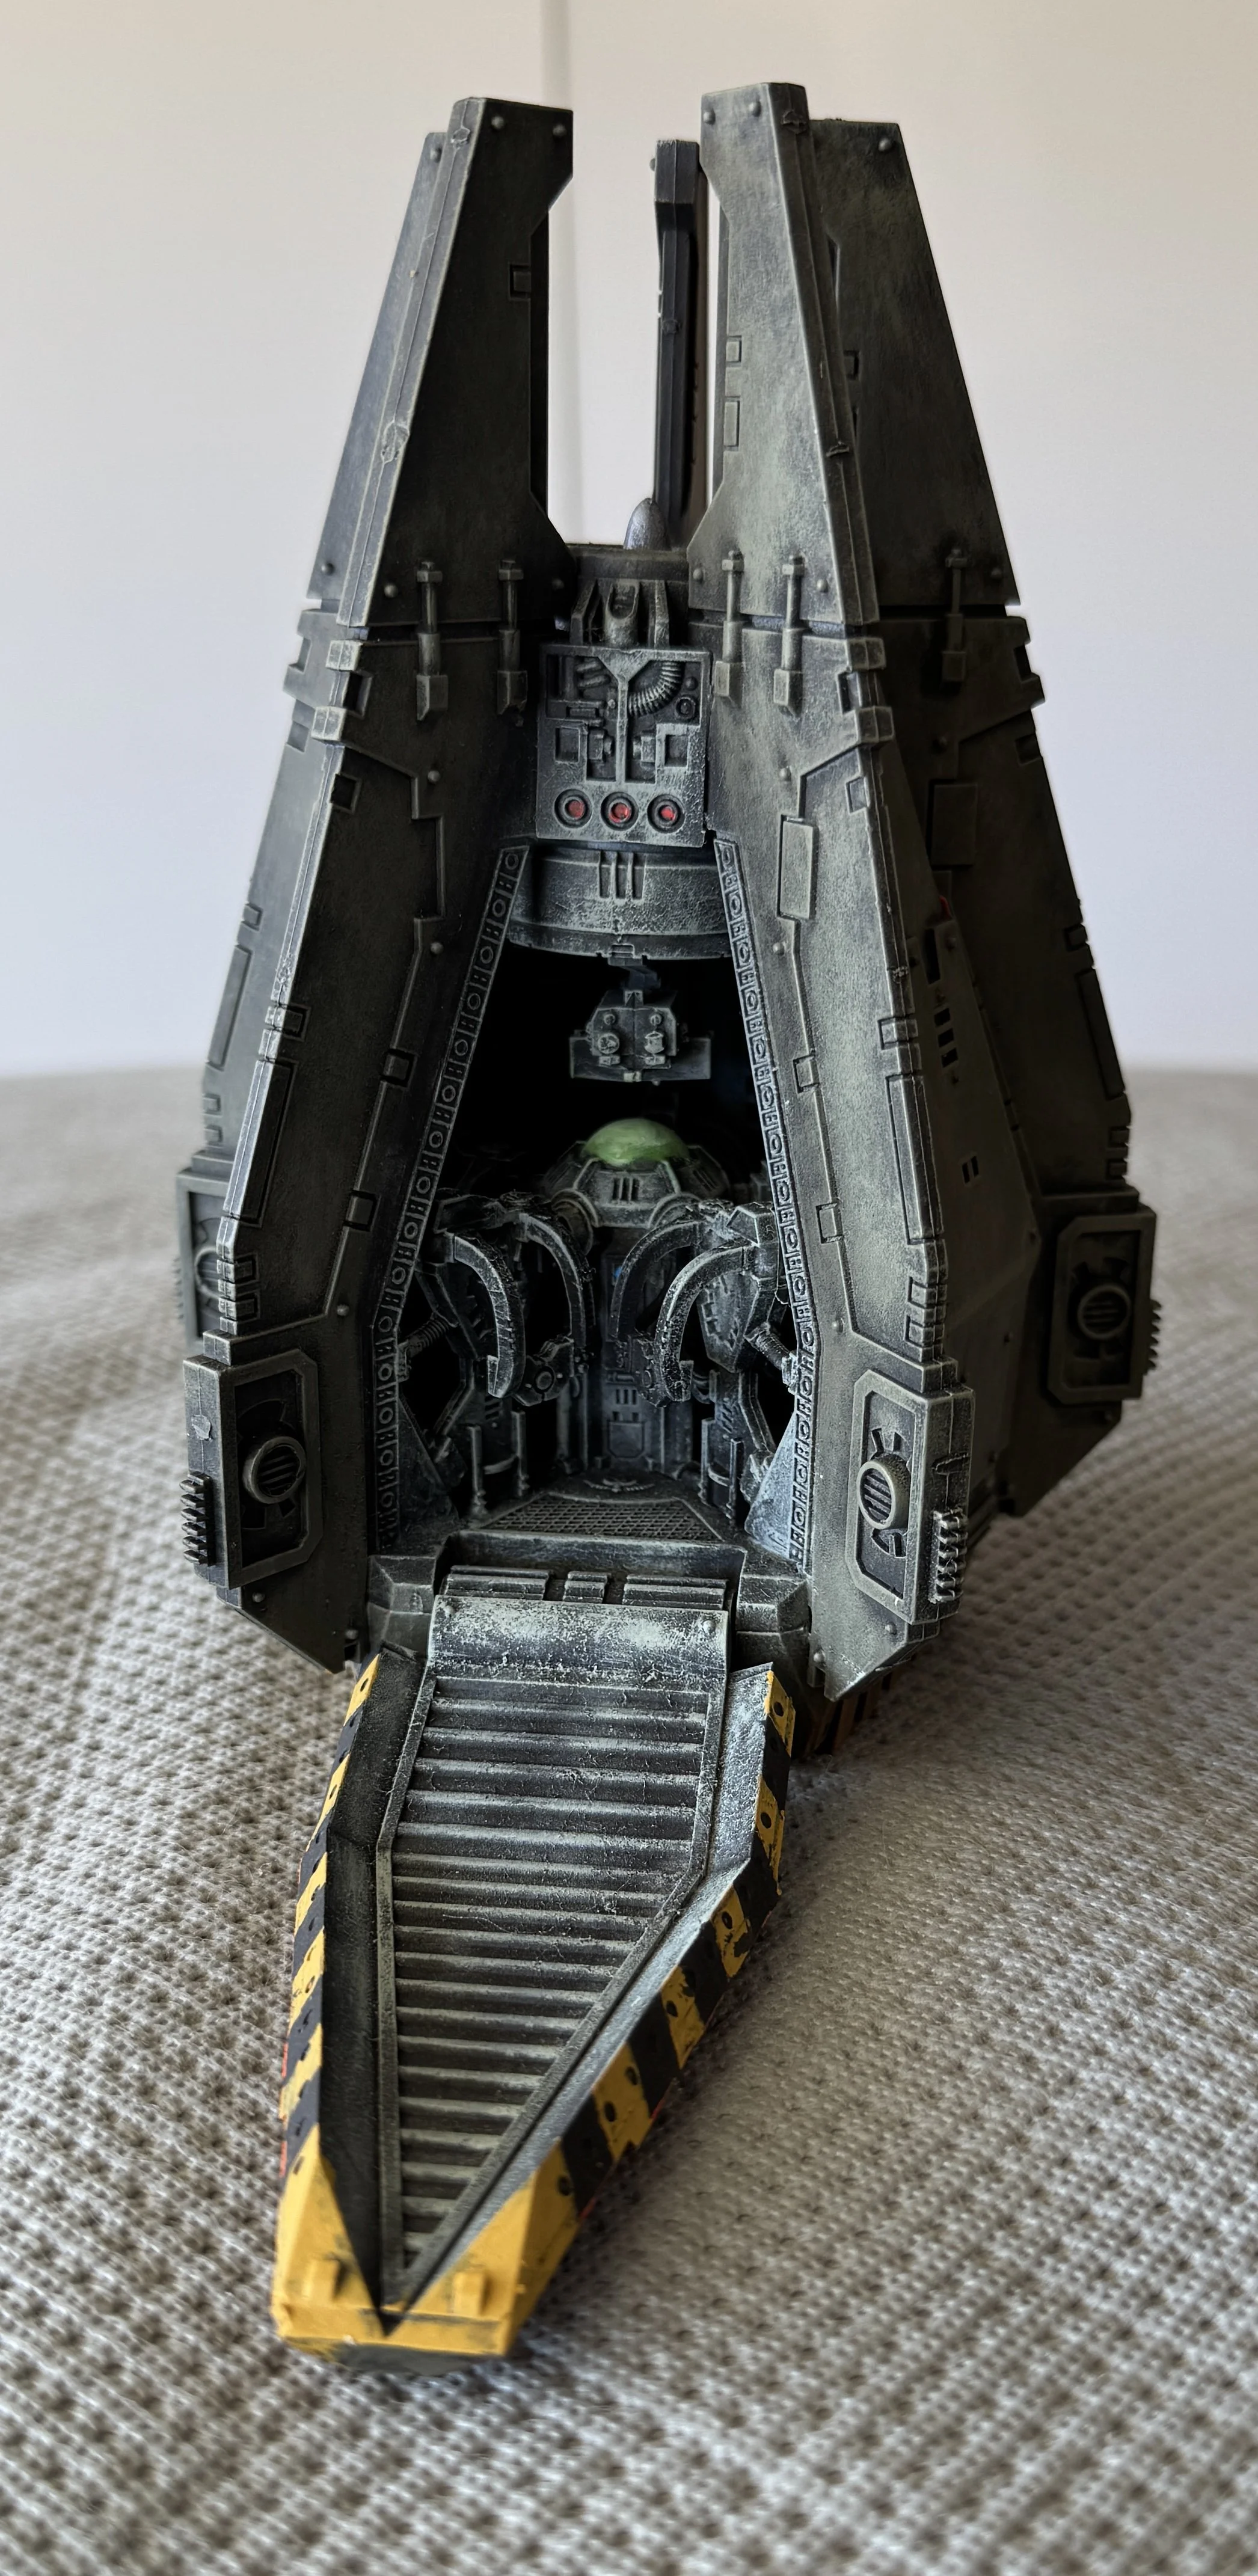
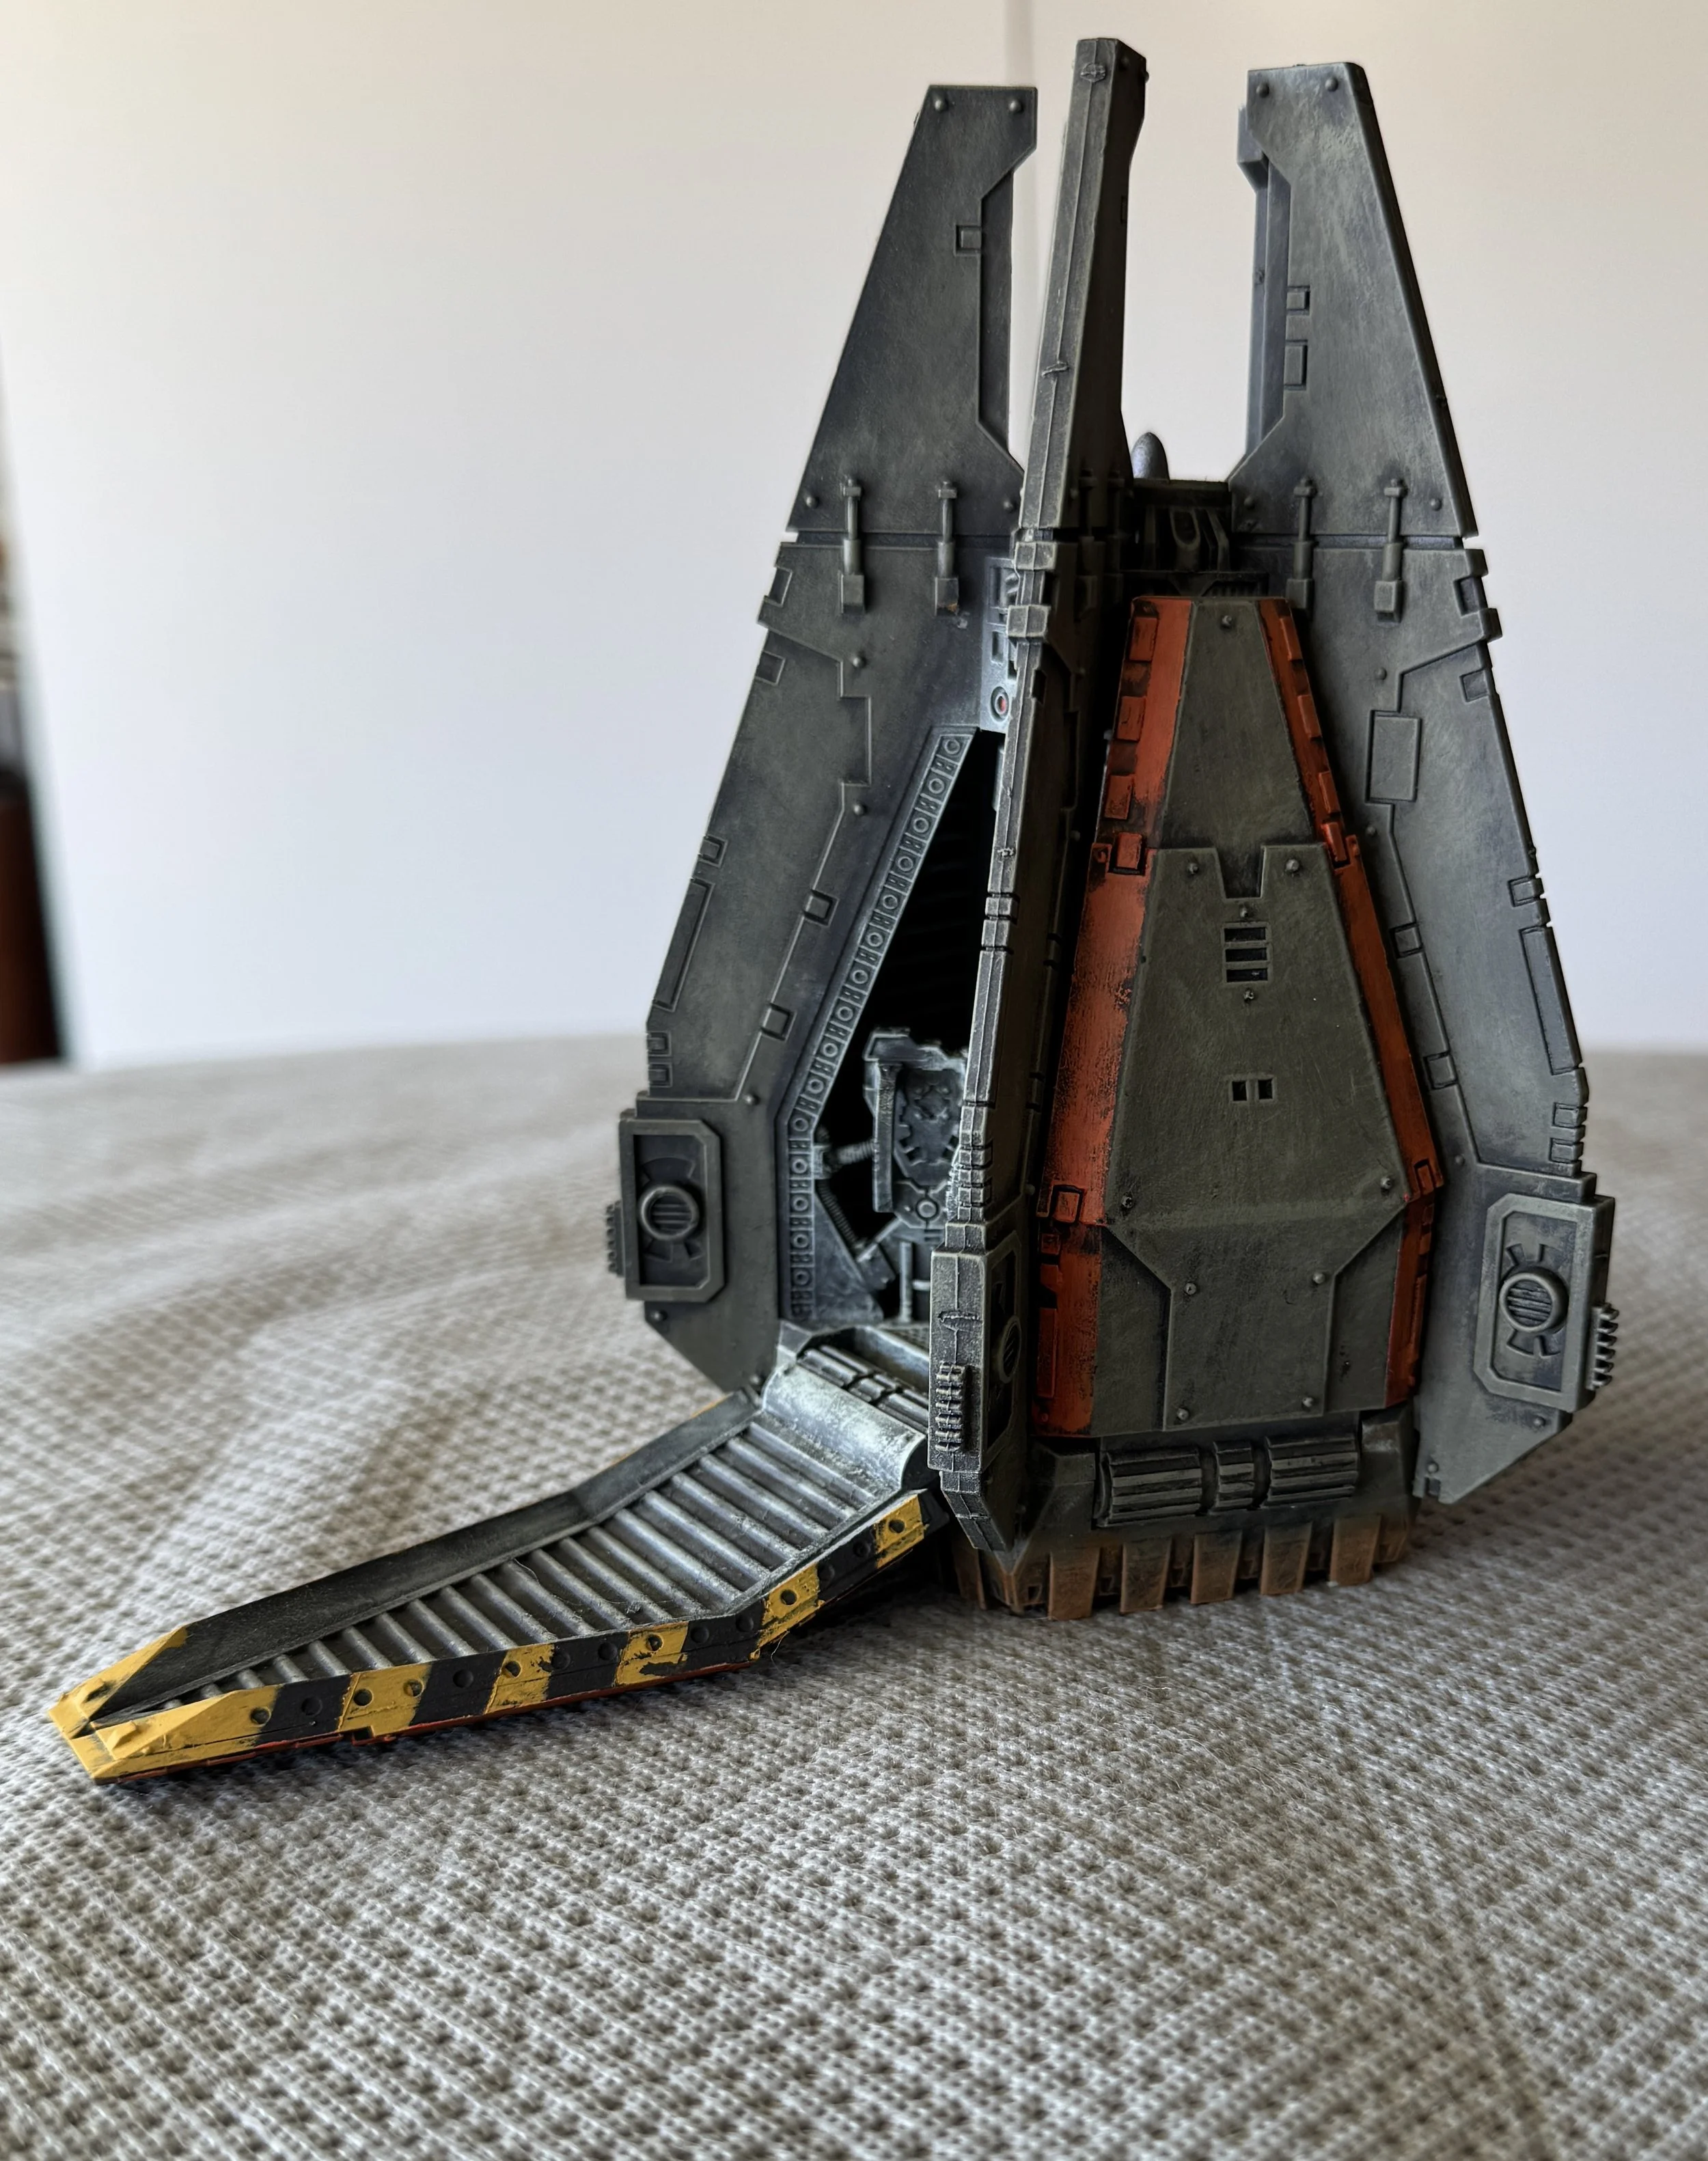
With the second Clone Turbo Tank done, I turned my brush to painting the last of the items I bought at the recent Brookhurst Hobbies Bring and Buy. That final item is another Games Workship piece, a drop capsule. I was particularly attracted to this not only because it was cheap and complete, but it was a version that lacked the traditional 40K markings so it was much more open to a variety of uses. I kept the paint scheme simple. It will be used as a recon capsule (ten Colonial Marines) for my Aliens’ terraforming space stations collection.
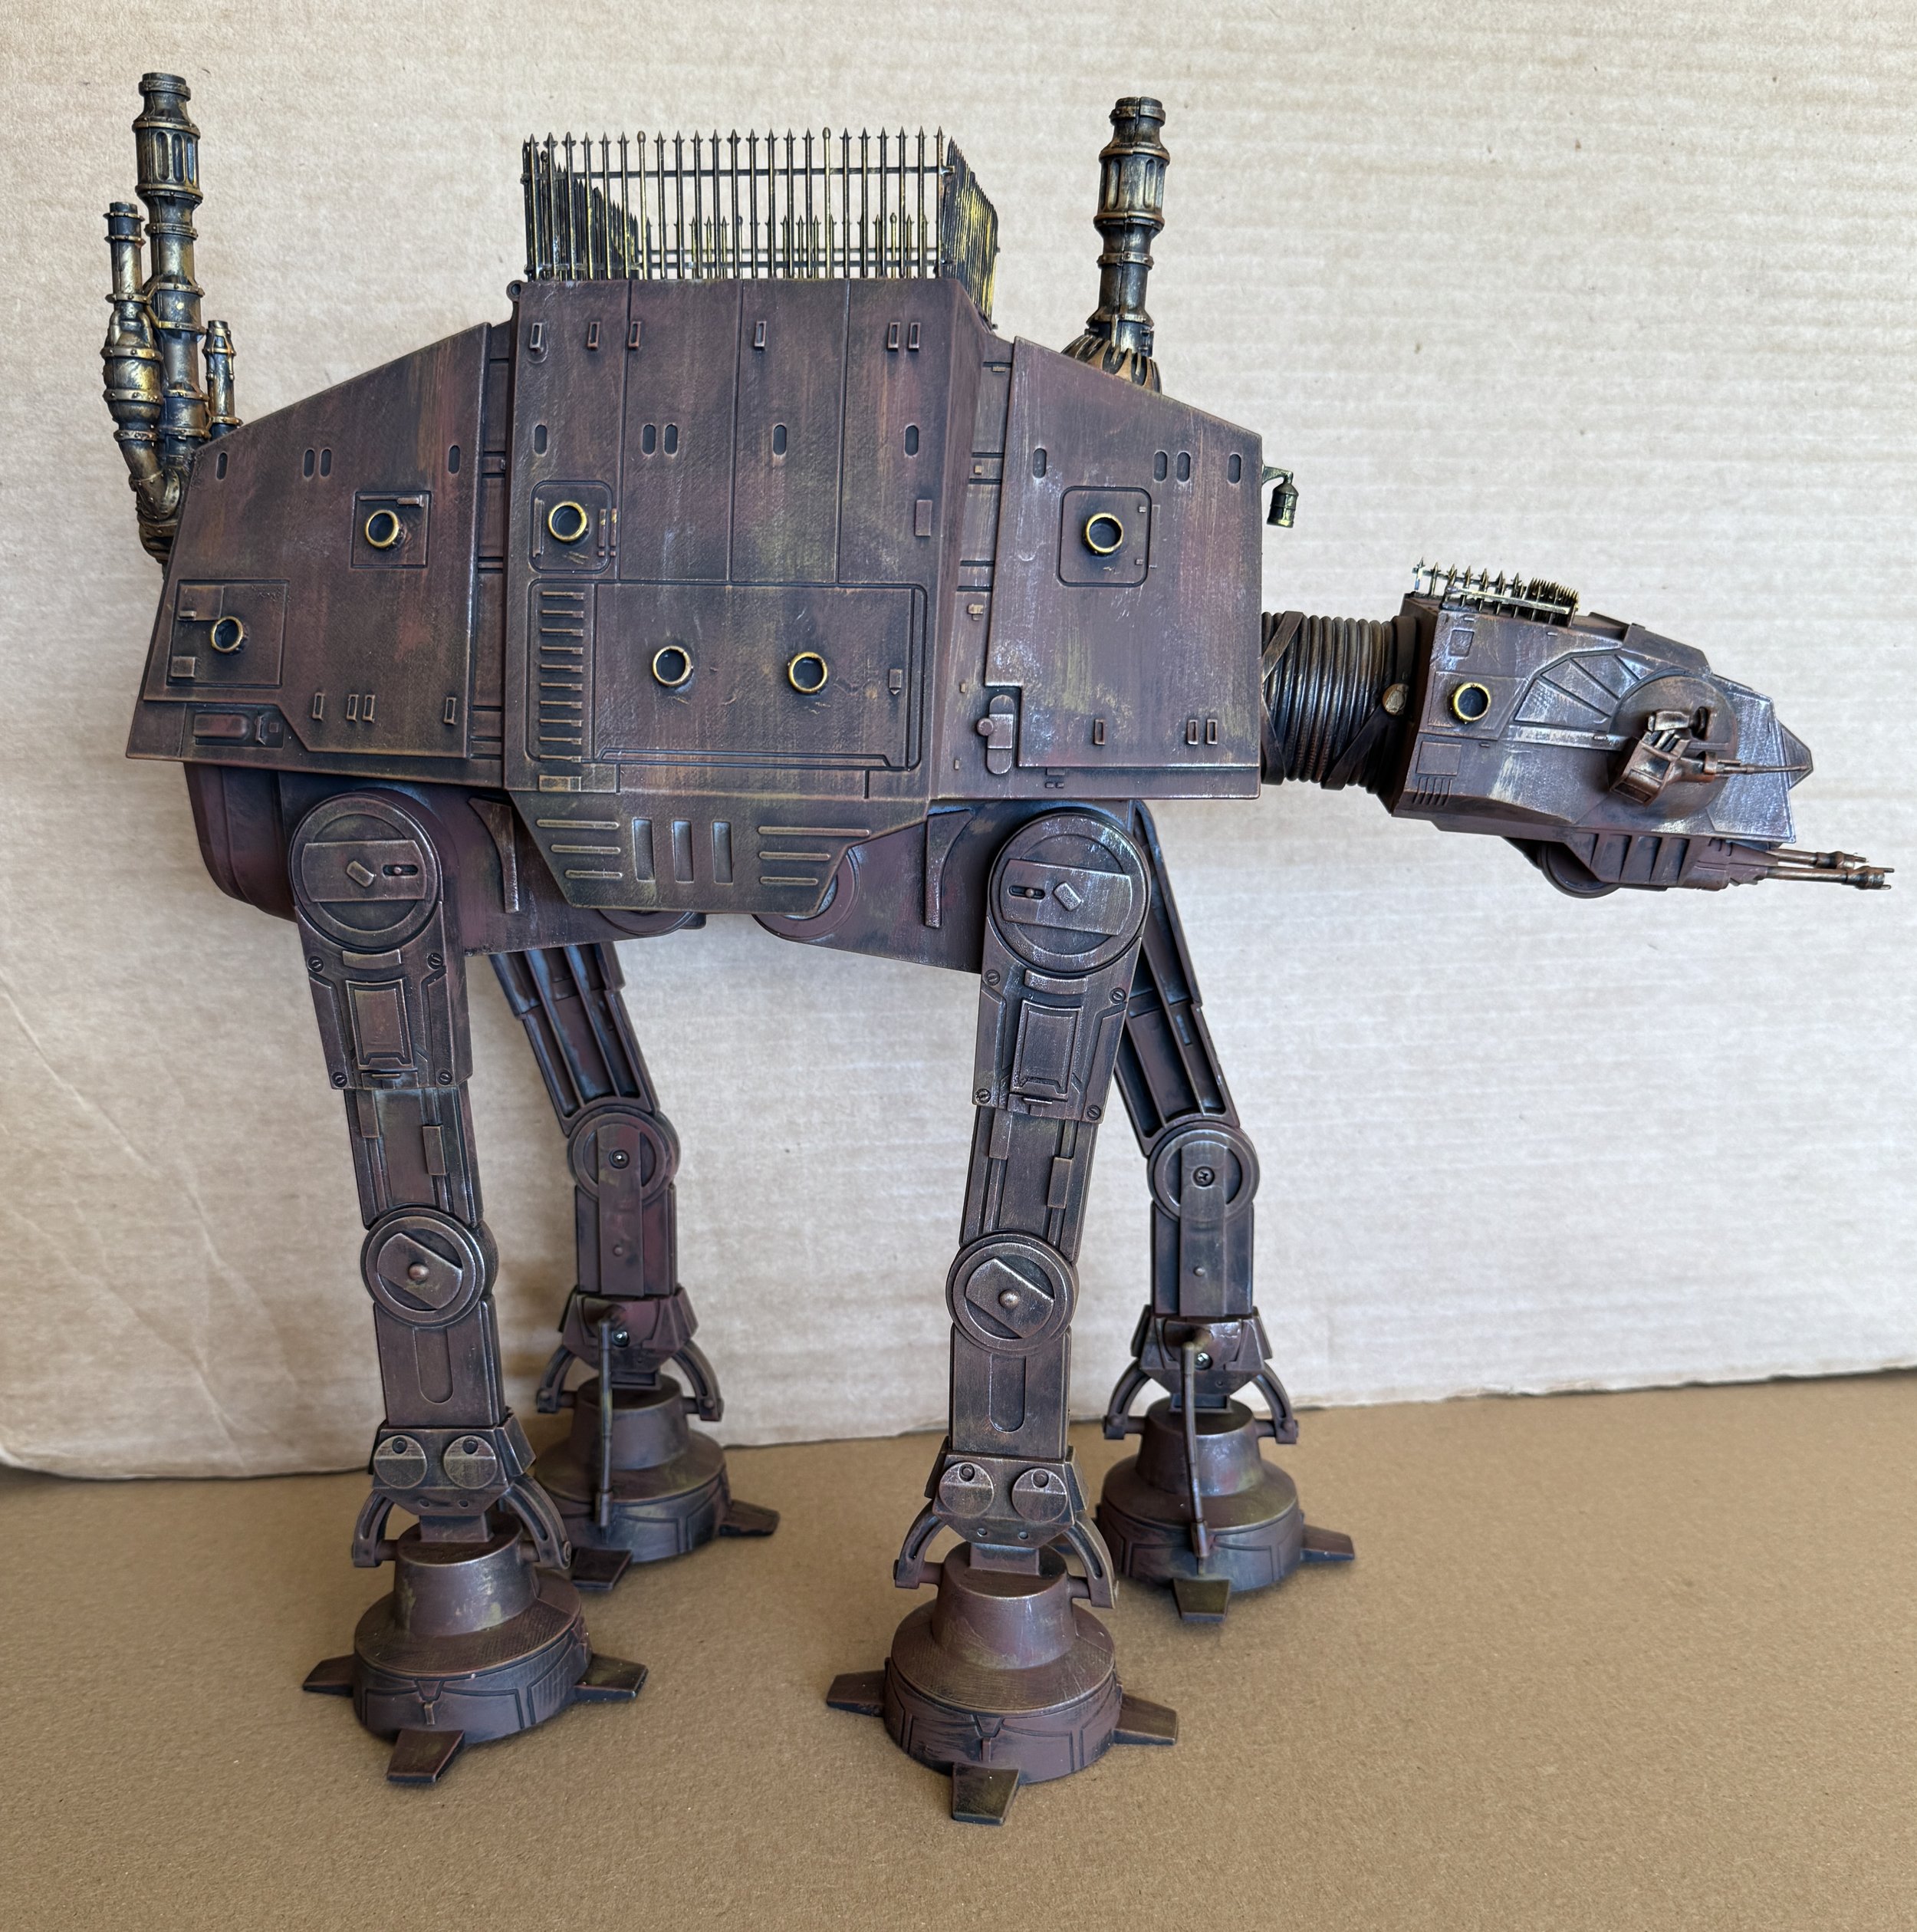
About a year ago I bought a Disneyland AT-AT popcorn bucket (sold at the park) for $15 at the swap meet. It is not compatible with my Playskool AT-ATs, but it looks great and the price was right. What I envisioned when I bought it was a steampunk AT-AT. As this workbench week neared the end, I decided to see if I could bring that vision to life. I added Mouse Models’ fencing, portholes, and Games Workshop stacks. I think it’s the paint that gives its character and turns it from plastic to metal.


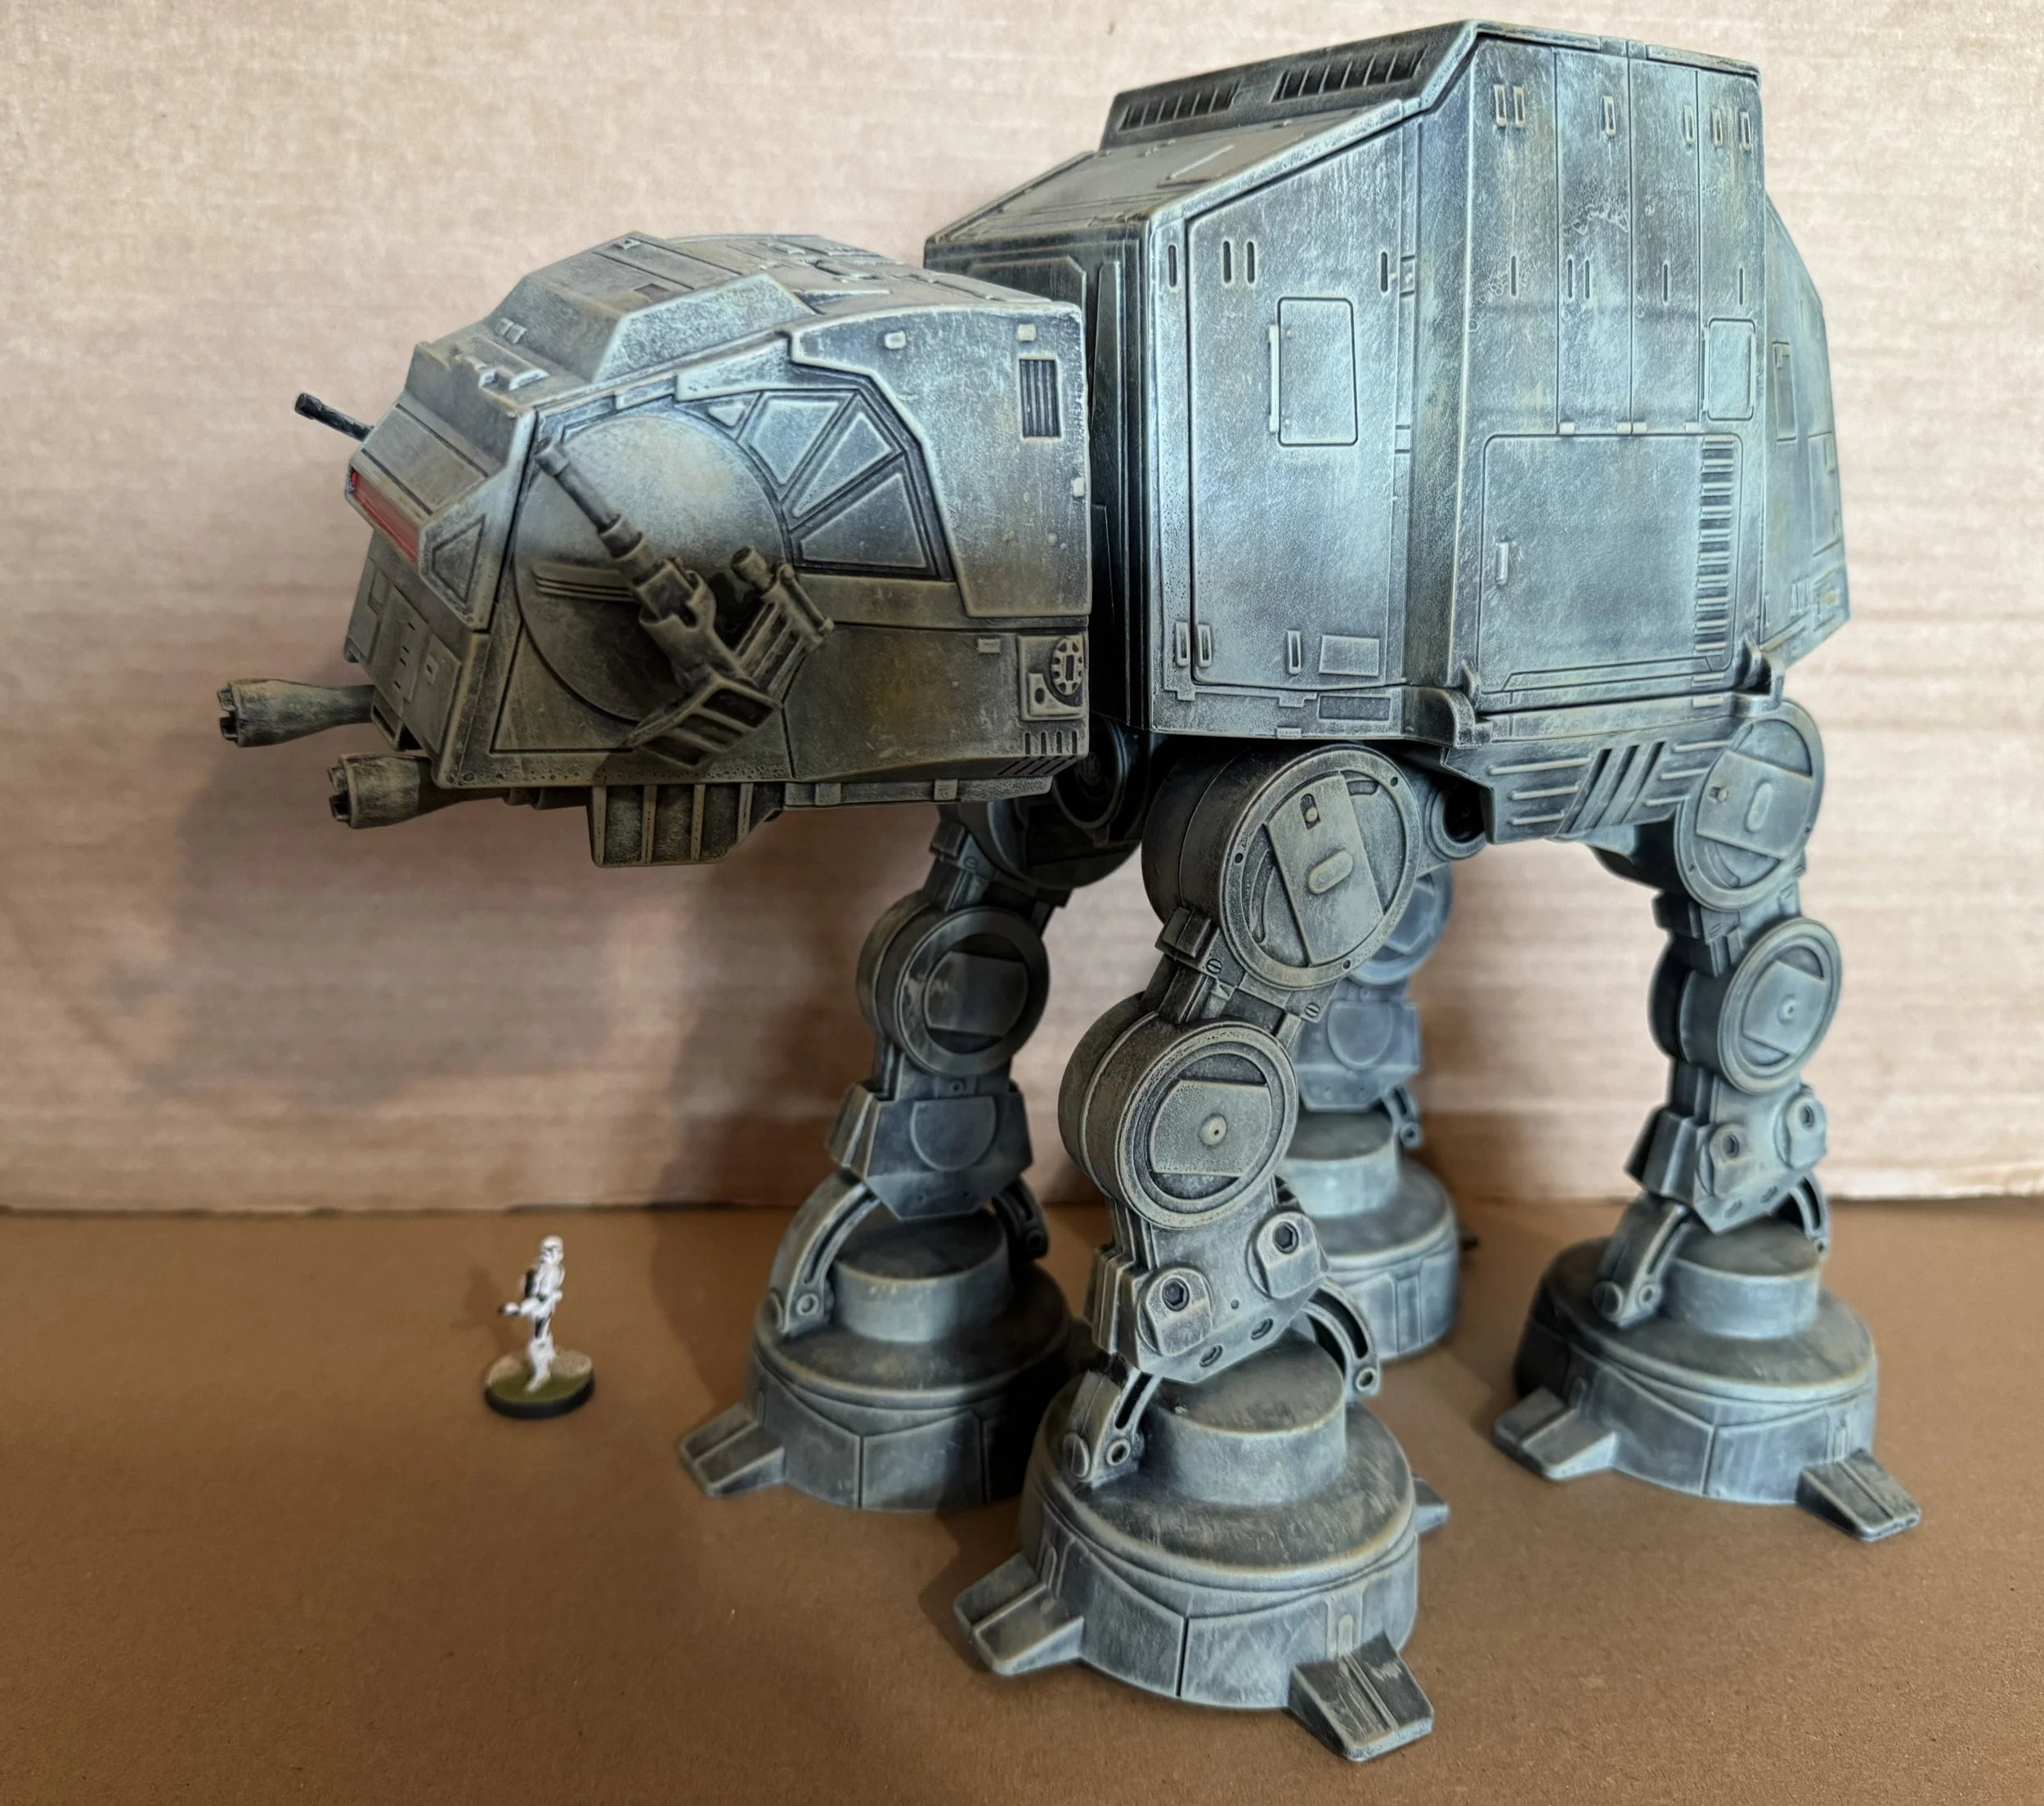
November 16, 2025
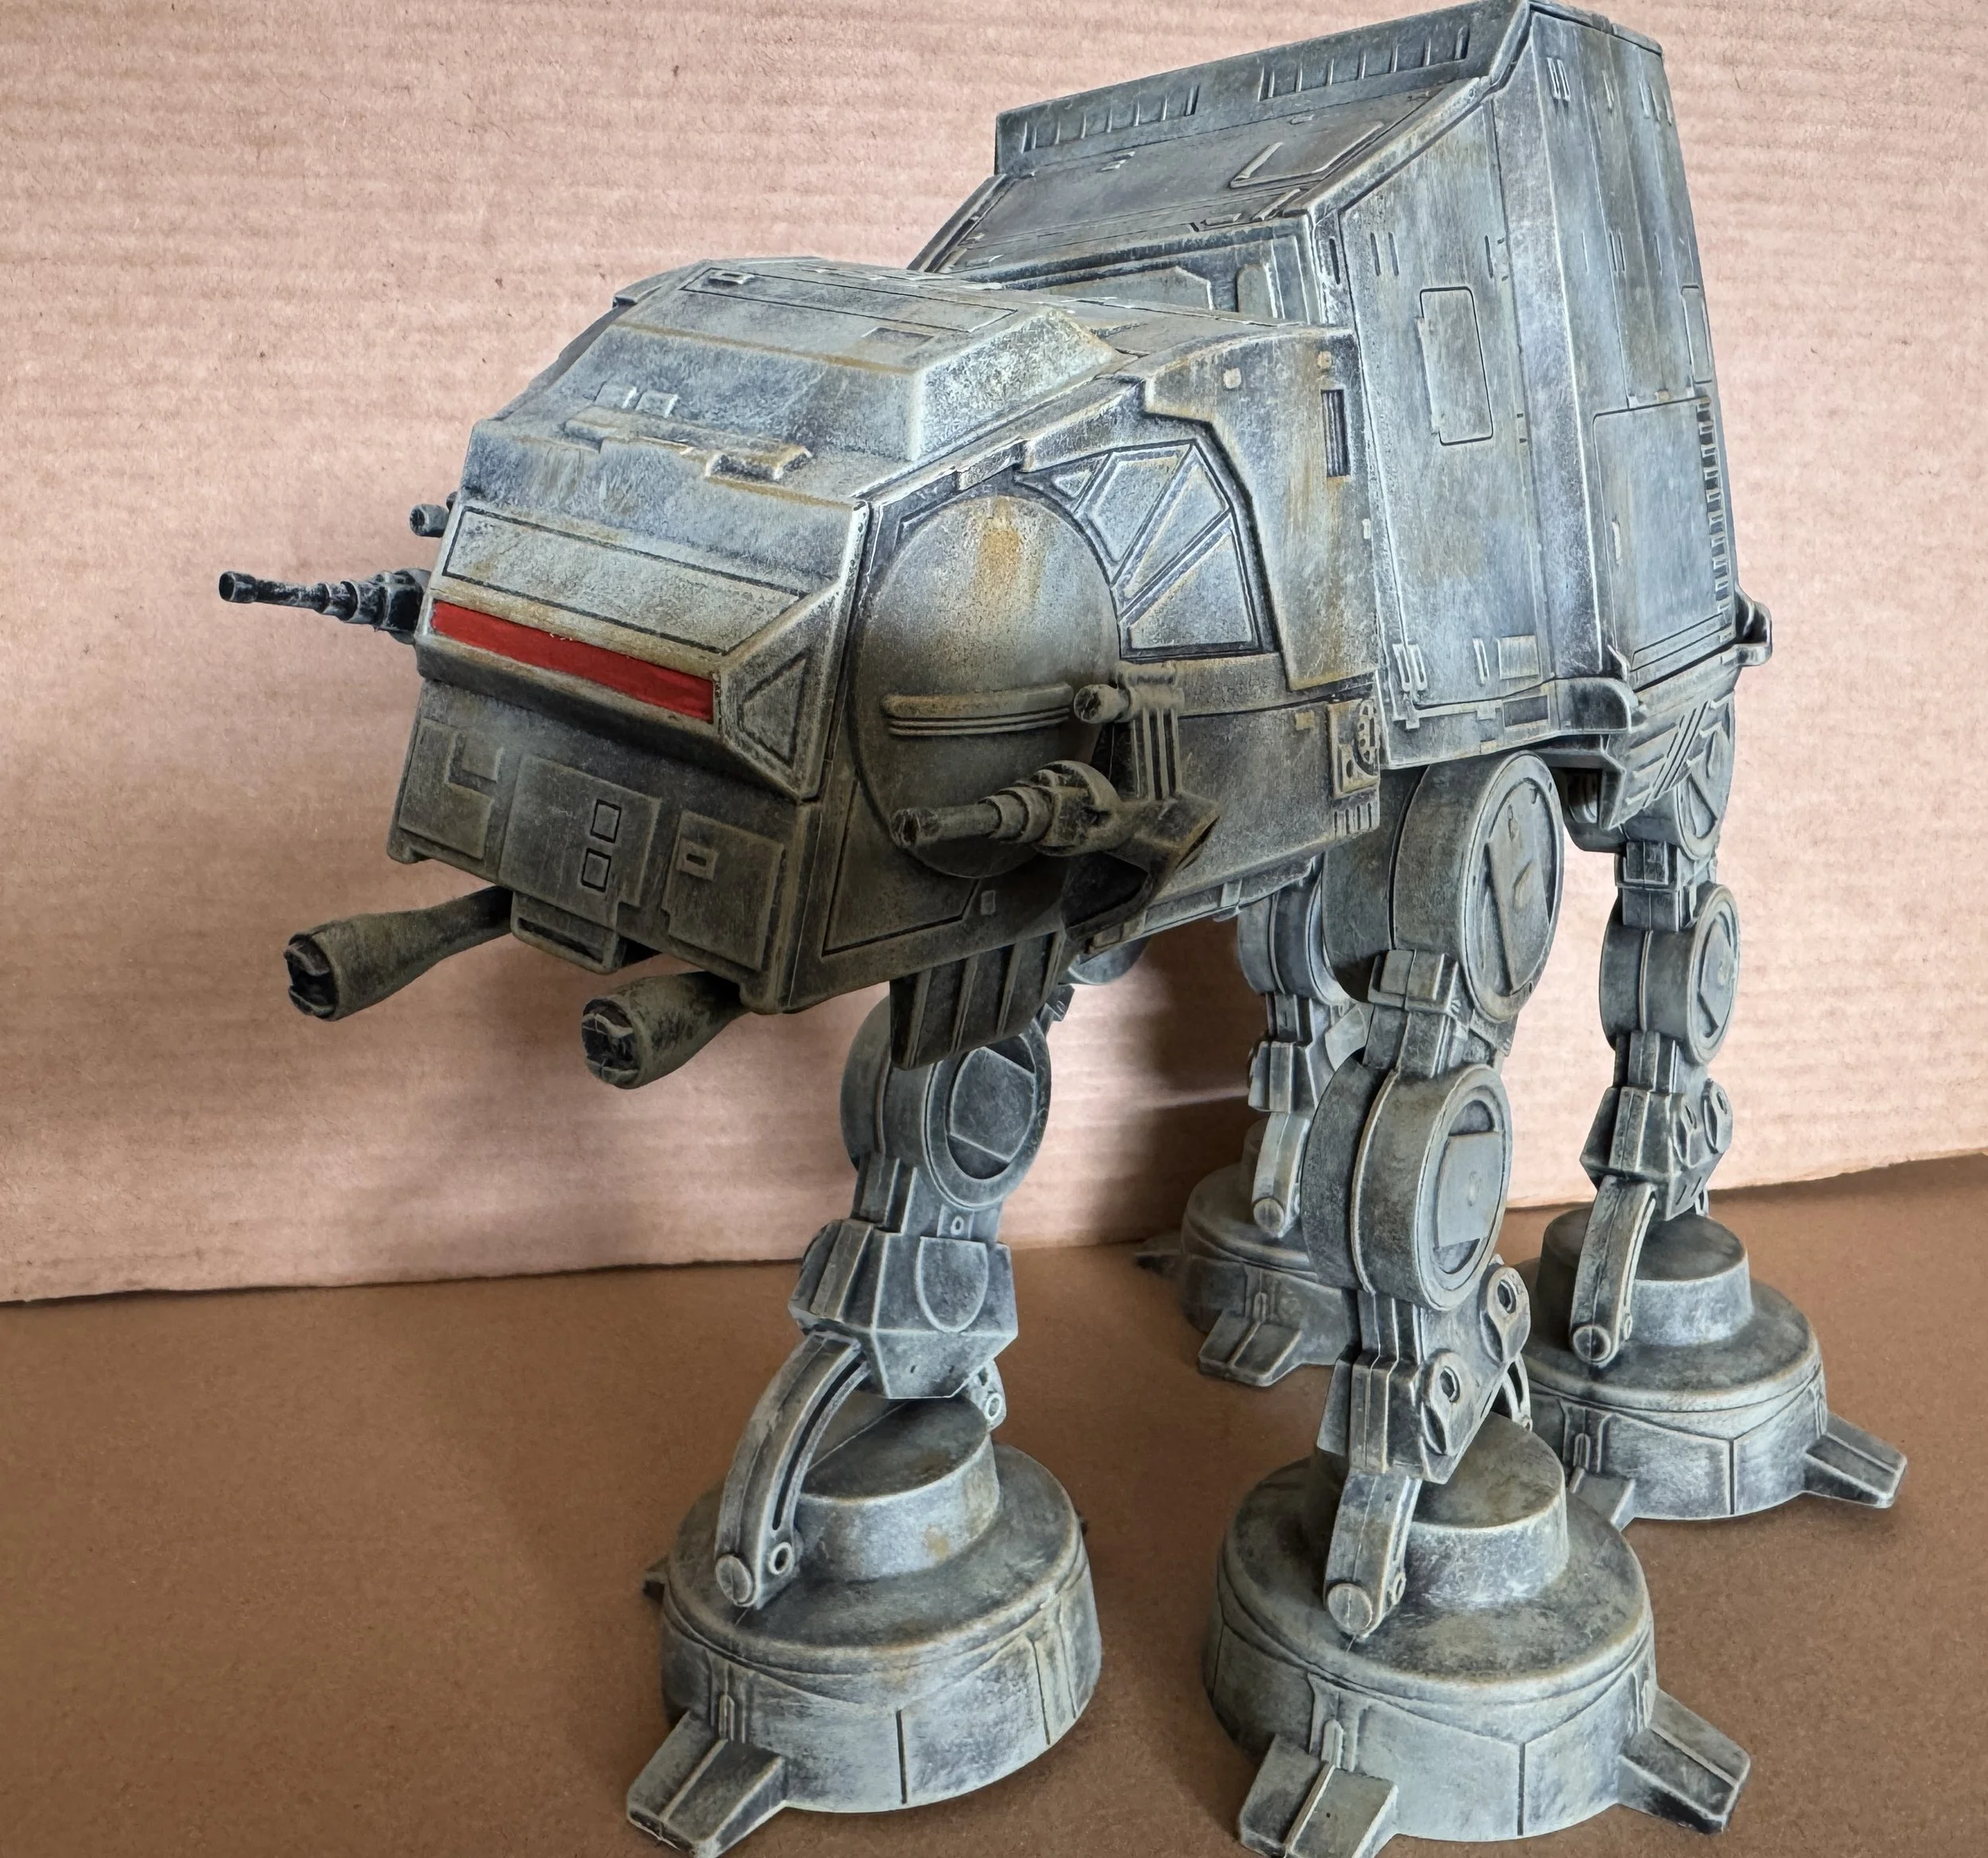
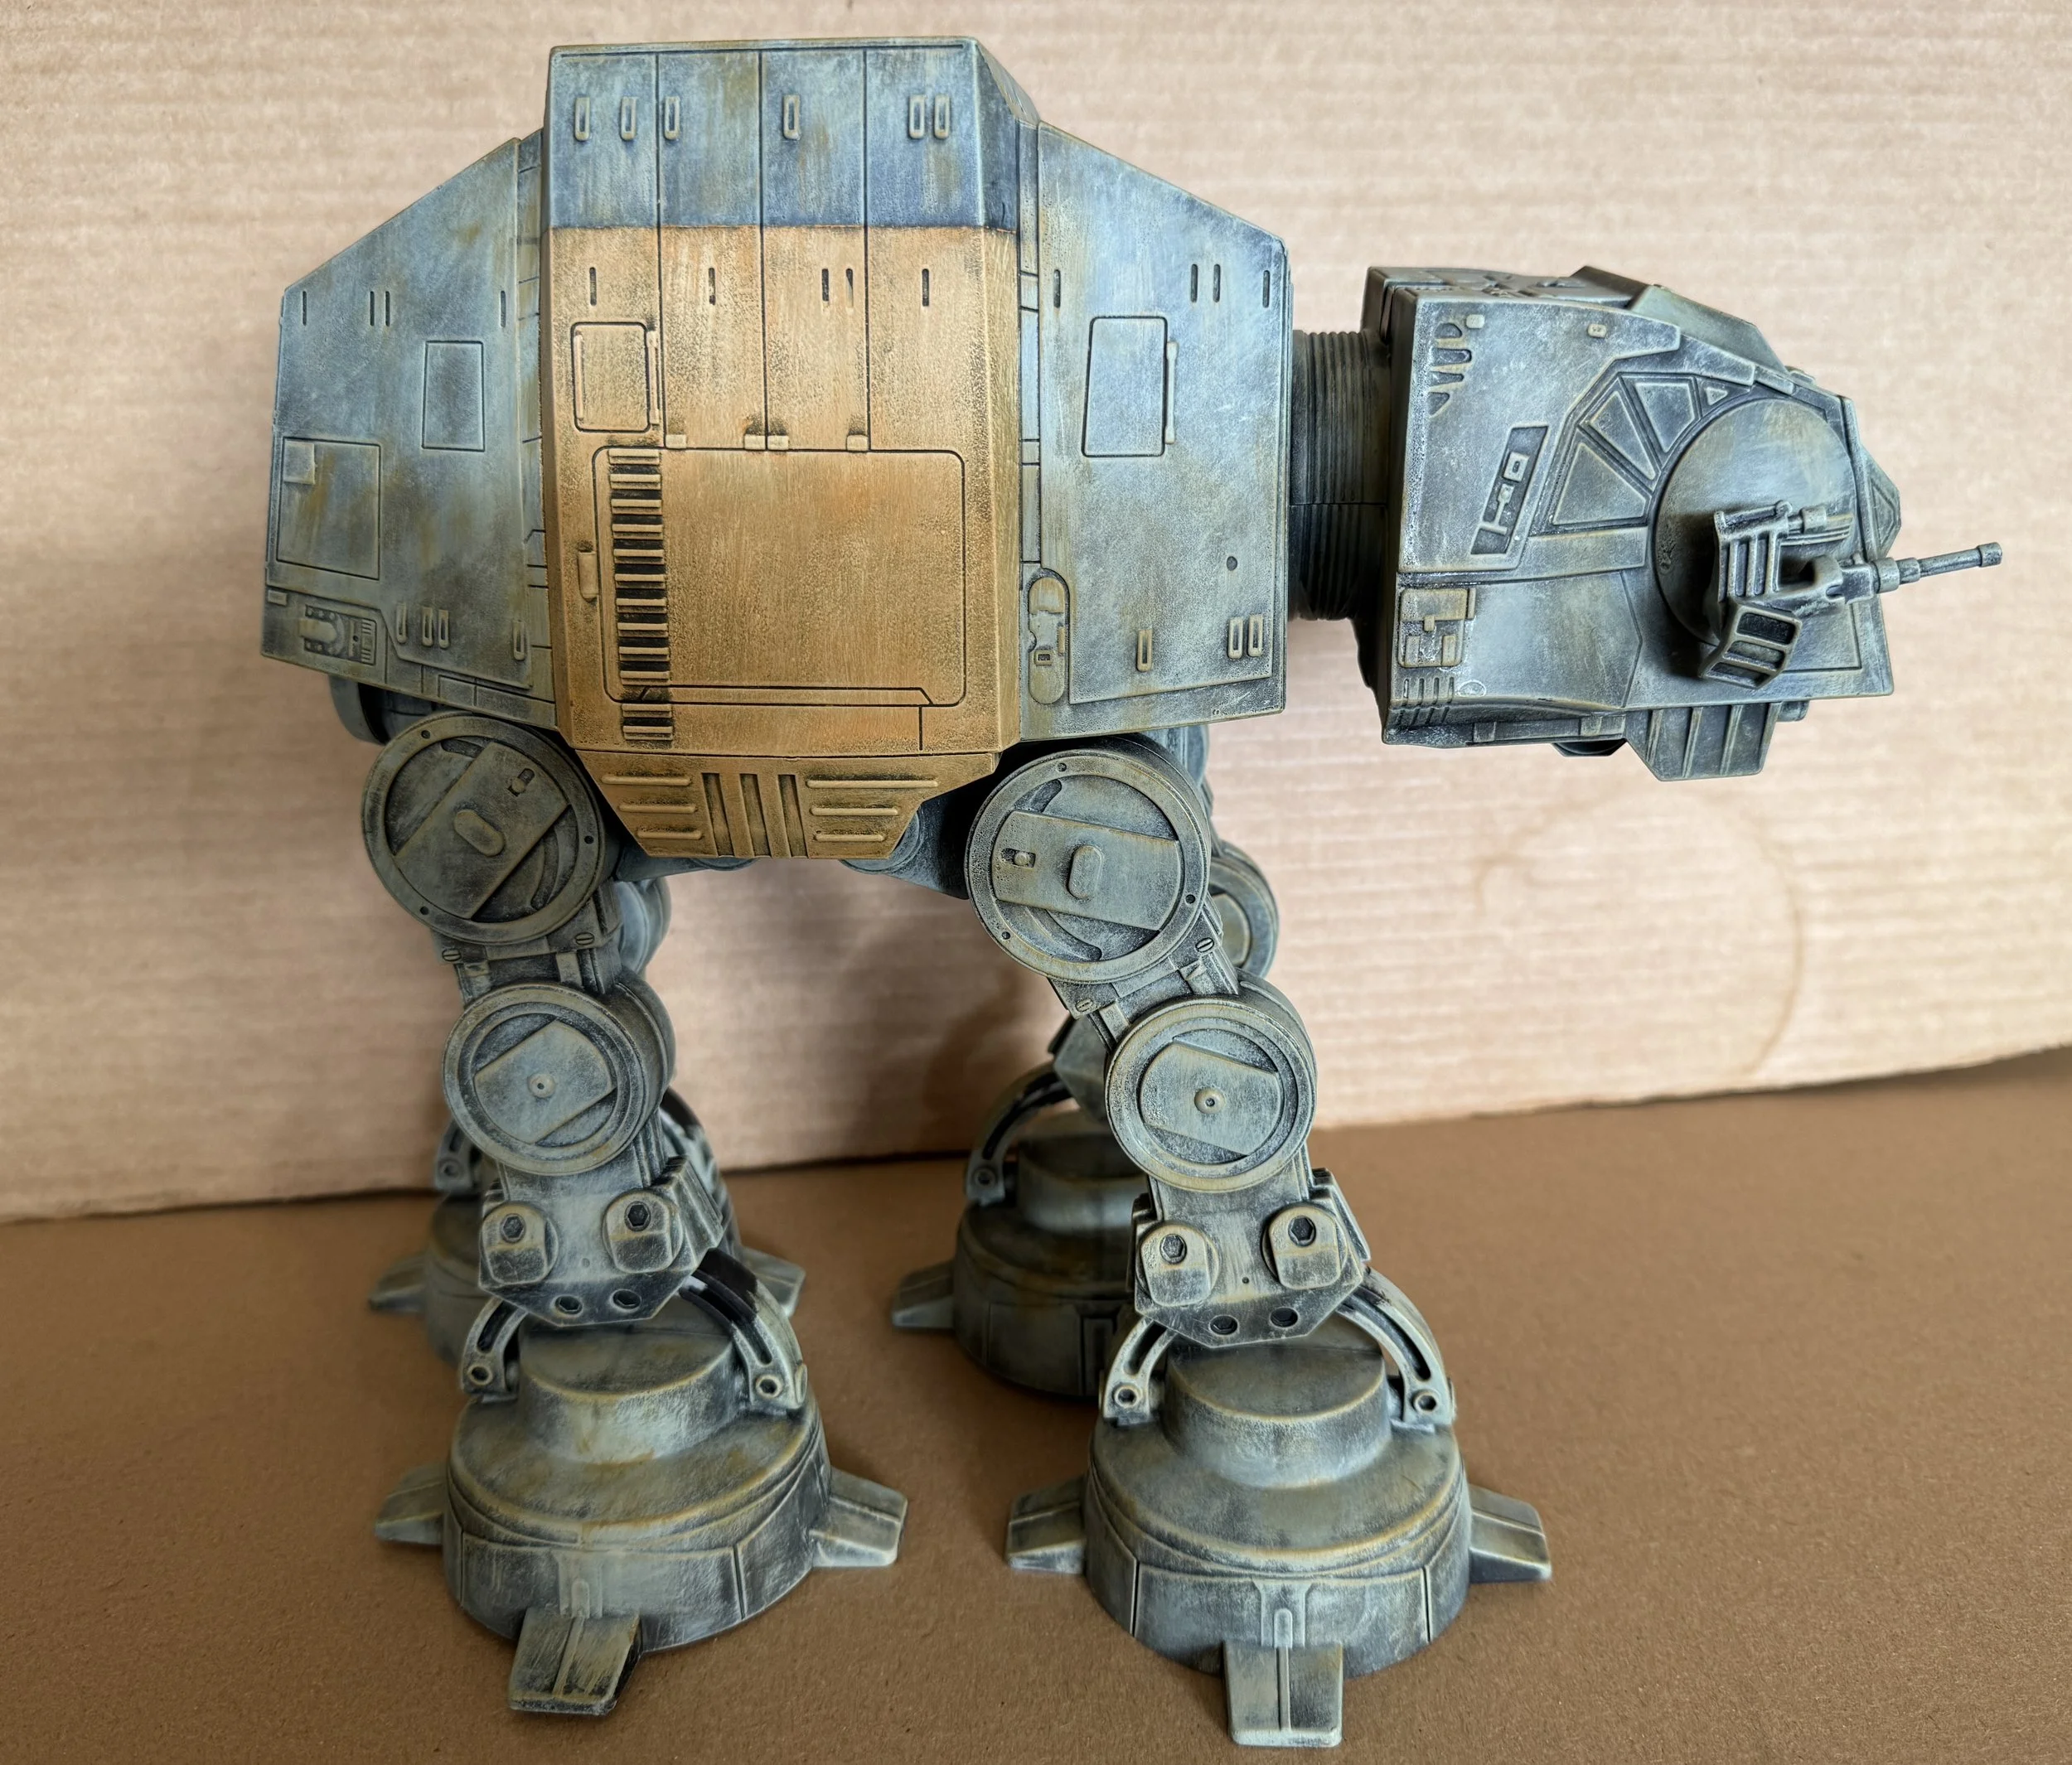
It was a busy workbench week. I began by painting three more Playskool AT-ATs and one Playskool AT-AT with its chin guns removed and painted like an AT-ACT. I’ve only posted pictures of one of the three AT-ATs because their size makes them hard to photograph and they all look basically the same. I’ve also posted pictures of the AT-ACT.
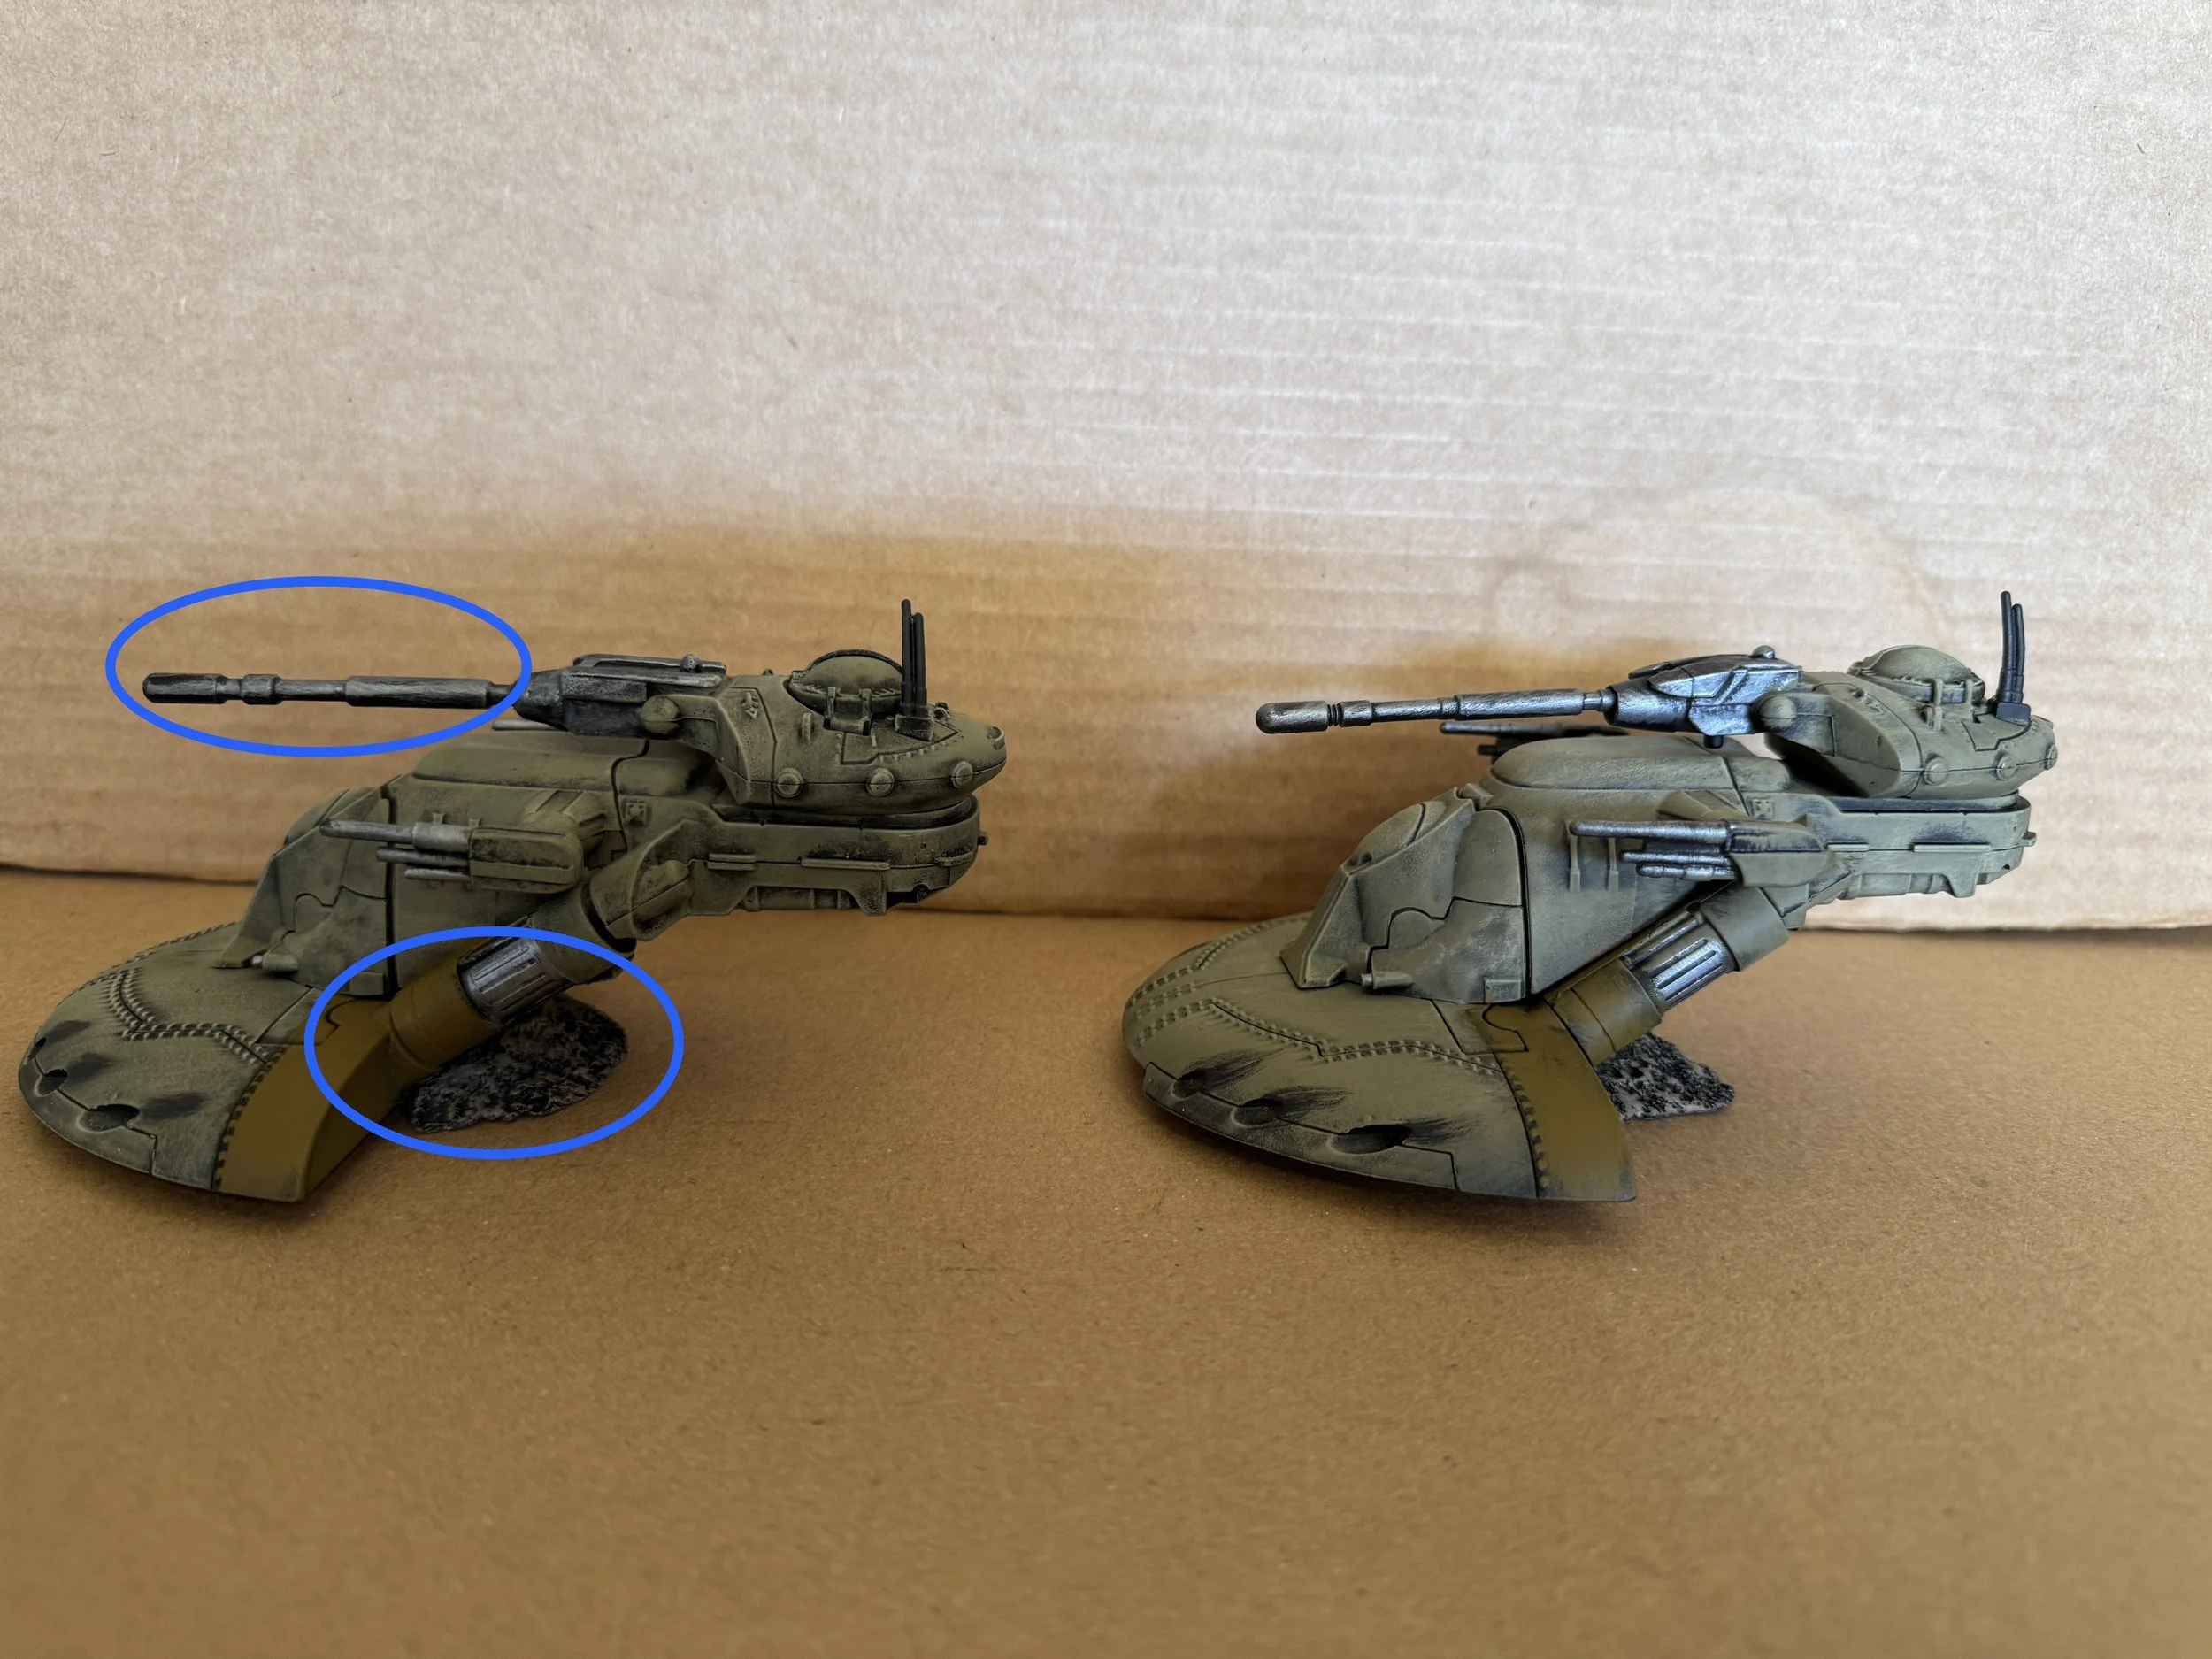
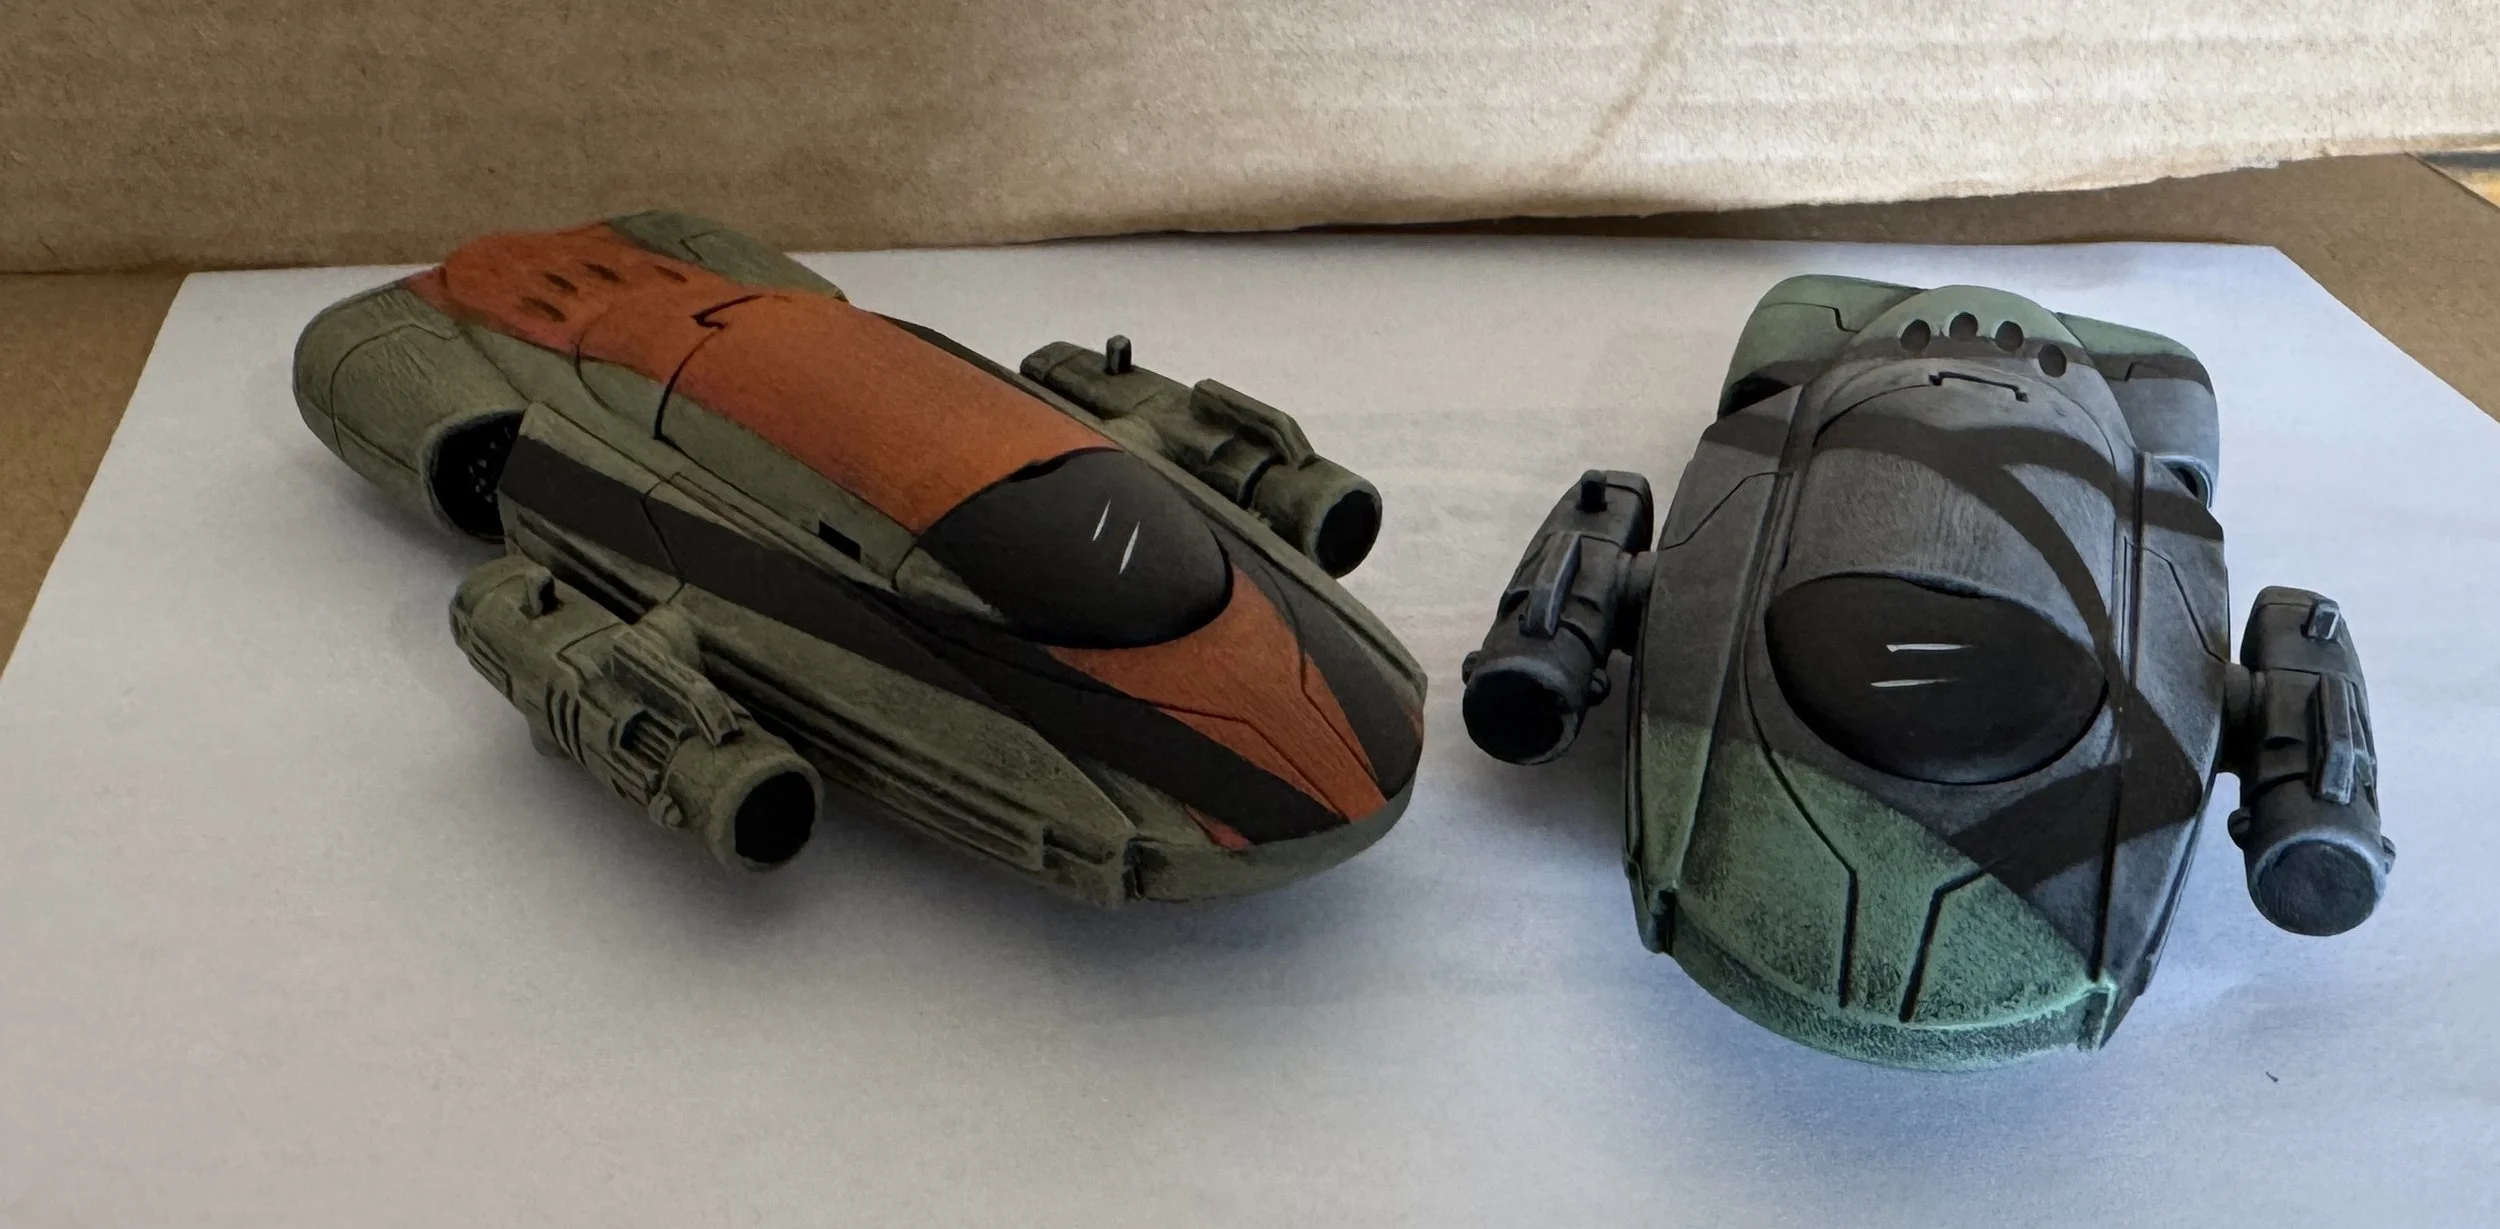
With AT-ATs and AT-ACT done, I turned my attention to painting two Gian Speeders by Action Fleet.
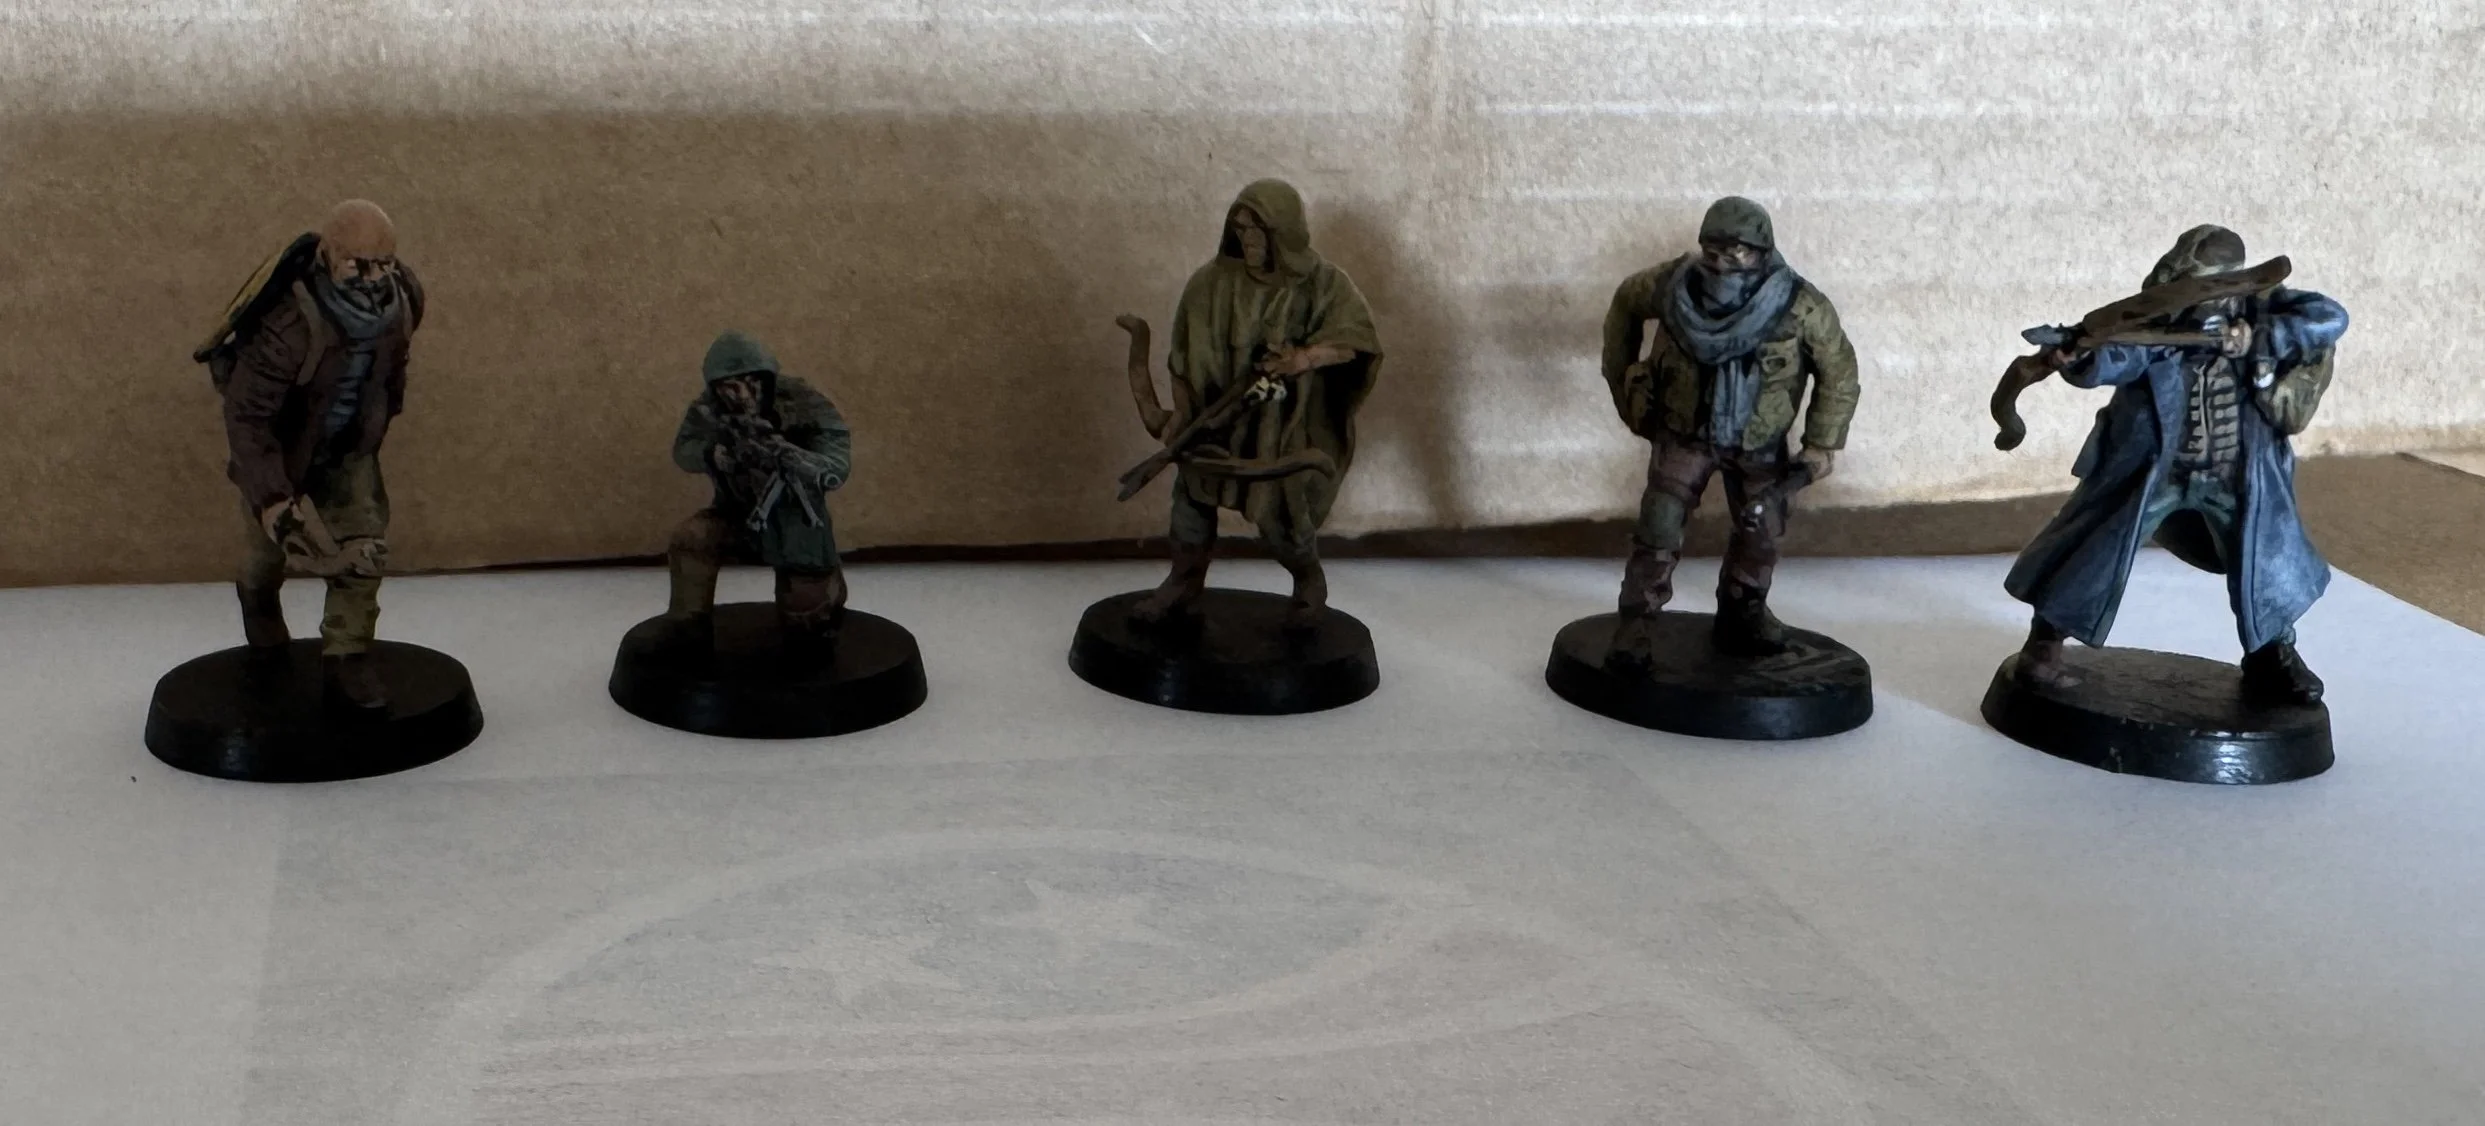
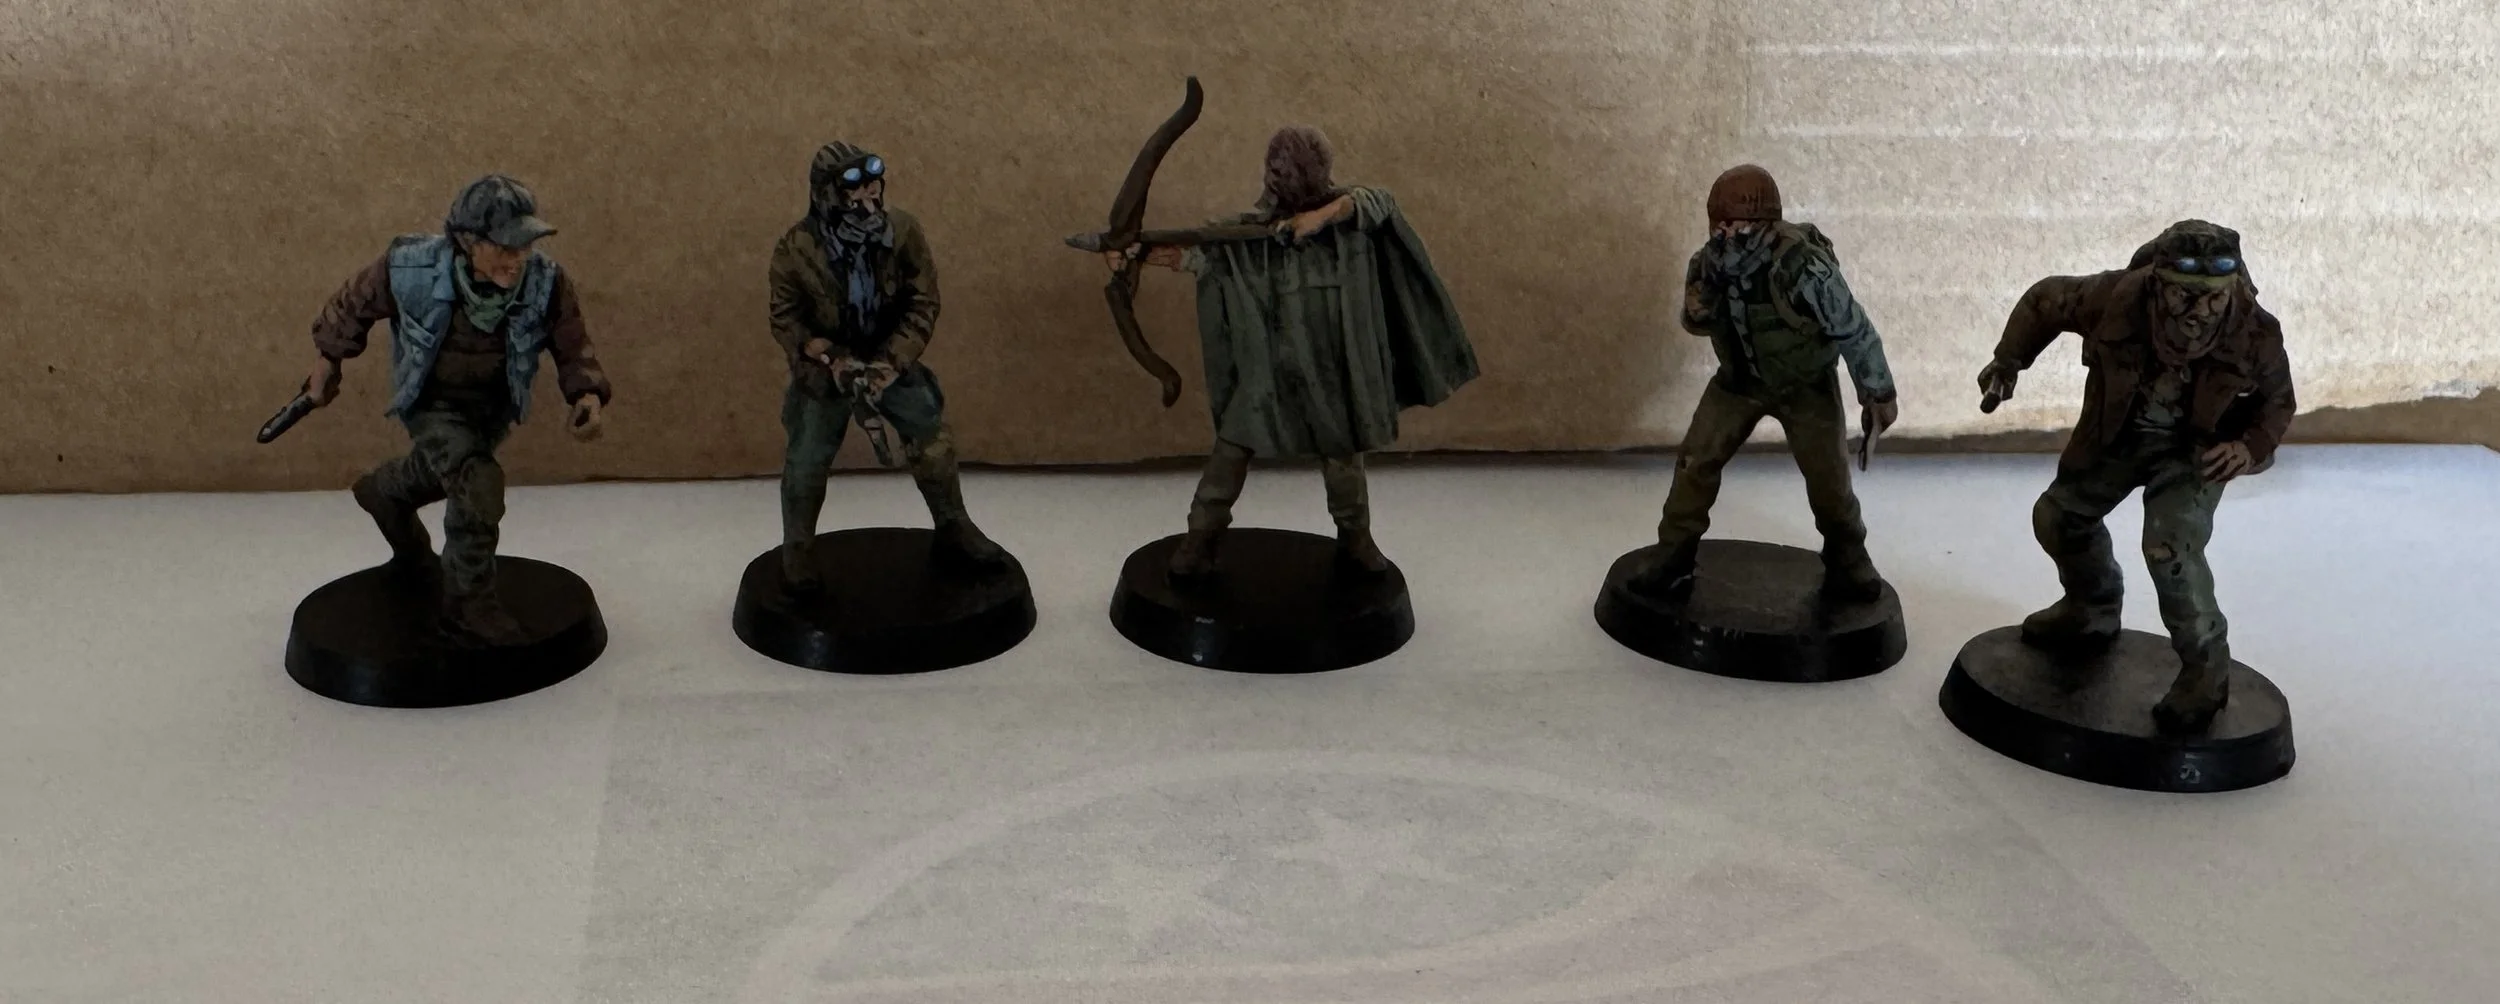
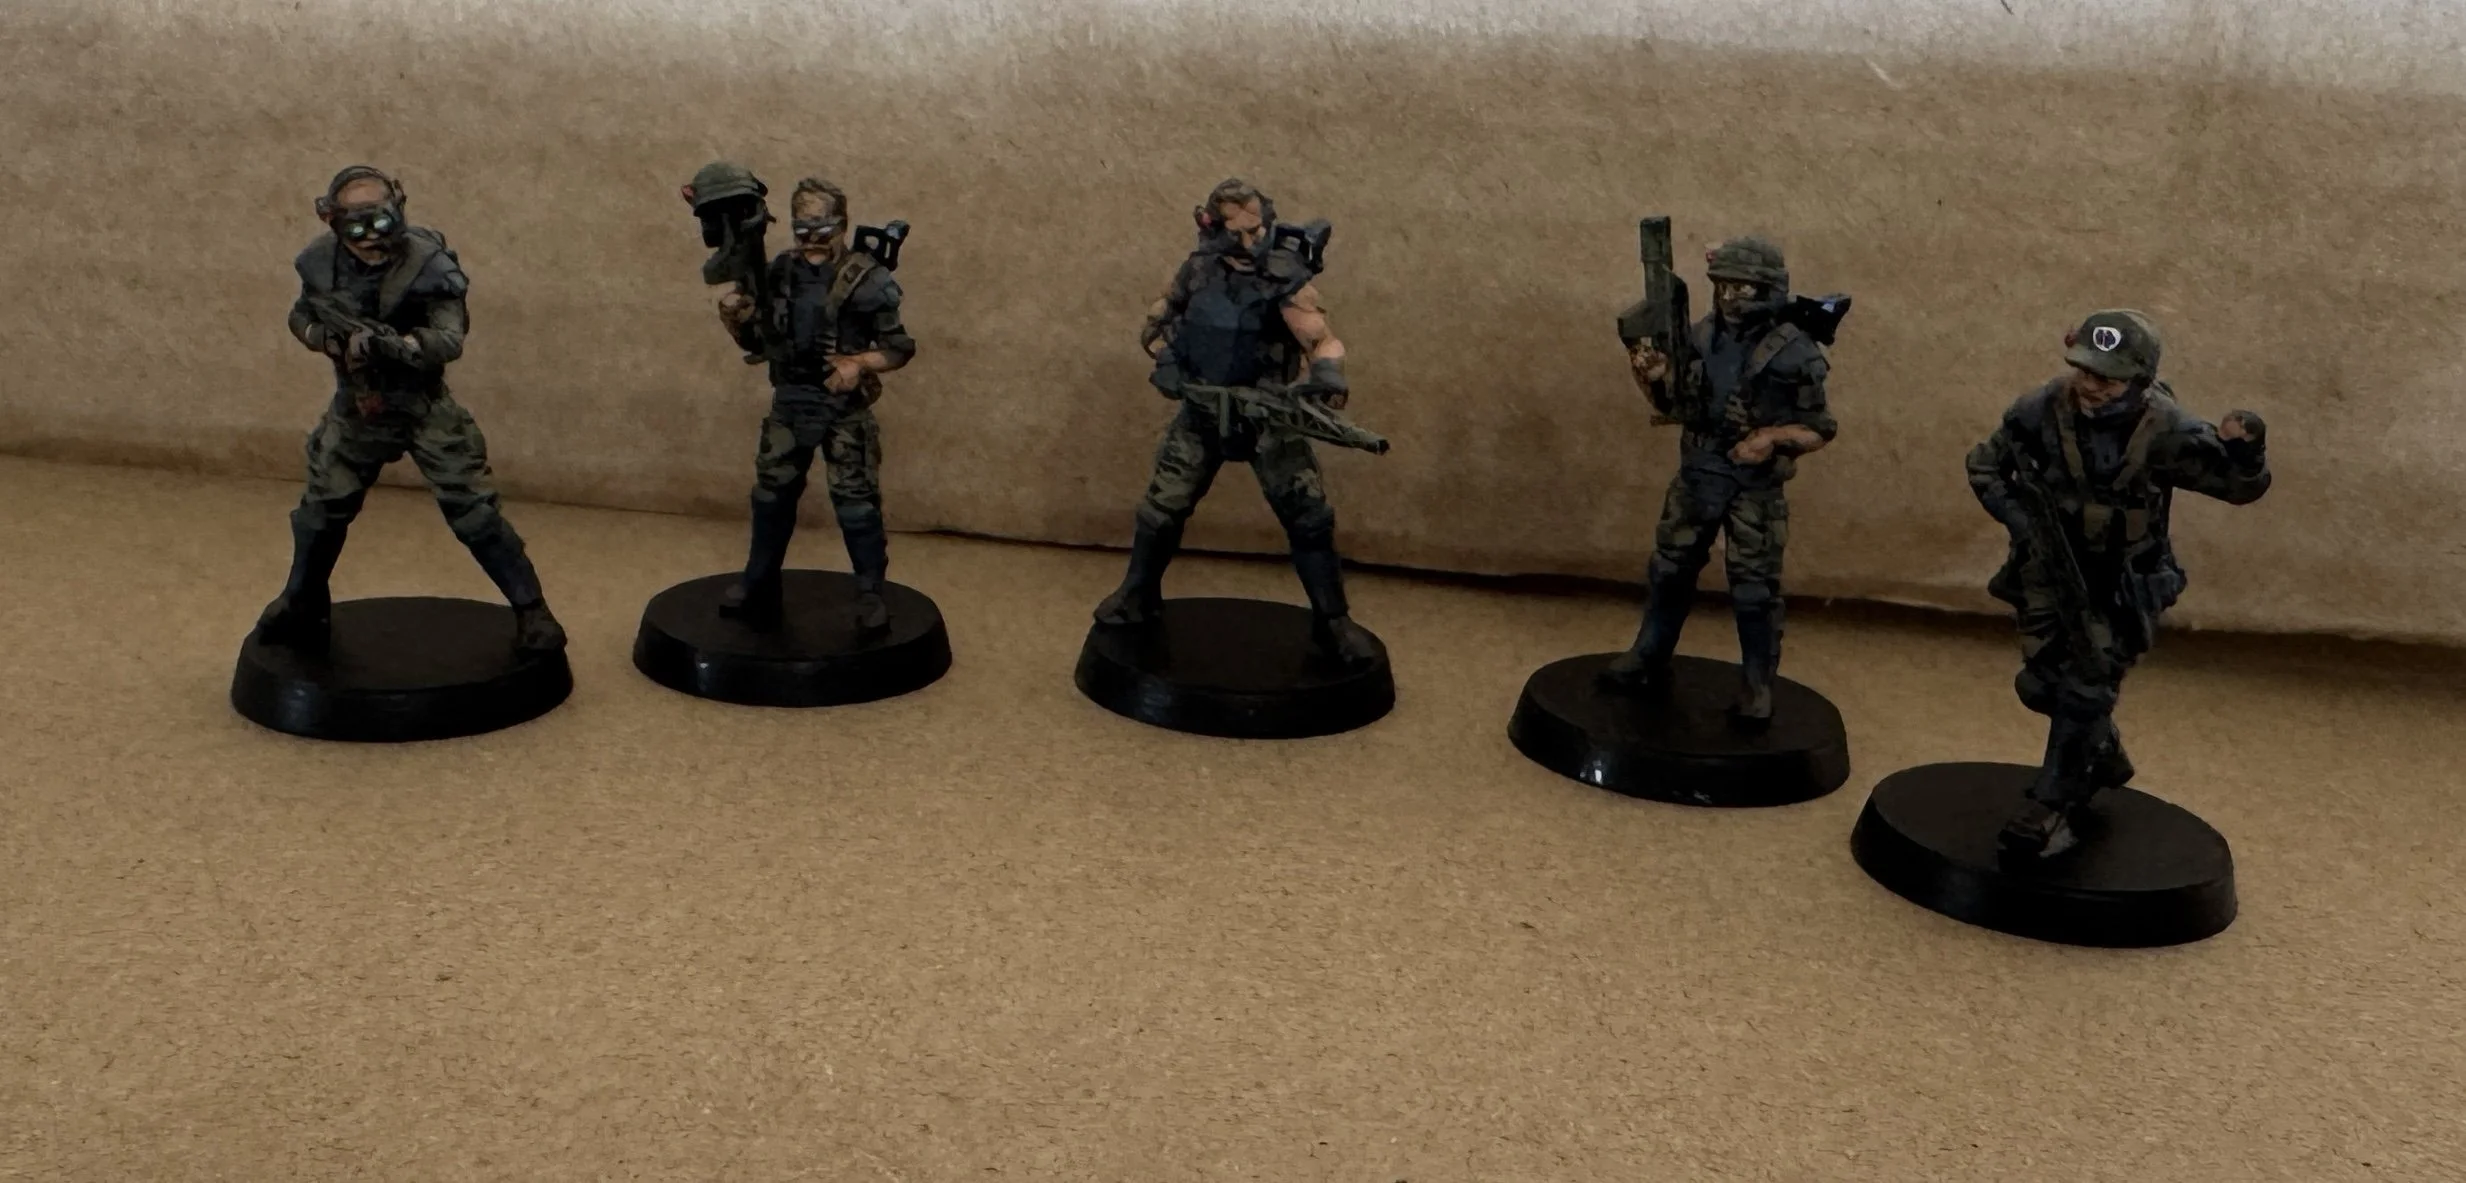
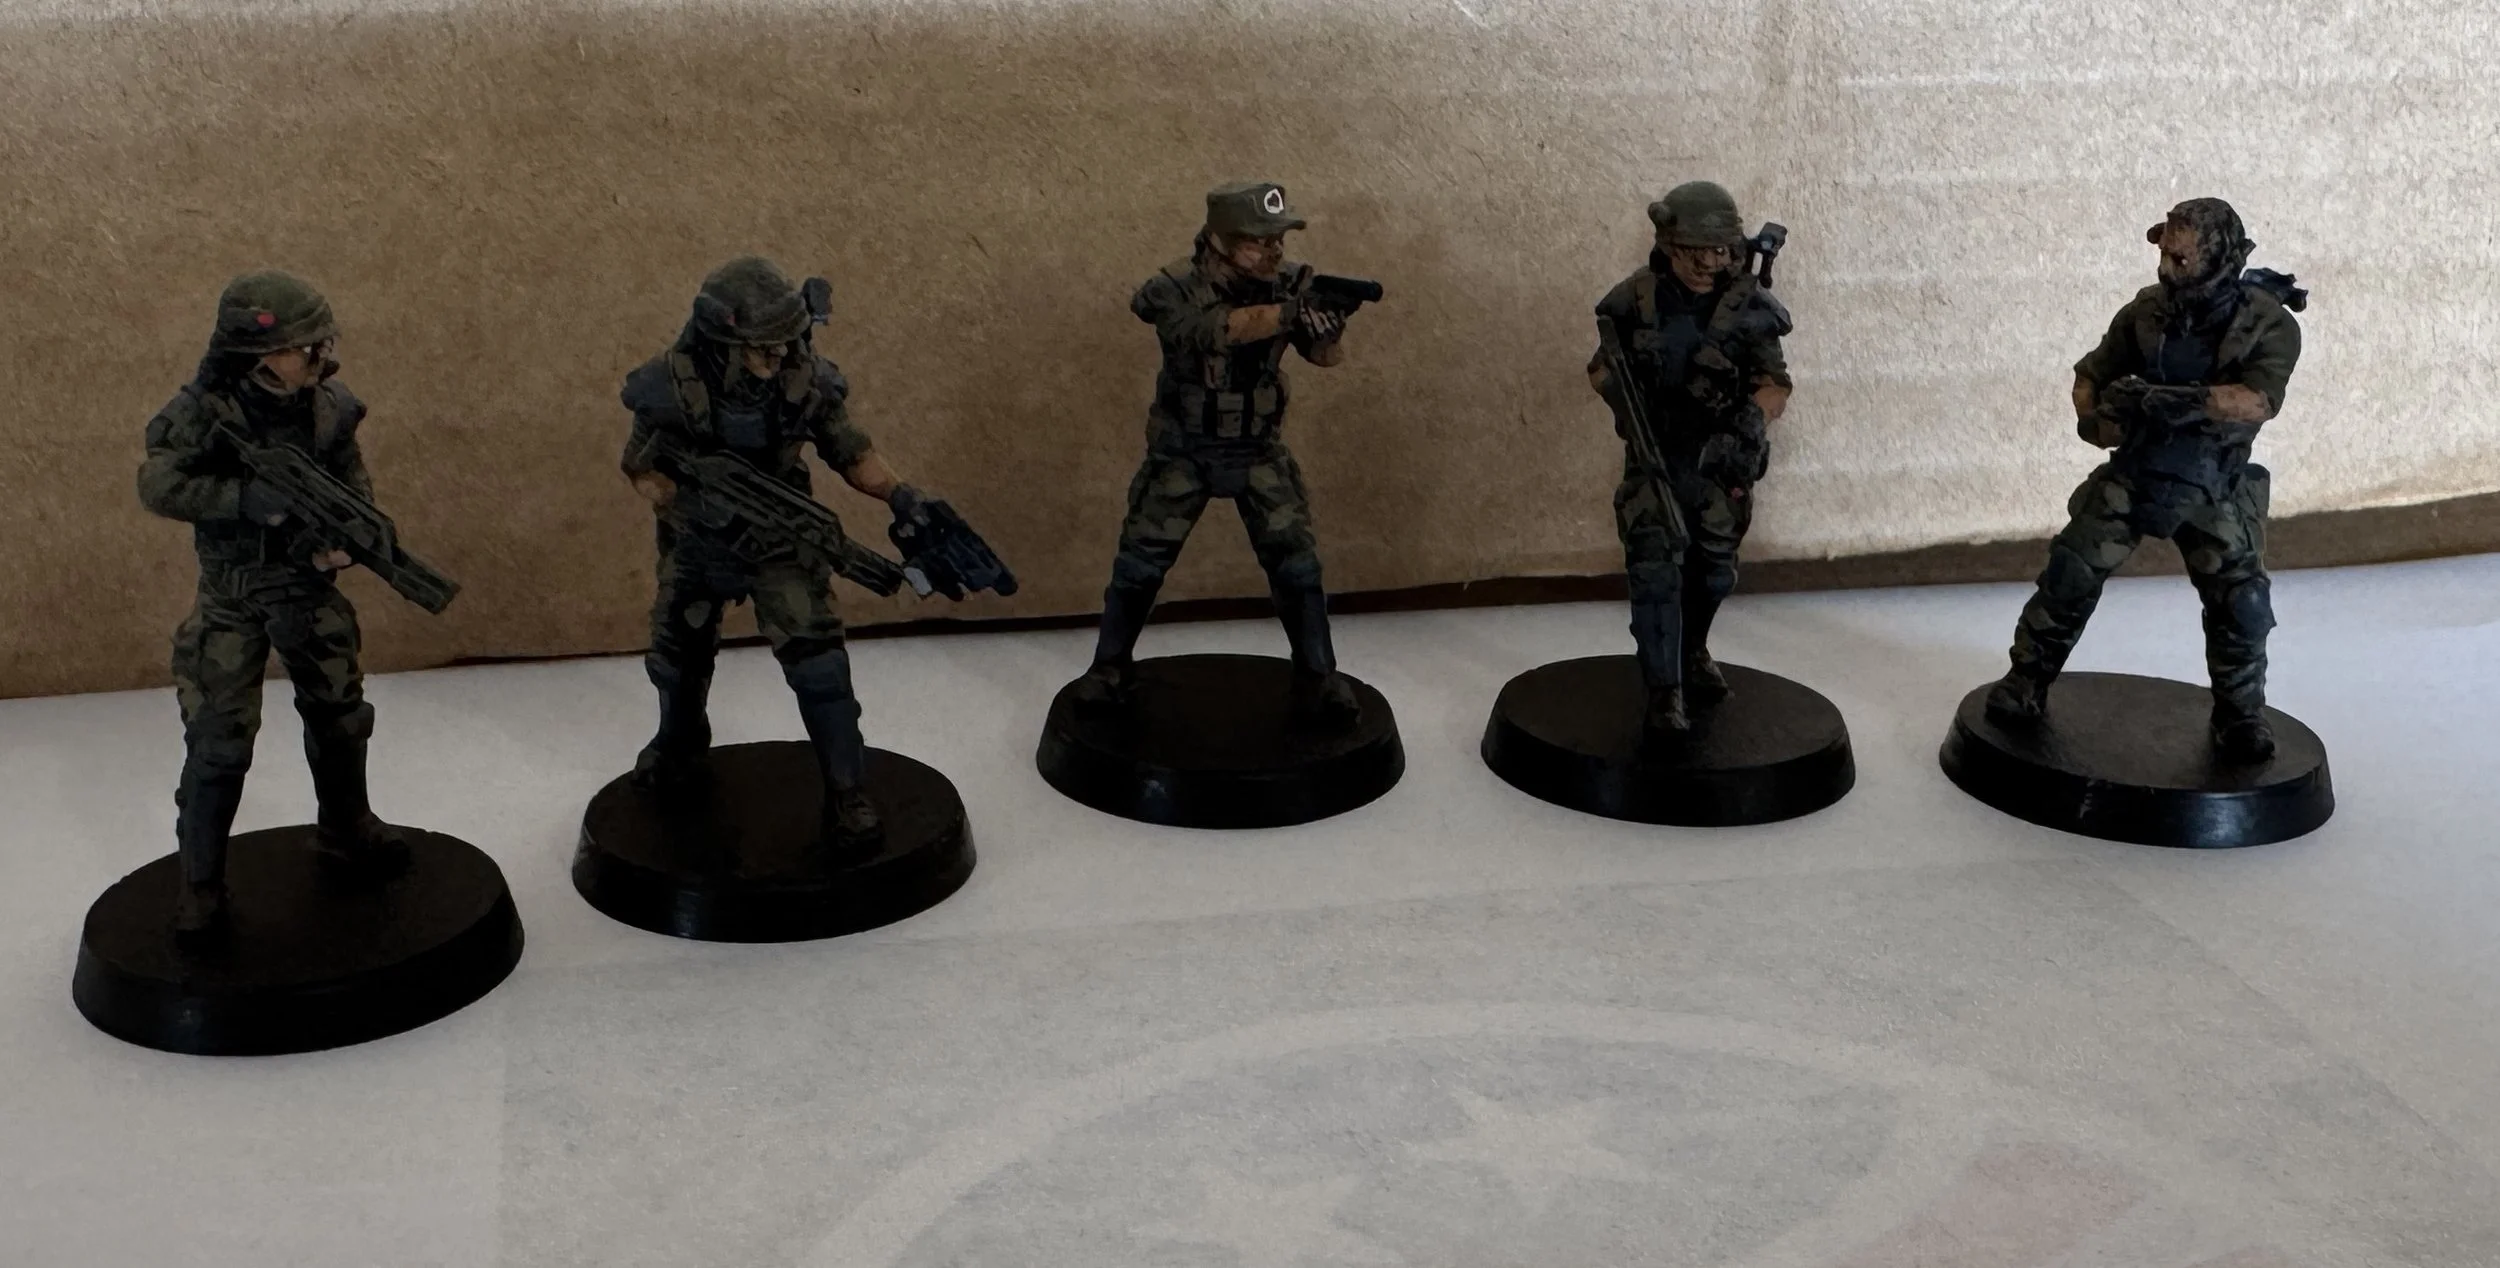
I wanted to start painting my Clone Turbo Tanks, but it was raining and I couldn’t spray a base coat of flat black on the Turbo Tanks, so I decided to paint some newly arrived Survivor figures and Colonial Marines that I will be using with my Aliens-style collection. The uniforms for the Colonial Marines used Vallejo Model Colors: Luft Grey for armor, US Olive Drab and Khaki for the pants, US Olive Drab for the helmets, and US Brown Drab for the belts, pouches, and strapping.

November 9, 2025
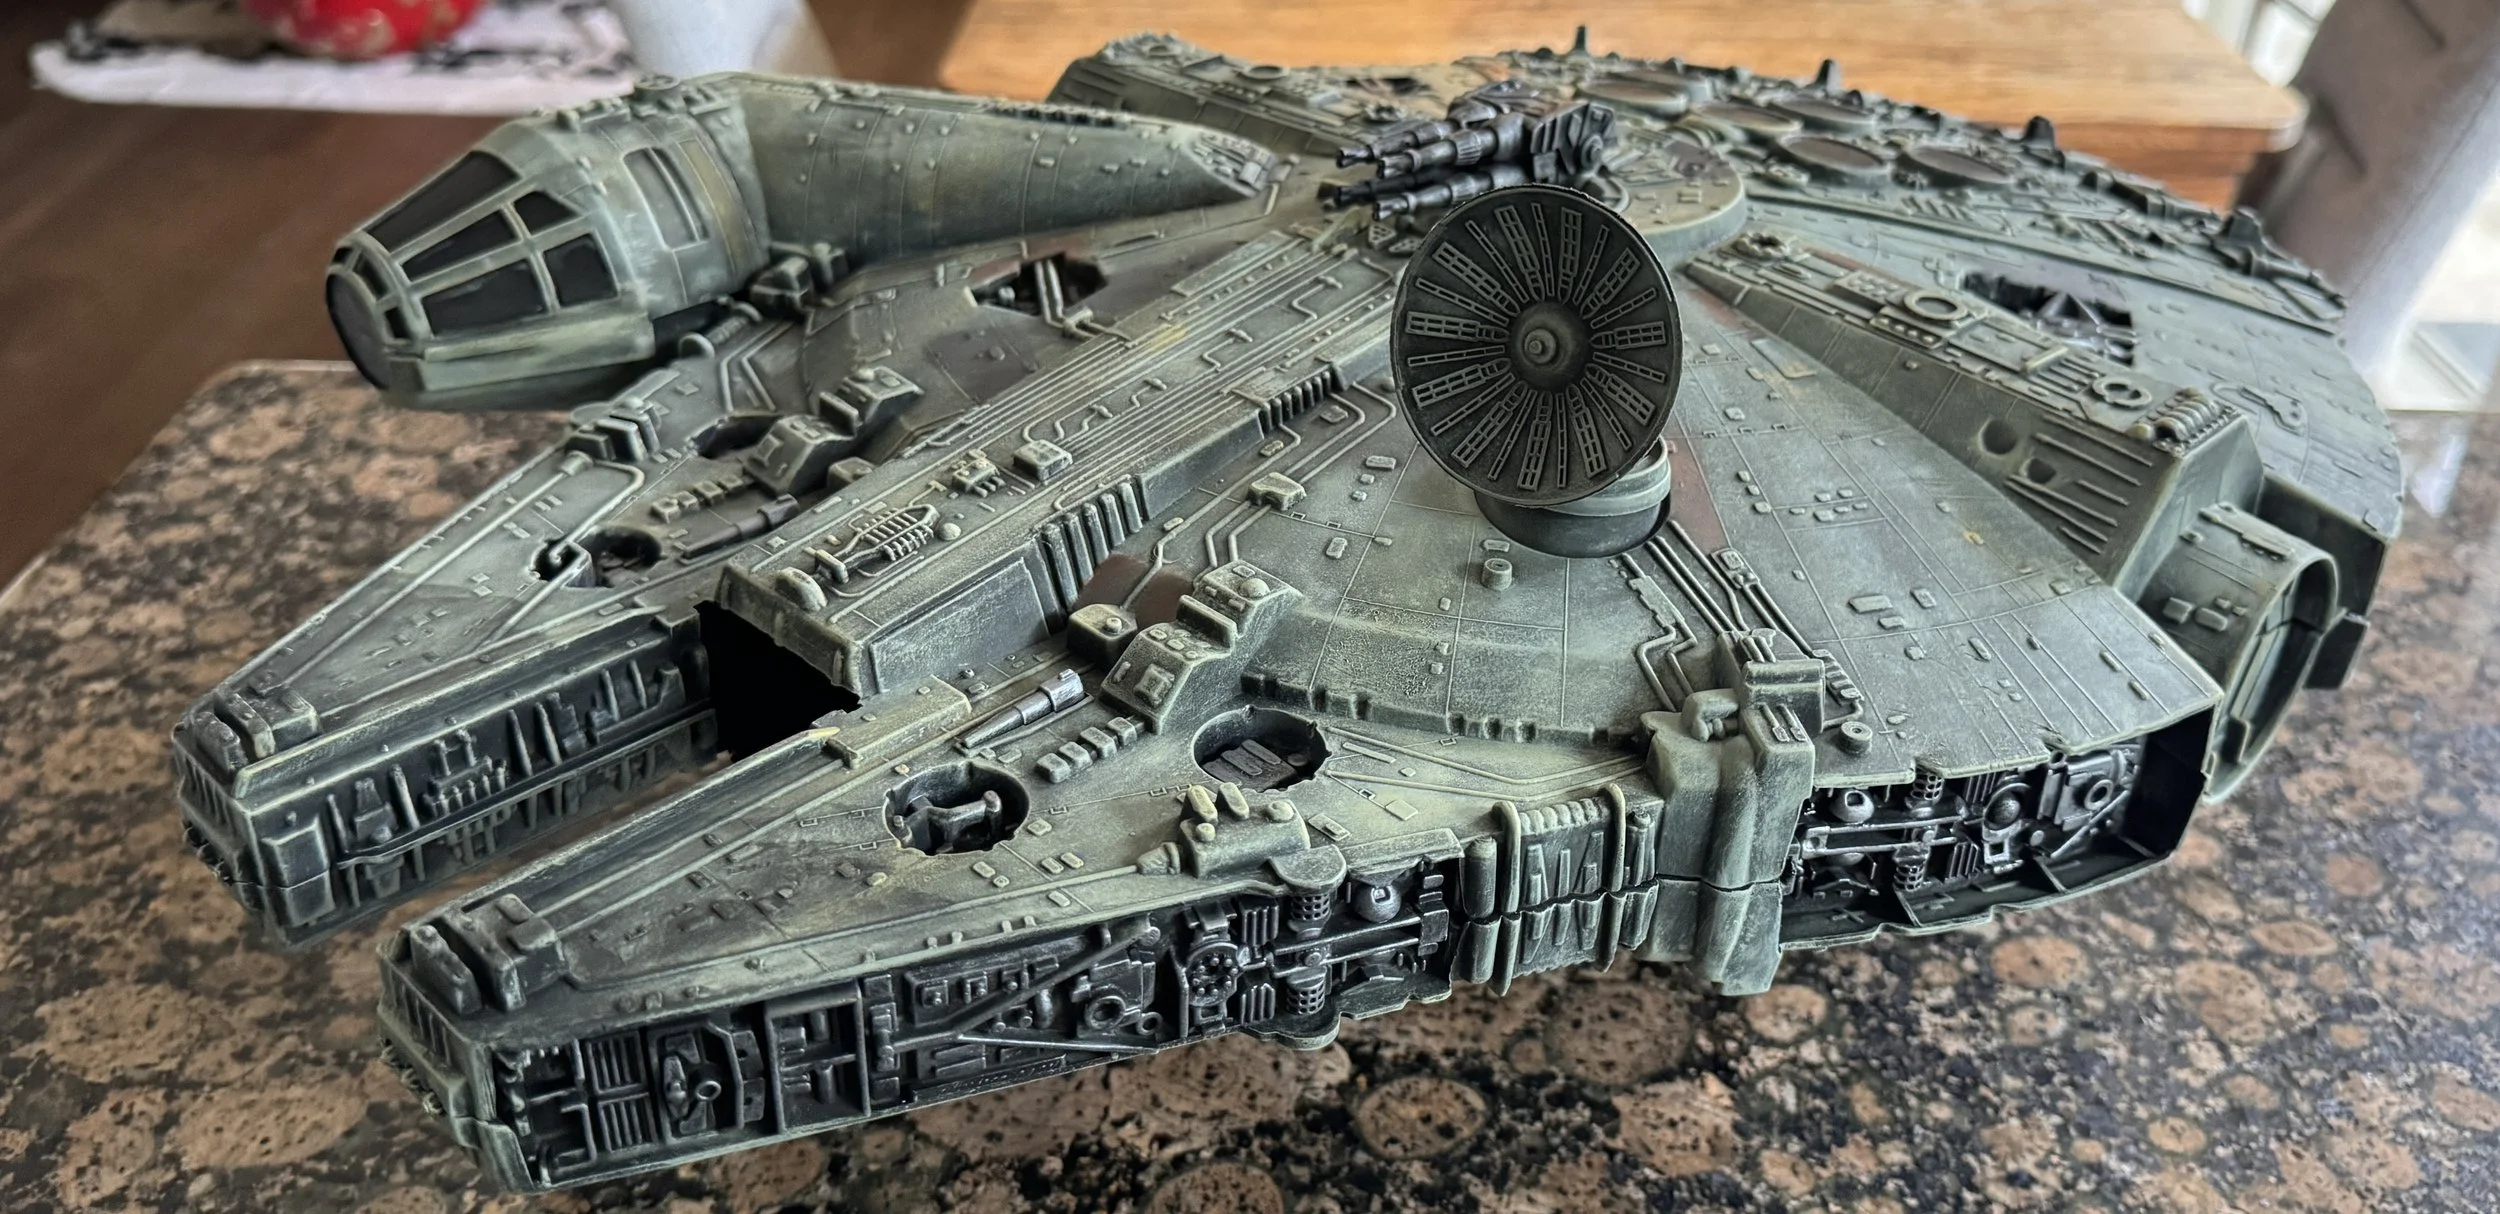
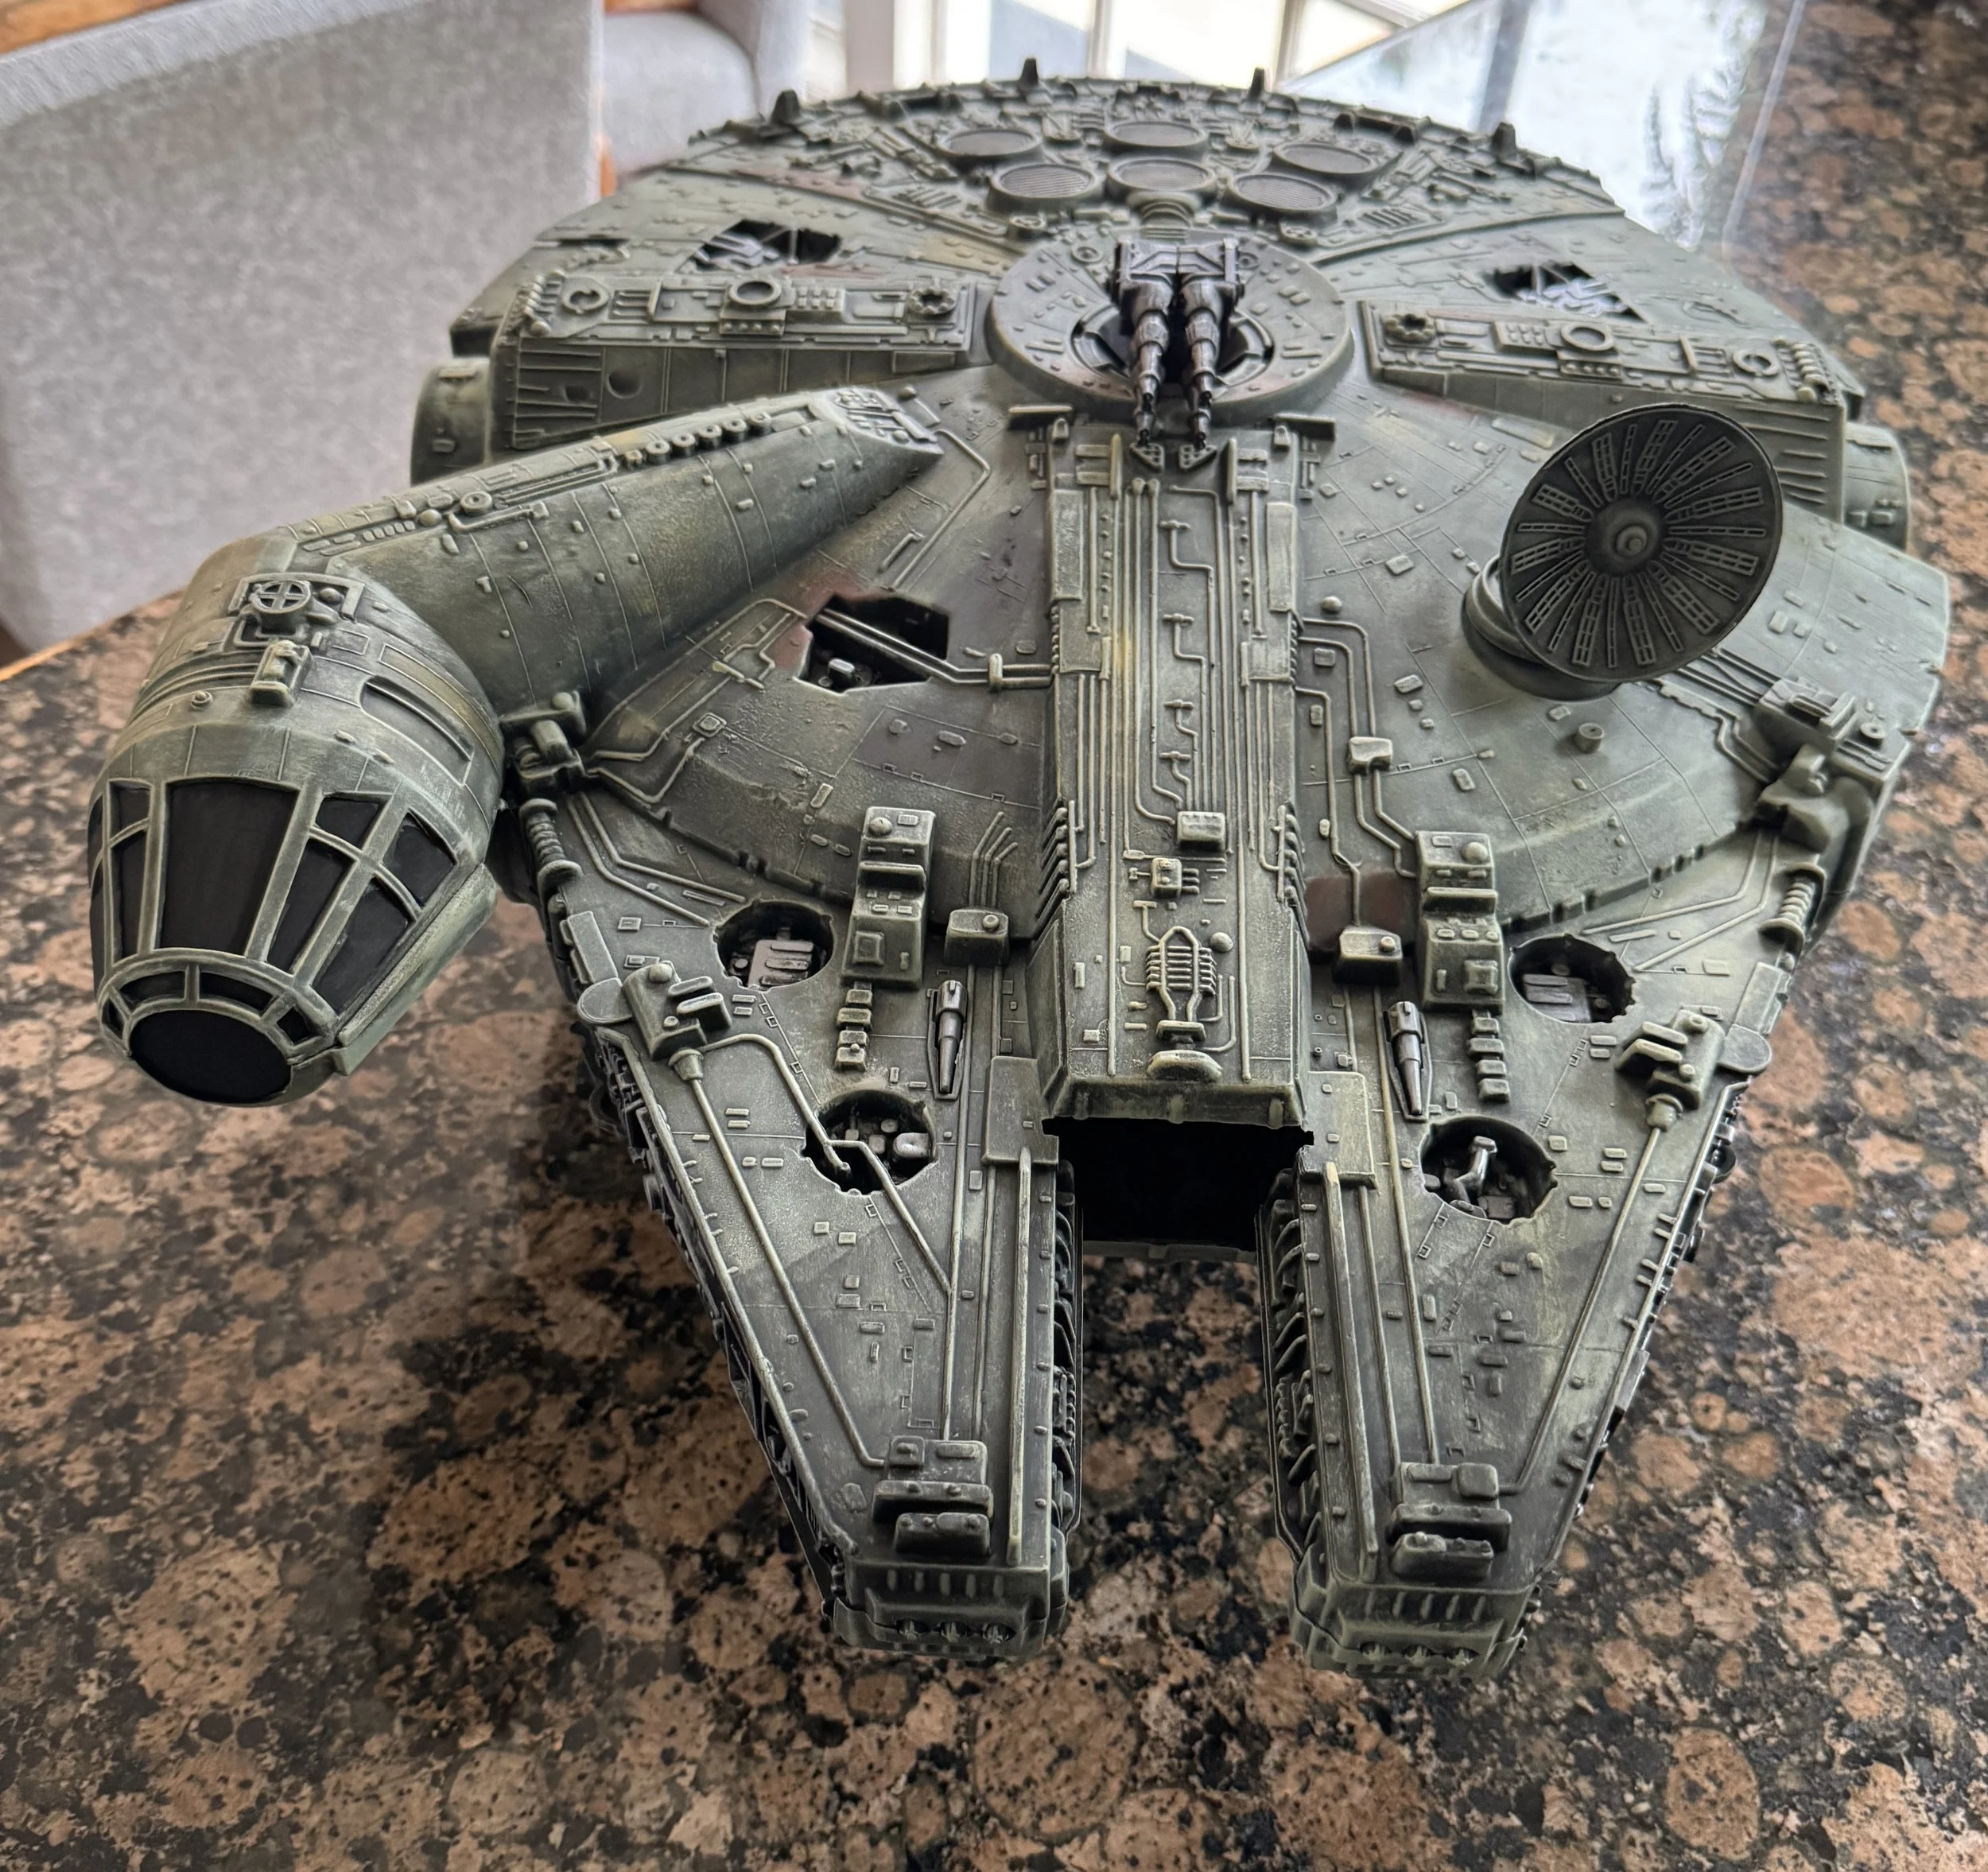
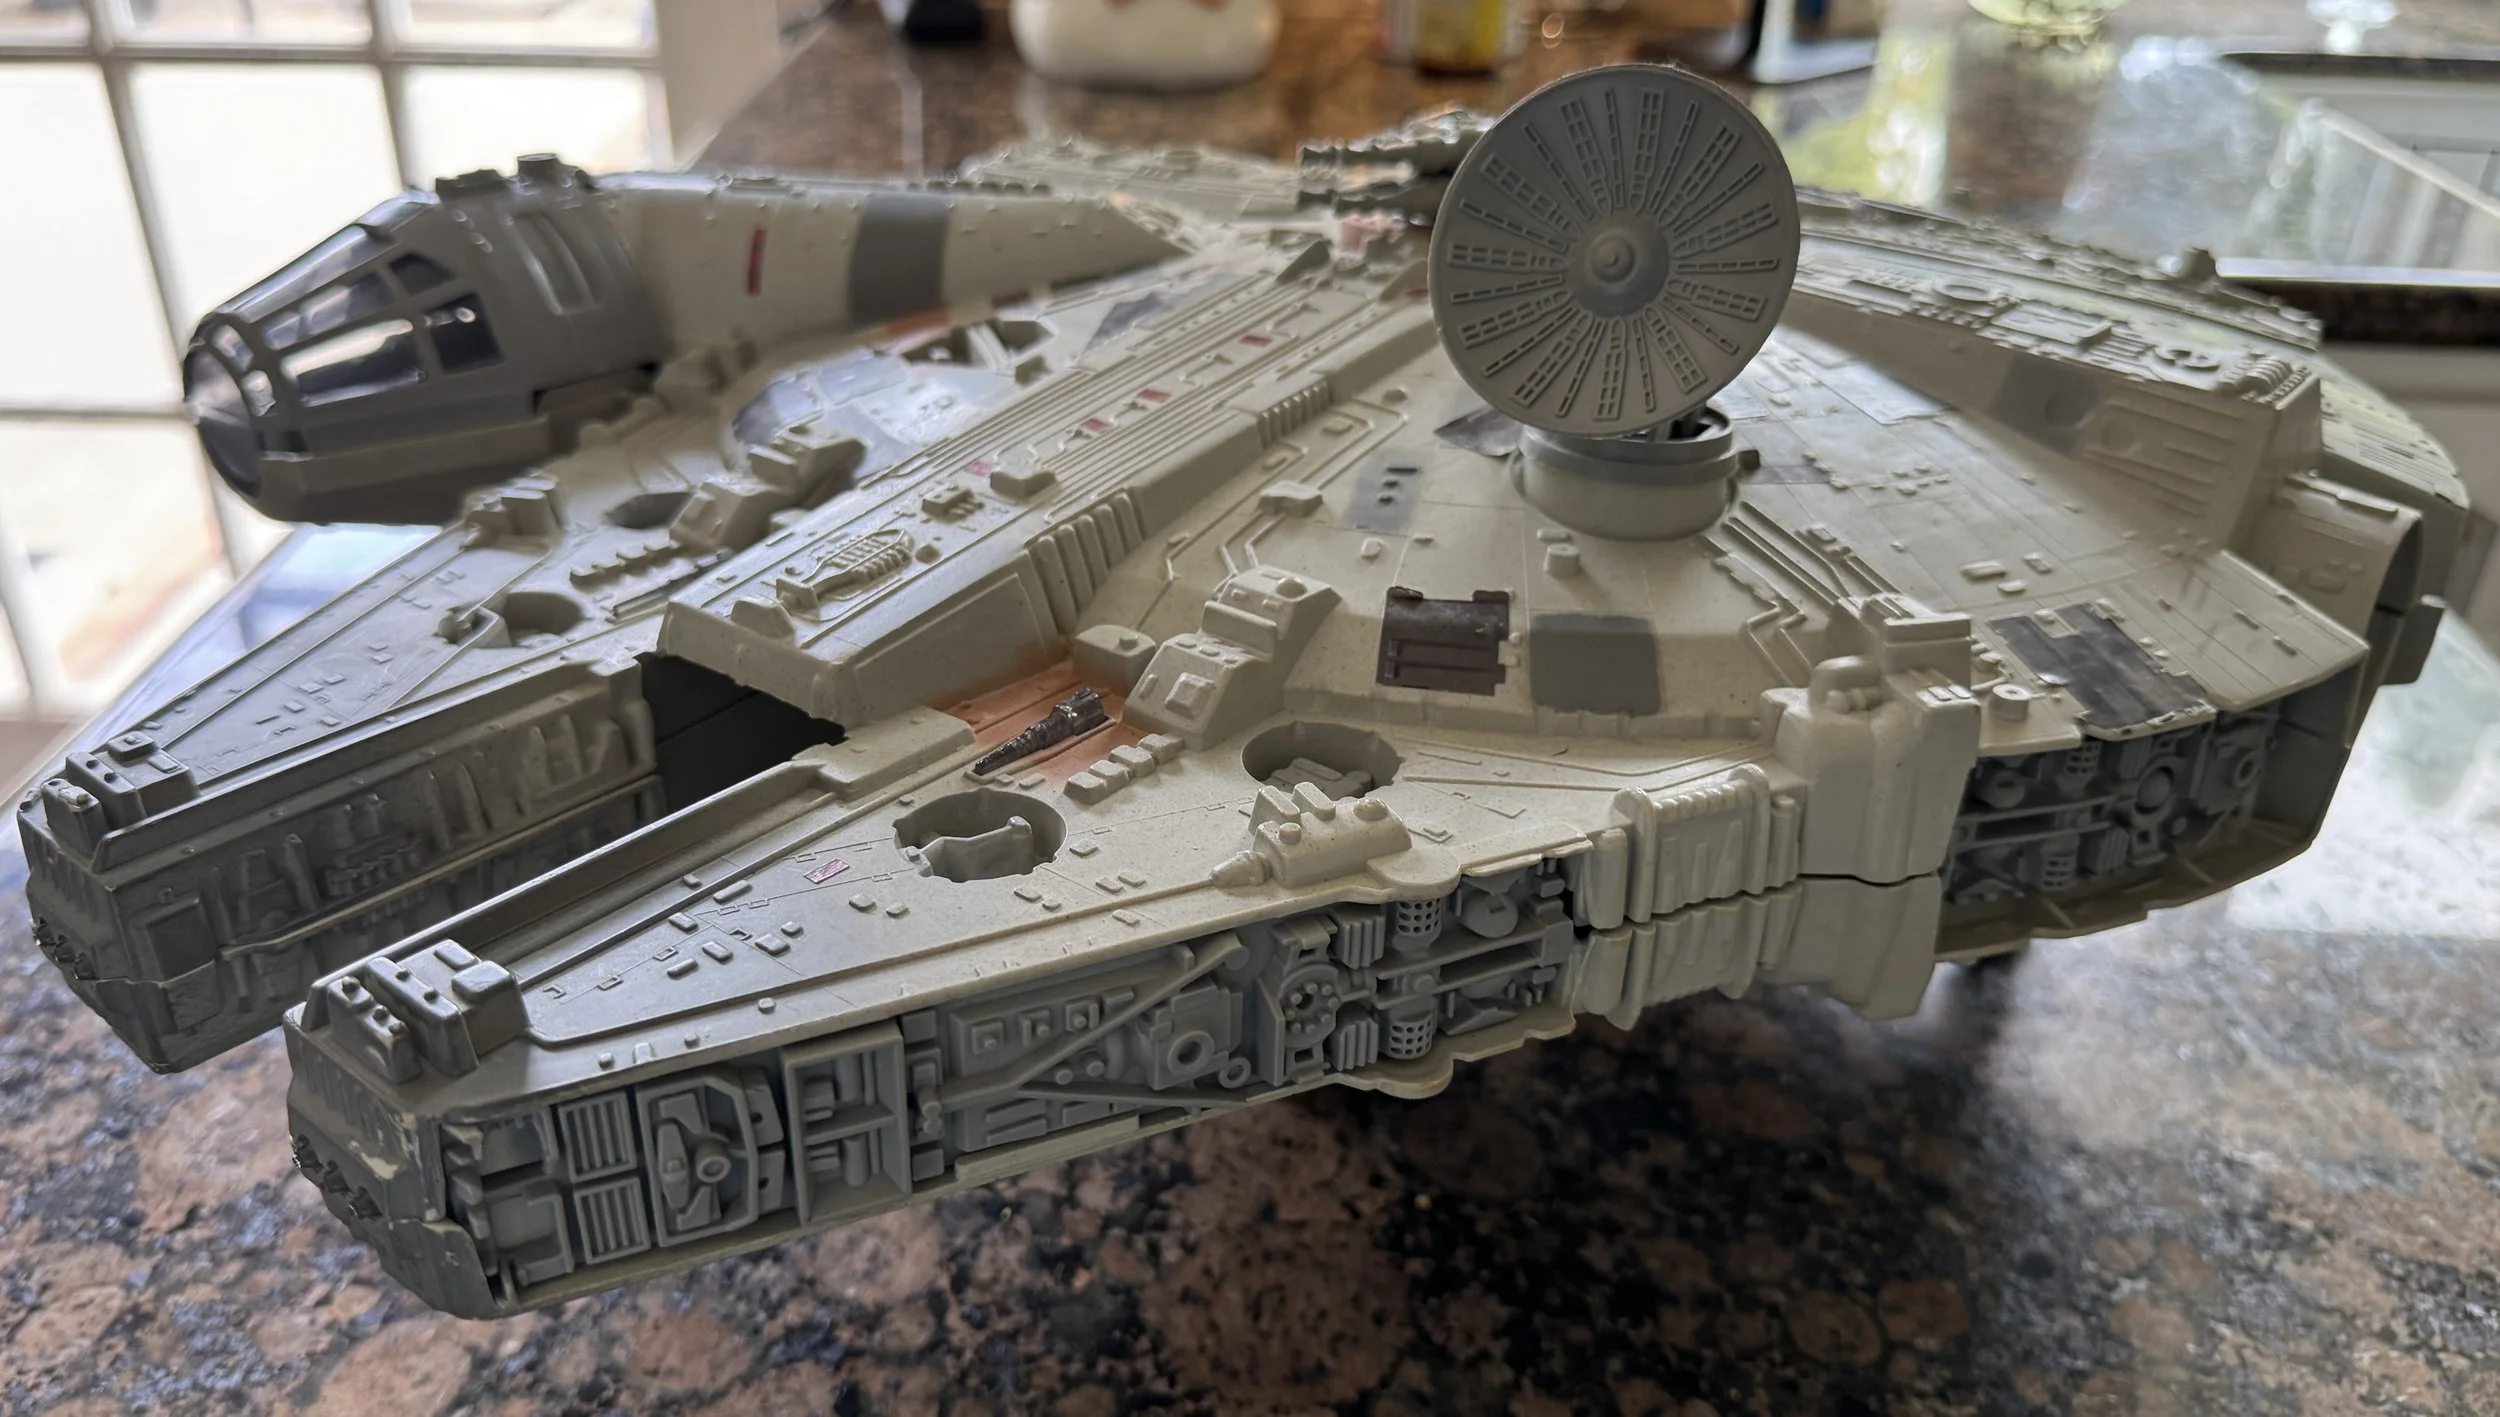
I scored big at the swap meet two weekends ago with a Tonka Millennium Falcon (1996) in near perfect condition for just $20. All that was missing was the underbelly gun and the two interior ramp supports (I had a perfect gun replacement and the supports were easily made with Evergreen plastic). It's a big boy... 21" long and 15" wide. I was so happy with this find that I jumped it to the head of my get-it-done list and finished painting it yesterday. Because of its size it was a beast to paint. I've provided three pictures of the newly painted ship and one of it as it was when I found it.
This past weekend we did some shopping at Home Goods looking for some holiday décor. We found a huge Christmas ball (22” in diameter). Unfortunately, it was the only one available anywhere in our extended community, and it was imperfectly painted. We bought the ball, and I took on the job of correcting the imperfect paint job.
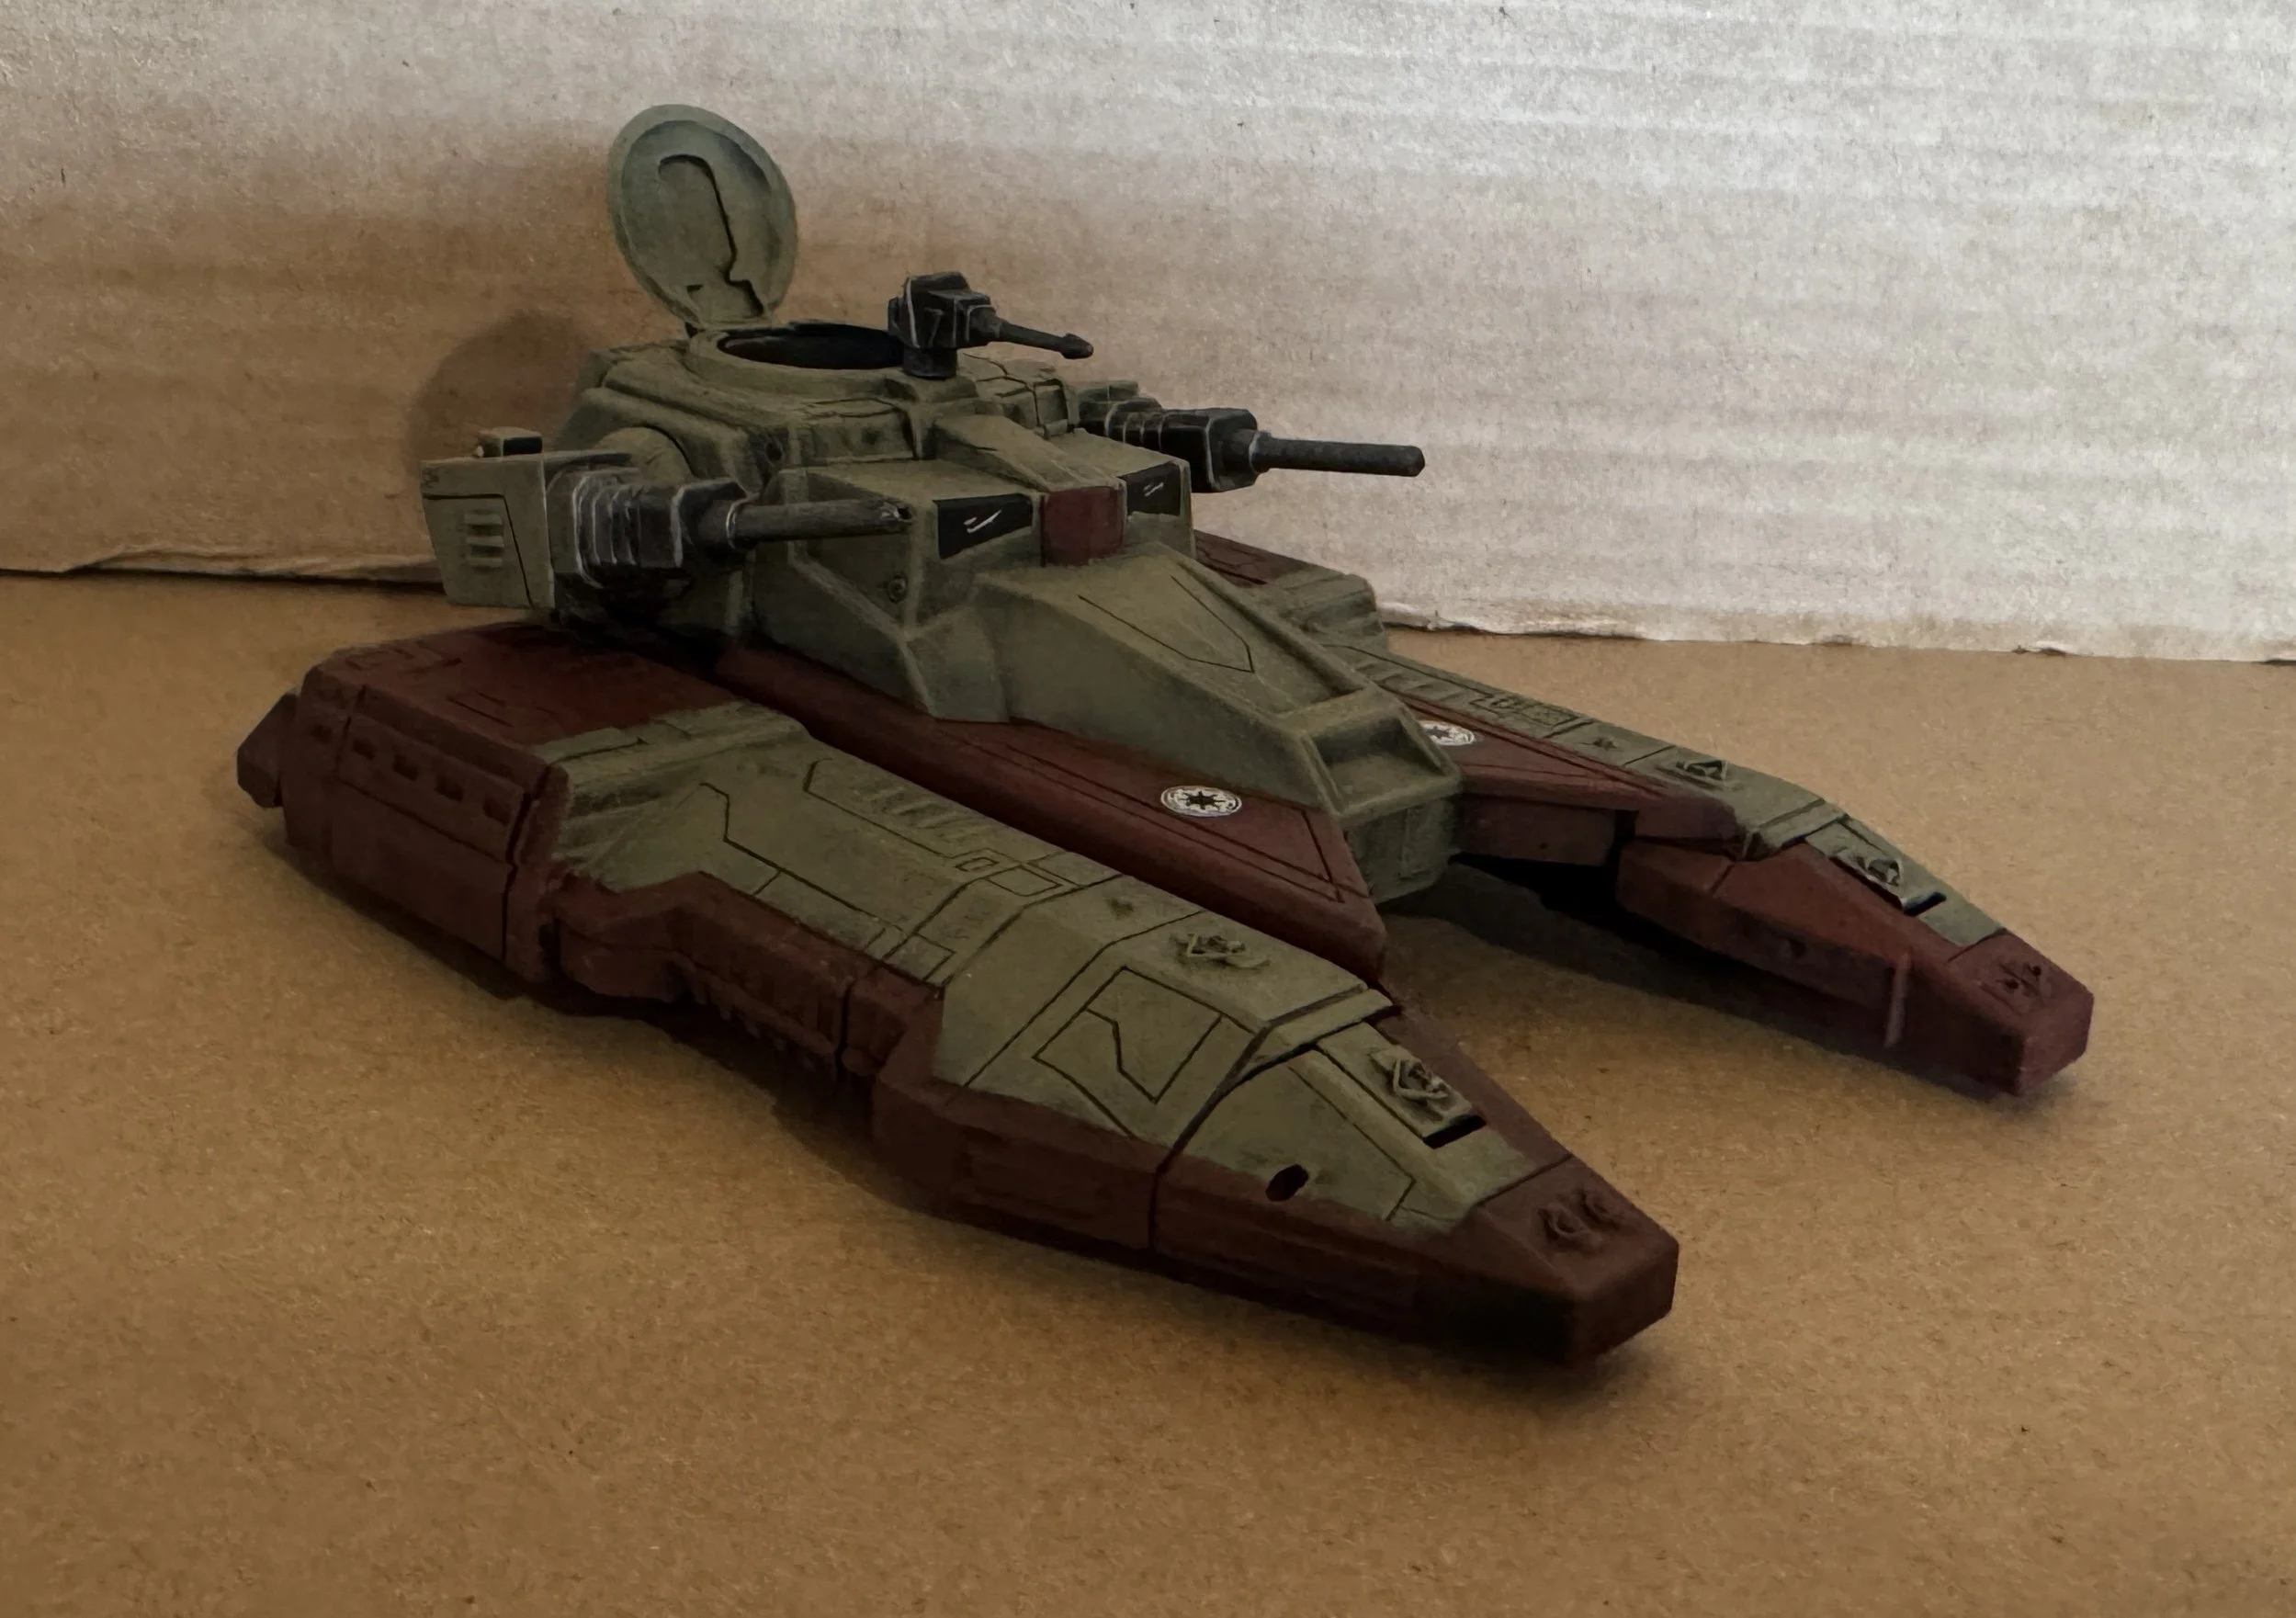
With the Christmas ball done, I turned my attention to my sixth Star Wars transformer Republic fighter tank. This was a real risk because I decided I wanted one with the hatch open, and they didn’t come that way, so I was going to have to cut the hatch cover off and set it in the open position… risky. Fortunately, it all worked out well.
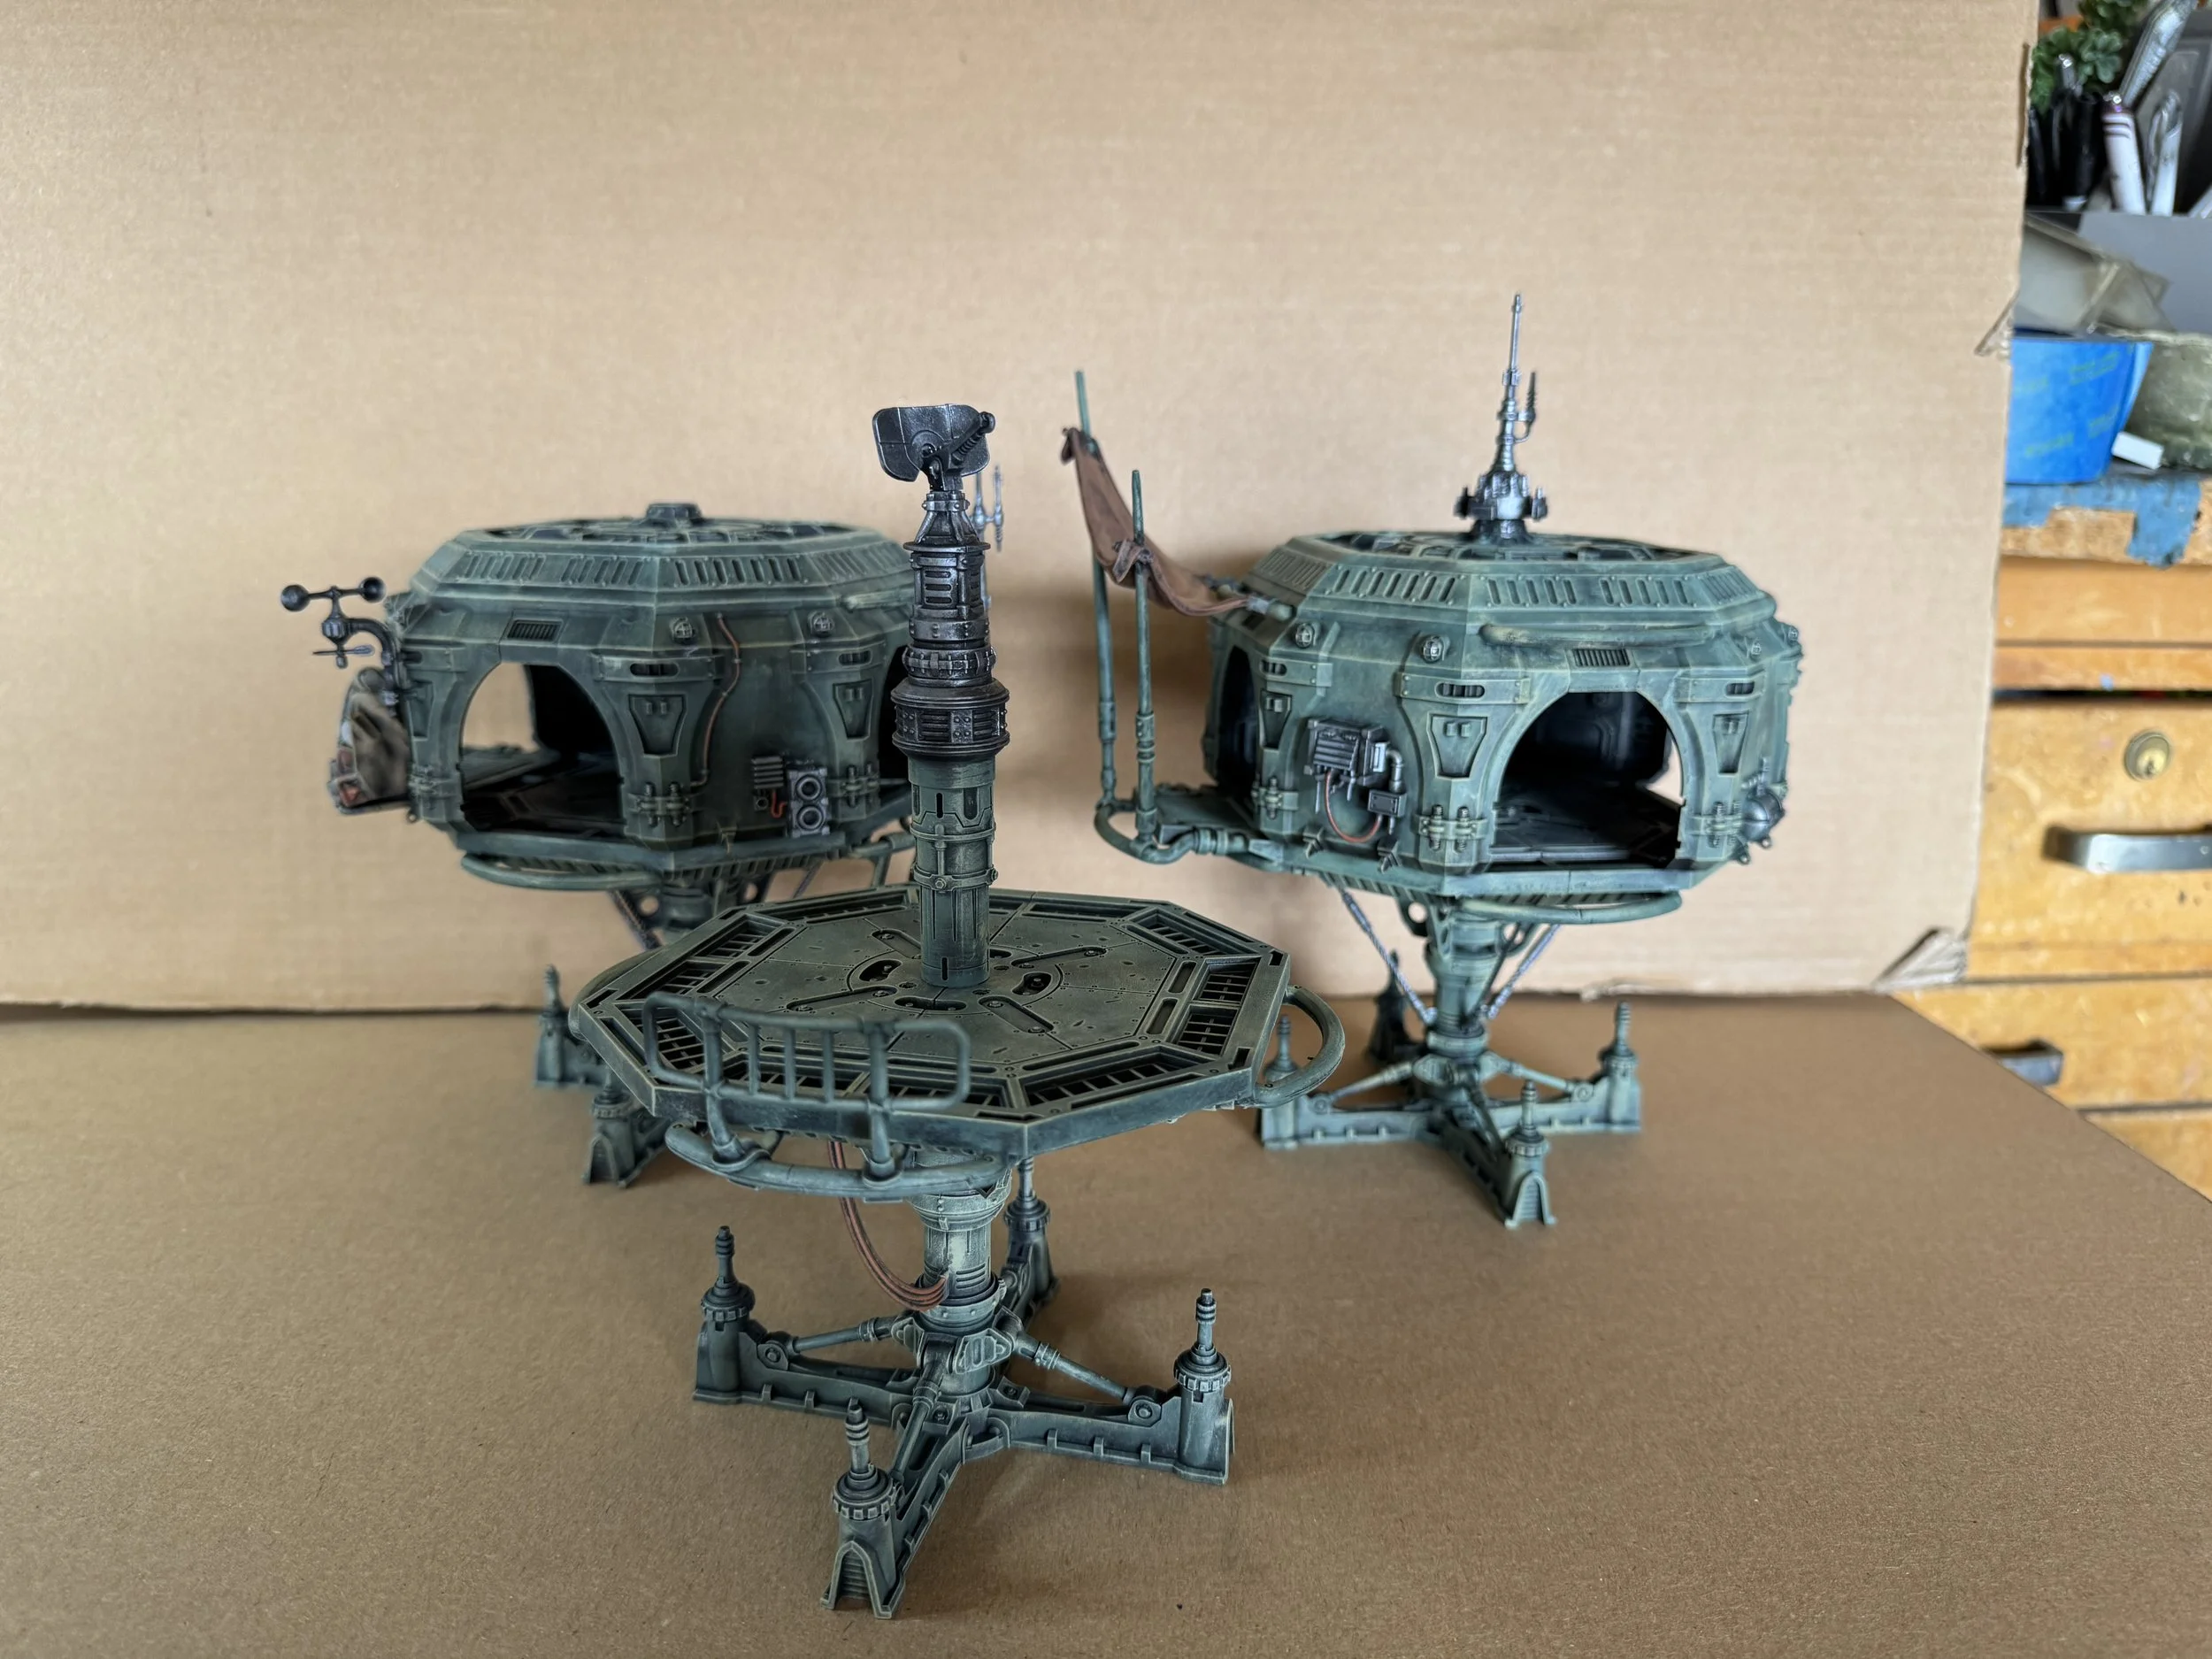
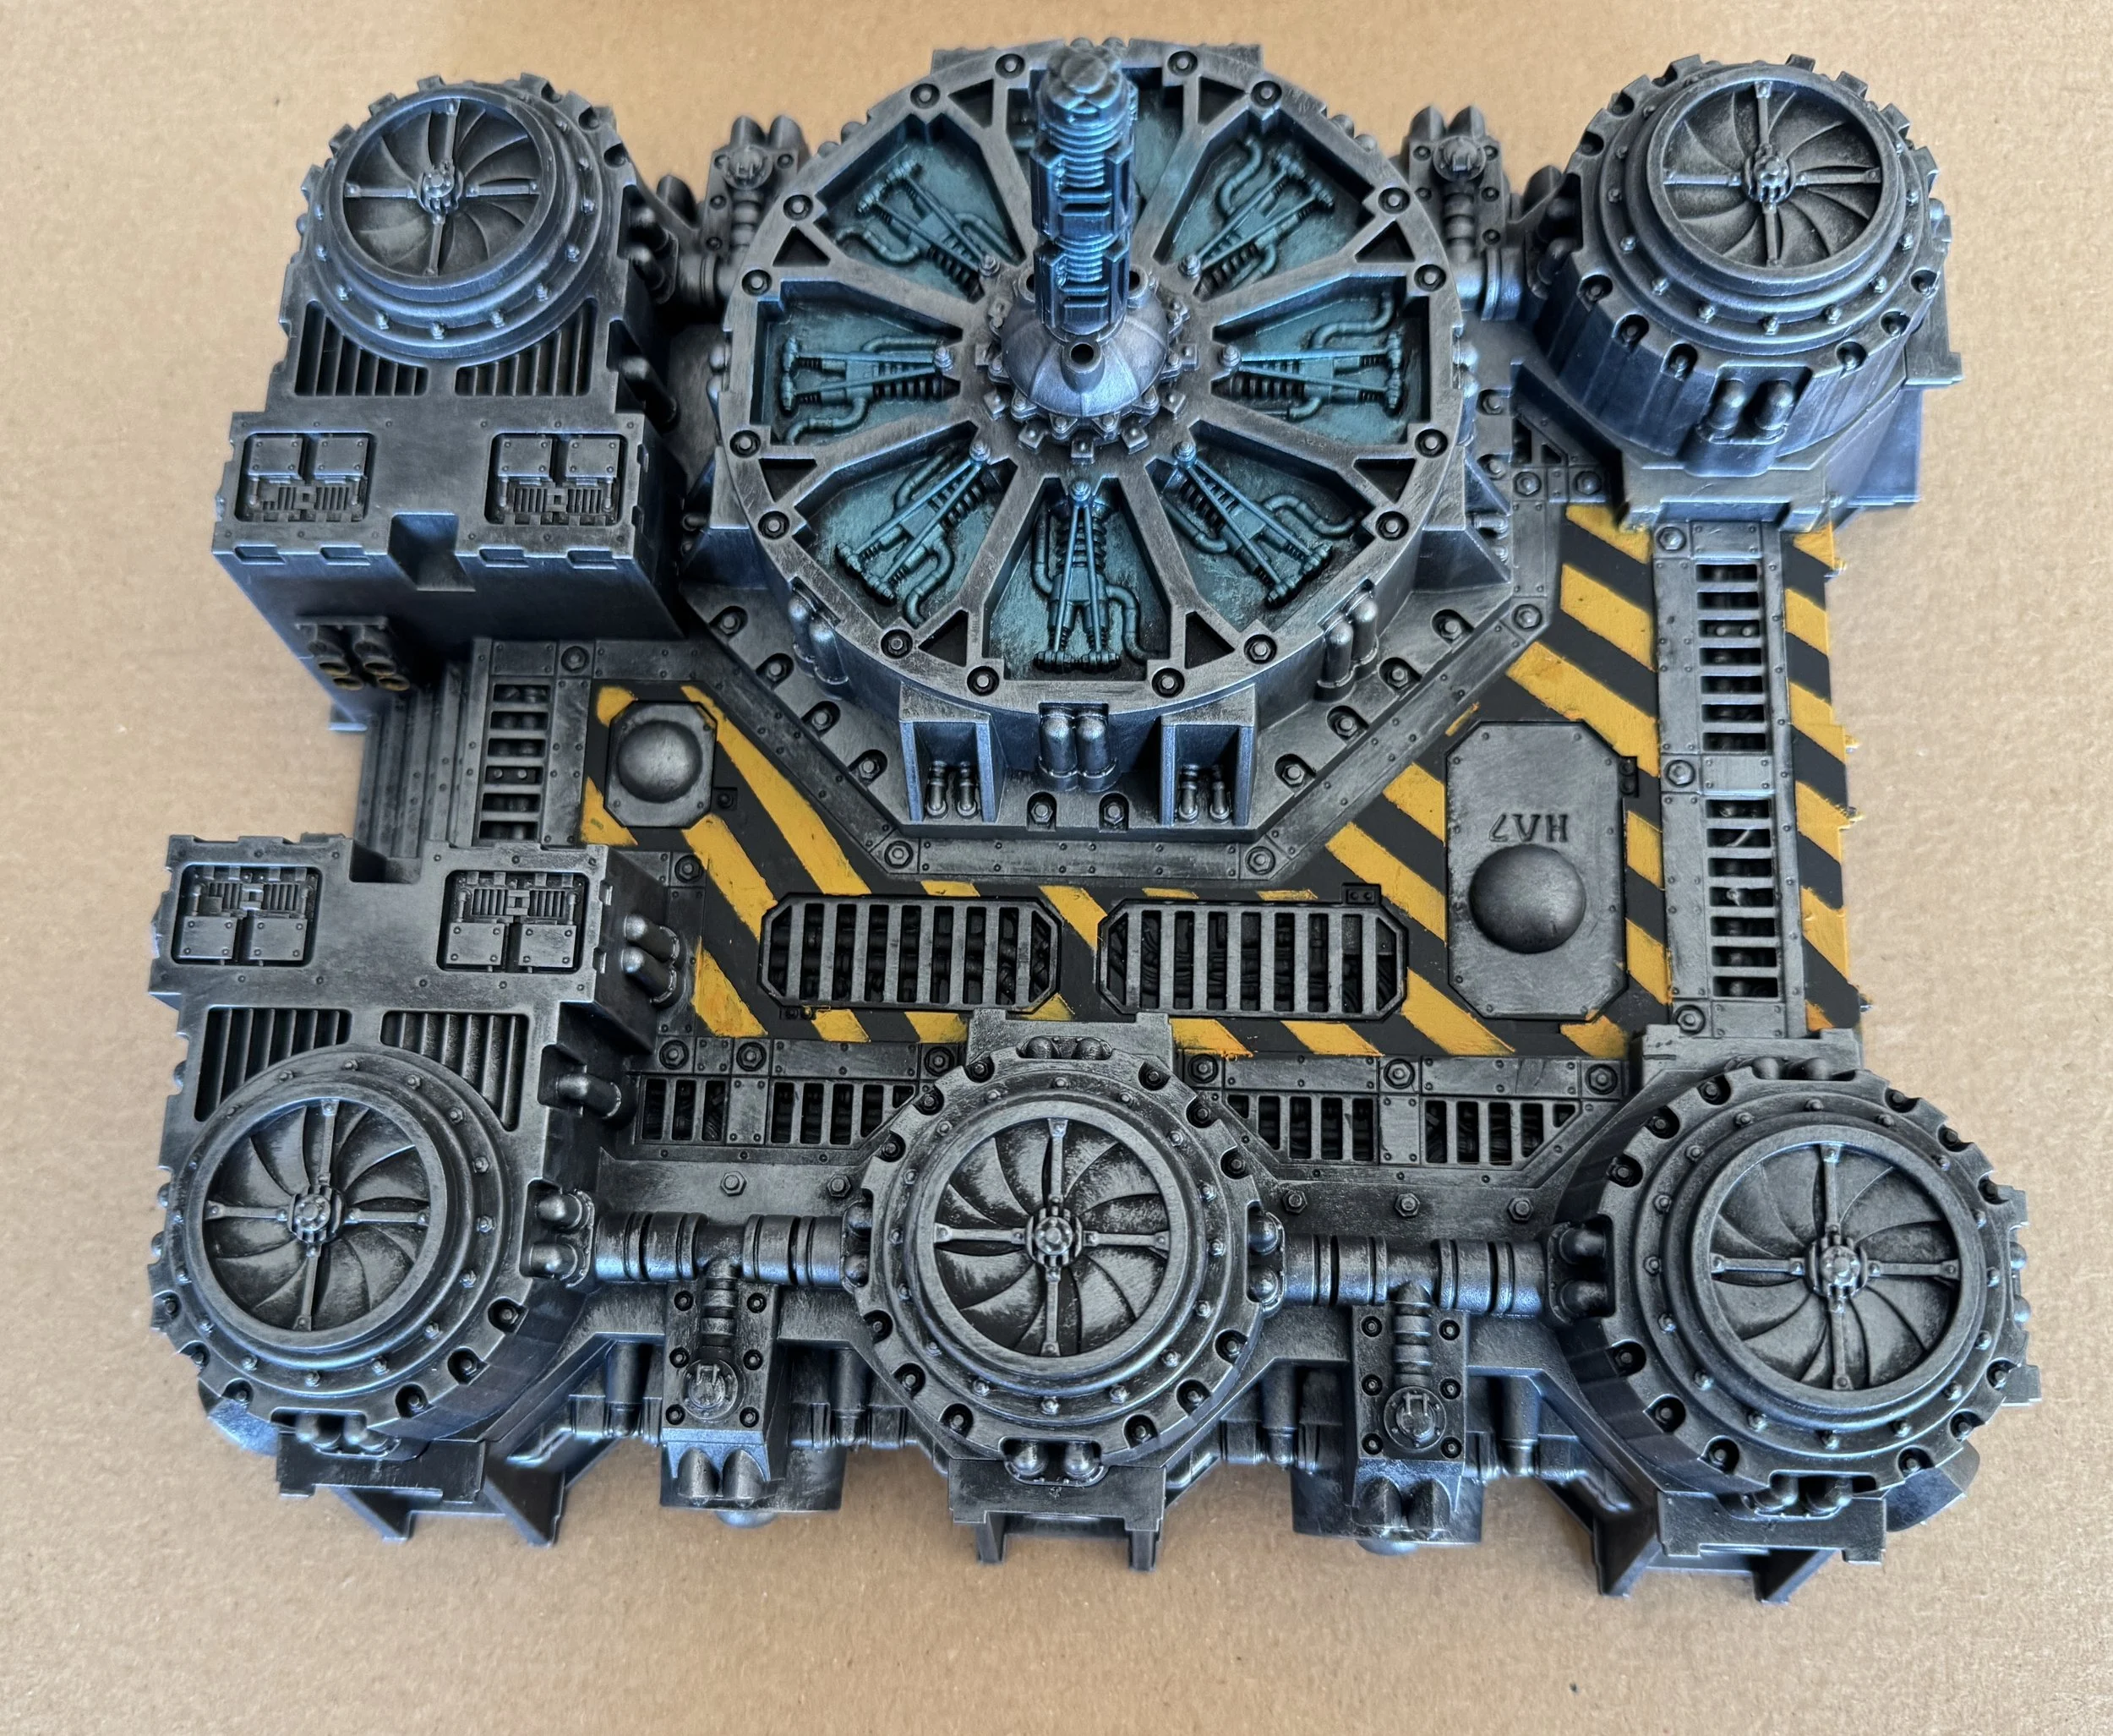
The third great element of my $60 Brookhurst Hobbies’ Bring and Buy was the GW Nightmare Generatorium Hub which I didn’t know existed until I got home and had time to look through the bundle of goodies I had lucked into. (The other two elements of that bundle were the GW Haemotrope Reactors and the Necromunda Ash Waste Hab Modules game set.) Before painting the Generatorium Hub, I made a number of modifications all of which were focused on hiding the GW skulls.
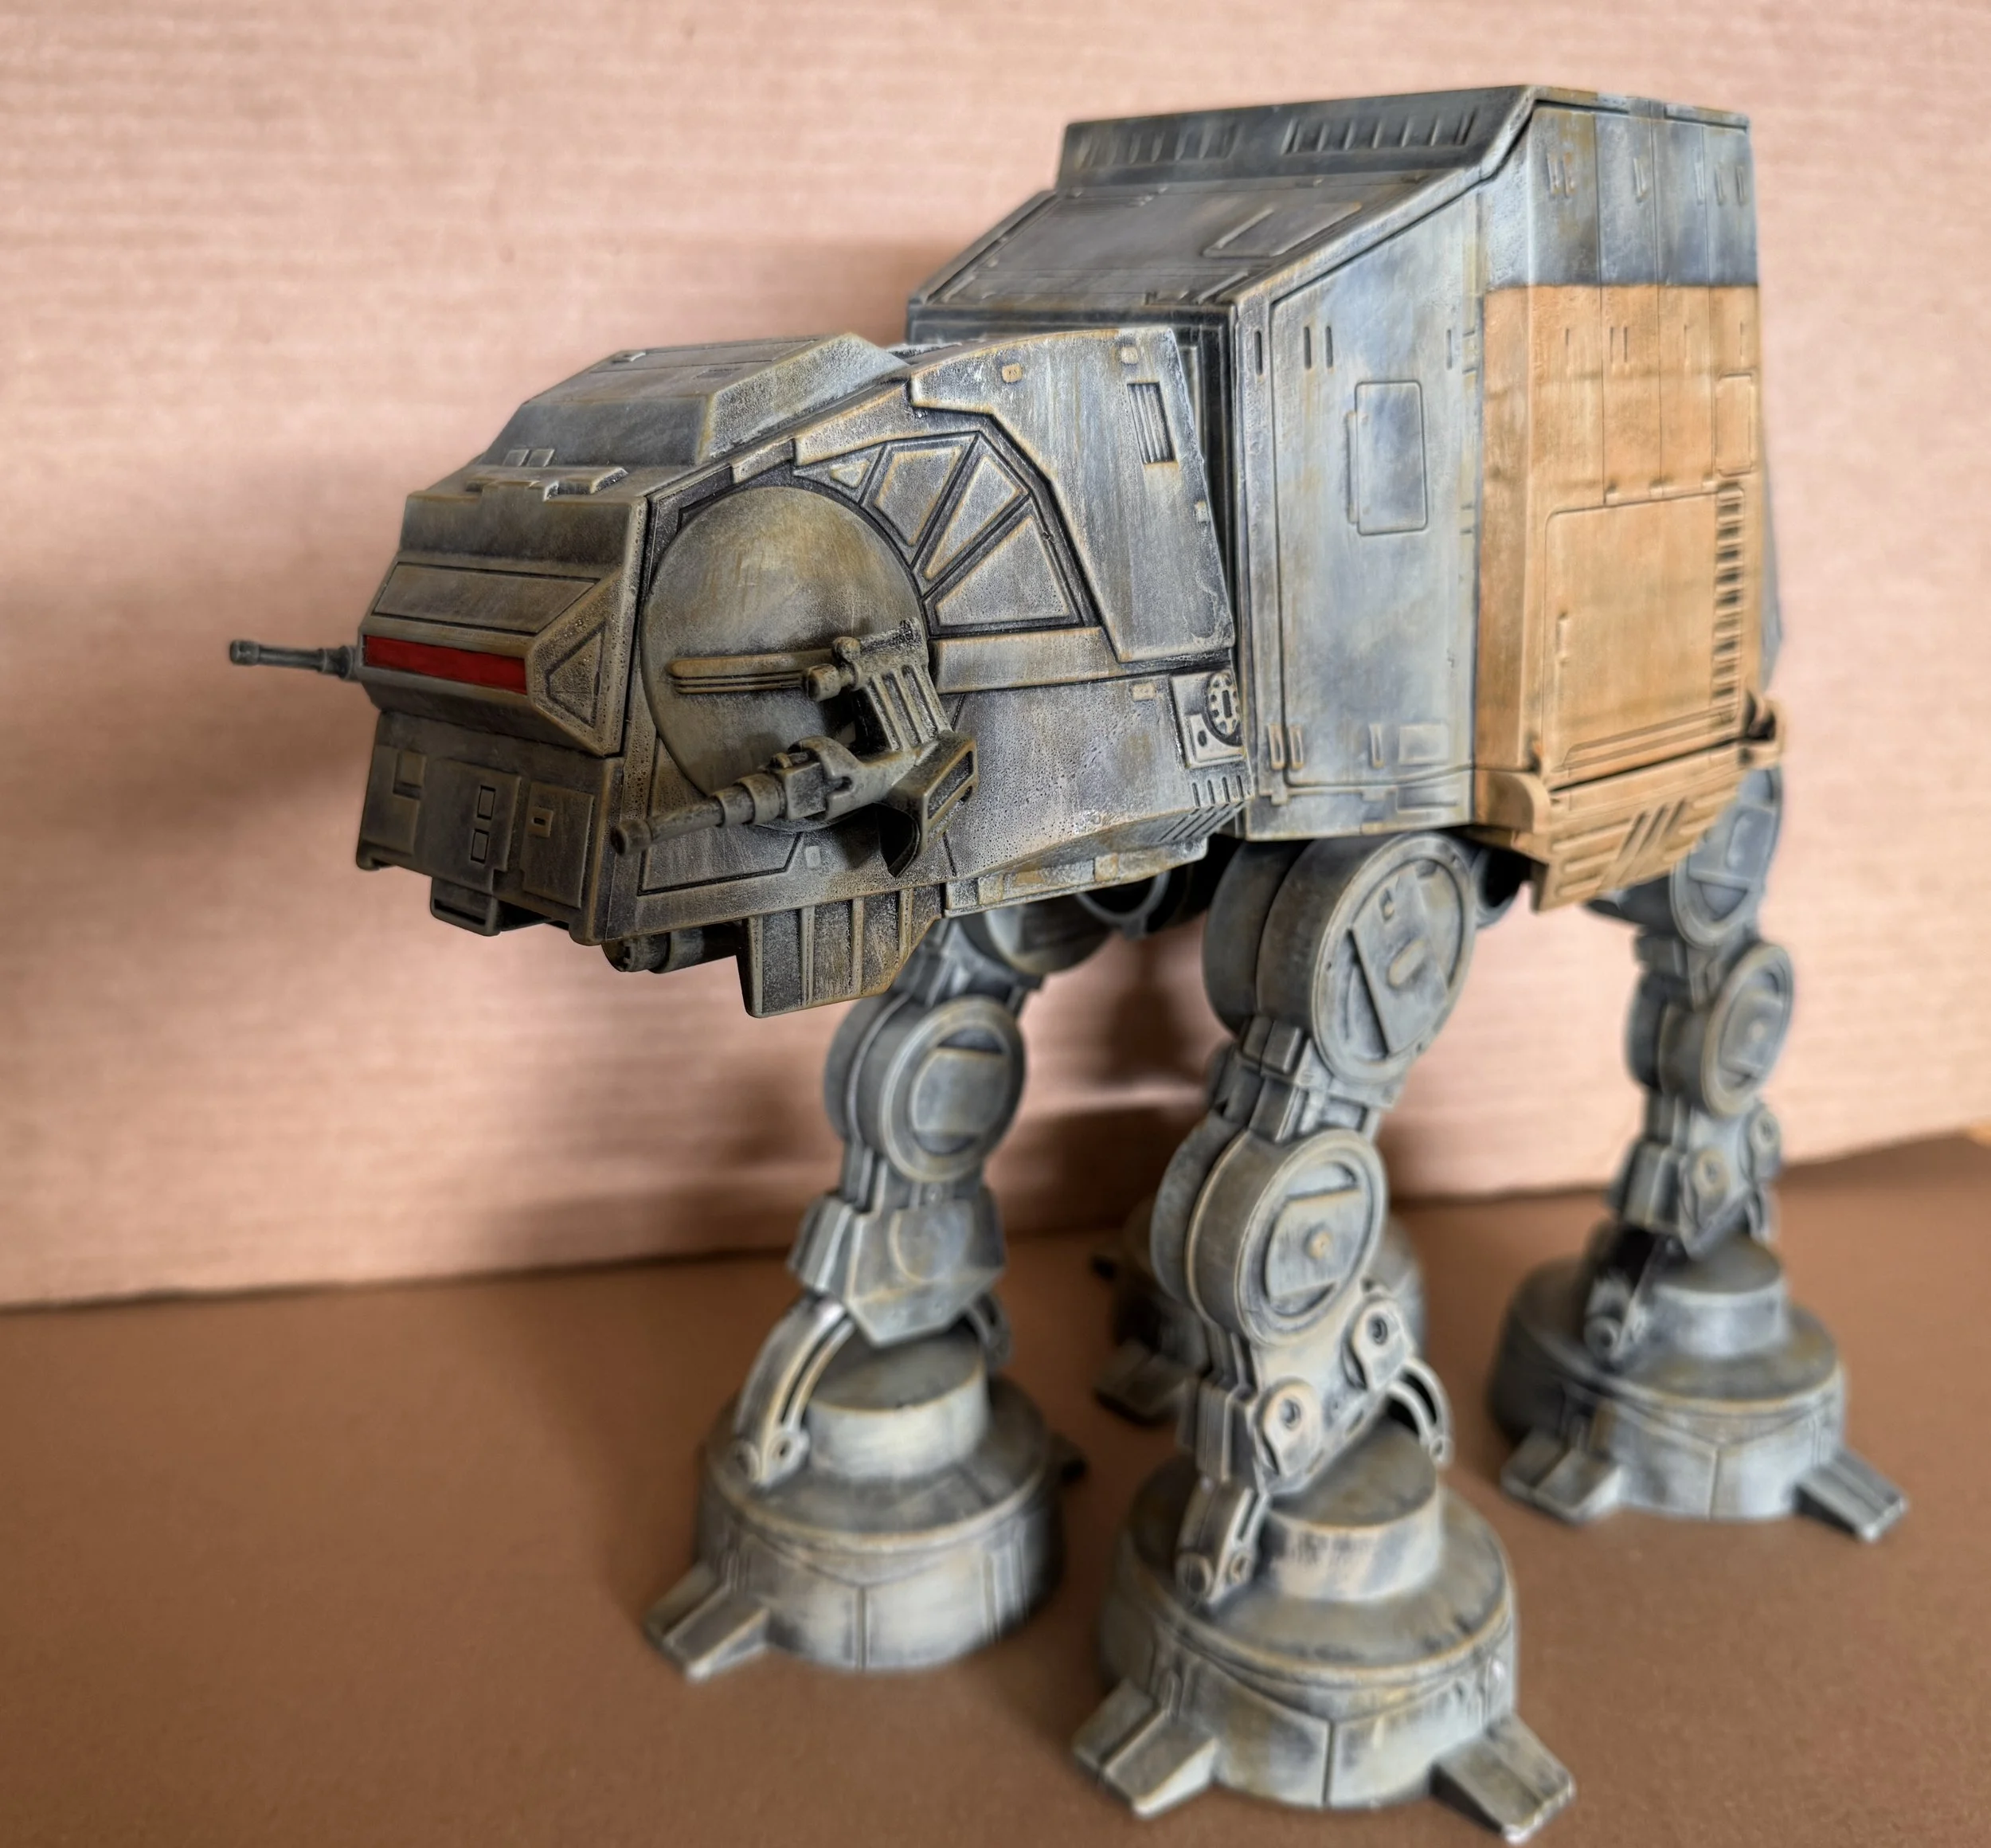
More than a decade ago I began collecting Playskool Heroes AT-ATs. They are probably not to everyone’s taste because of their chunky look (12” long and 11” tall), but they offered me what I was looking for… cheap (between $5 and $15 each at the swap meet back in the day) which offered me the opportunity to get a lot of them, and their size worked well on my 5’ x 7’ layout table. Also their legs snap on and off for easier storage. I ended the week painting three of these Playskool giants (2 pictured here/they all look the same)… I sprayed them flat black and then covered that with a dry brushing of Vallejo Model Color Pastel Green which used to be called Light Grey Green. I then dry brushed a highlight of Stone Grey and ended with another highlight of Khaki Grey.


November 2, 2025
I began the week modifying and painting the Haemotrope Reactors I got at last month’s Brookhurst Hobbies’ Bring and Buy. The biggest part of the job was hiding the huge skulls that are so much a part of Games Workshop terrain pieces. I did that by adding items taken from a Pegasus Chemical Plant set.
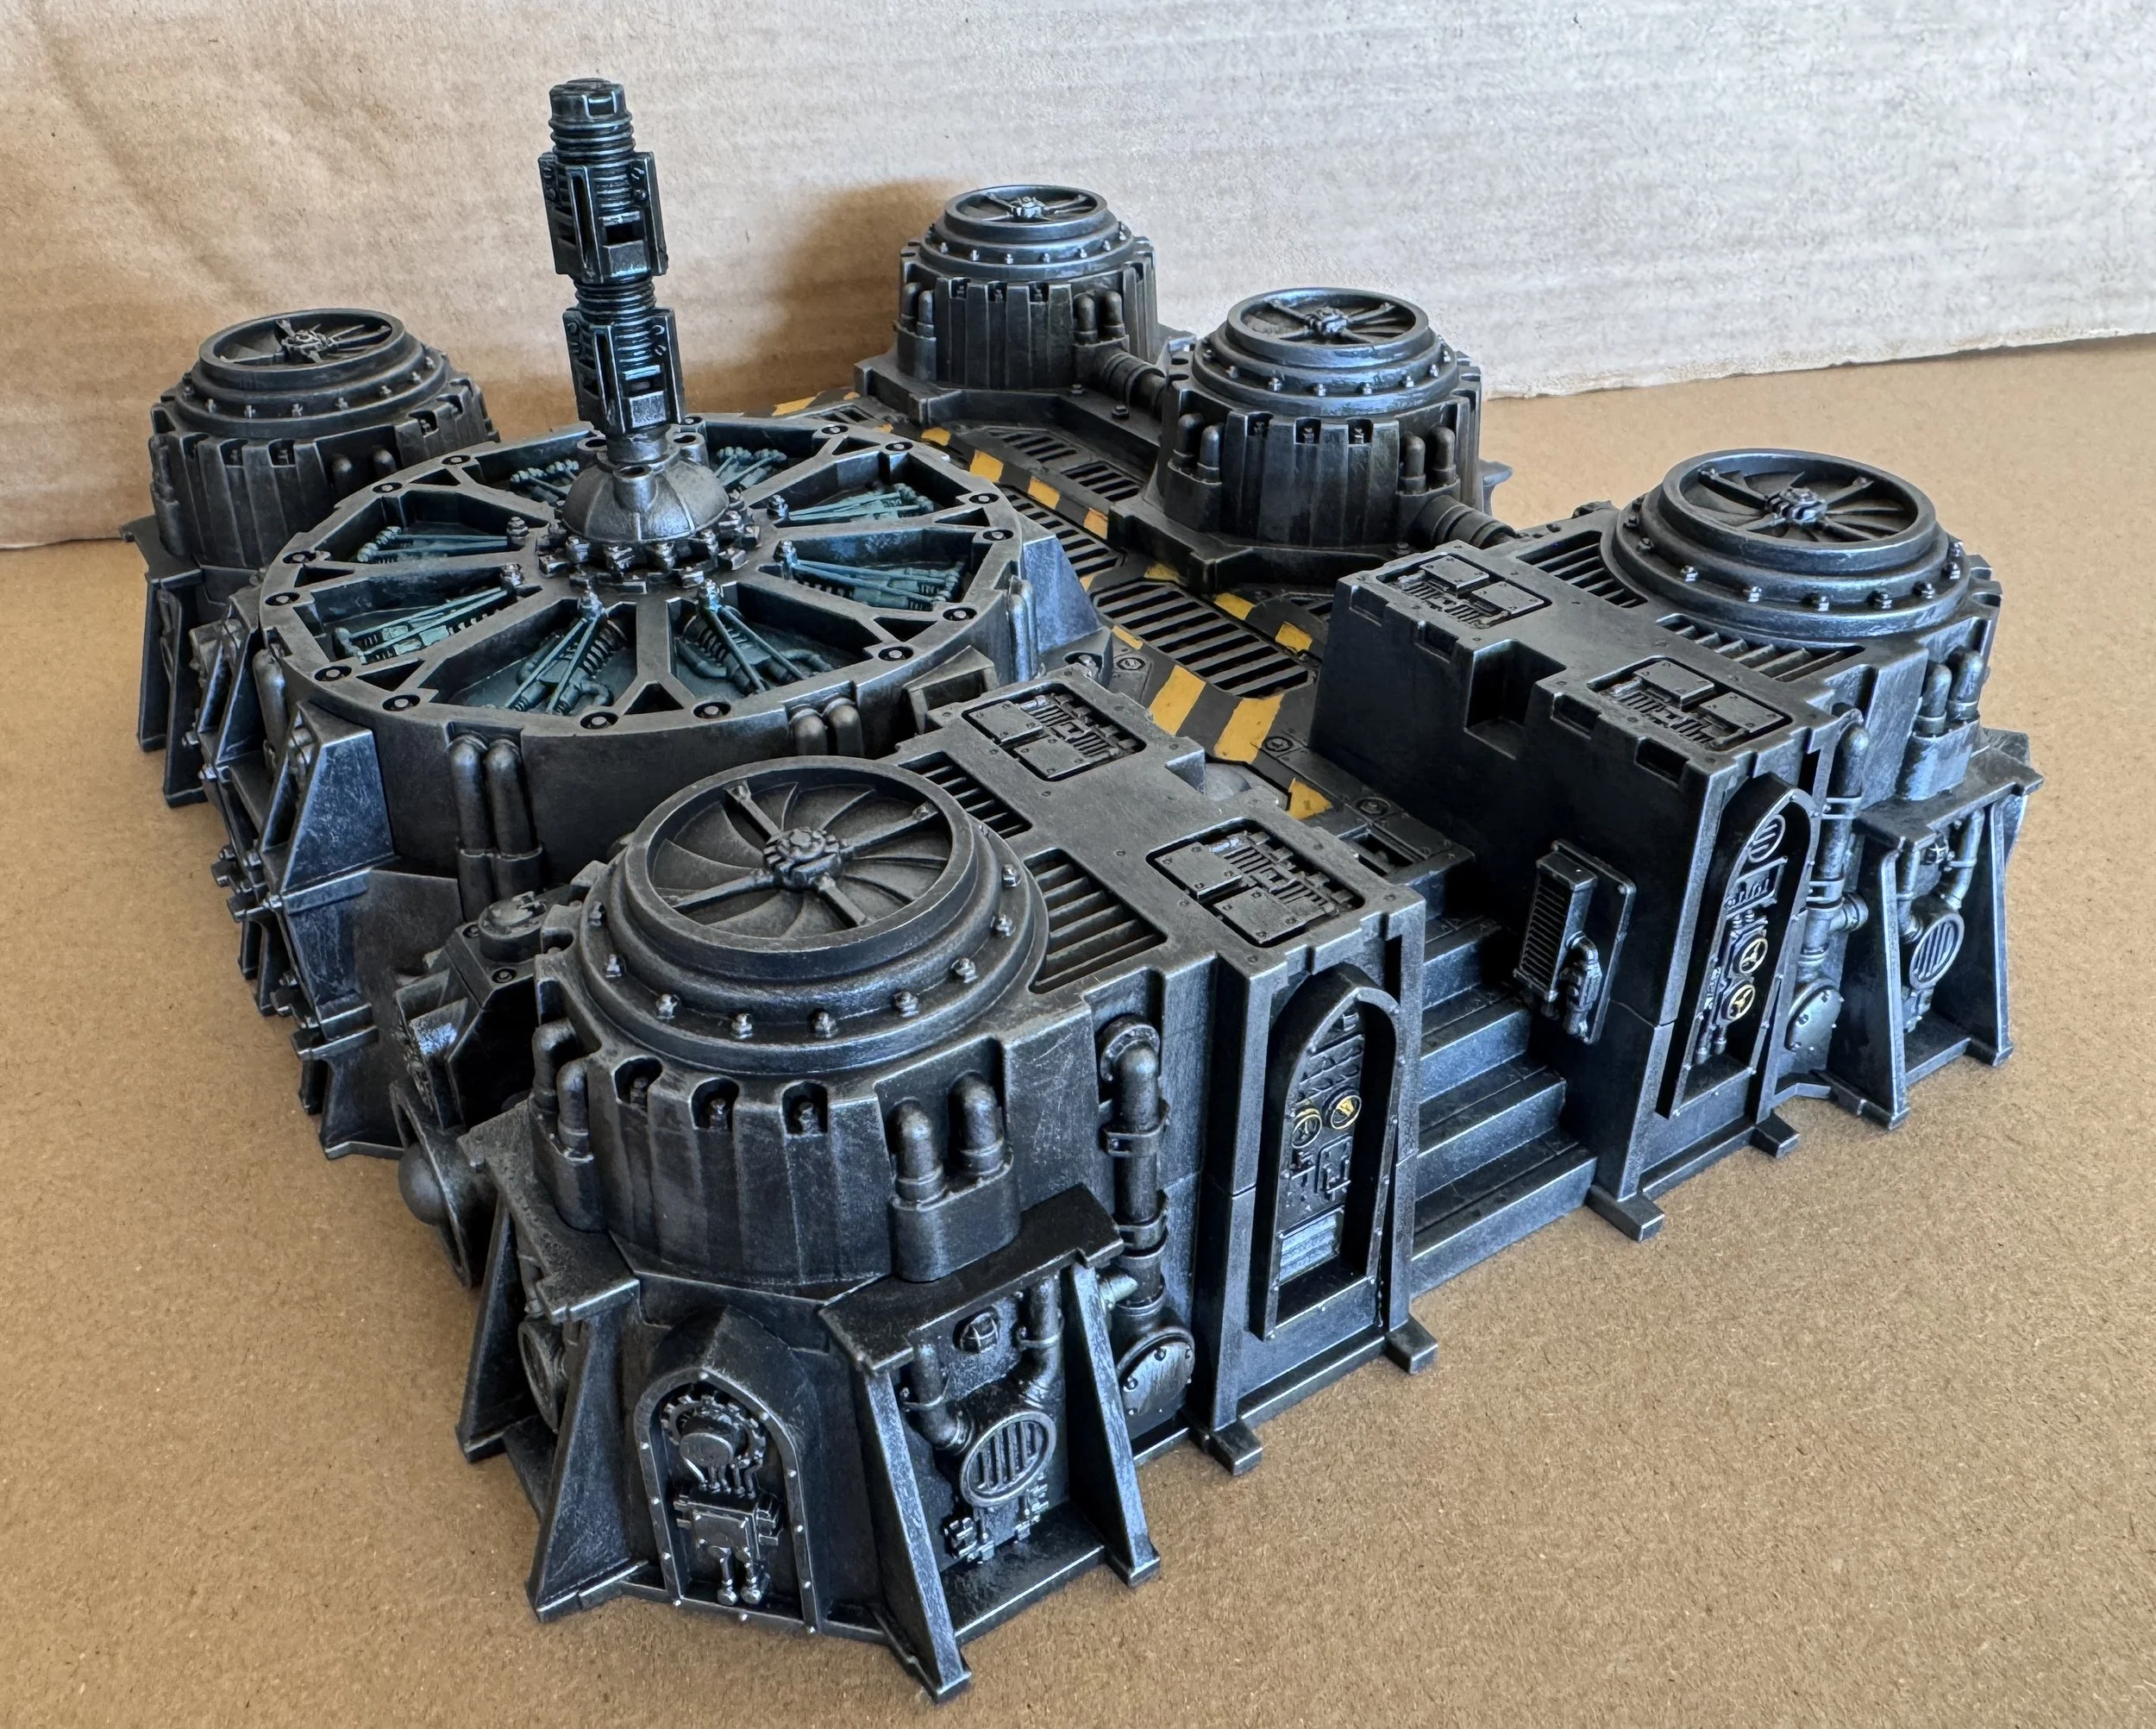
With the reactors complete I finished painting the last five landings and all the ramps that were part of my hot deal at the Bring and Buy. I am posting two photos so I can include the entire Necromunda Ash Waste set that I got for $60.
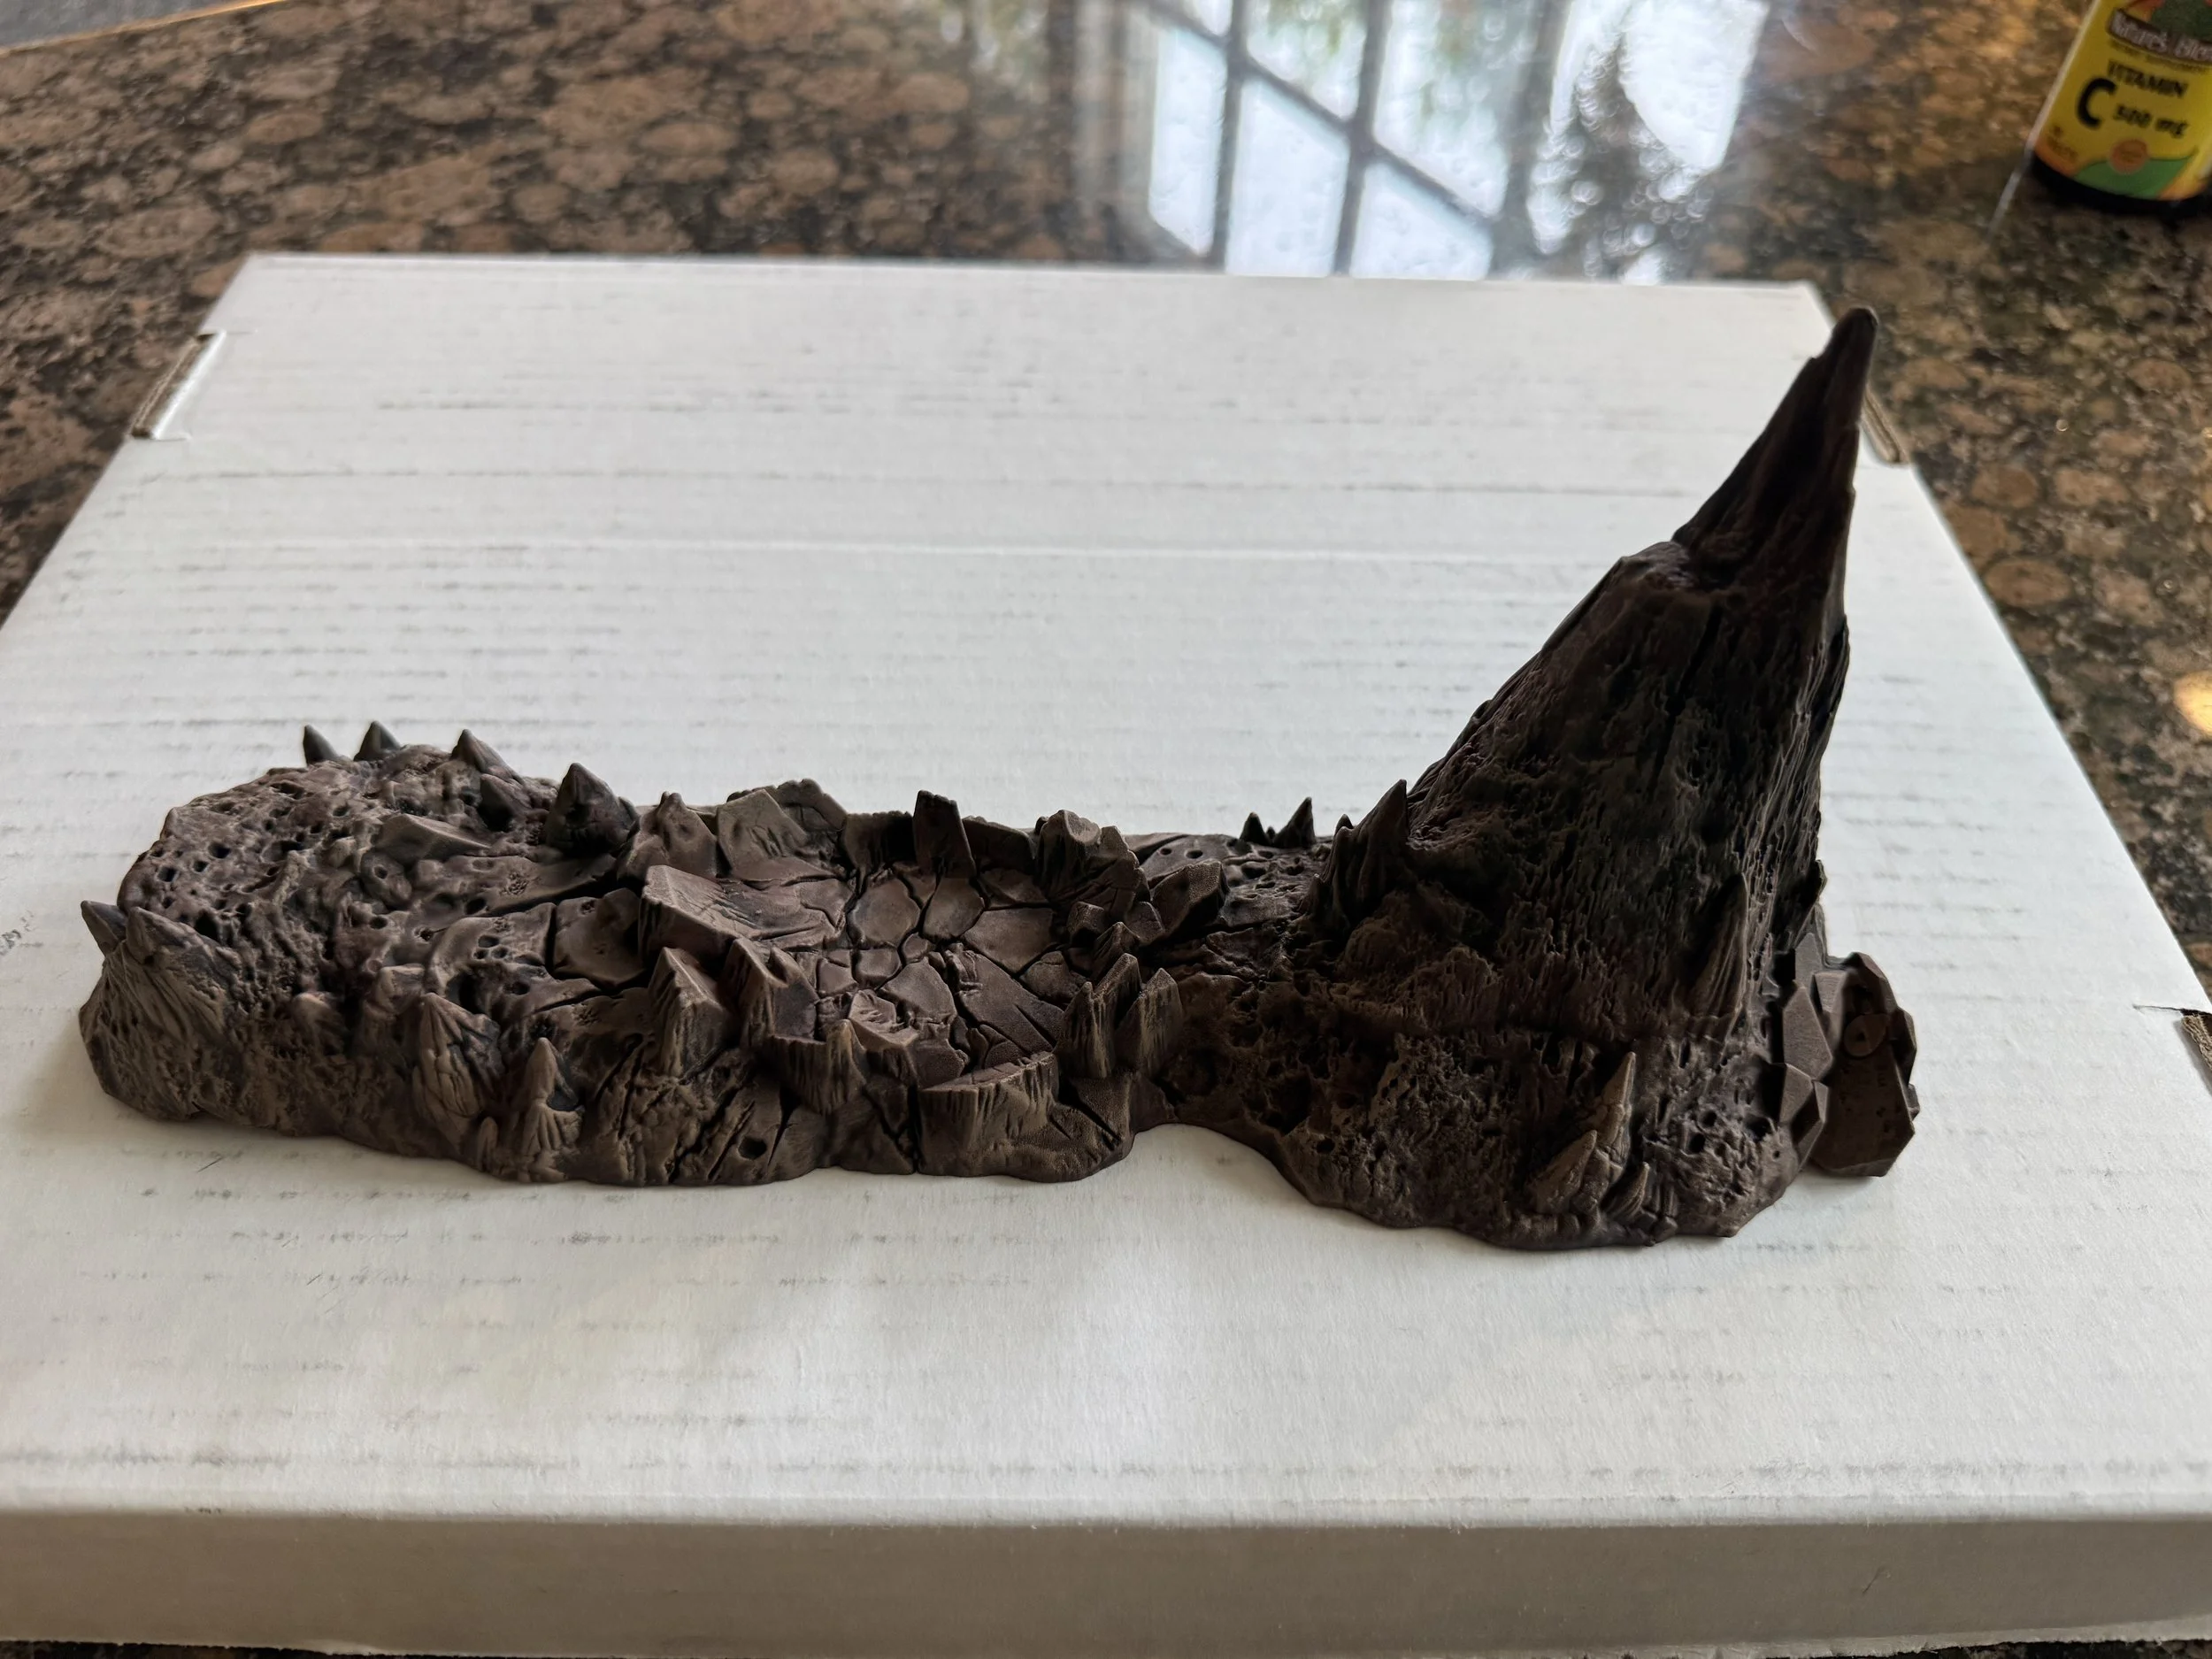
I ended the week painting a rock formation I’d purchased at the swap meet for $1.