November 28, 2021
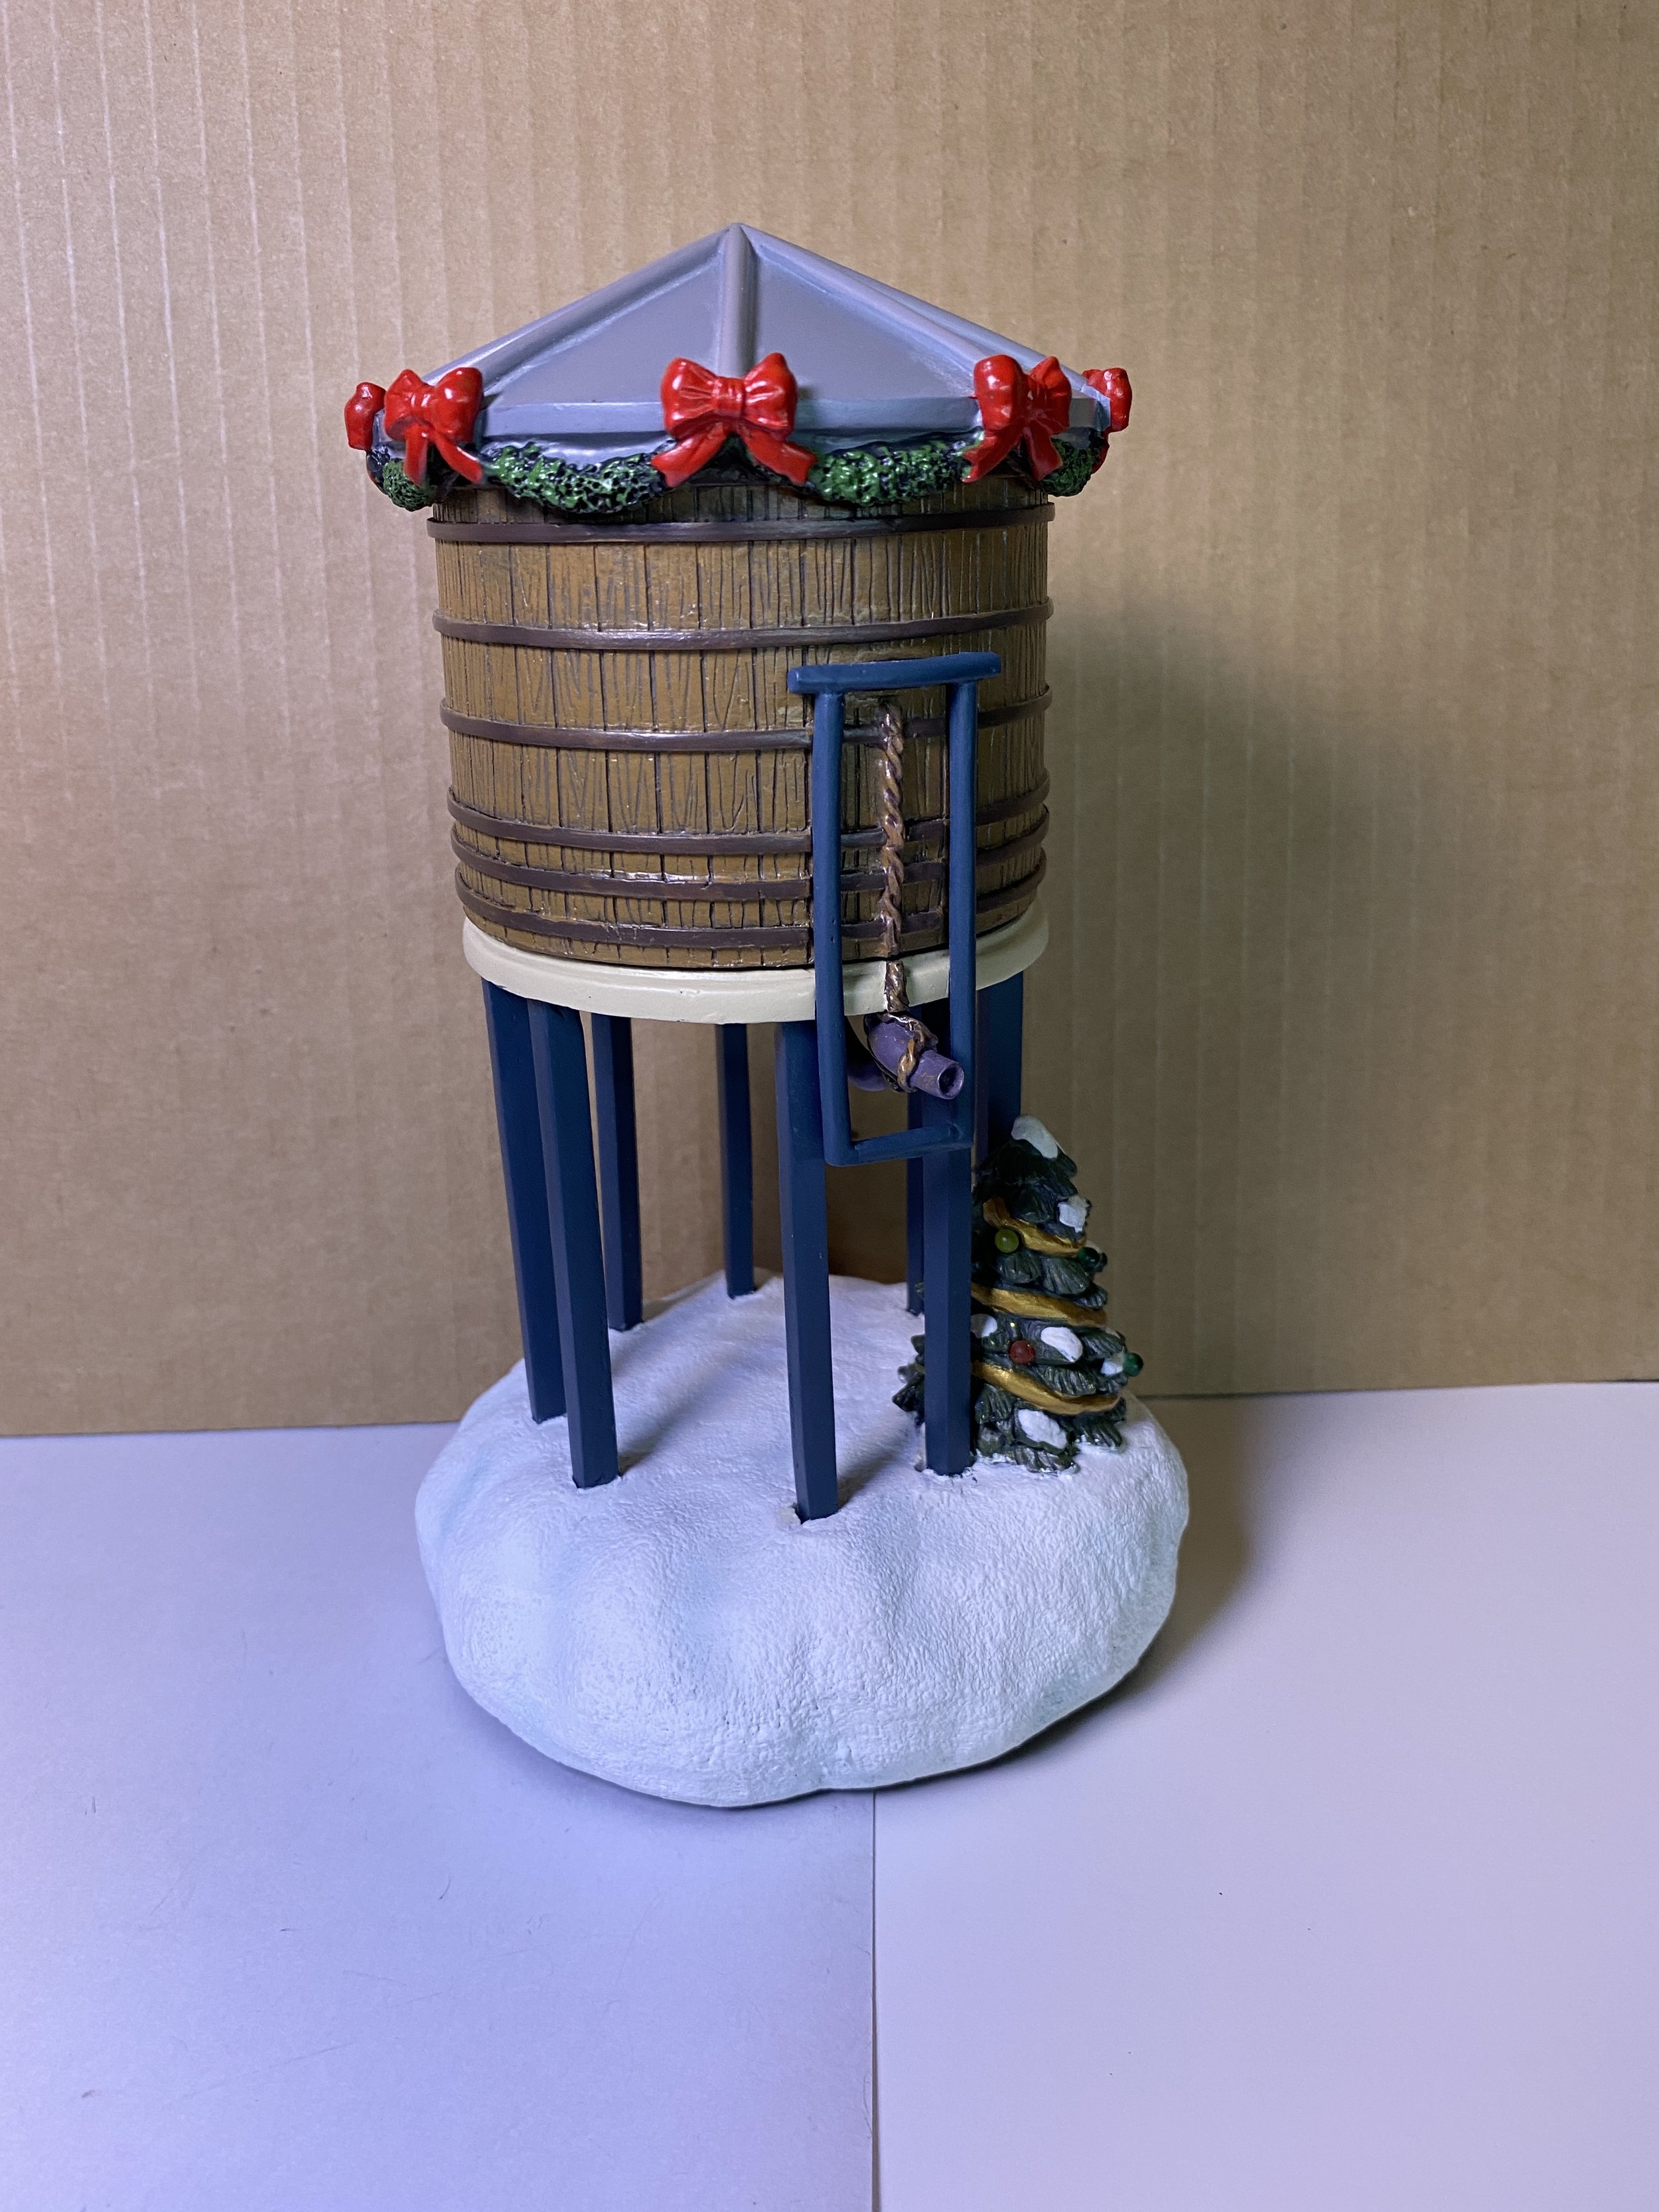
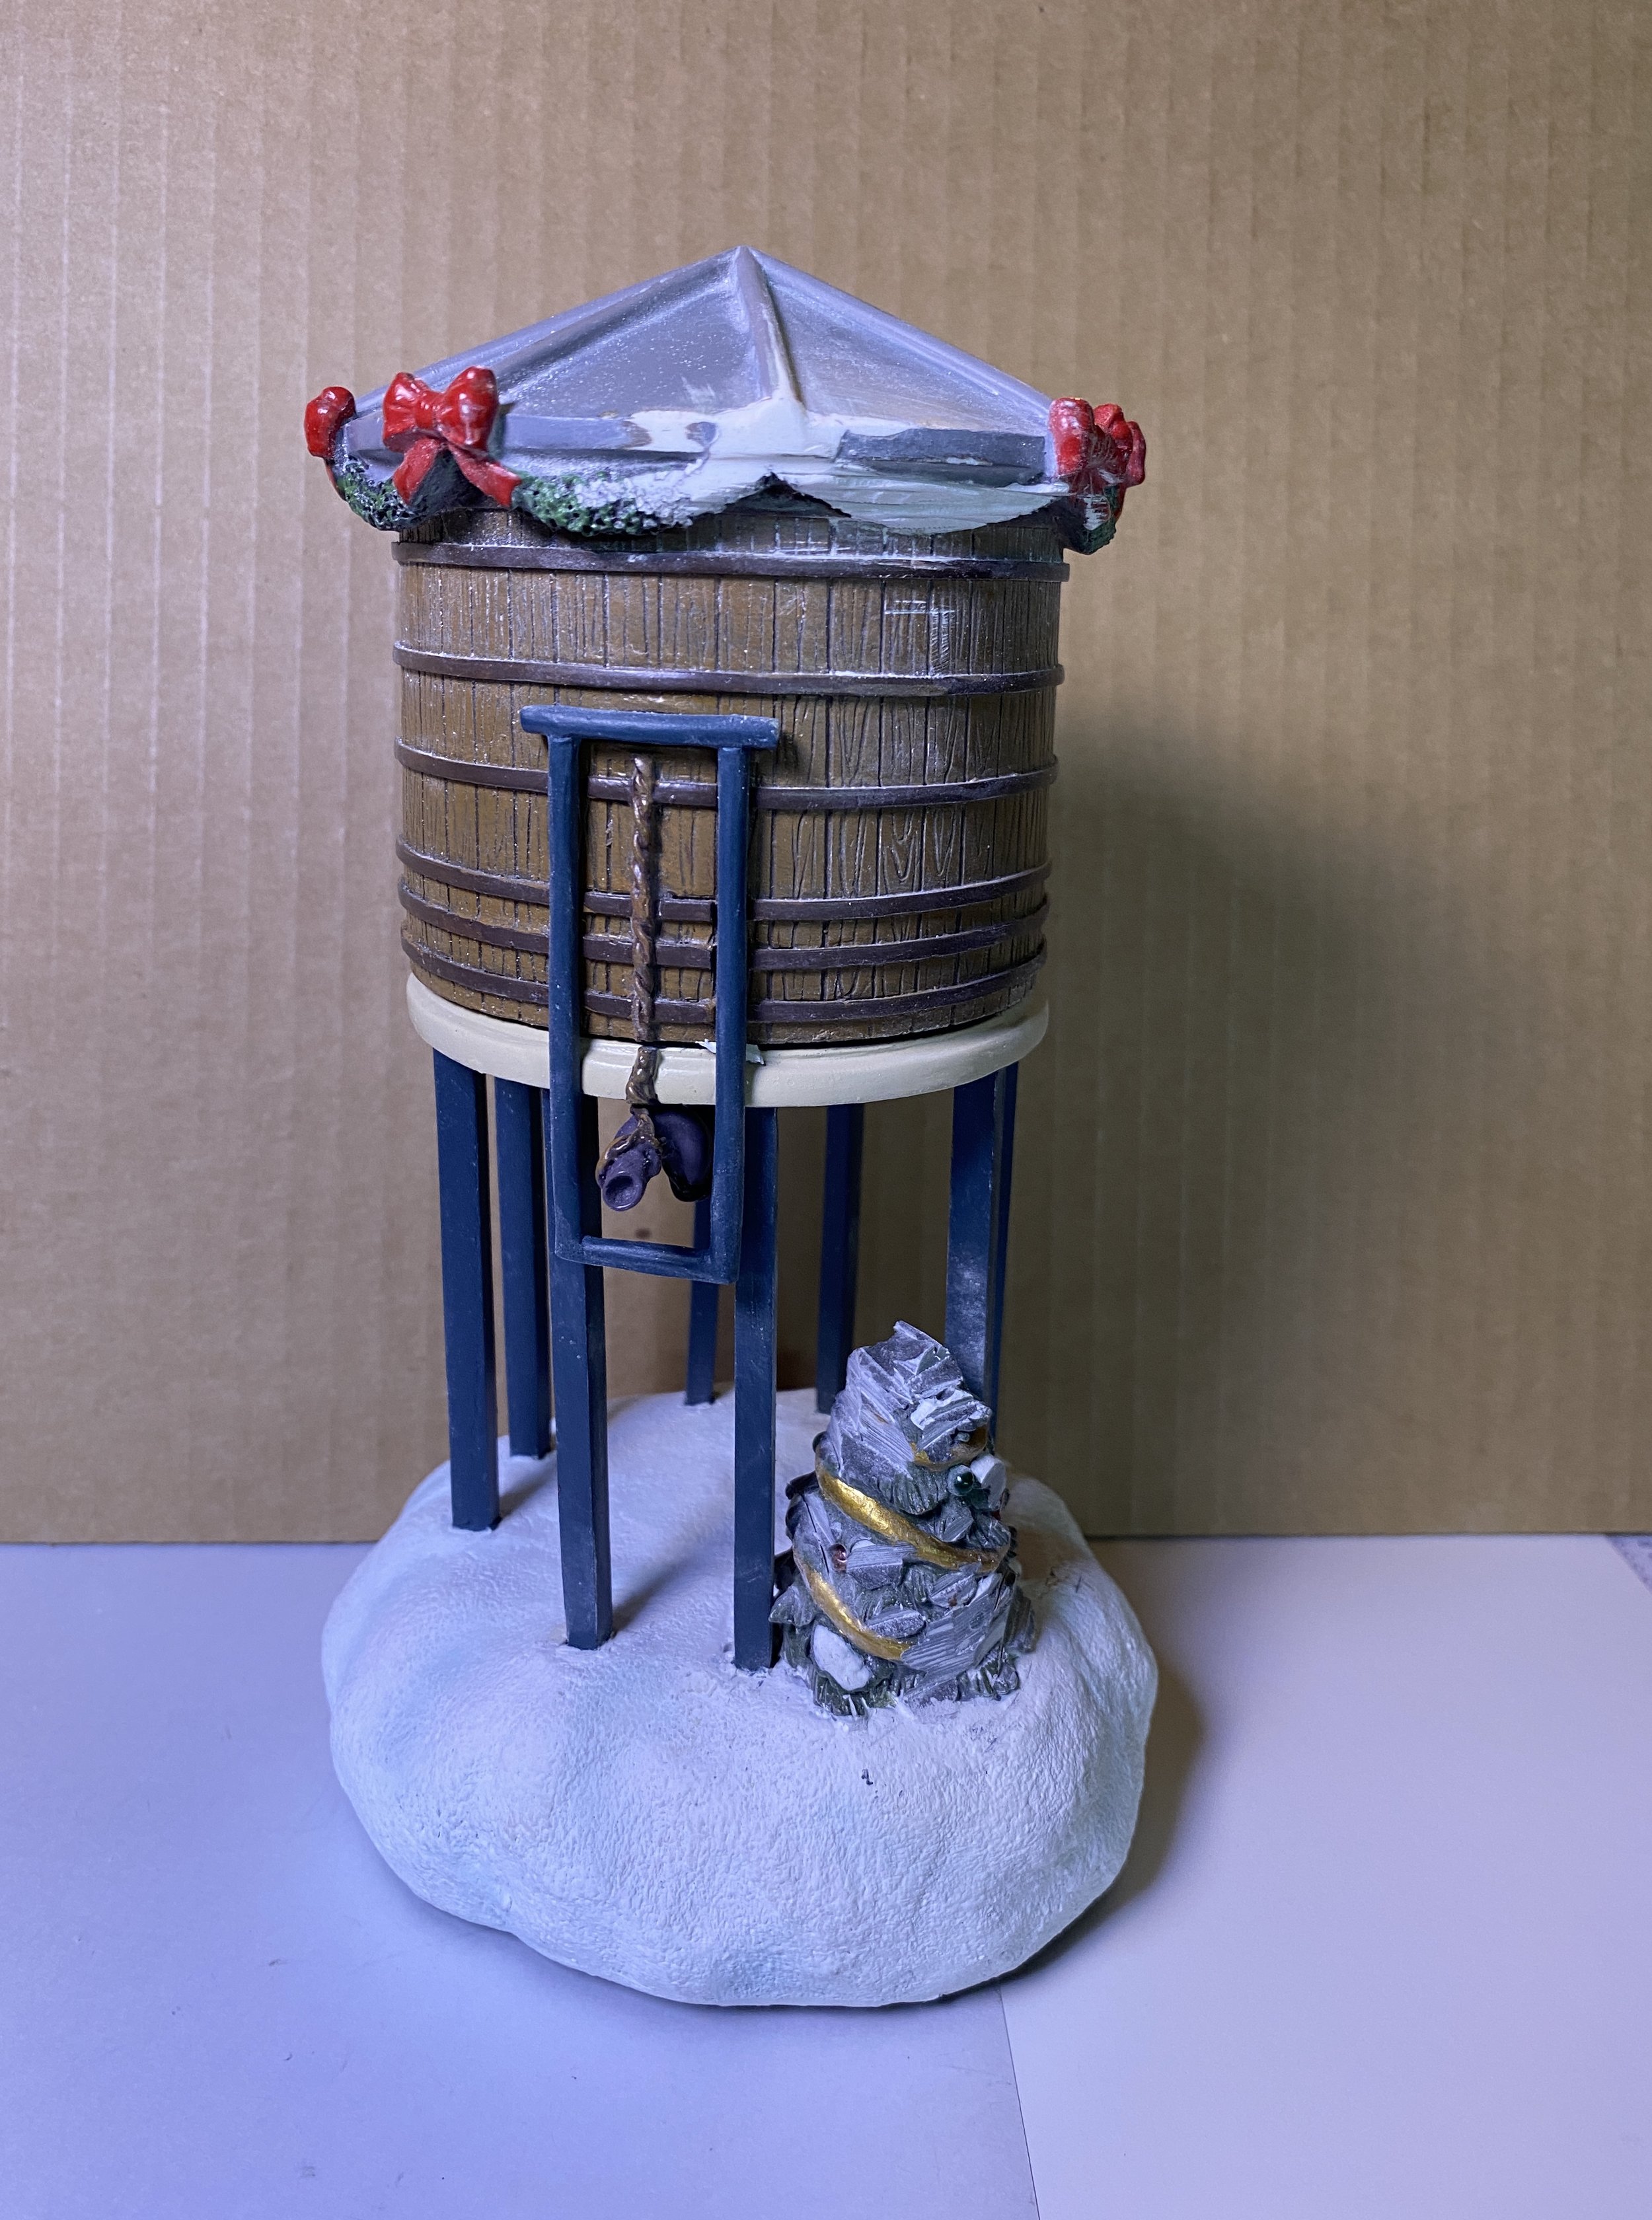
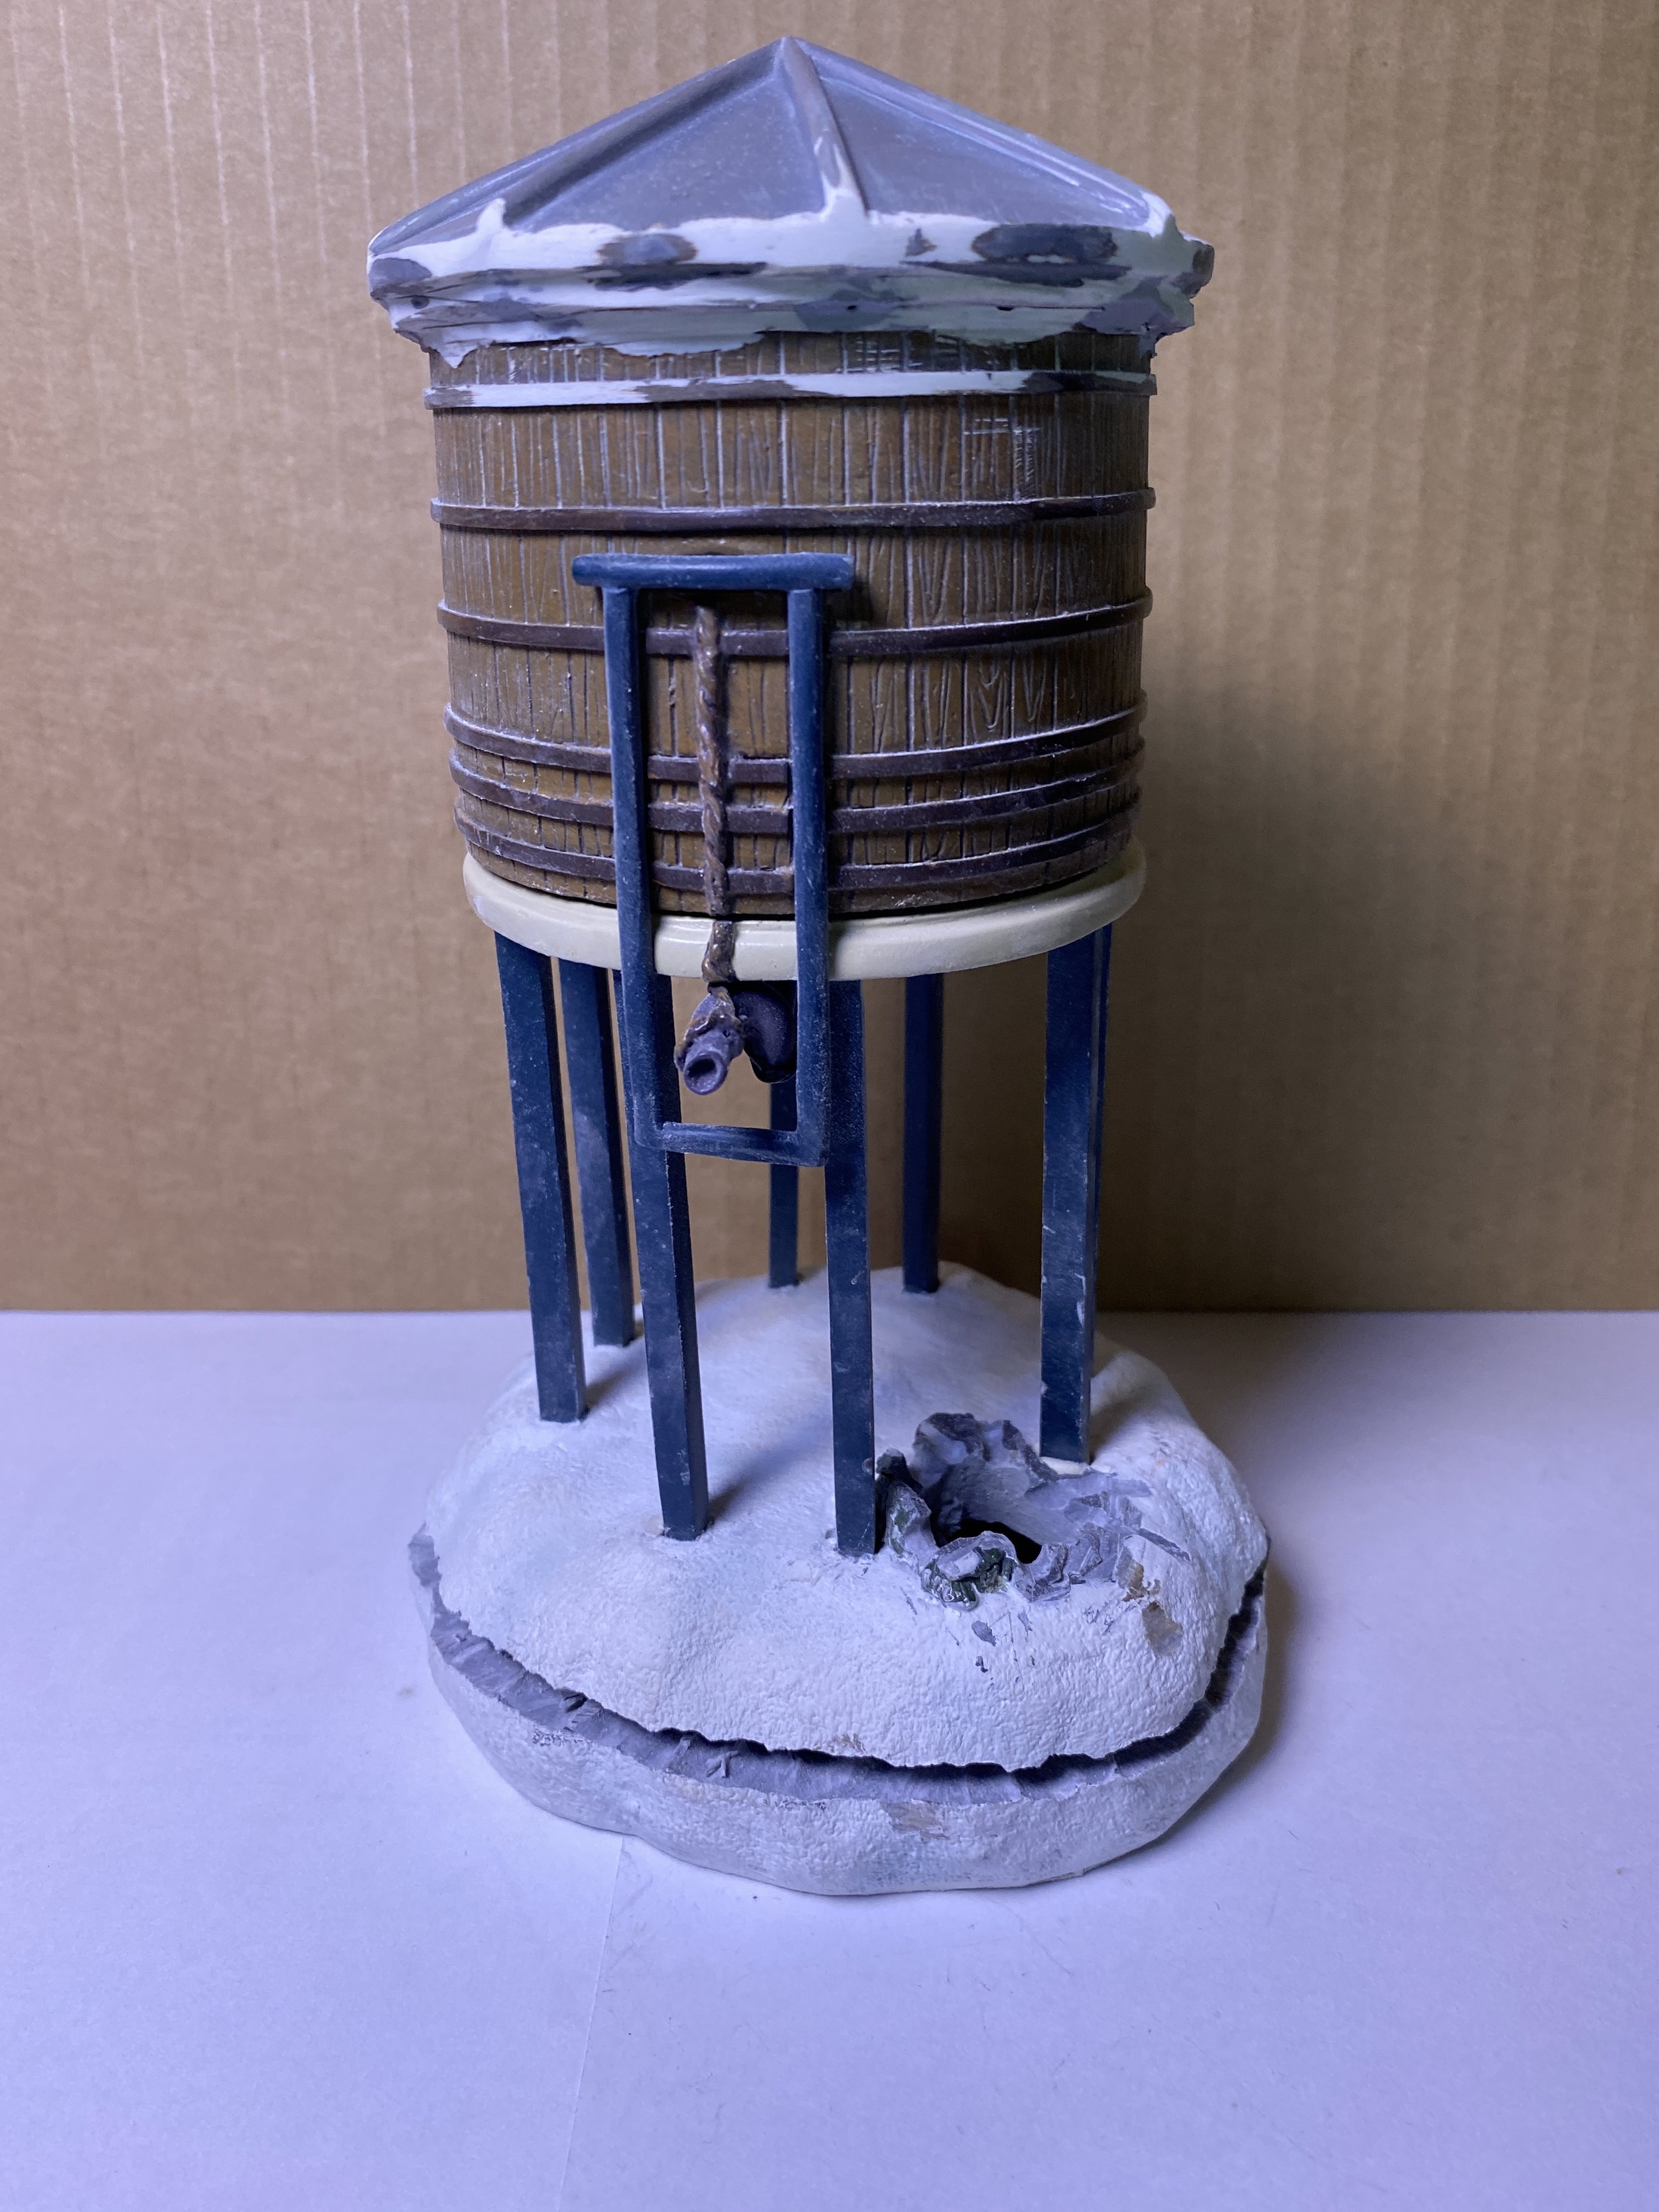
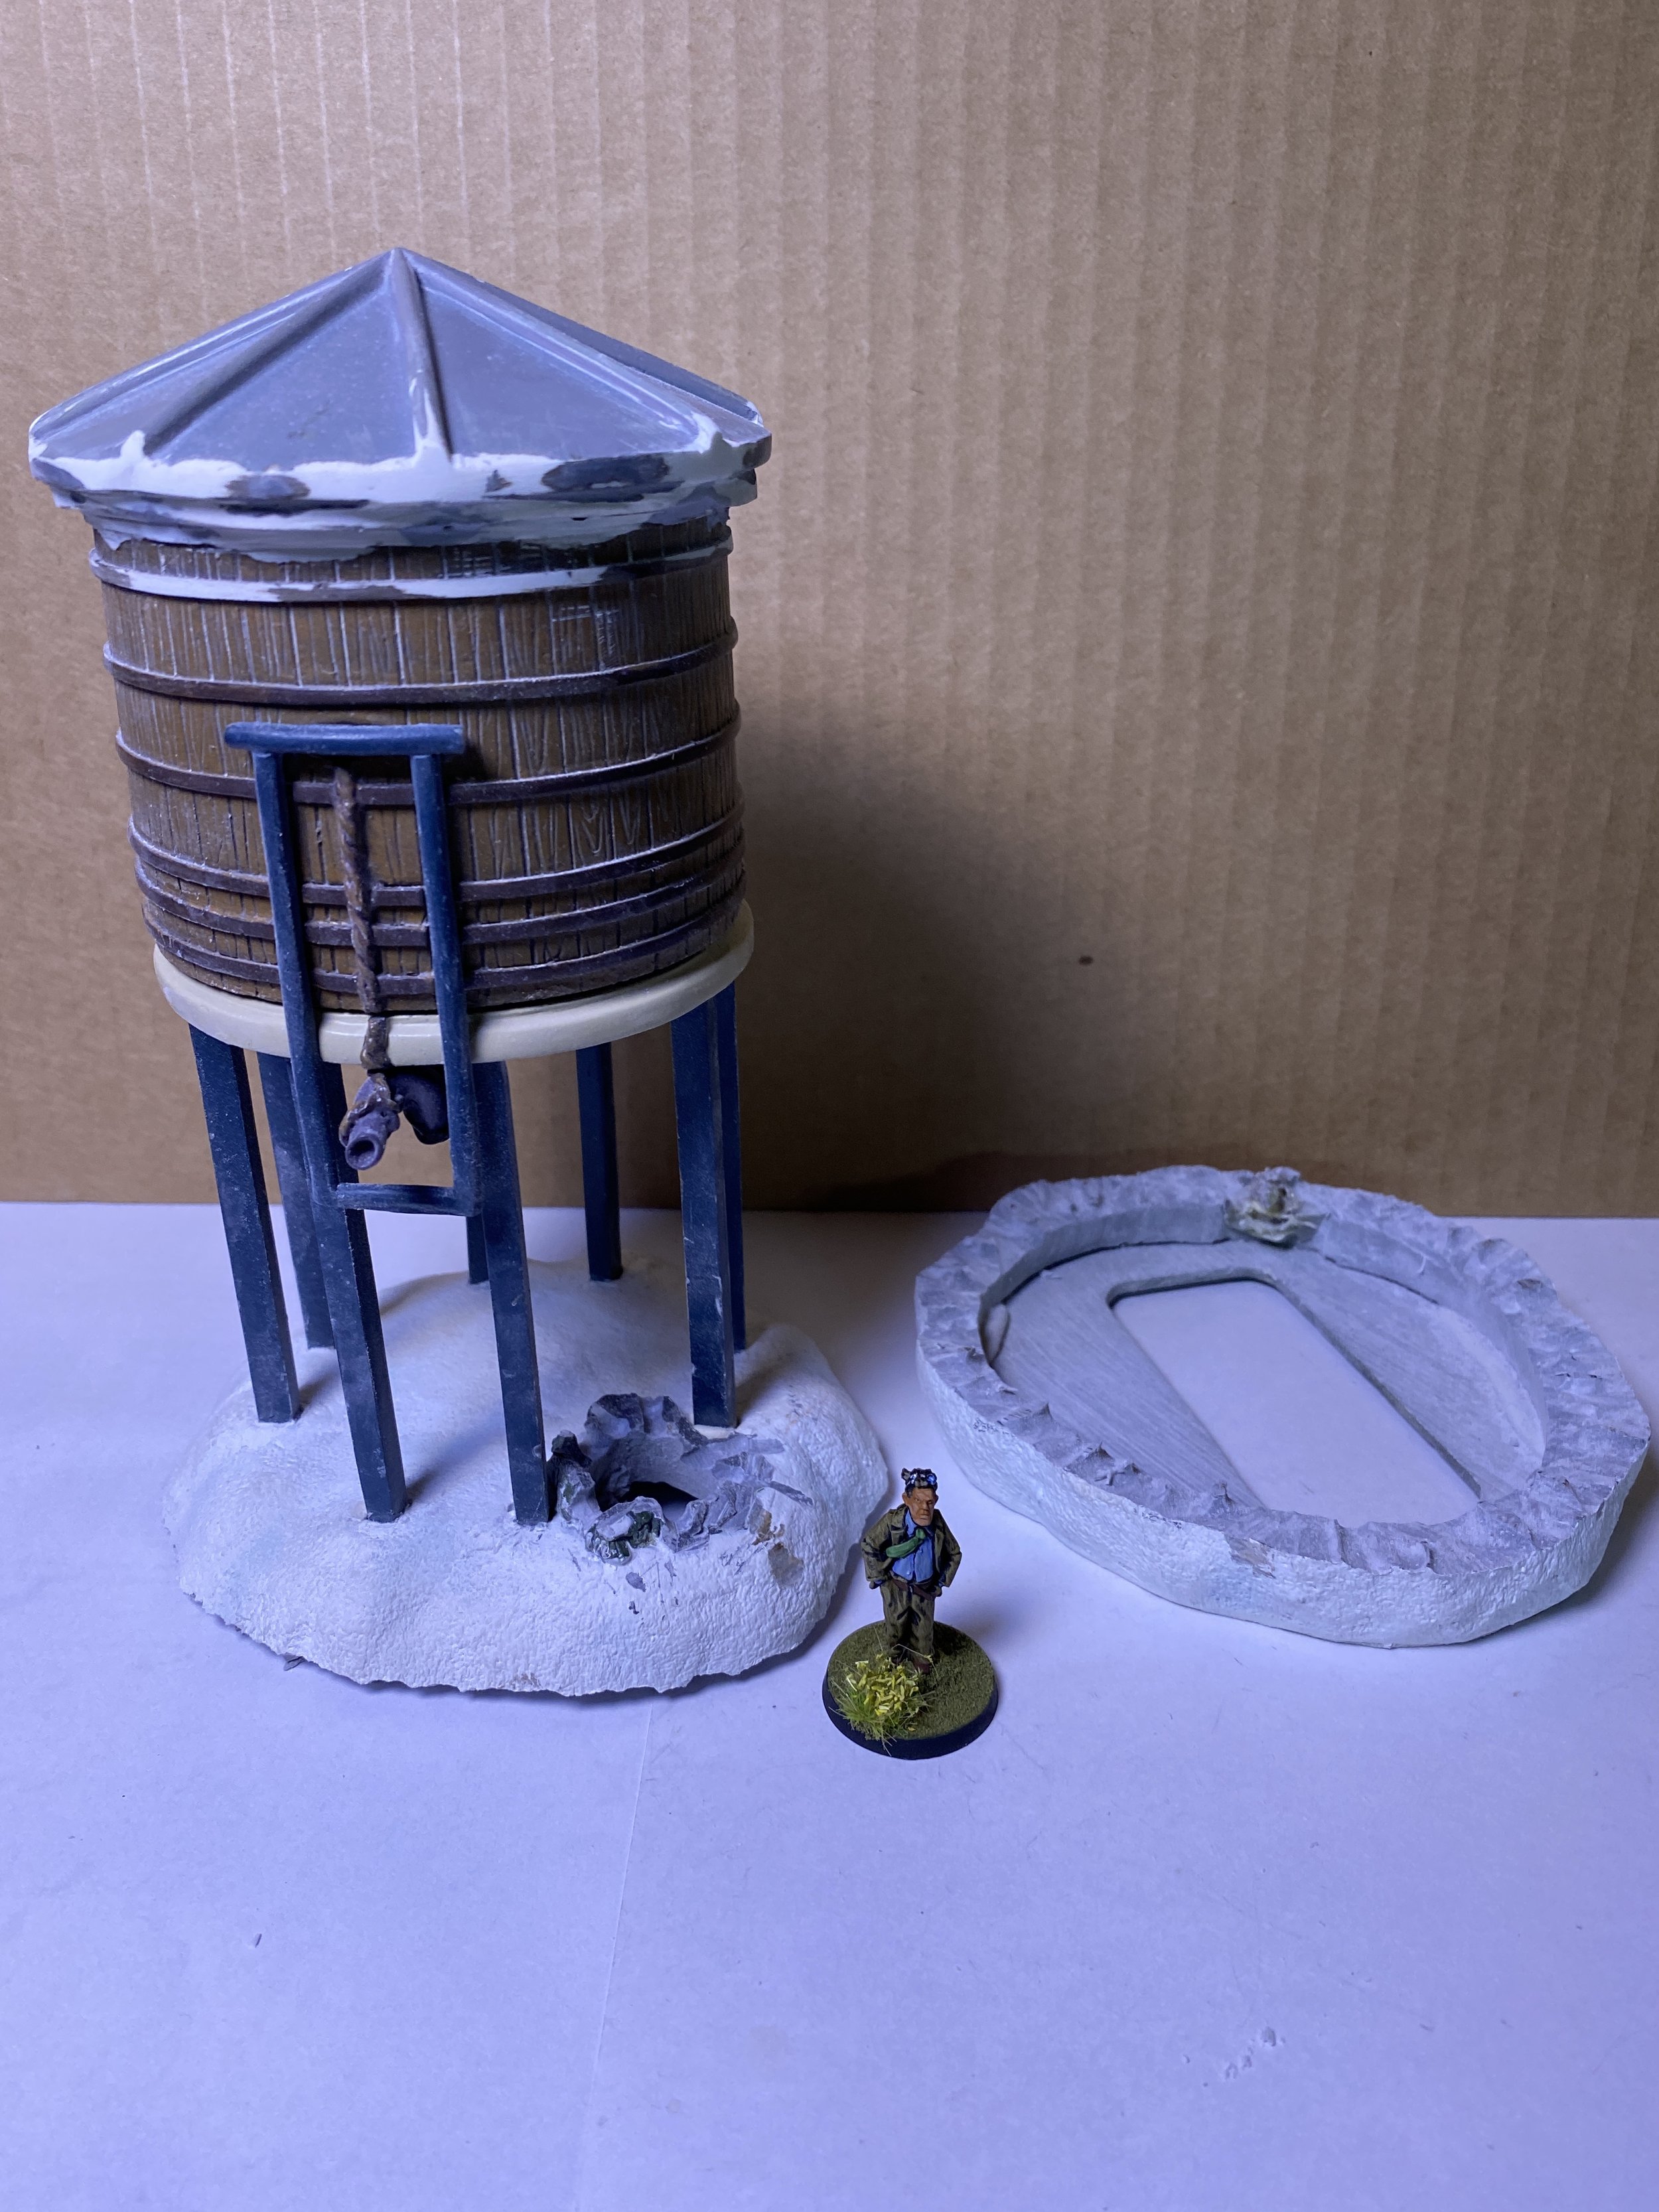
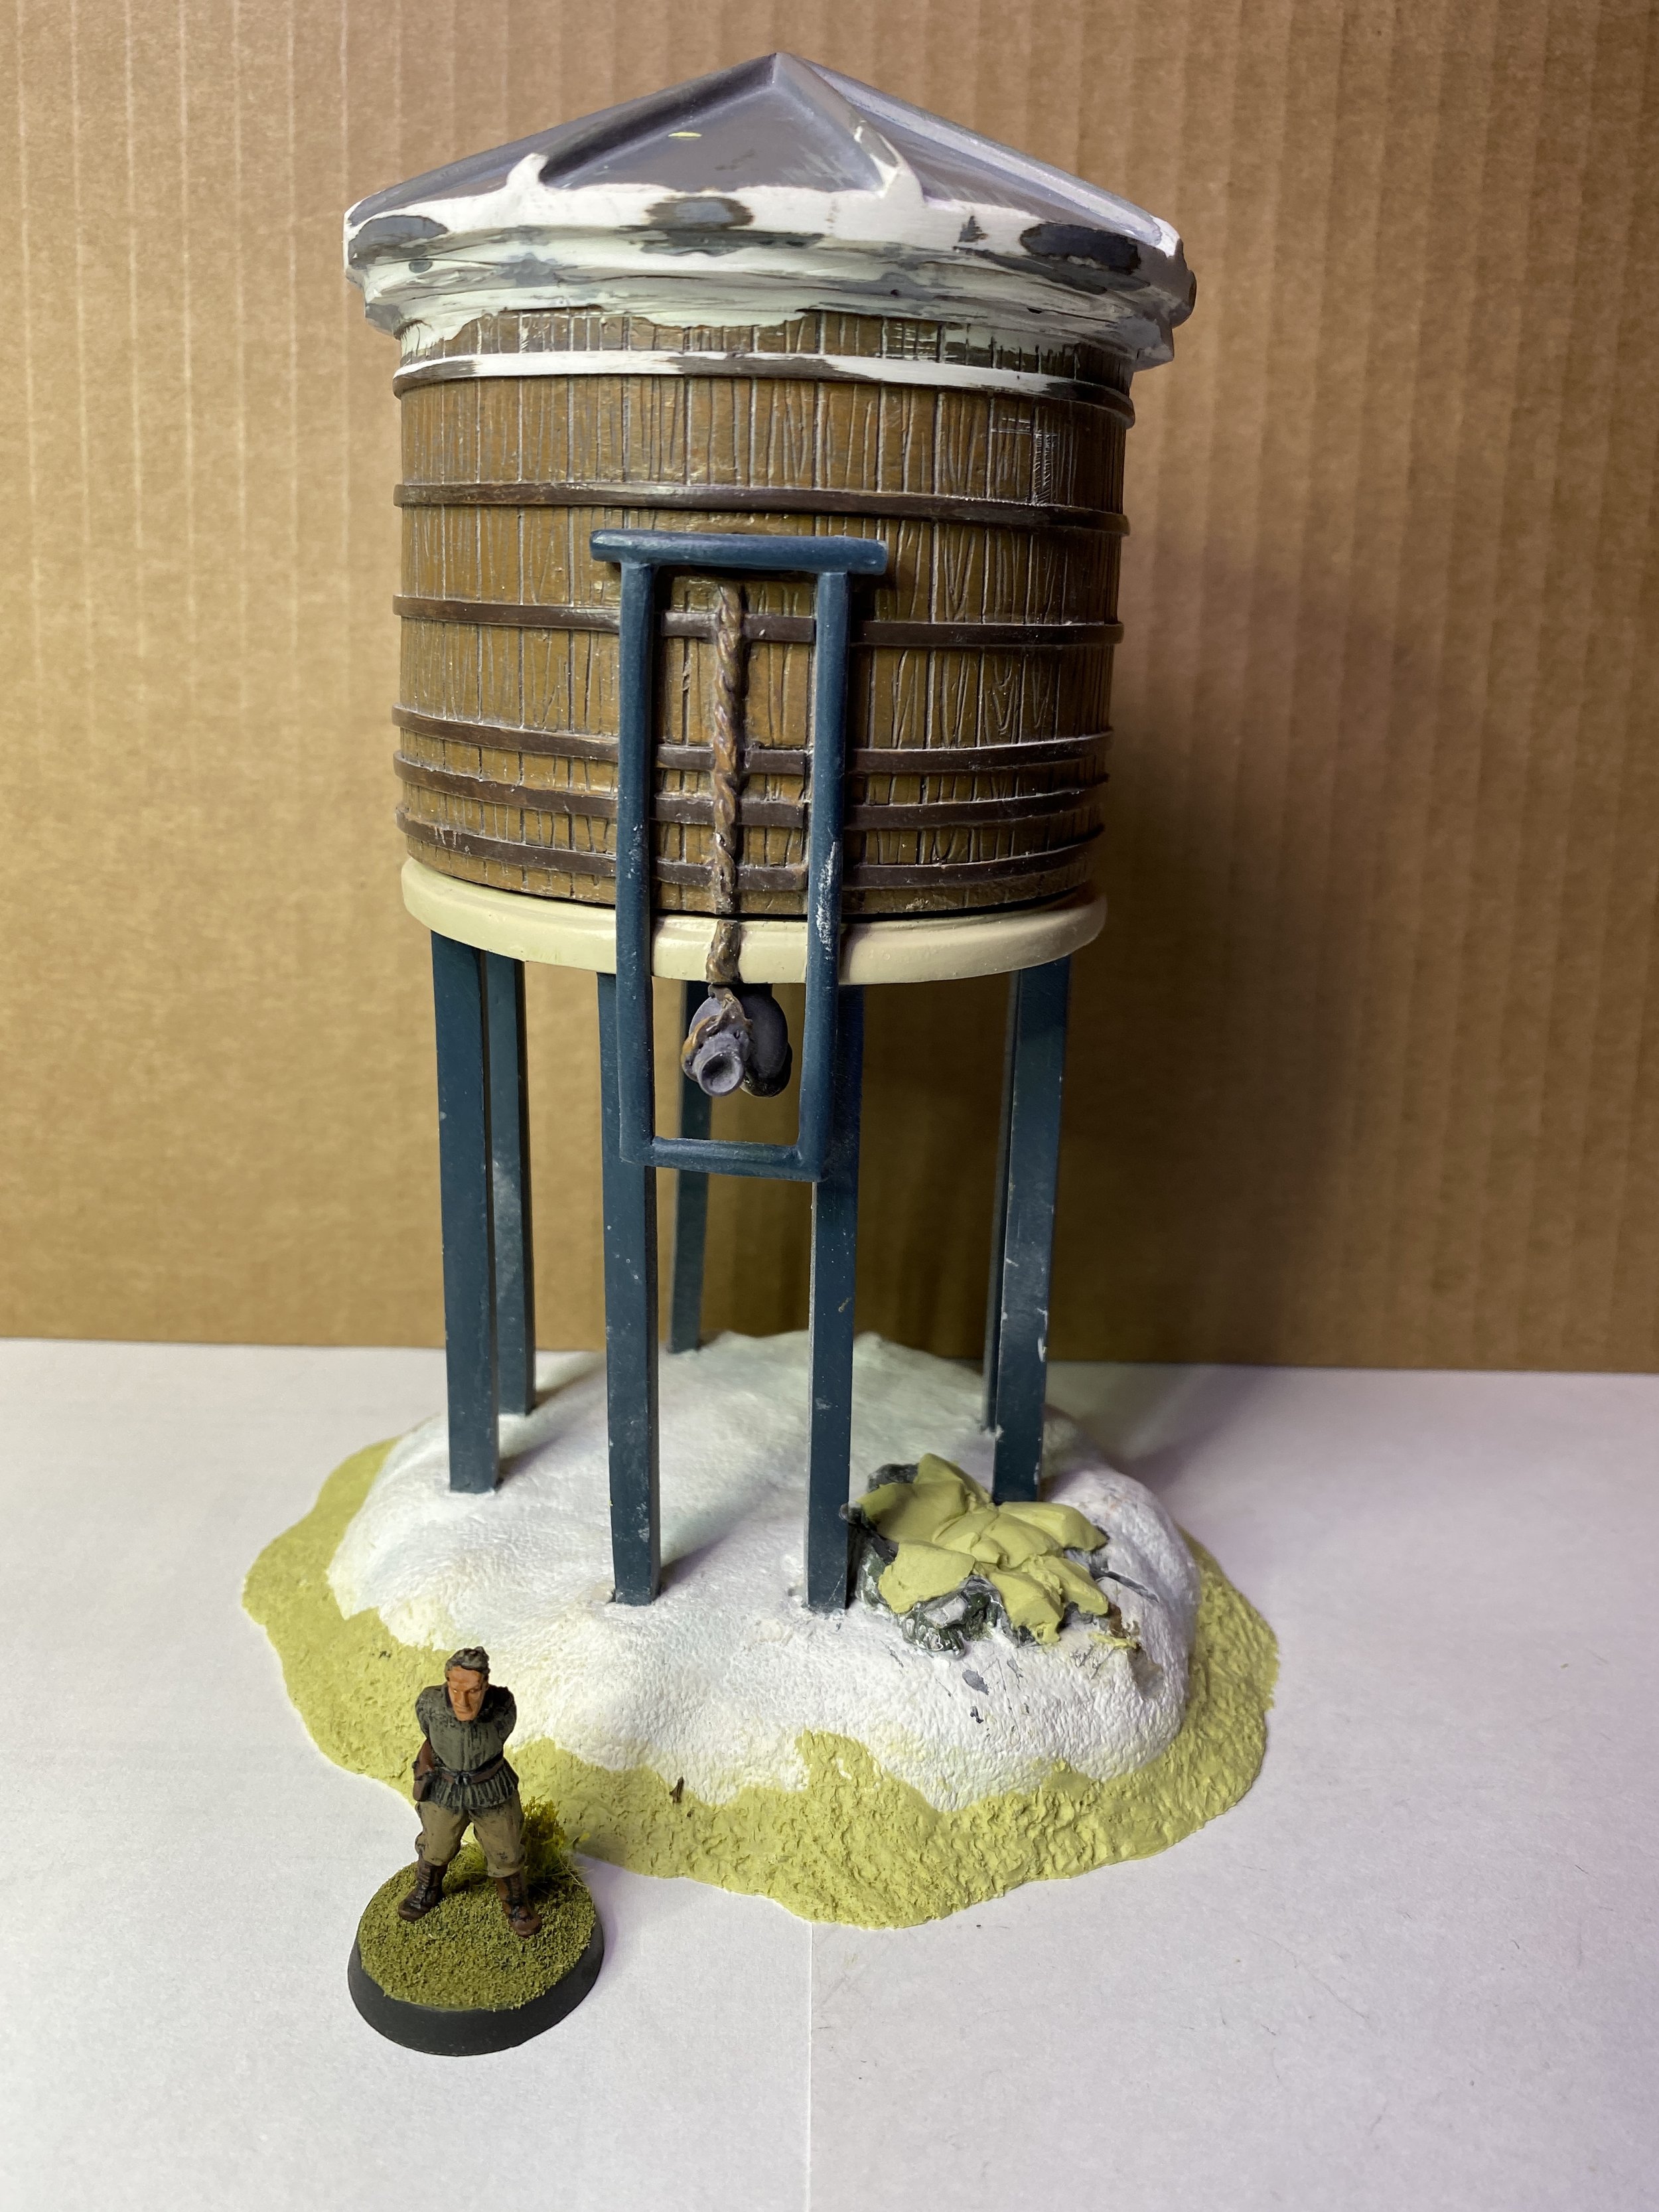
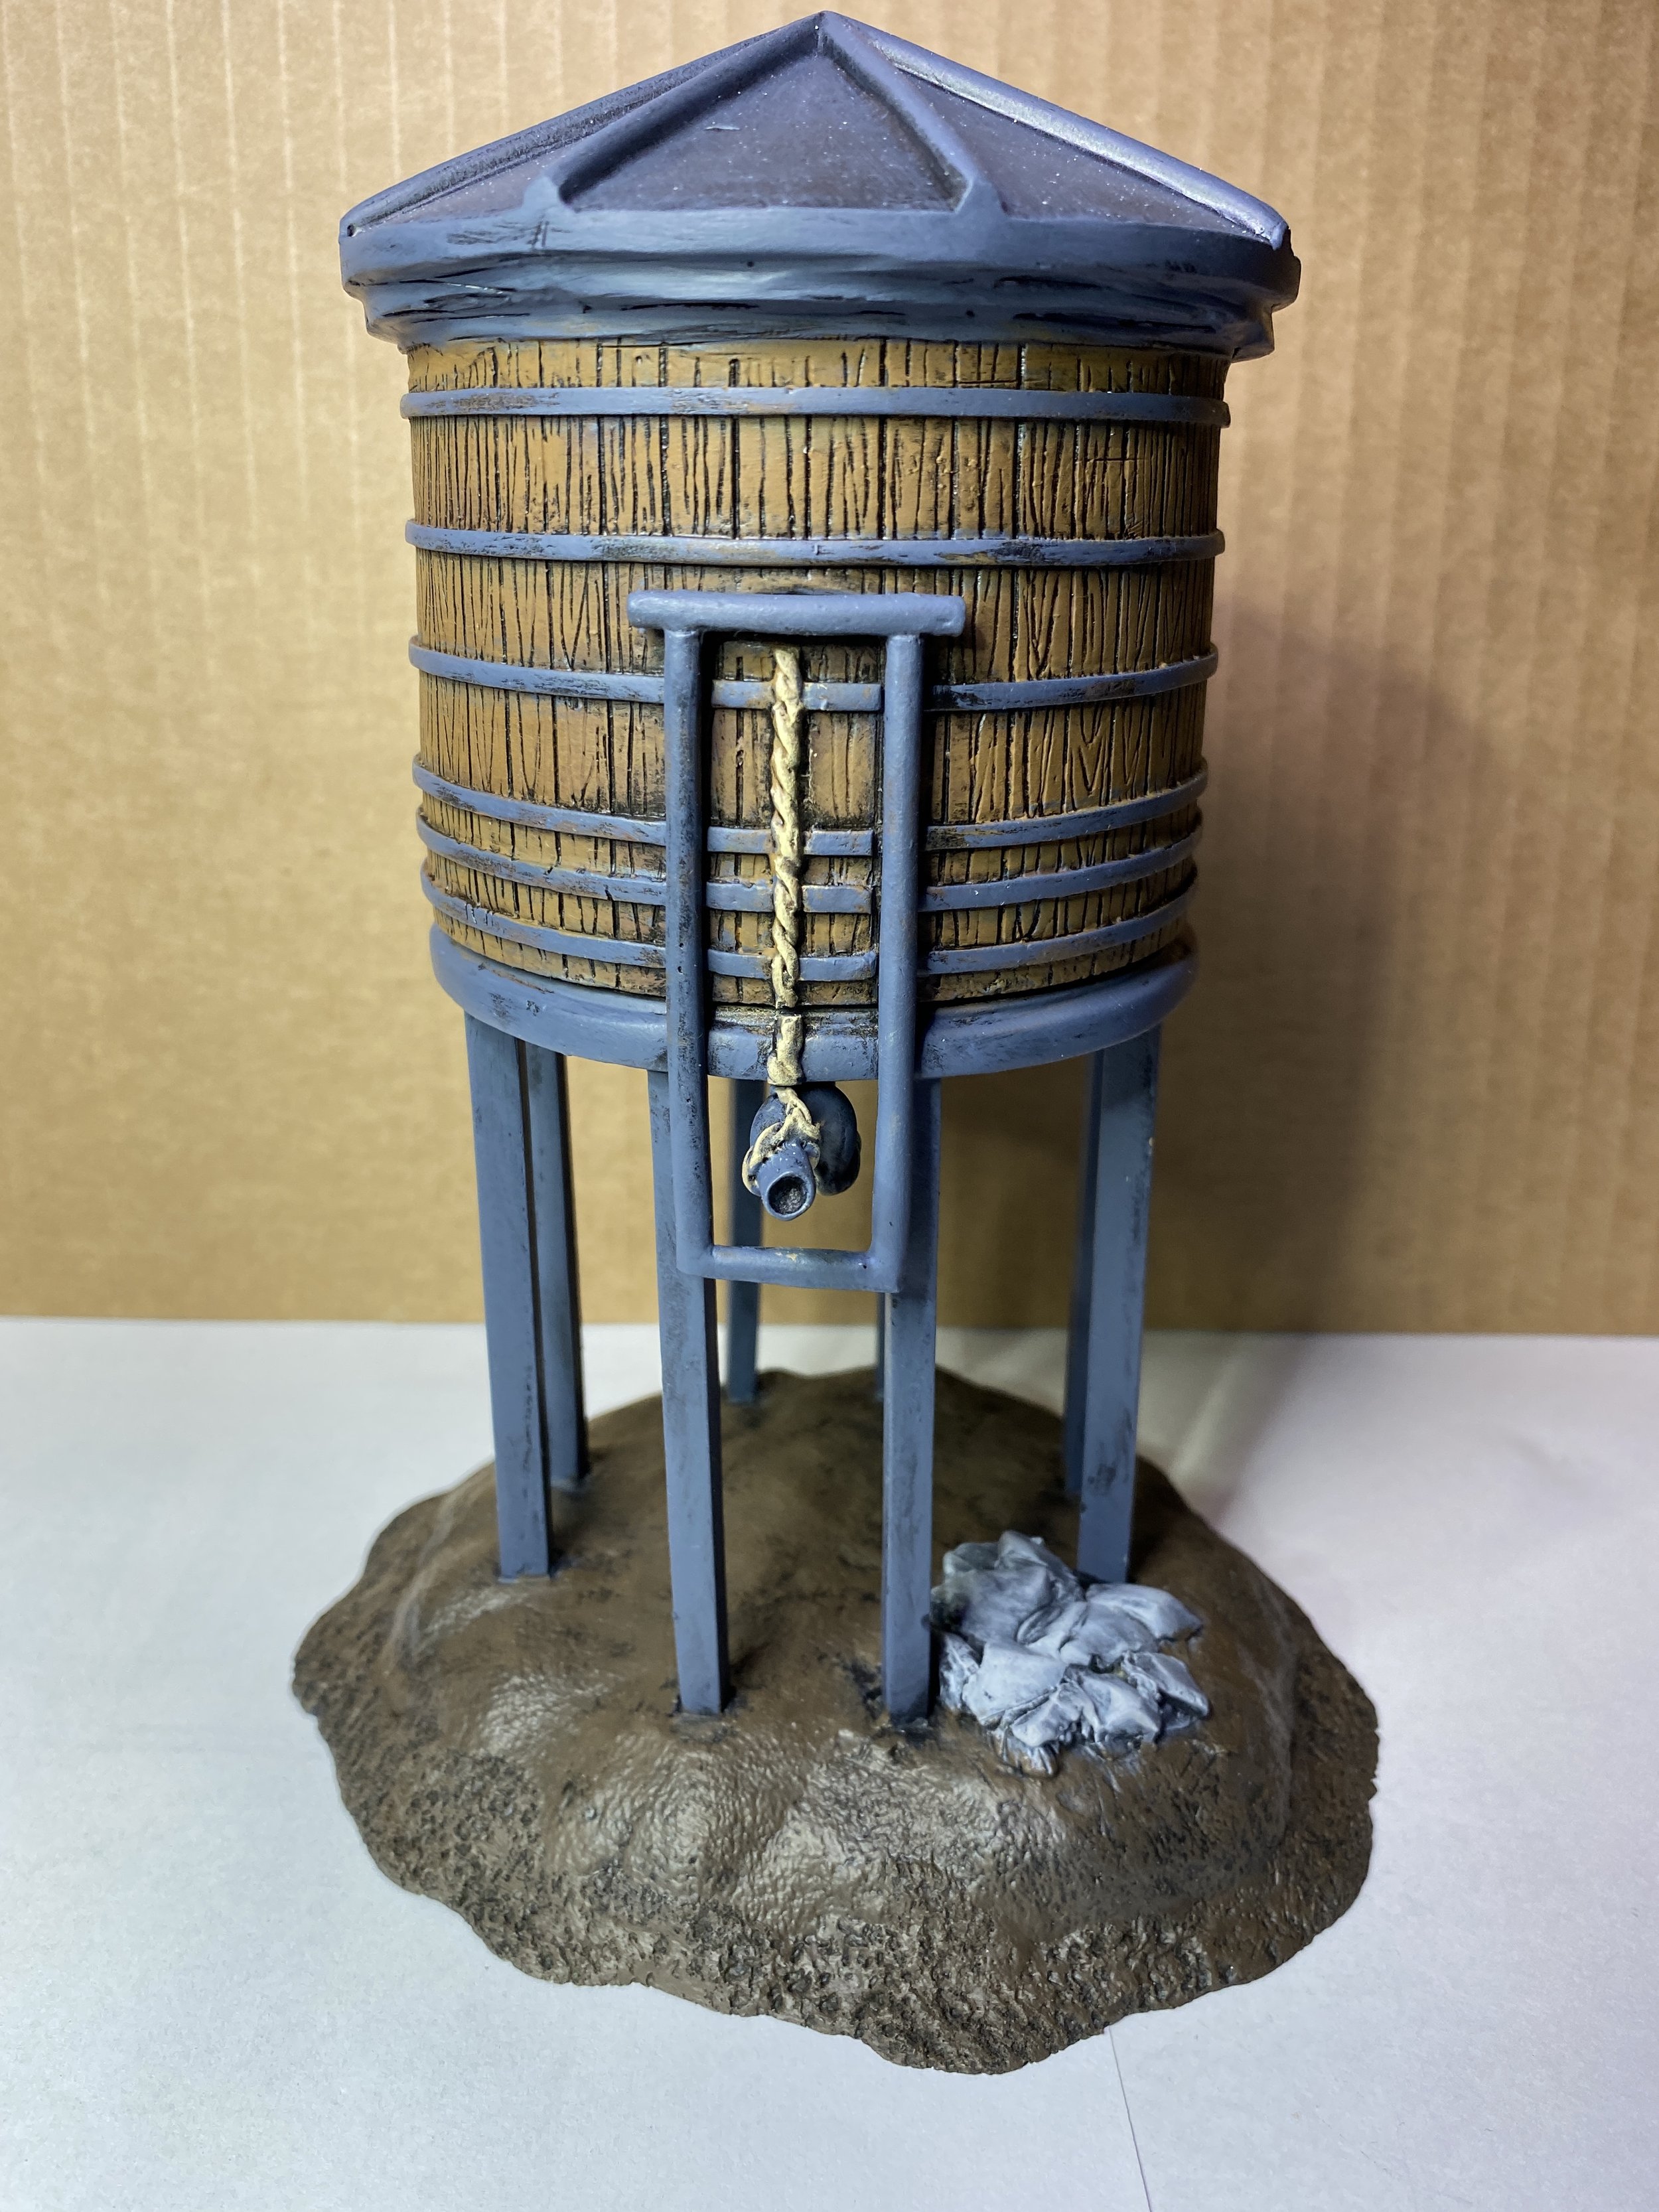
My big swap meet purchase this weekend was the Hawthorne Village Wooden Water Tower… a piece of Christmas décor. The tower itself is 7” tall and the tank is 3” in diameter. The base adds another 1 ½”. It was in perfect condition; still in its foam box. I gave it a good feel before buying it, and I was sure that it was resin and maybe a little plastic. It looked like an interesting detour project from my 15mm WW2 North Africa collection, and those detours are important when I have a major project that is going to last about nine months. It also looked like it would be perfect for 28mm and a future project I am planning for my Gordon Institute collection. It was $10 which I knew was a good price for a Hawthorne Village piece of this size. When I got it home, I checked on eBay for more details about it, and found that the only one shown was priced at $43 (item and shipping). What shocked me was the description provided by the seller who claimed it was ceramic and porcelain. My jaw dropped. If that was true, I had just wasted $10. I didn’t need a water tower with a Christmas tree and big red bows all around the top of the tank. I can’t cut or grind ceramic or porcelain. I can break it, but not cut it. So something I was going to put aside for a later time now became the focus of my workbench attention.
I got out my hobby saw and began cutting, and it did cut; it is resin, hard resin, but it cut. I removed a bow and part of one wreath from the tank’s roof. The tree was a real pain, but I removed it except for a few small pieces at the bottom to leave as rocks when I filled the hole in with Milliput. I also decided to ease the slope of the base using Milliput, just before painting. The key now was slow and steady. I determined I would cut off one bow and part of one wreath each day until they were gone… not two; just one a day. These things can piss you off instead of being fun if you don’t take your time, and that can lead to real destruction. If I did a little removal every day for a week the bows and wreaths would be gone and all that would be left is the detailing of the areas to cut with a fine tooth saw and a sand stick.
By mid-week I had removed the bows and wreaths and begun to fill some holes caused by the cutting, but it came out pretty good. I was also able to reduce the height of the base by 7/8” which is going to make for a much better look. I did the last of the detail clean-up and gave the base a skirt of Milliput to ease the slope and hide the drill holes and cuts that were done to shorten the base. I also used Milliput to fill the hole left by the removal of the Christmas tree and sculpted some rocks over that area. With that done I gave it a simple dry brush paint job. I haven’t decided on what the base covering is going to be yet.
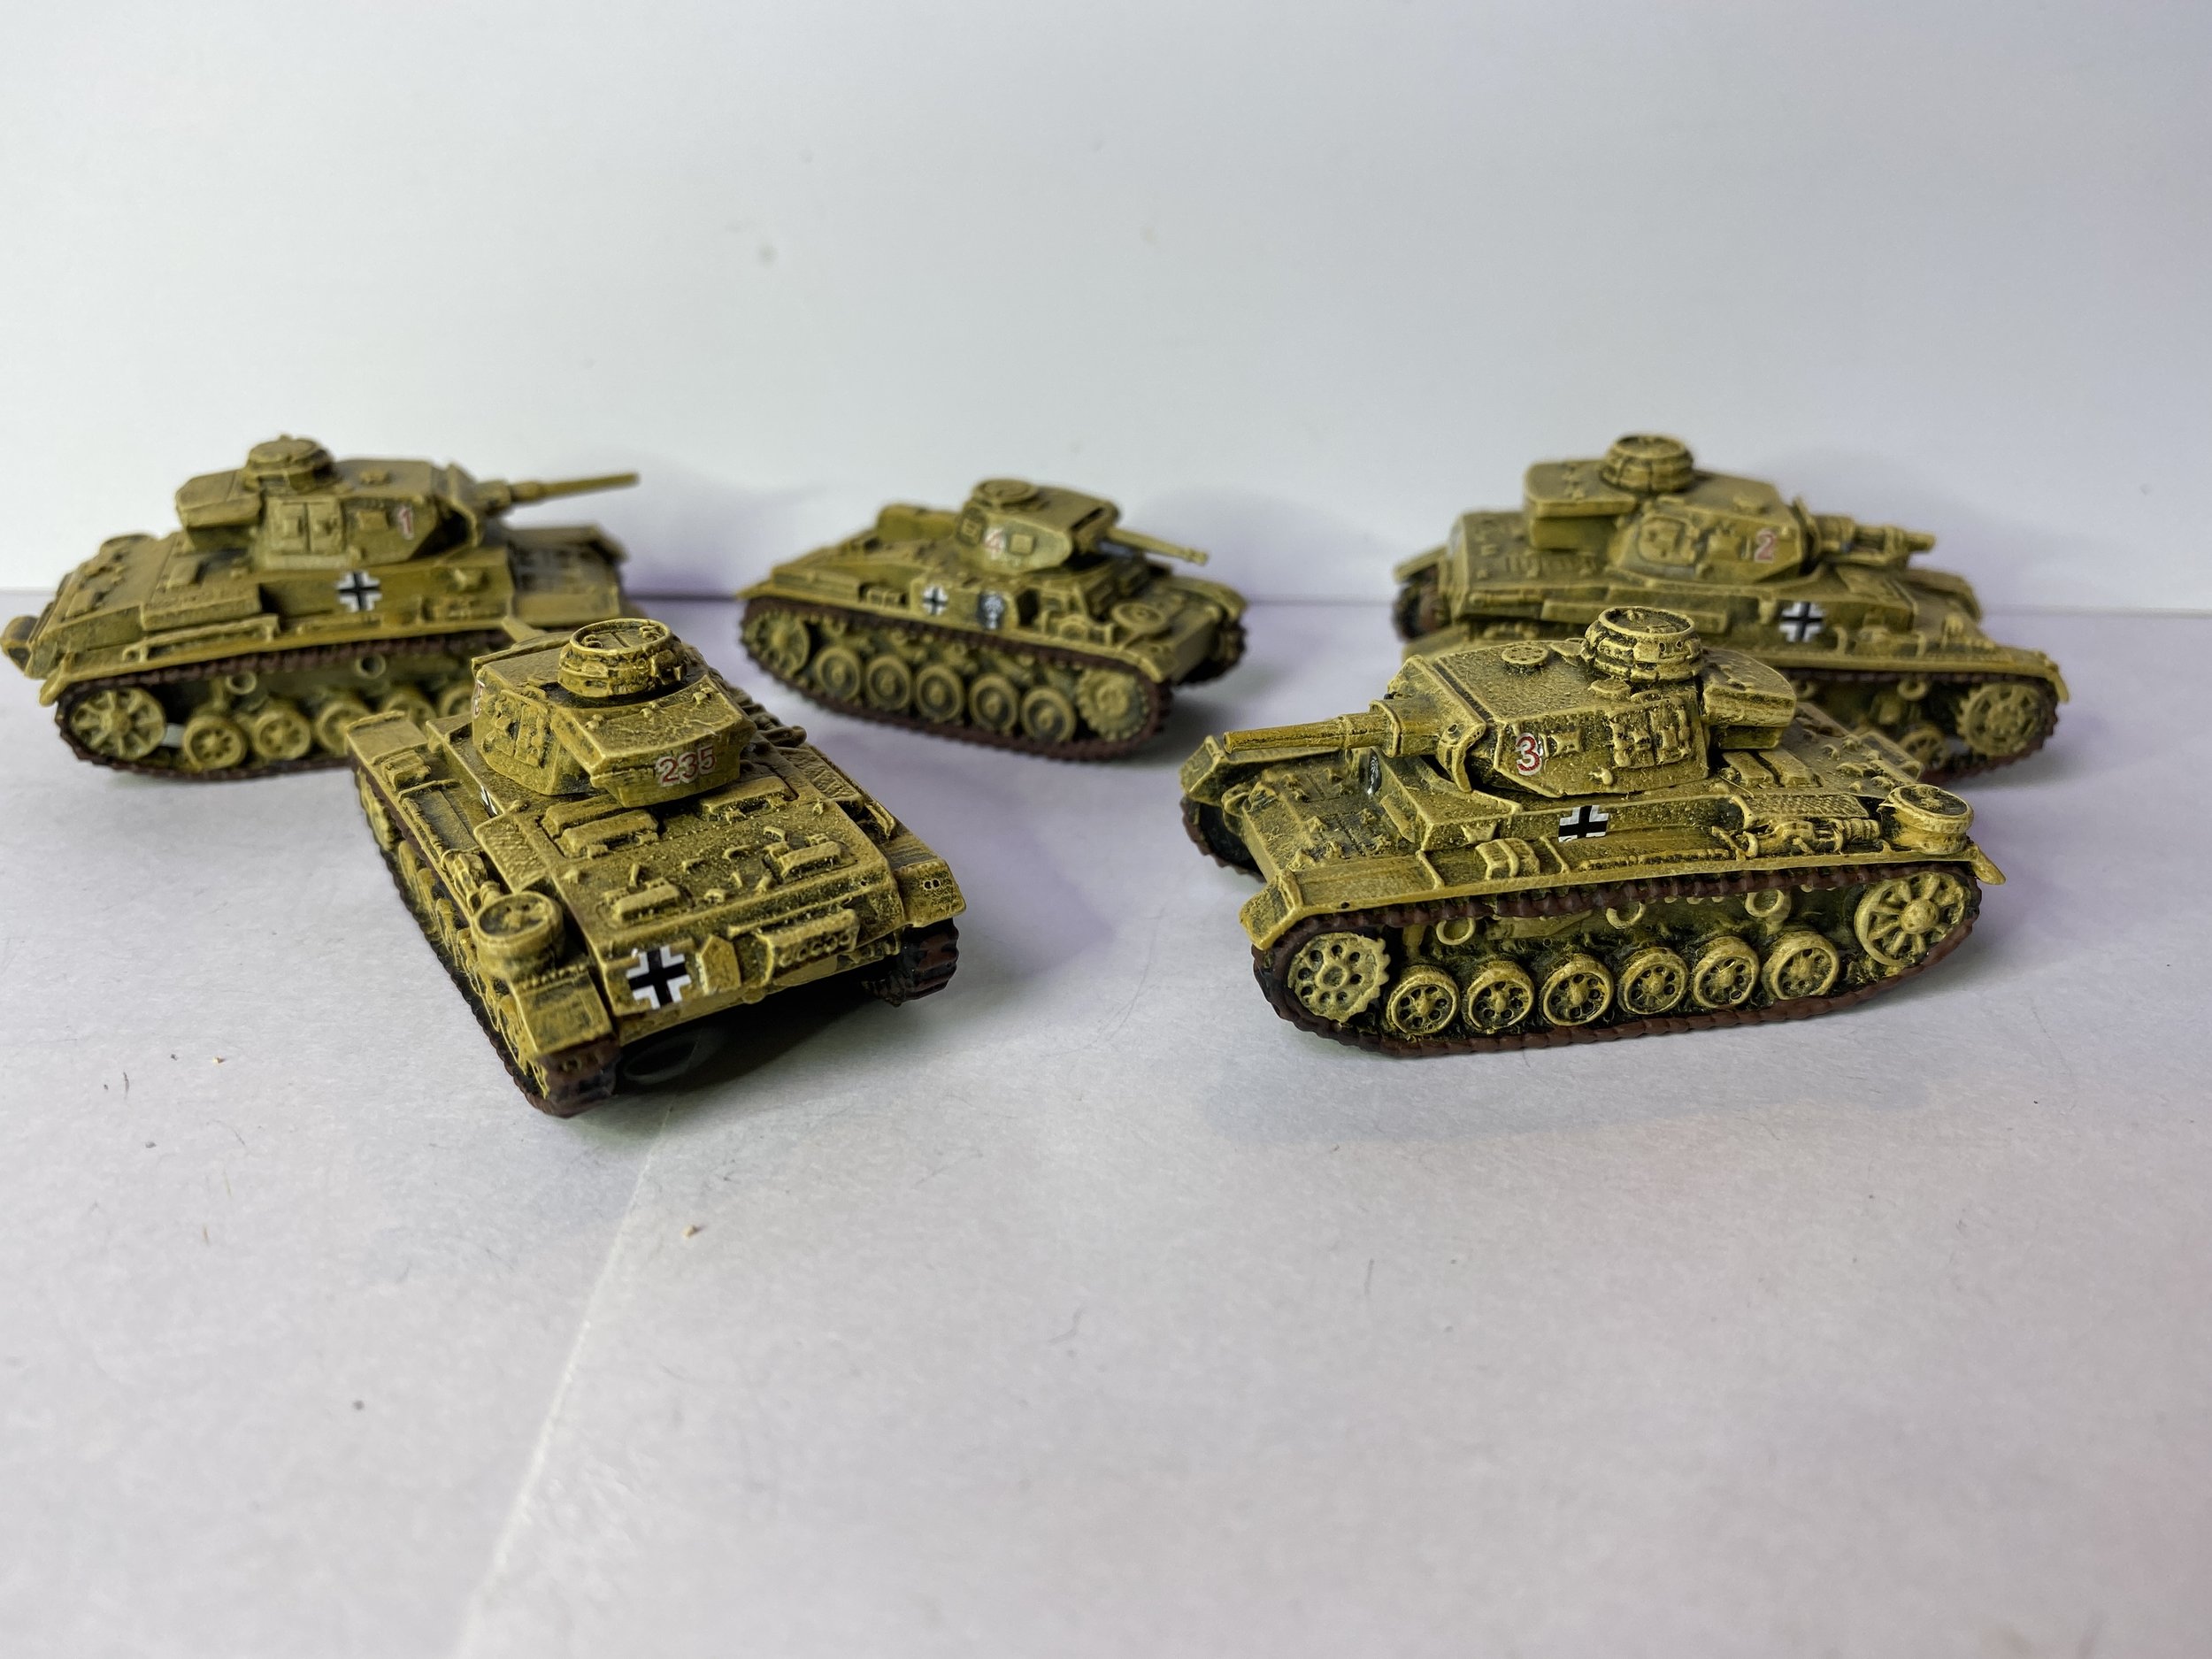
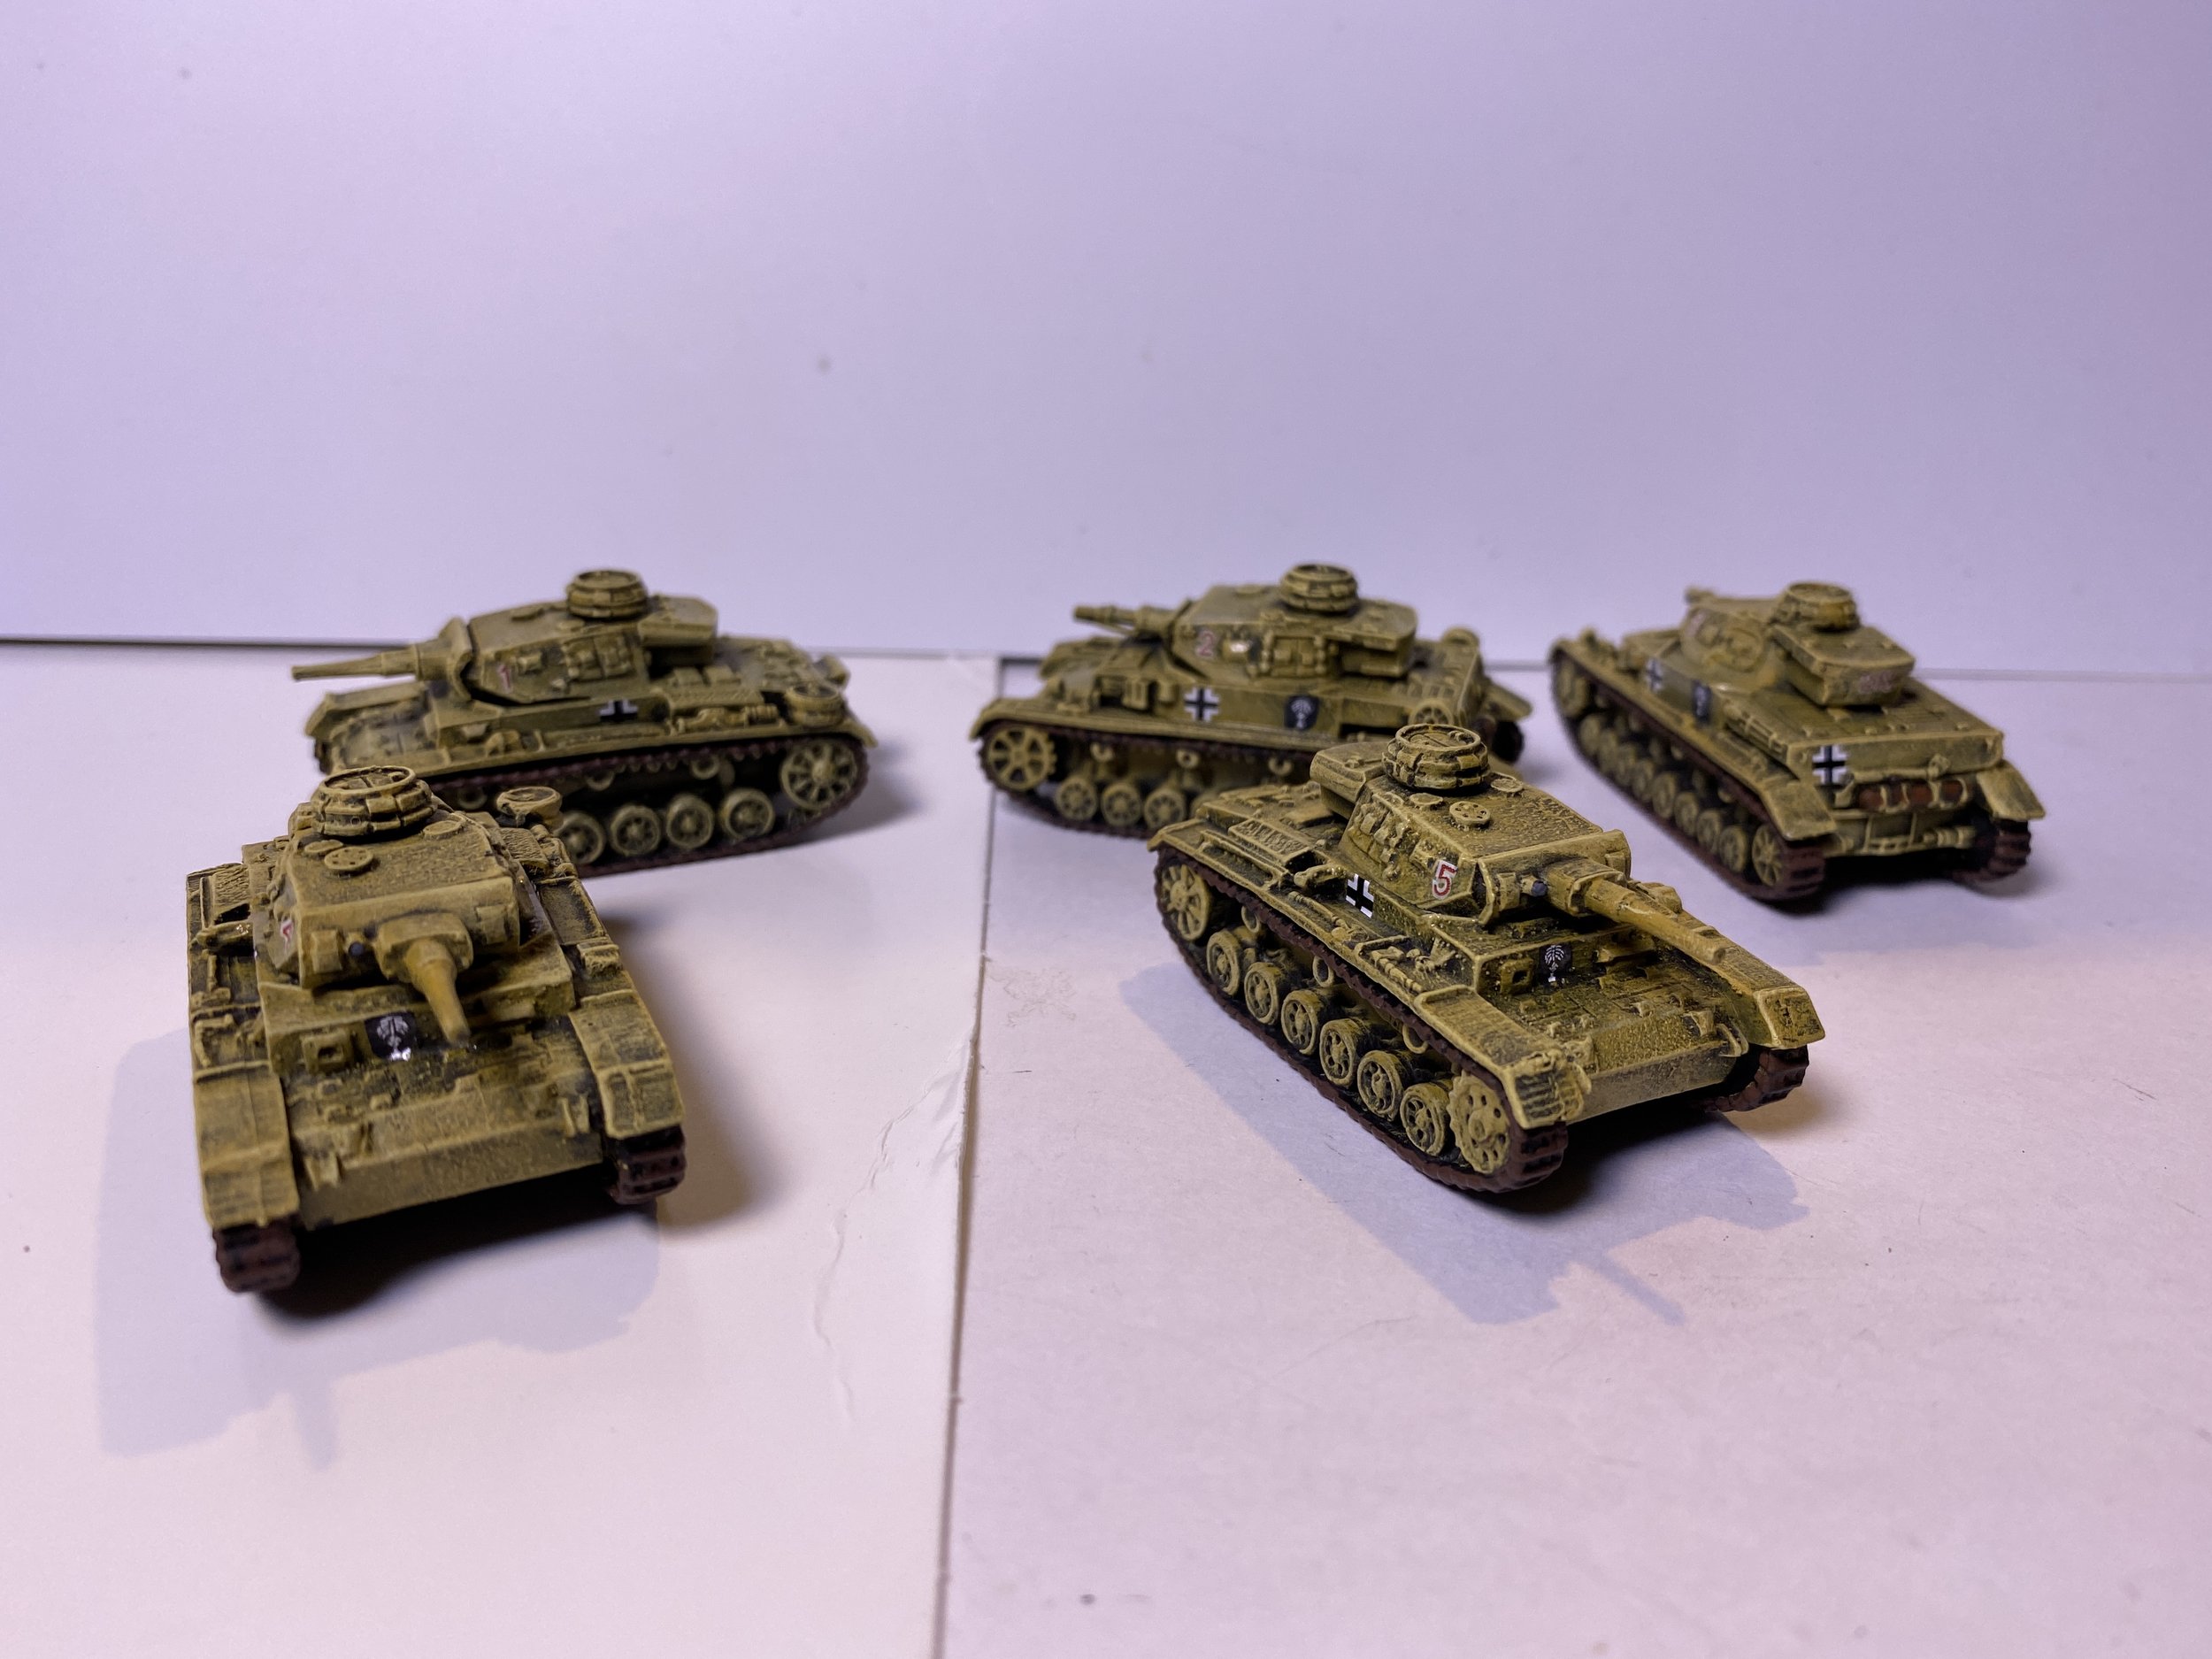
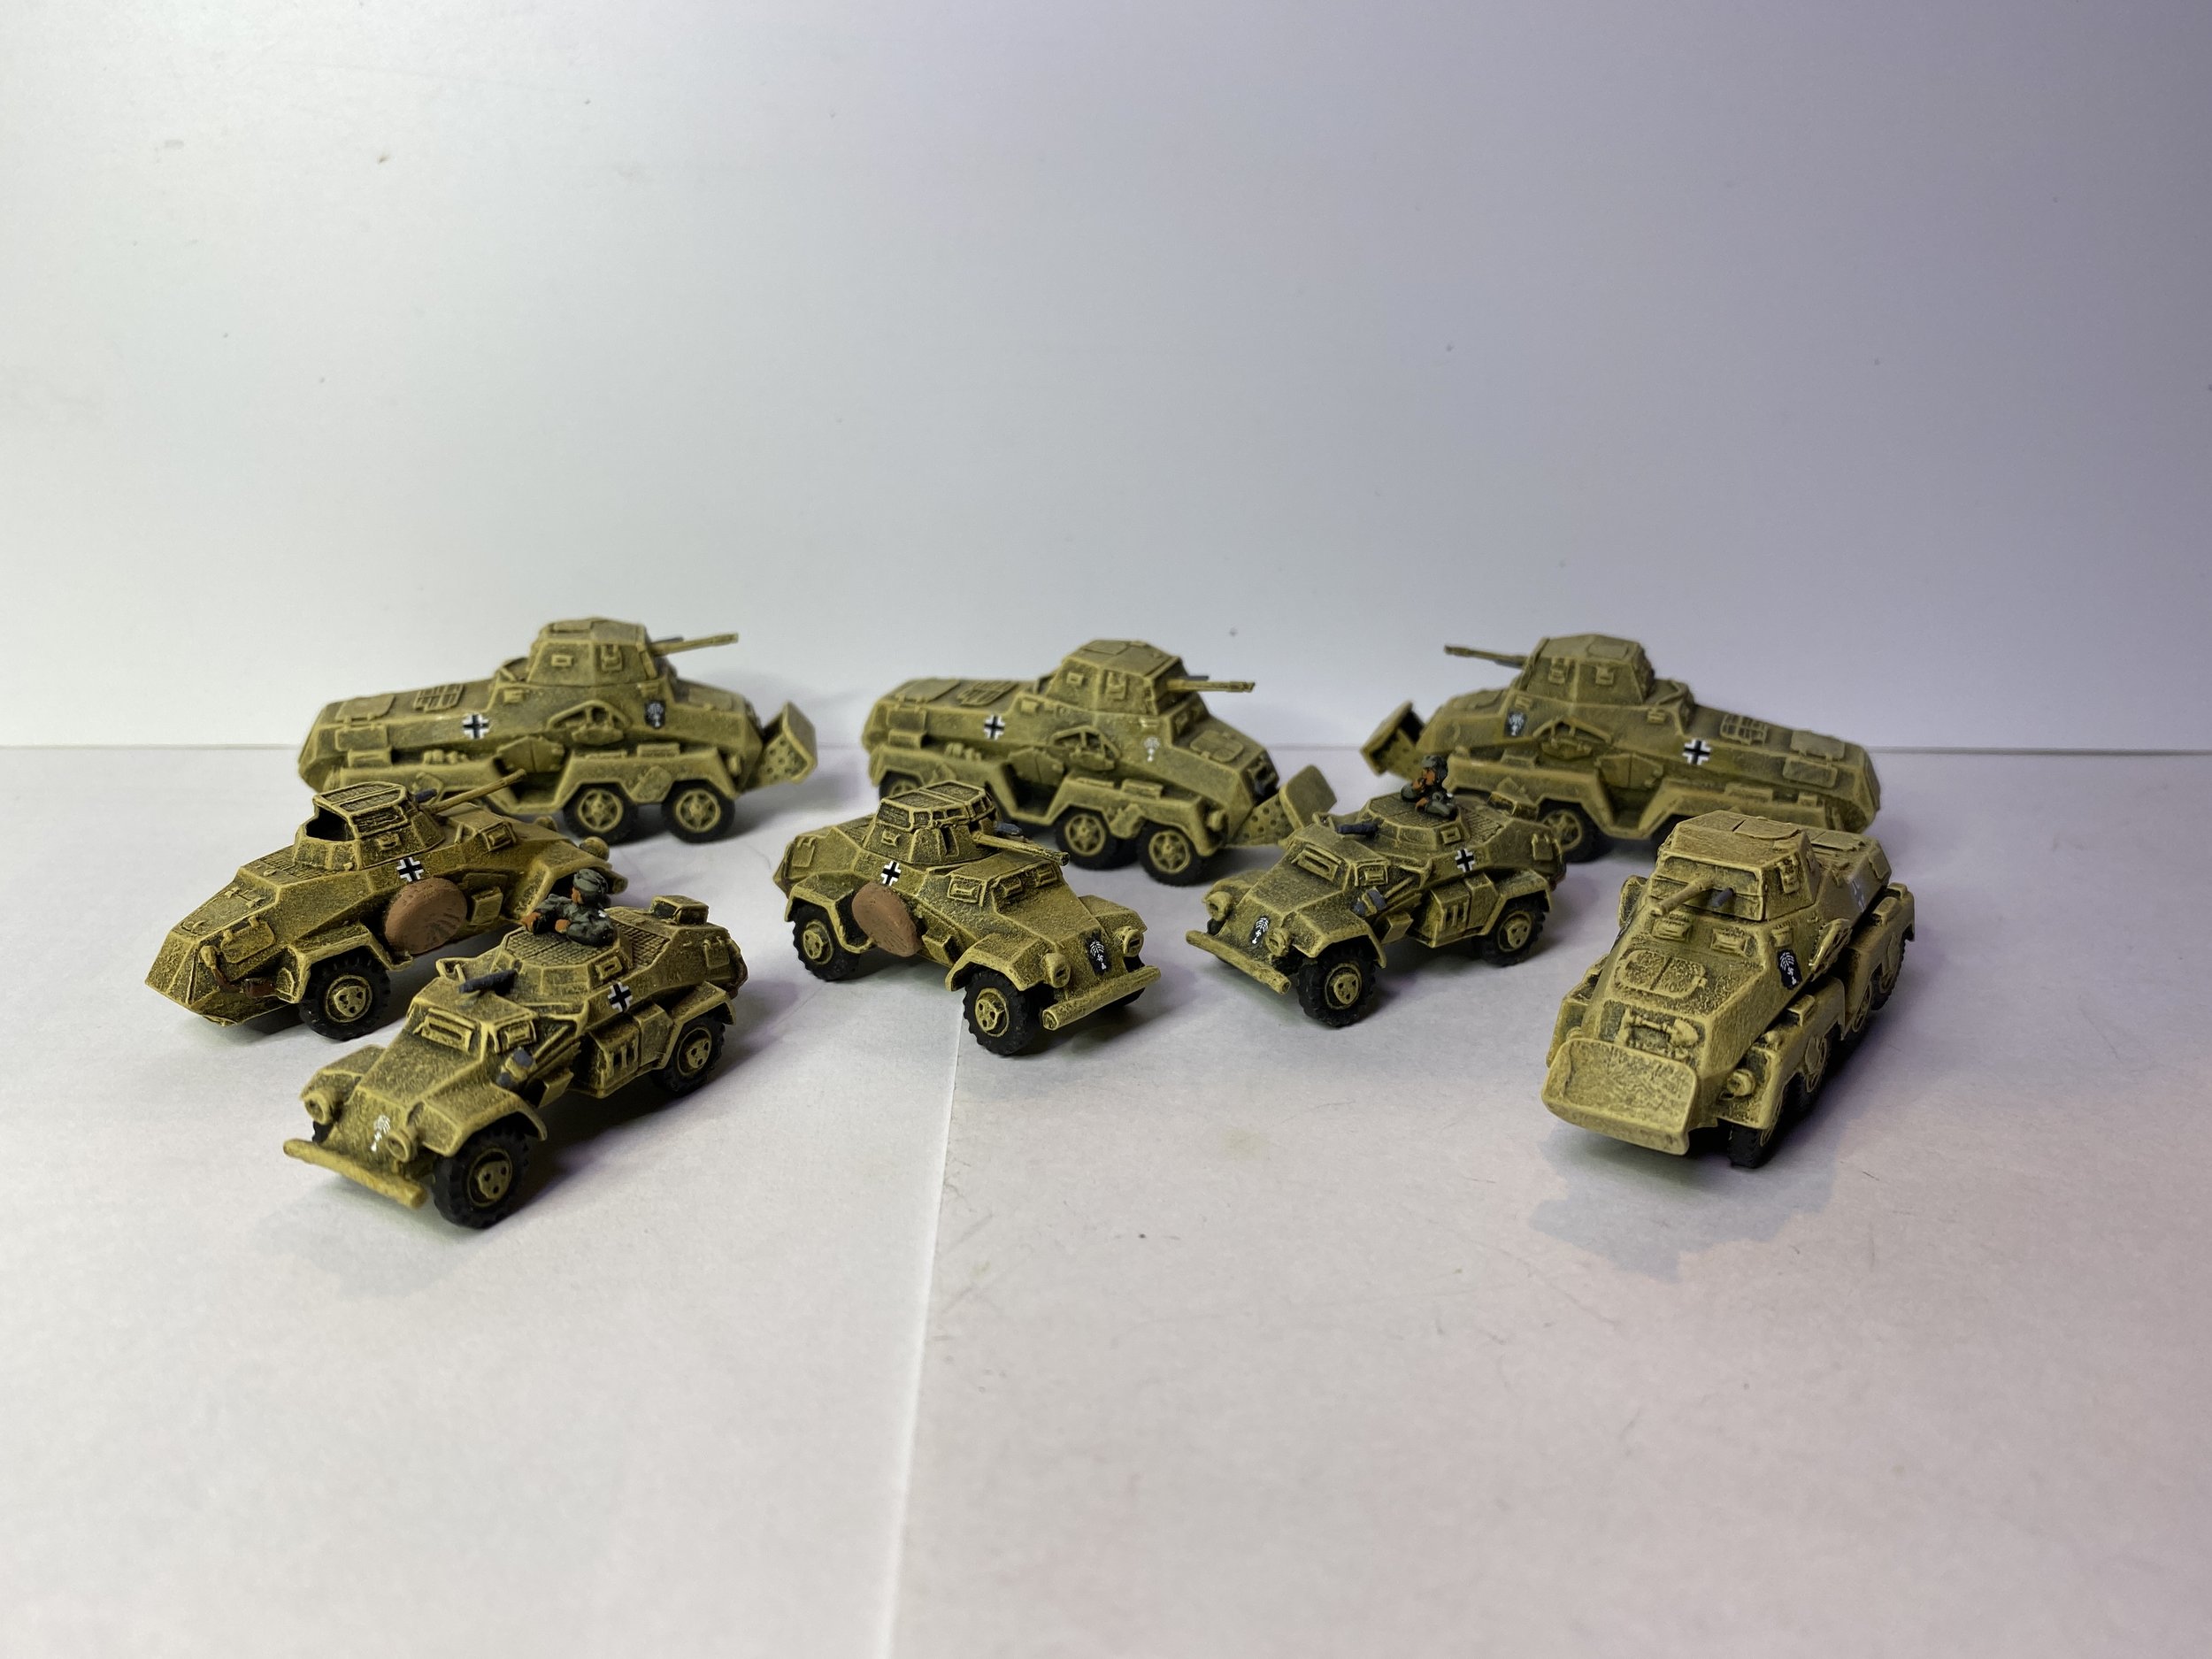
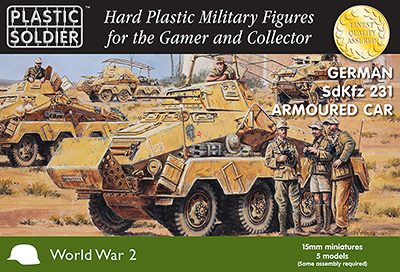
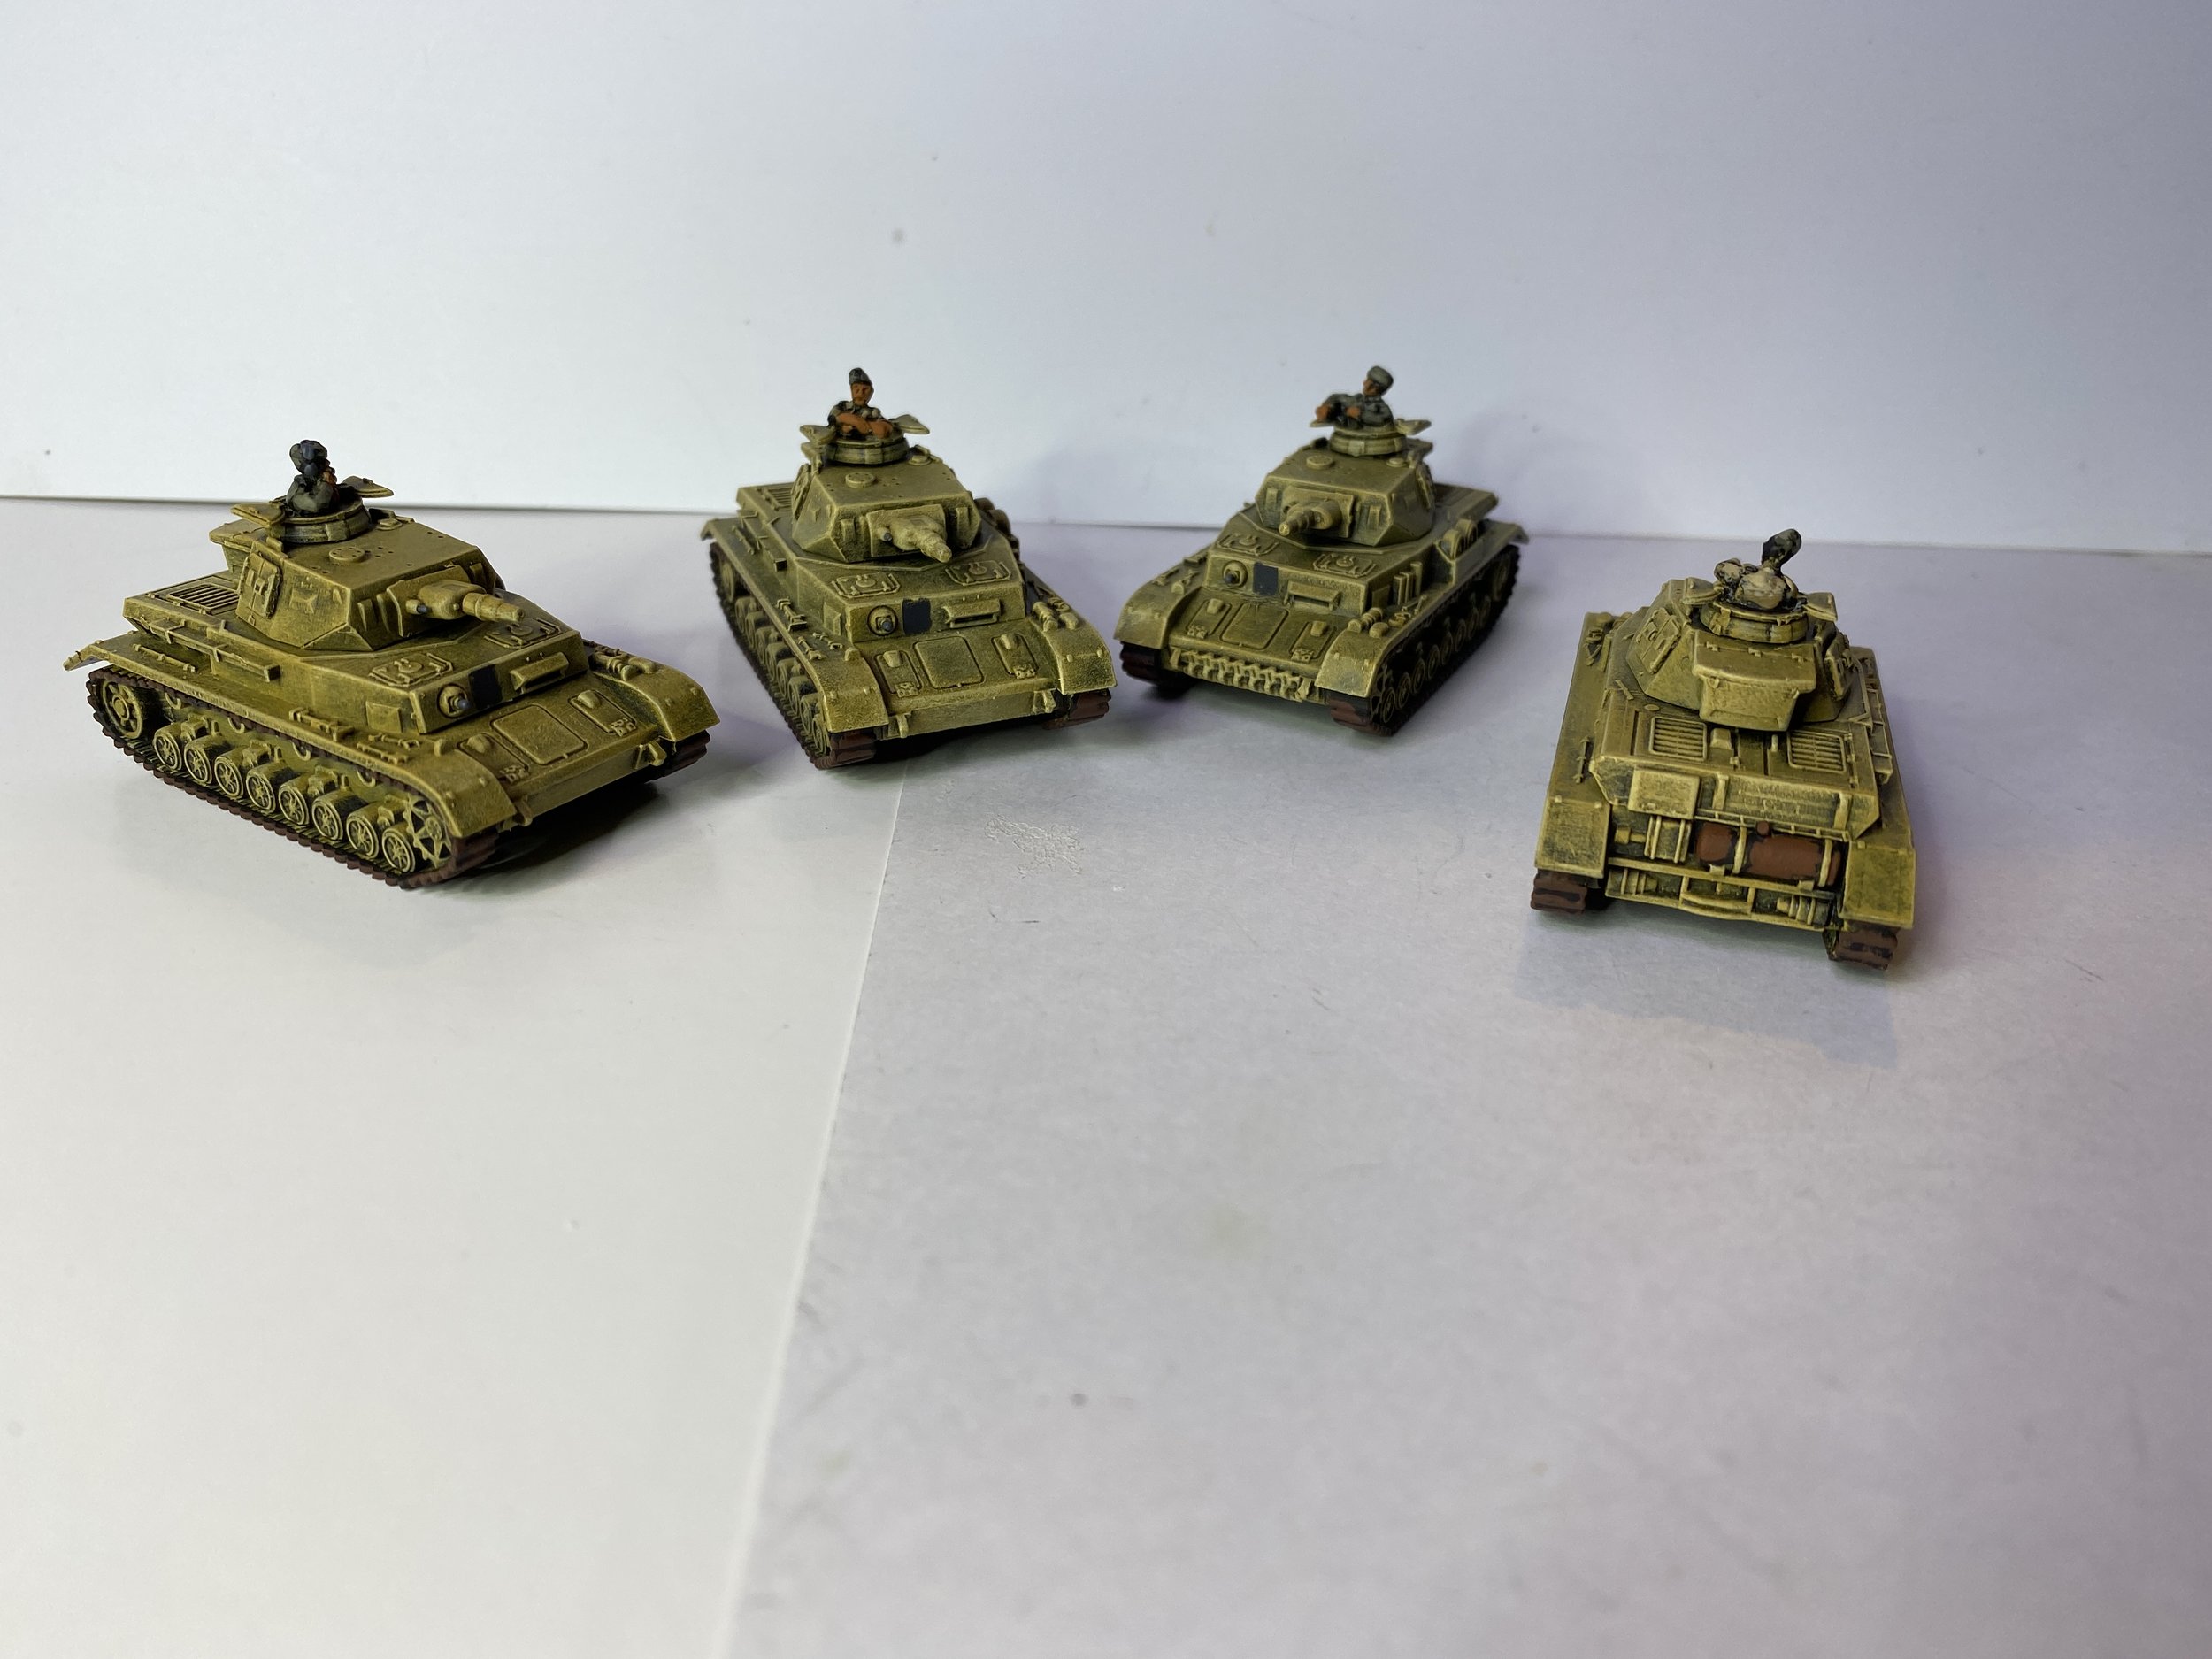
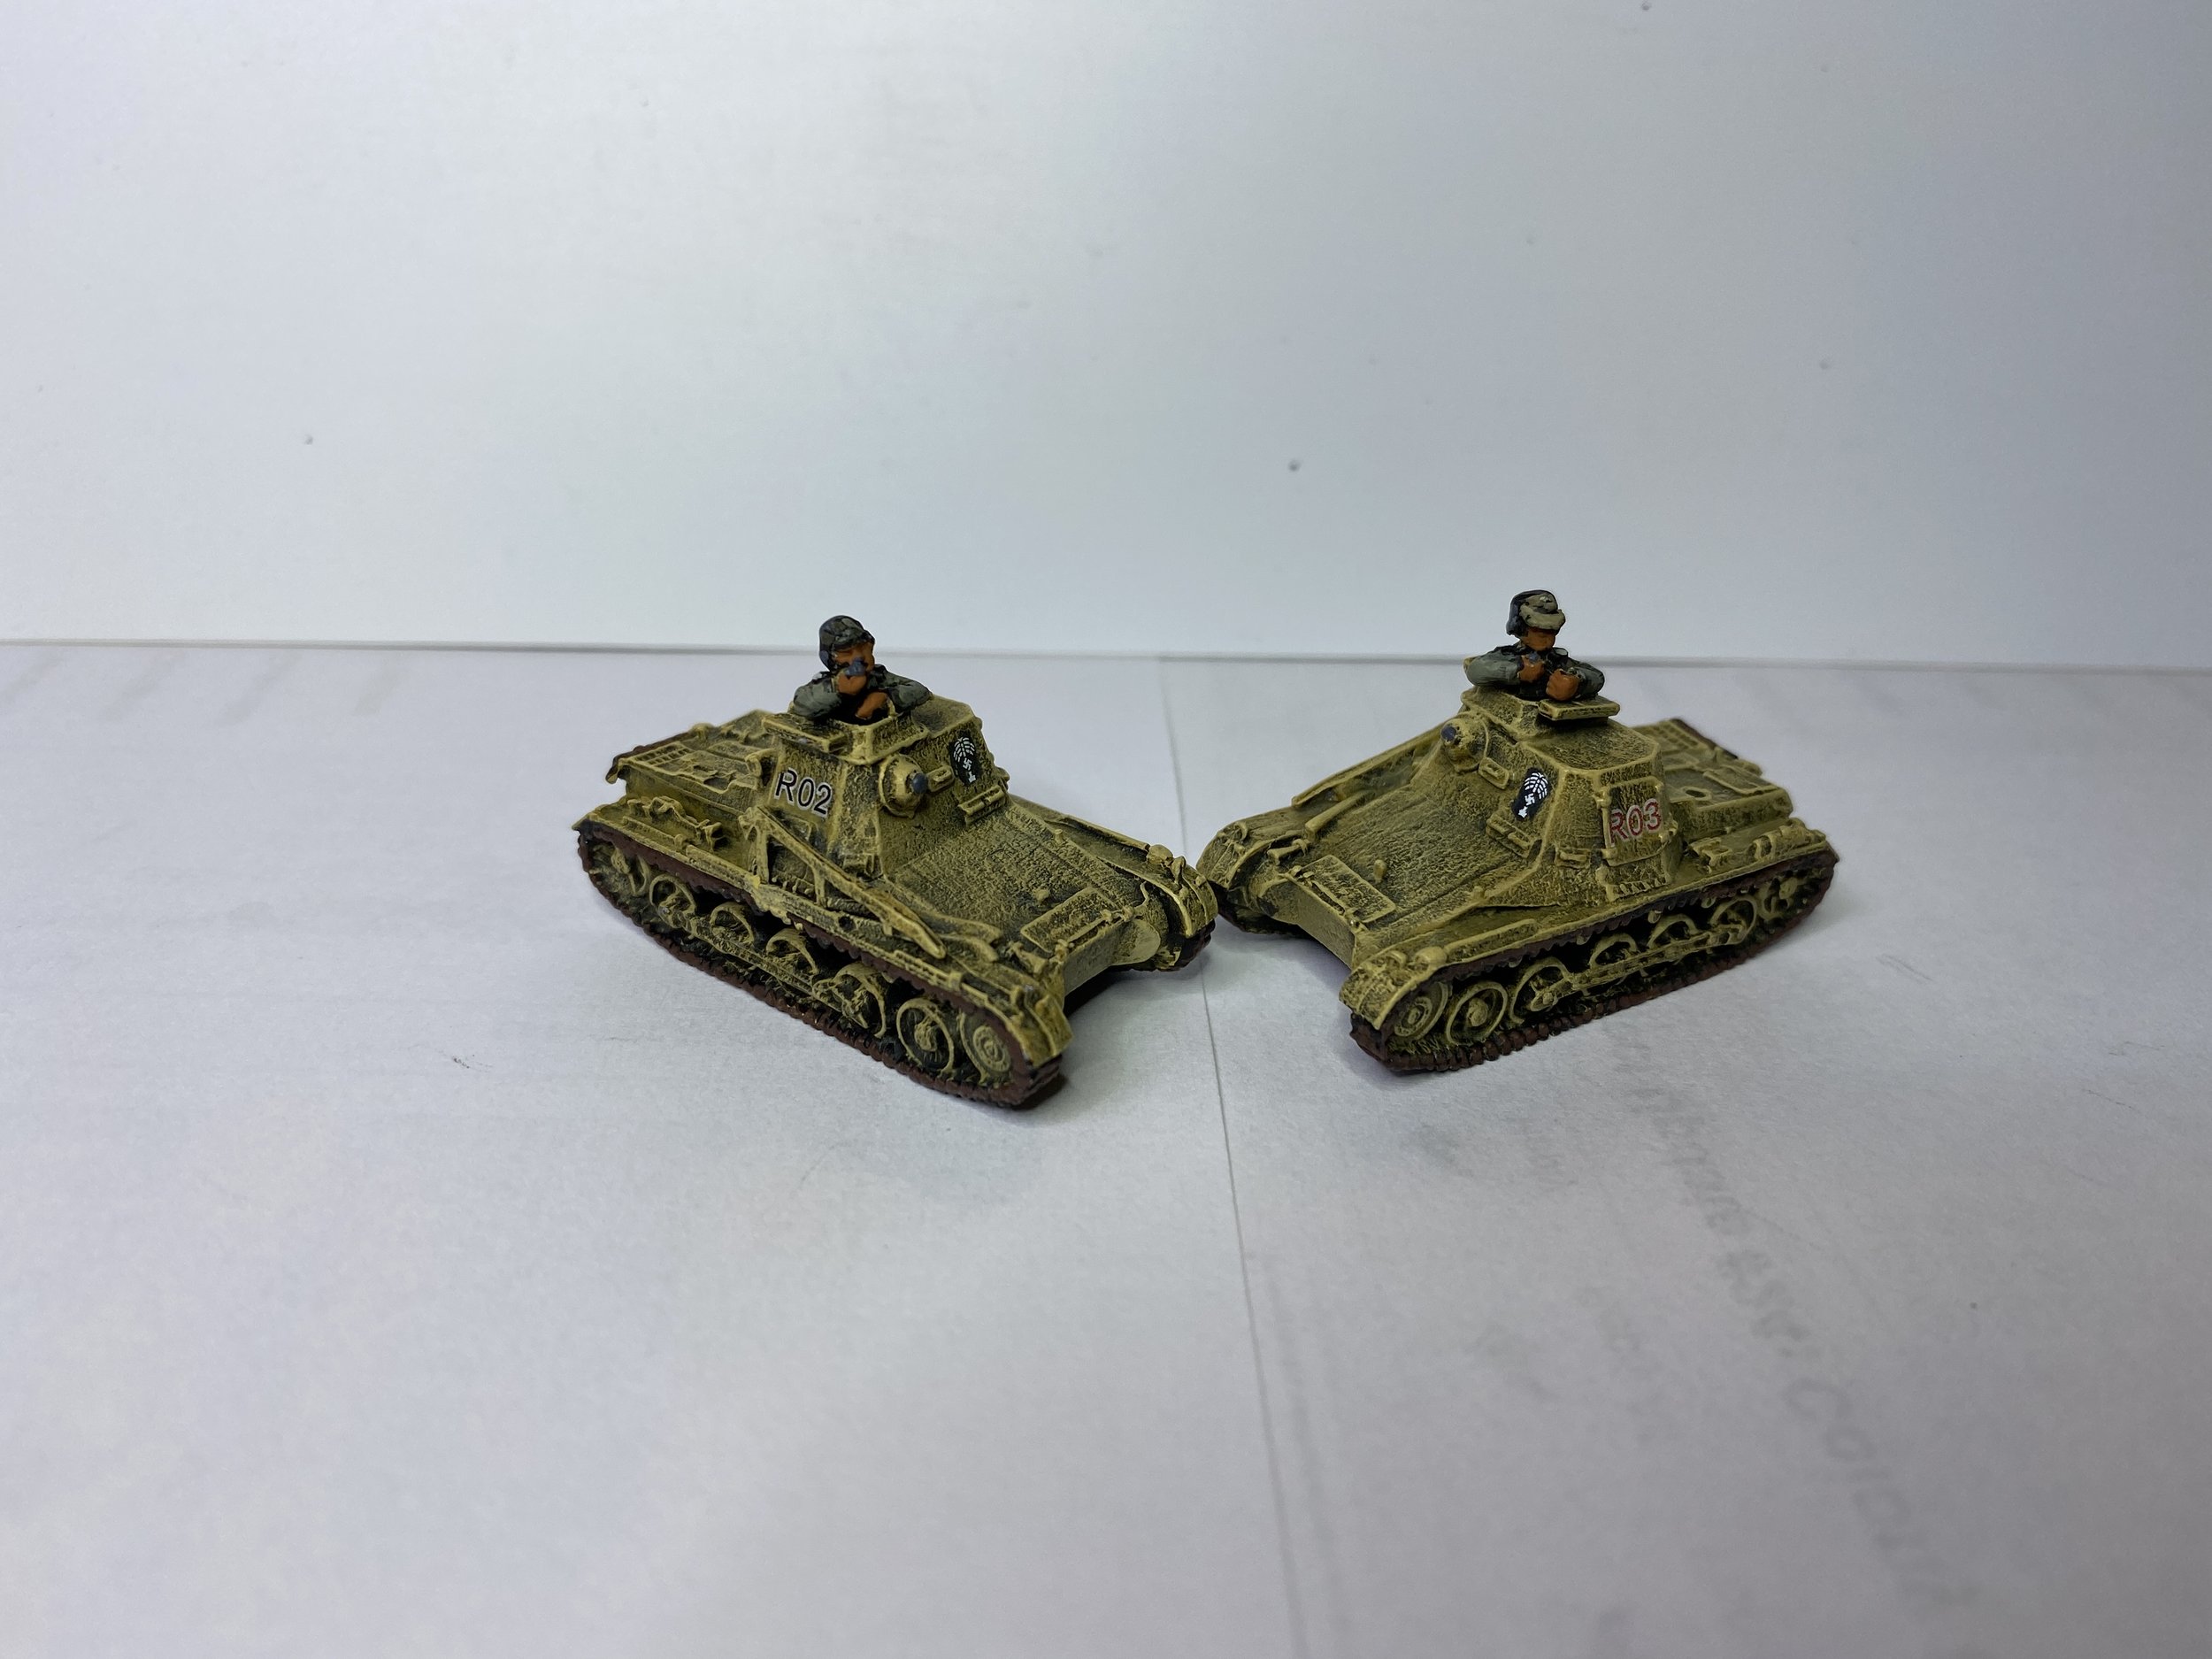
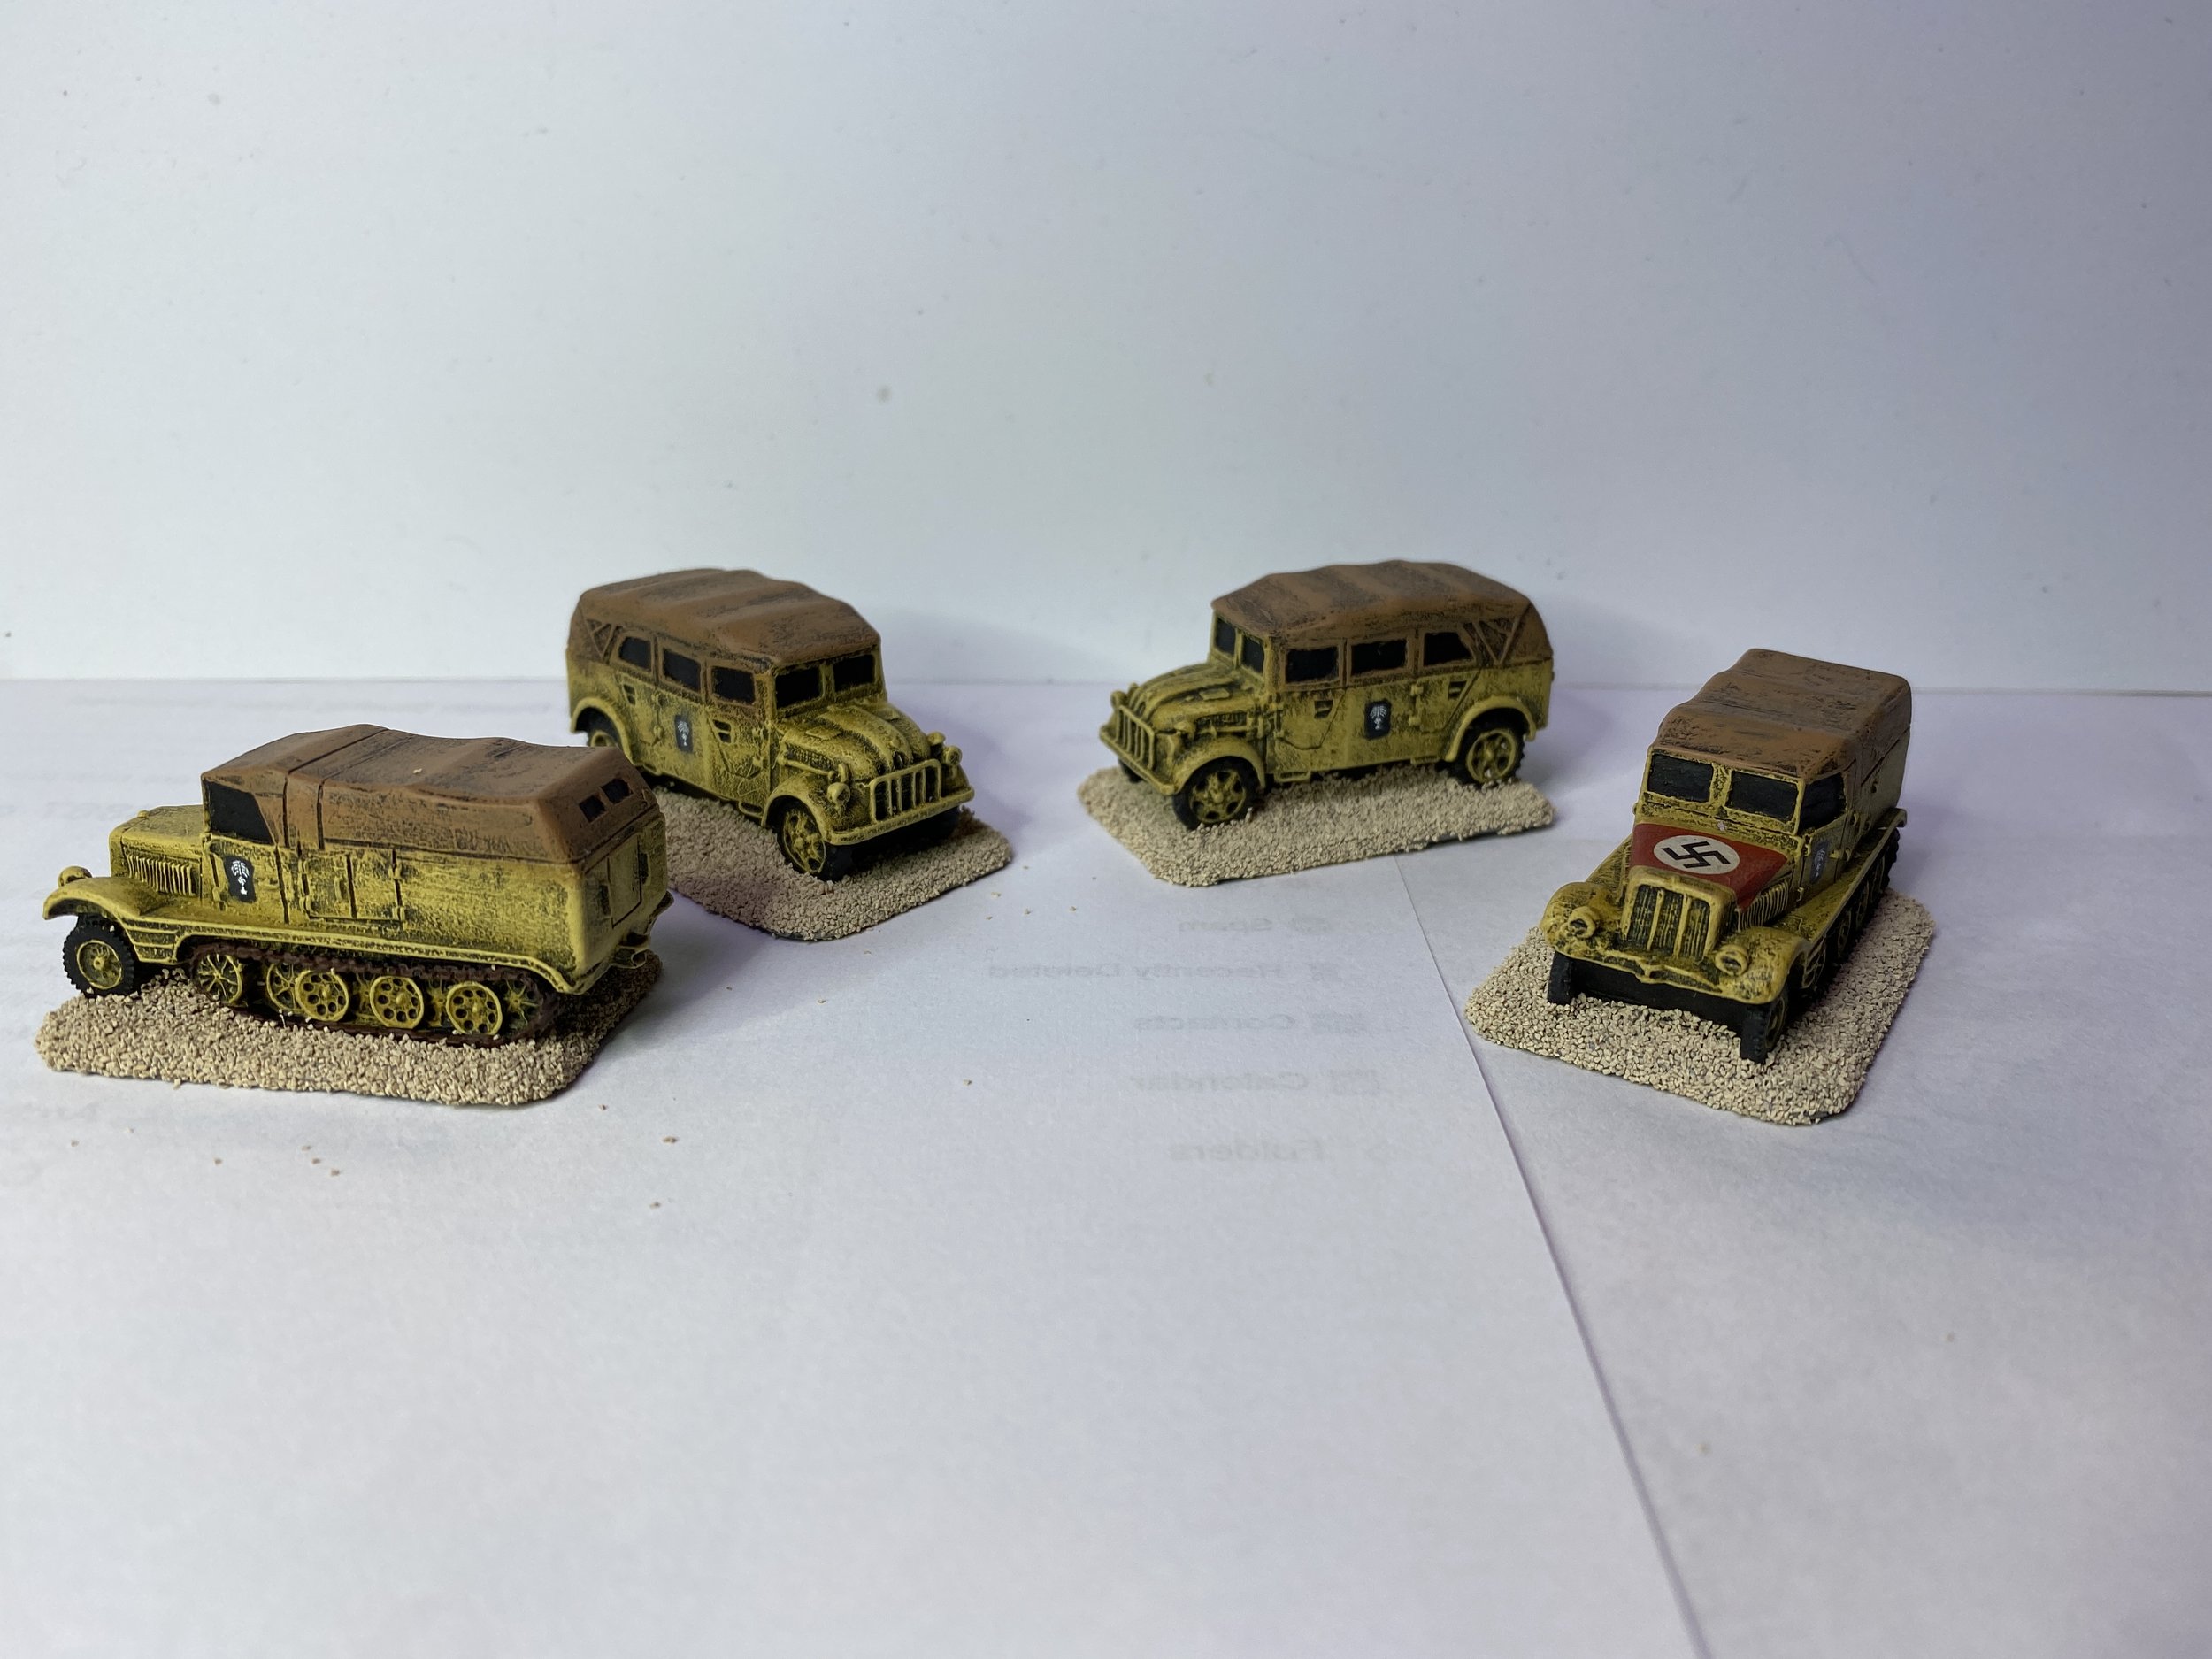
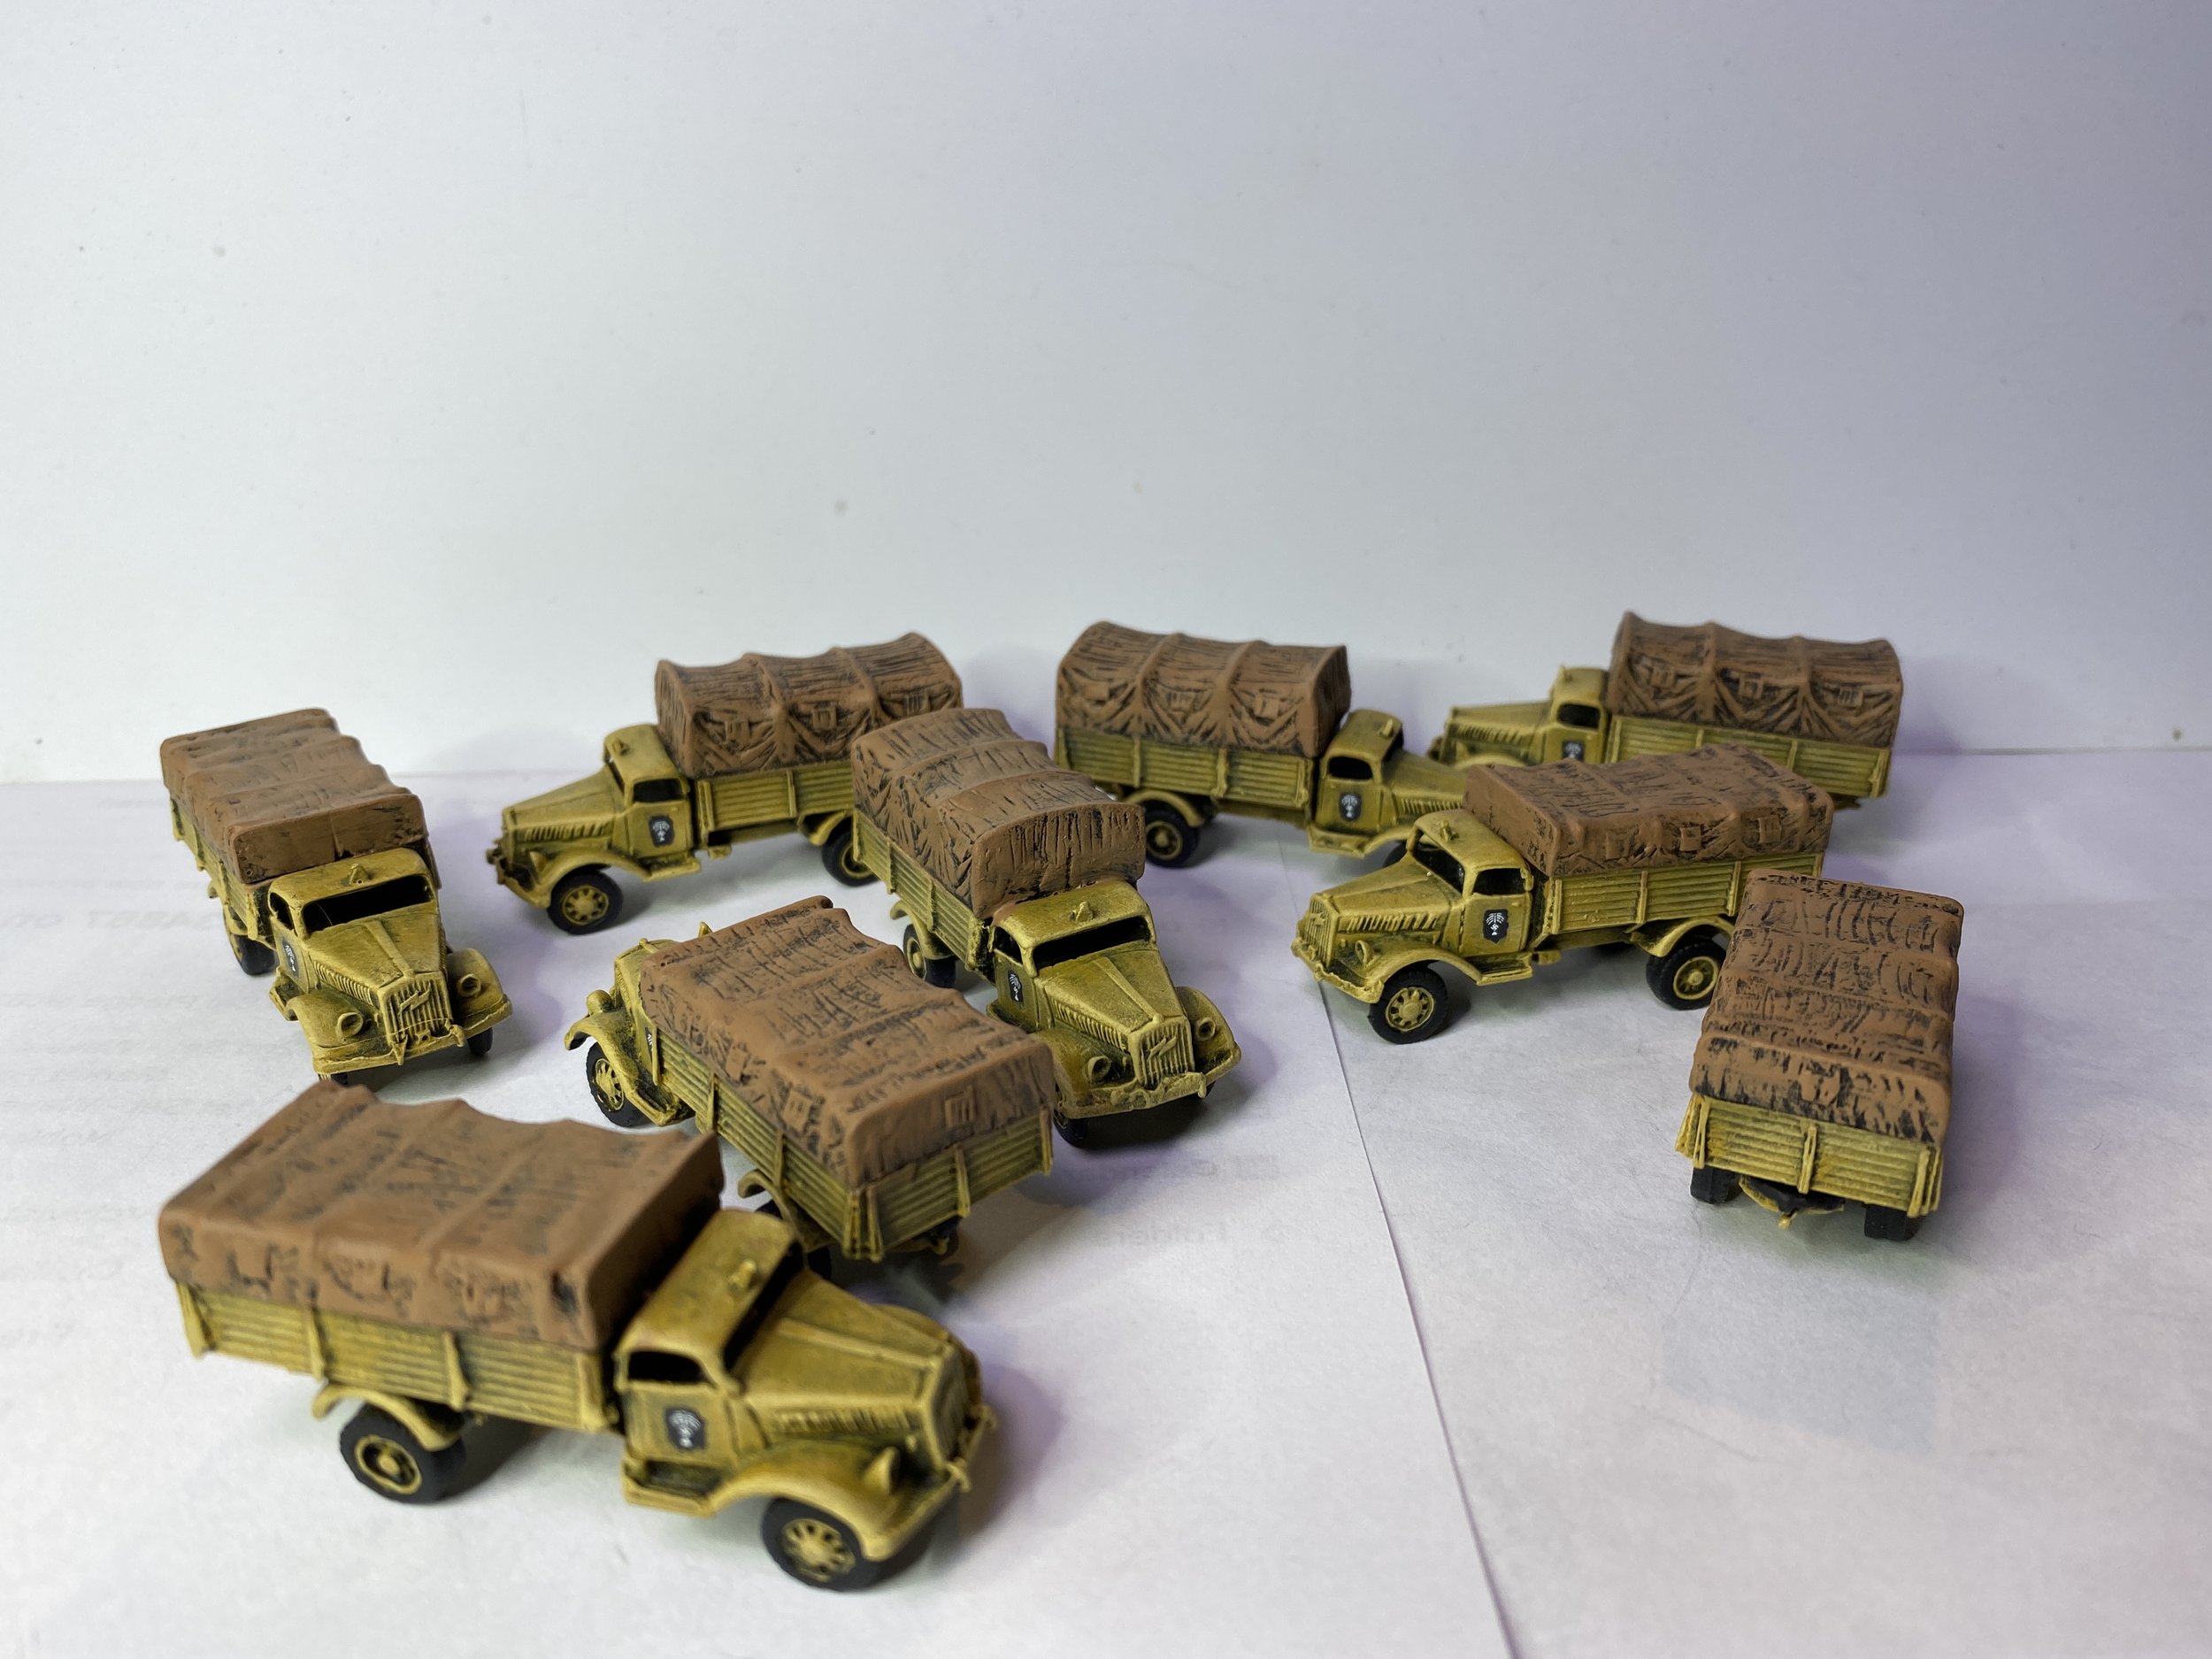
Although the workbench week started with a focus on the Hawthorne Village water tower and the structural work on that project continued throughout the week, the real focus of the week continued to be on my 15mm North Africa project. By mid-week I completed eight German armored cars… two SdKfz 221, two SdKfz 222, and four SdKfz 231 armored cars. Unlike the ones done last week these are all Flames of War. When I completed the four SdKfz 231s I got a real surprise. I was sure I had at least one pack of 231s by Command Decision. I was surprised to find that was not the case, and since I was going to make an order to Old Glory for three packs of their SdKfz 222s, one pack of Sdkfz 250s, and one pack of the SdKfz 7 prime mover, I decided I should add a couple packs of their SdKfz 231s. That is when I understood why I didn’t have any. For some reason, CD only makes the late war versions of the German eight-wheel armored car. With none available from CD or Flames of War, I thought seriously of buying a few by Gaming Models. I like the things I have gotten from GM, but I’ve been selective. The problem I had with their 231s is that they would be side-by-side with the FoW 231s and the difference would be obvious. I decided to see if Plastic Soldier Company made them. This would be my first Plastic Soldier Company purchase. They do or did make the version I wanted. Brookhurst told me they were not available from their distributors at this time… might be sitting off the coast near my house in a shipping container. I looked on eBay and discovered that there was another thing I had to be careful with Plastic Soldier; they make them in 1/72 and 15mm so you have to be careful if you are a rookie like me in terms of Plastic Soldier. The ones available on eBay are expensive, but I did find a box that was “only” $10 more than I would pay at Brookhurst and that included shipping from the UK. I bought that box of 5, but they will not get here until February.
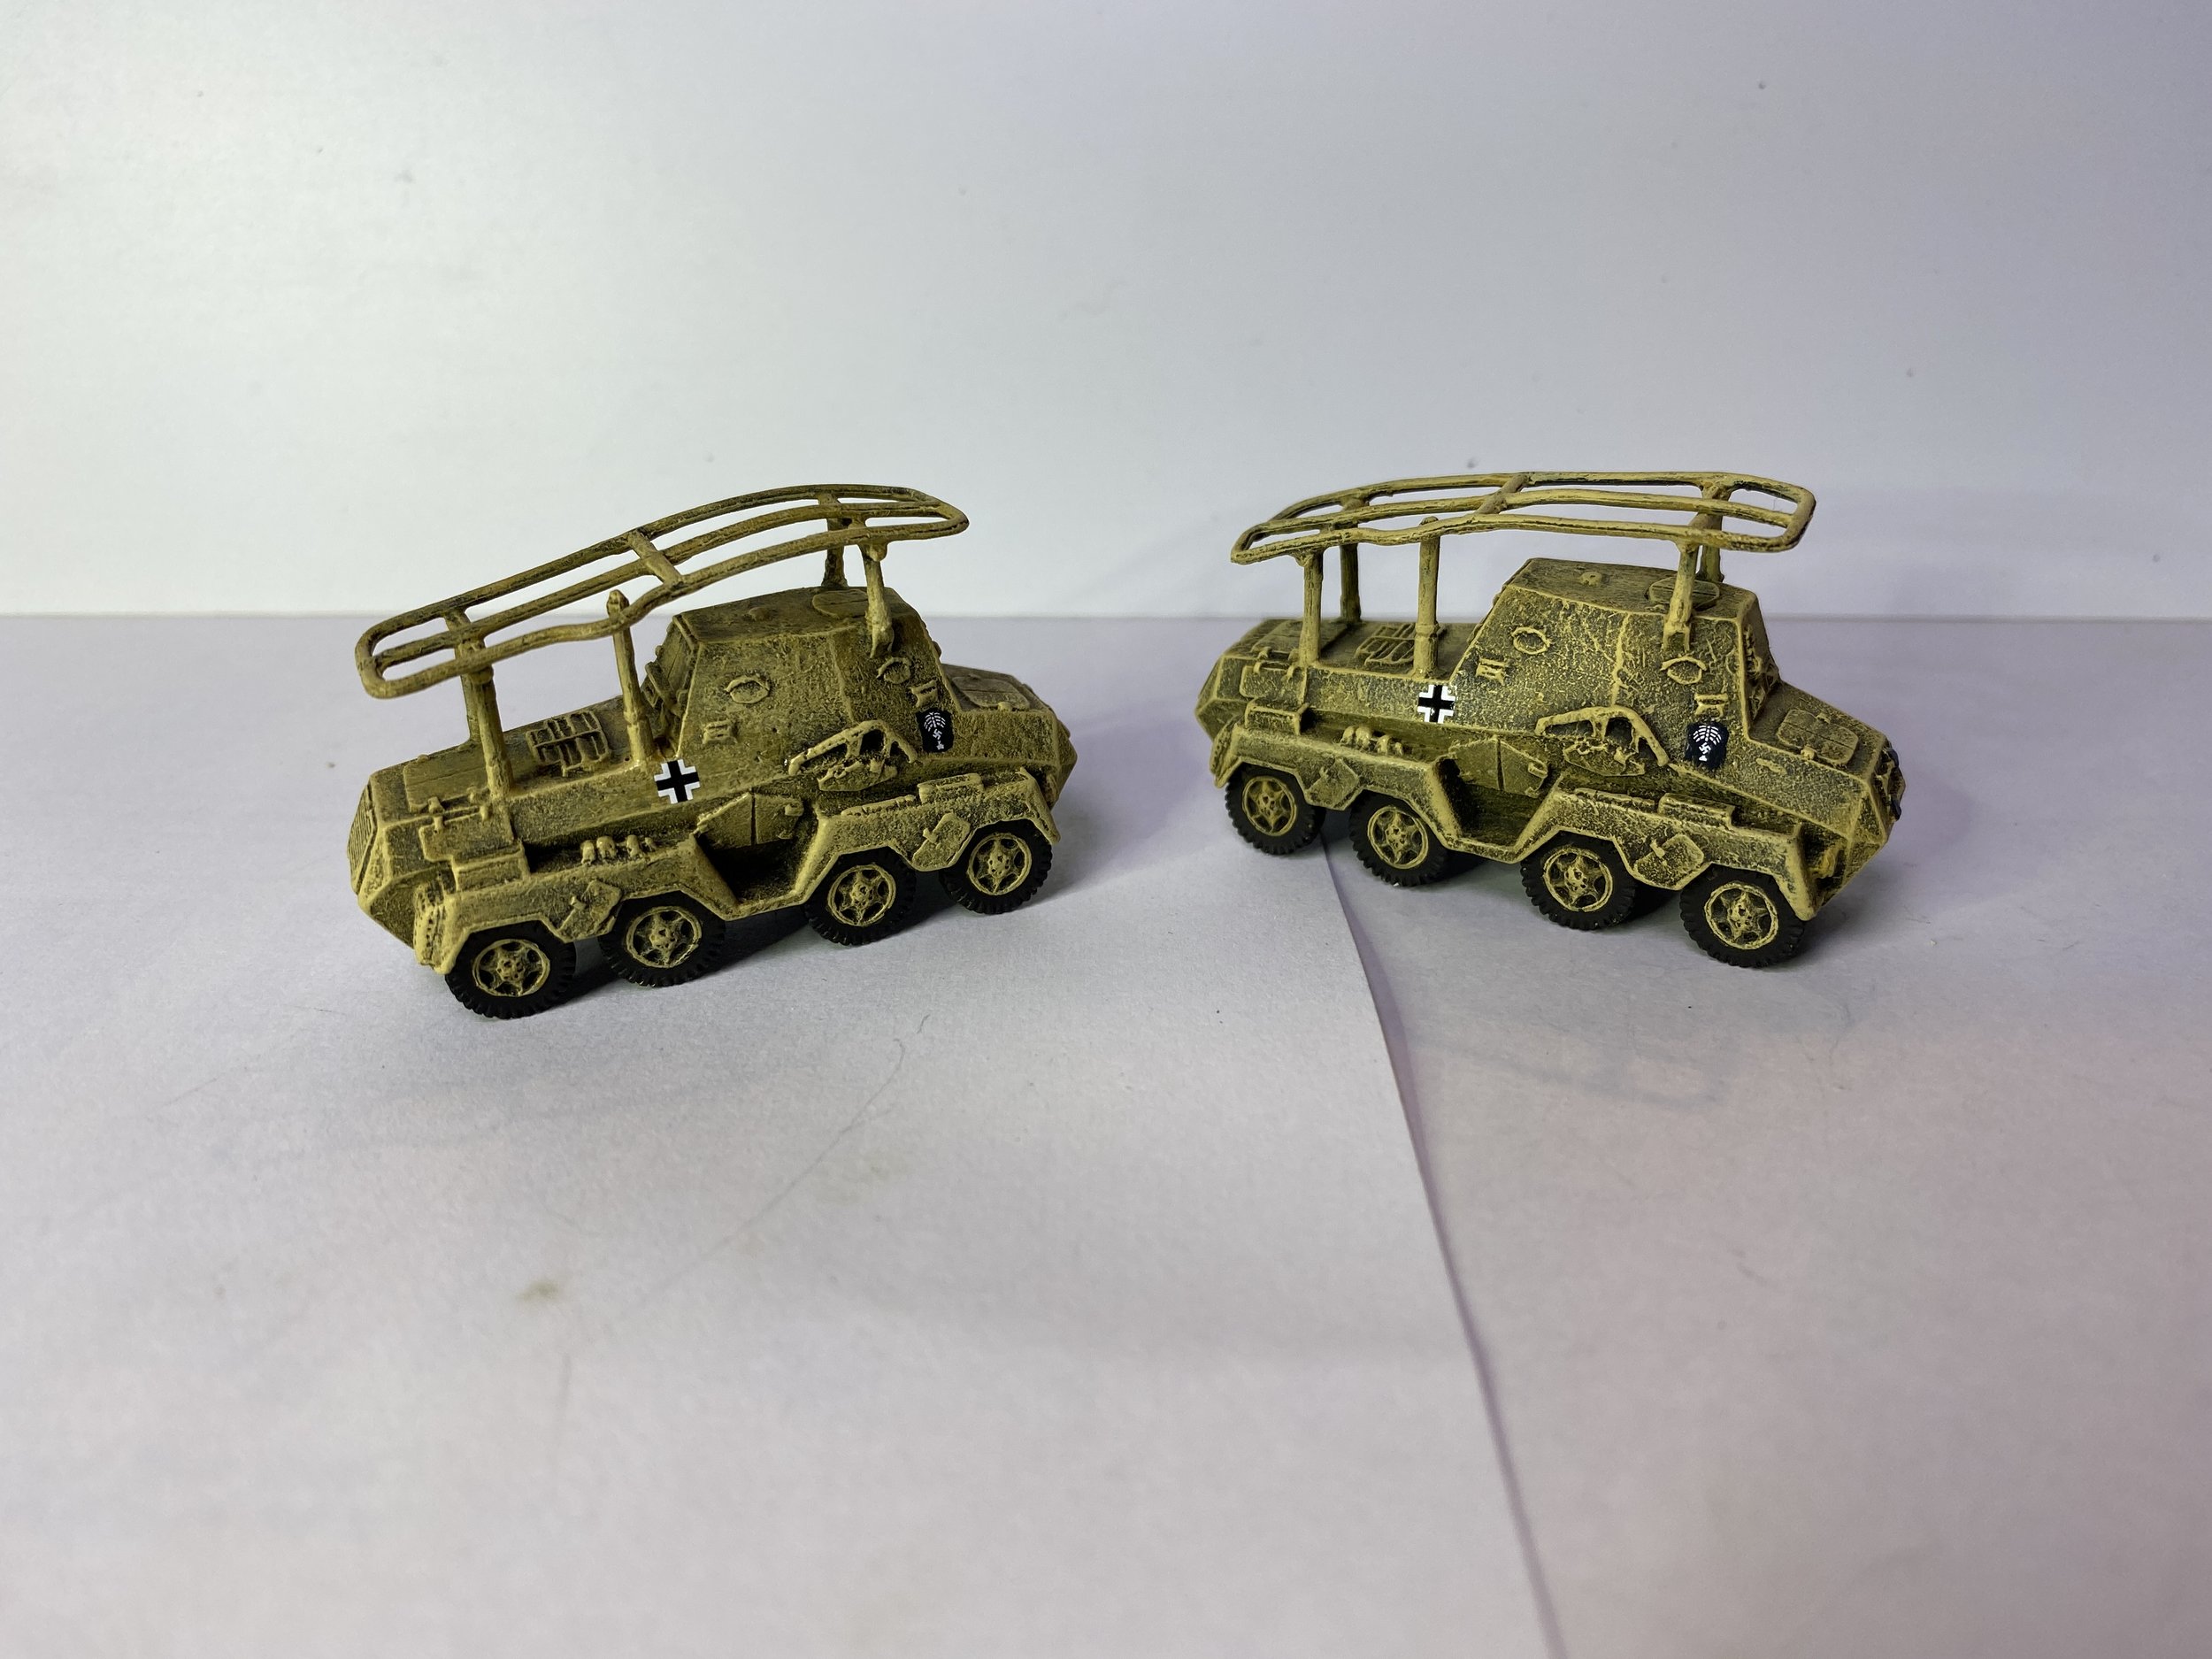
With the “where-do-I-get-more-SdKfz 231s” solved, I turned my attention to building and painting two Flames of War SdKfz 263 radio armored cars and one 223 radio armored car. I’ve also begun putting together some Plastic Soldier Company Pz. IVF1 with hatches open and tank commanders in those open hatches. I got four built and painted. Their decals remain to be done. I’ll be doing some Pz. III Gs with hatches open when Brookhurst gets them in from Plastic Soldier Company; I may even do a few Honeys with hatches open… British and one or two captured by the Germans. I have always liked metal and resin, but plastic is much easier to work with.

November 21, 2021
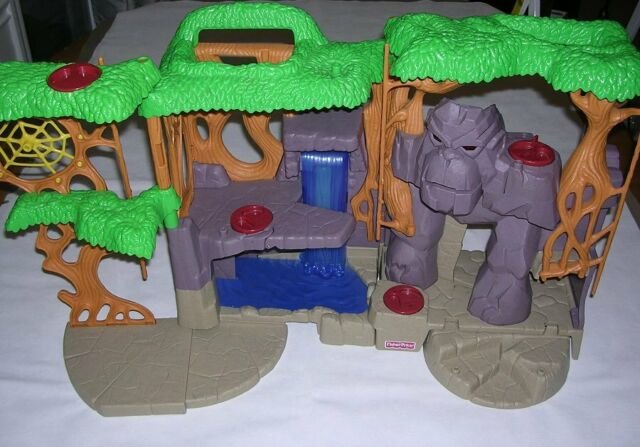
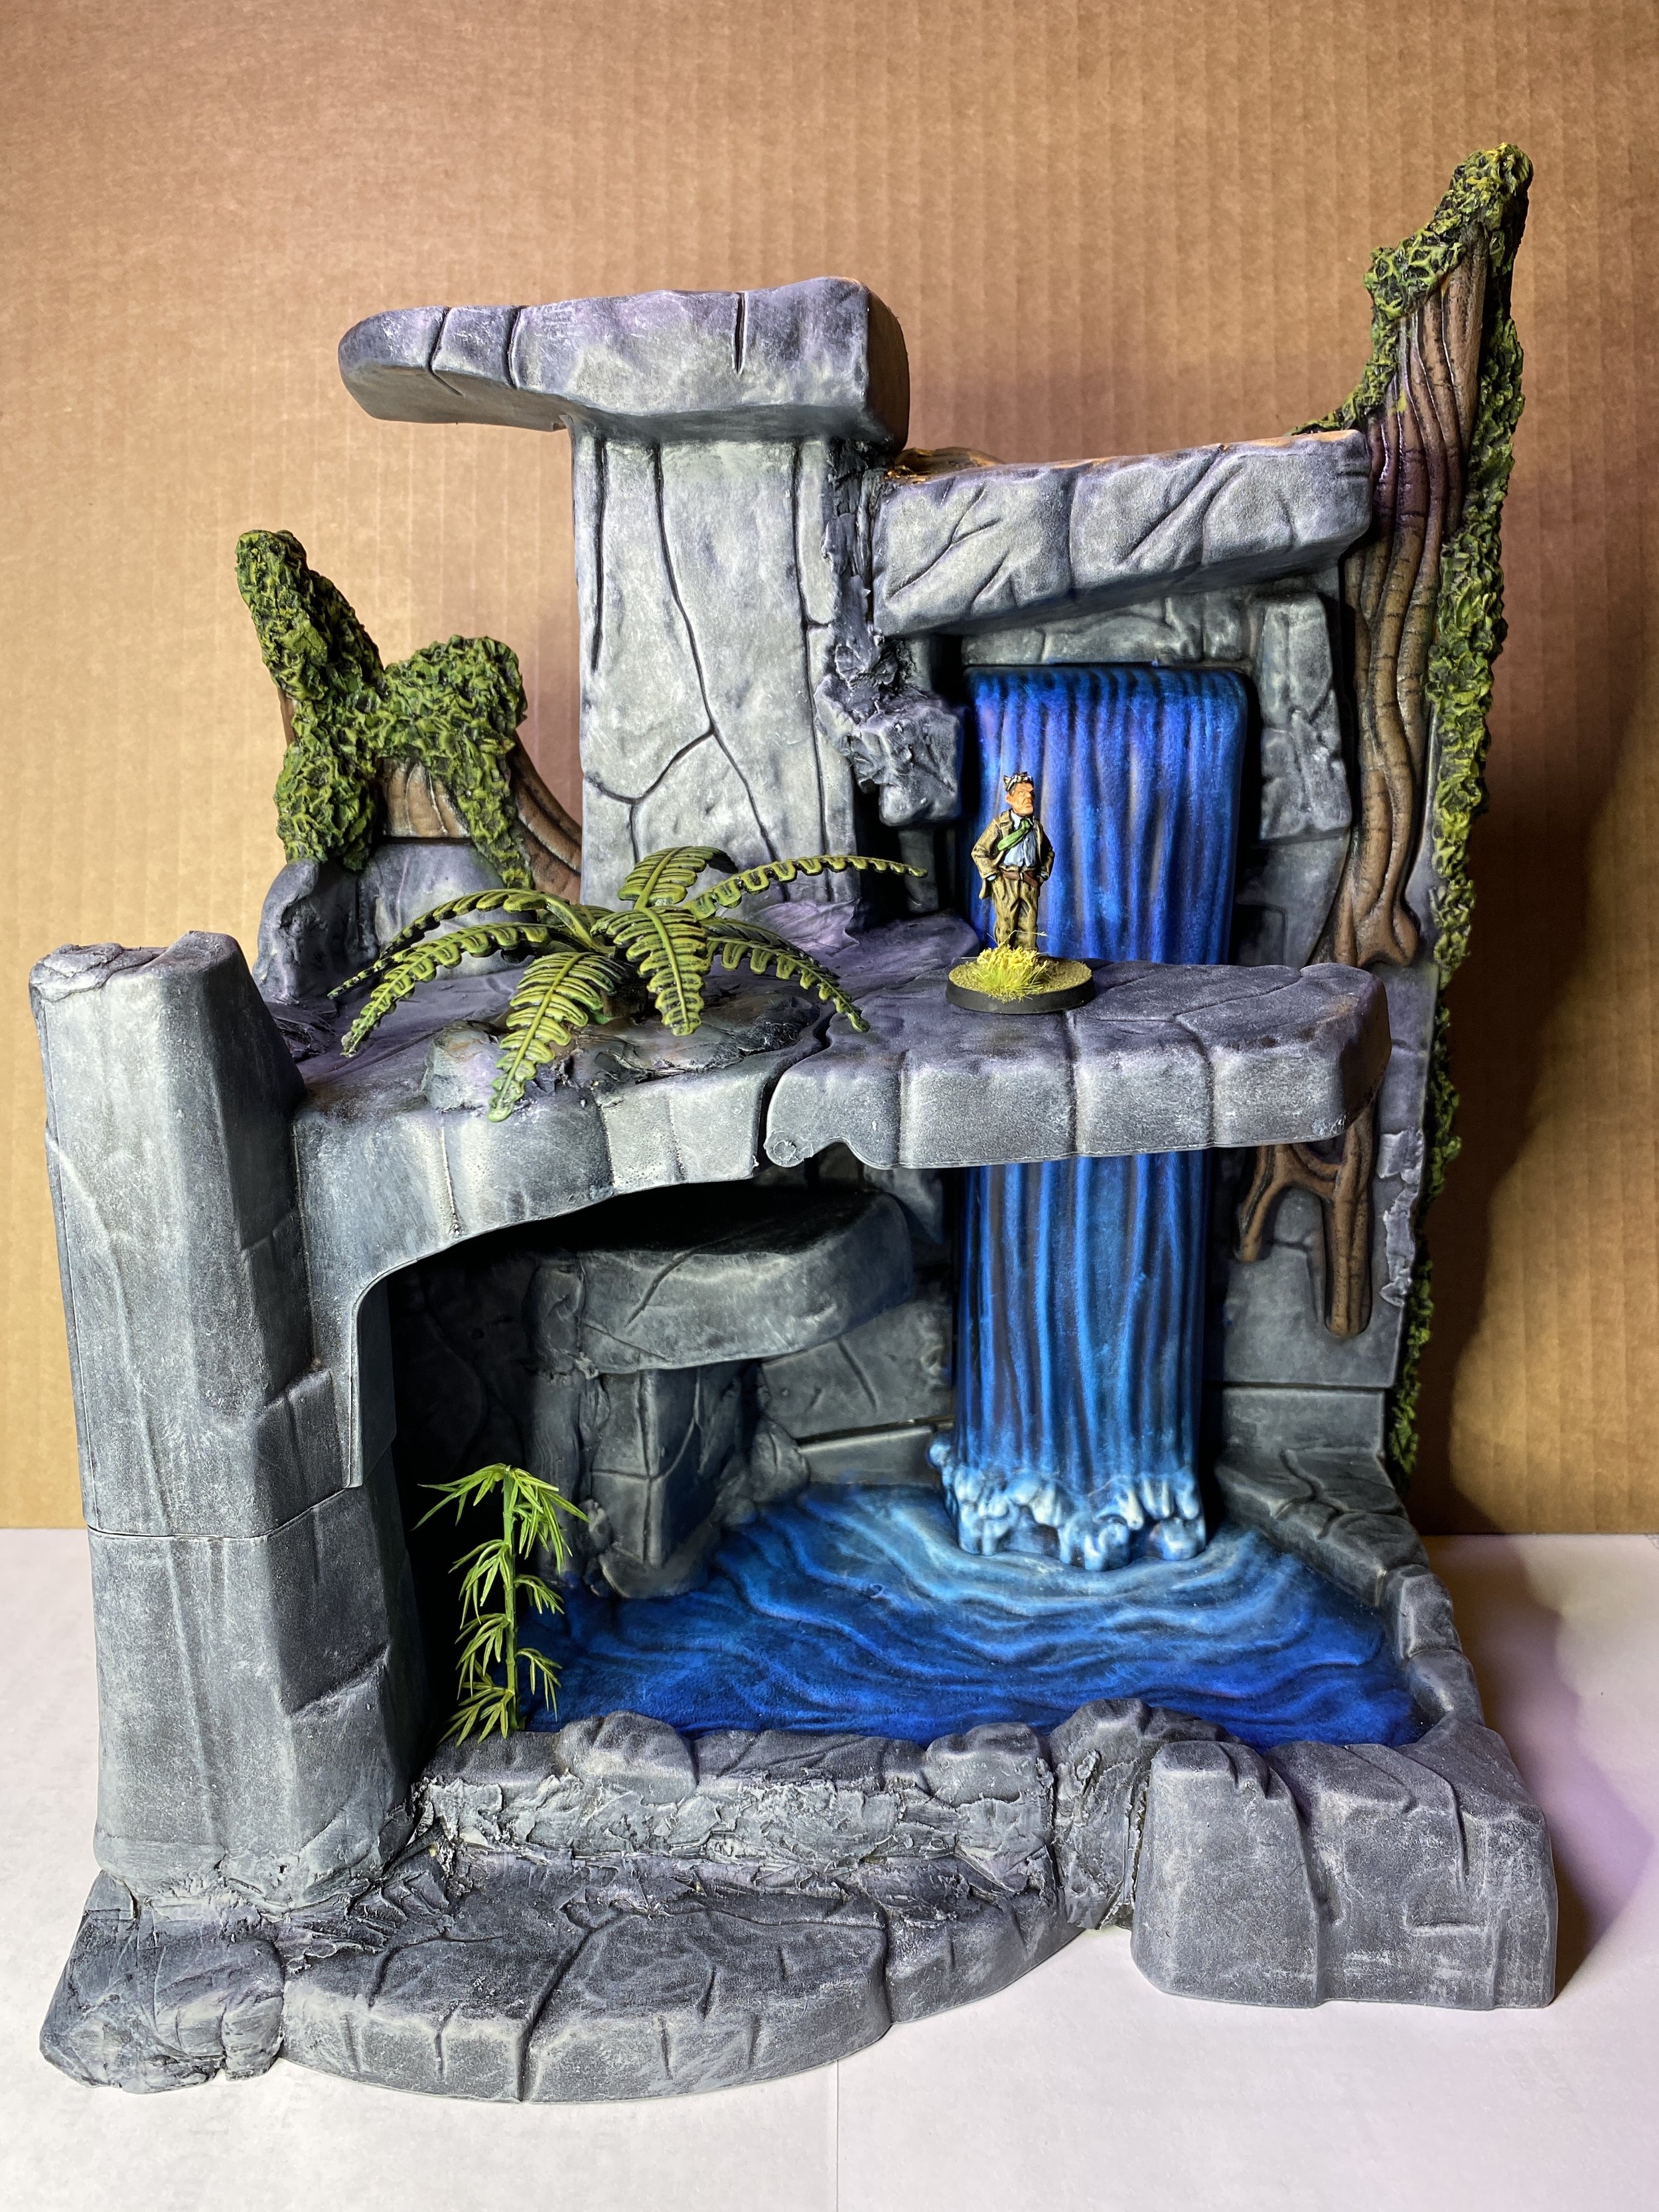
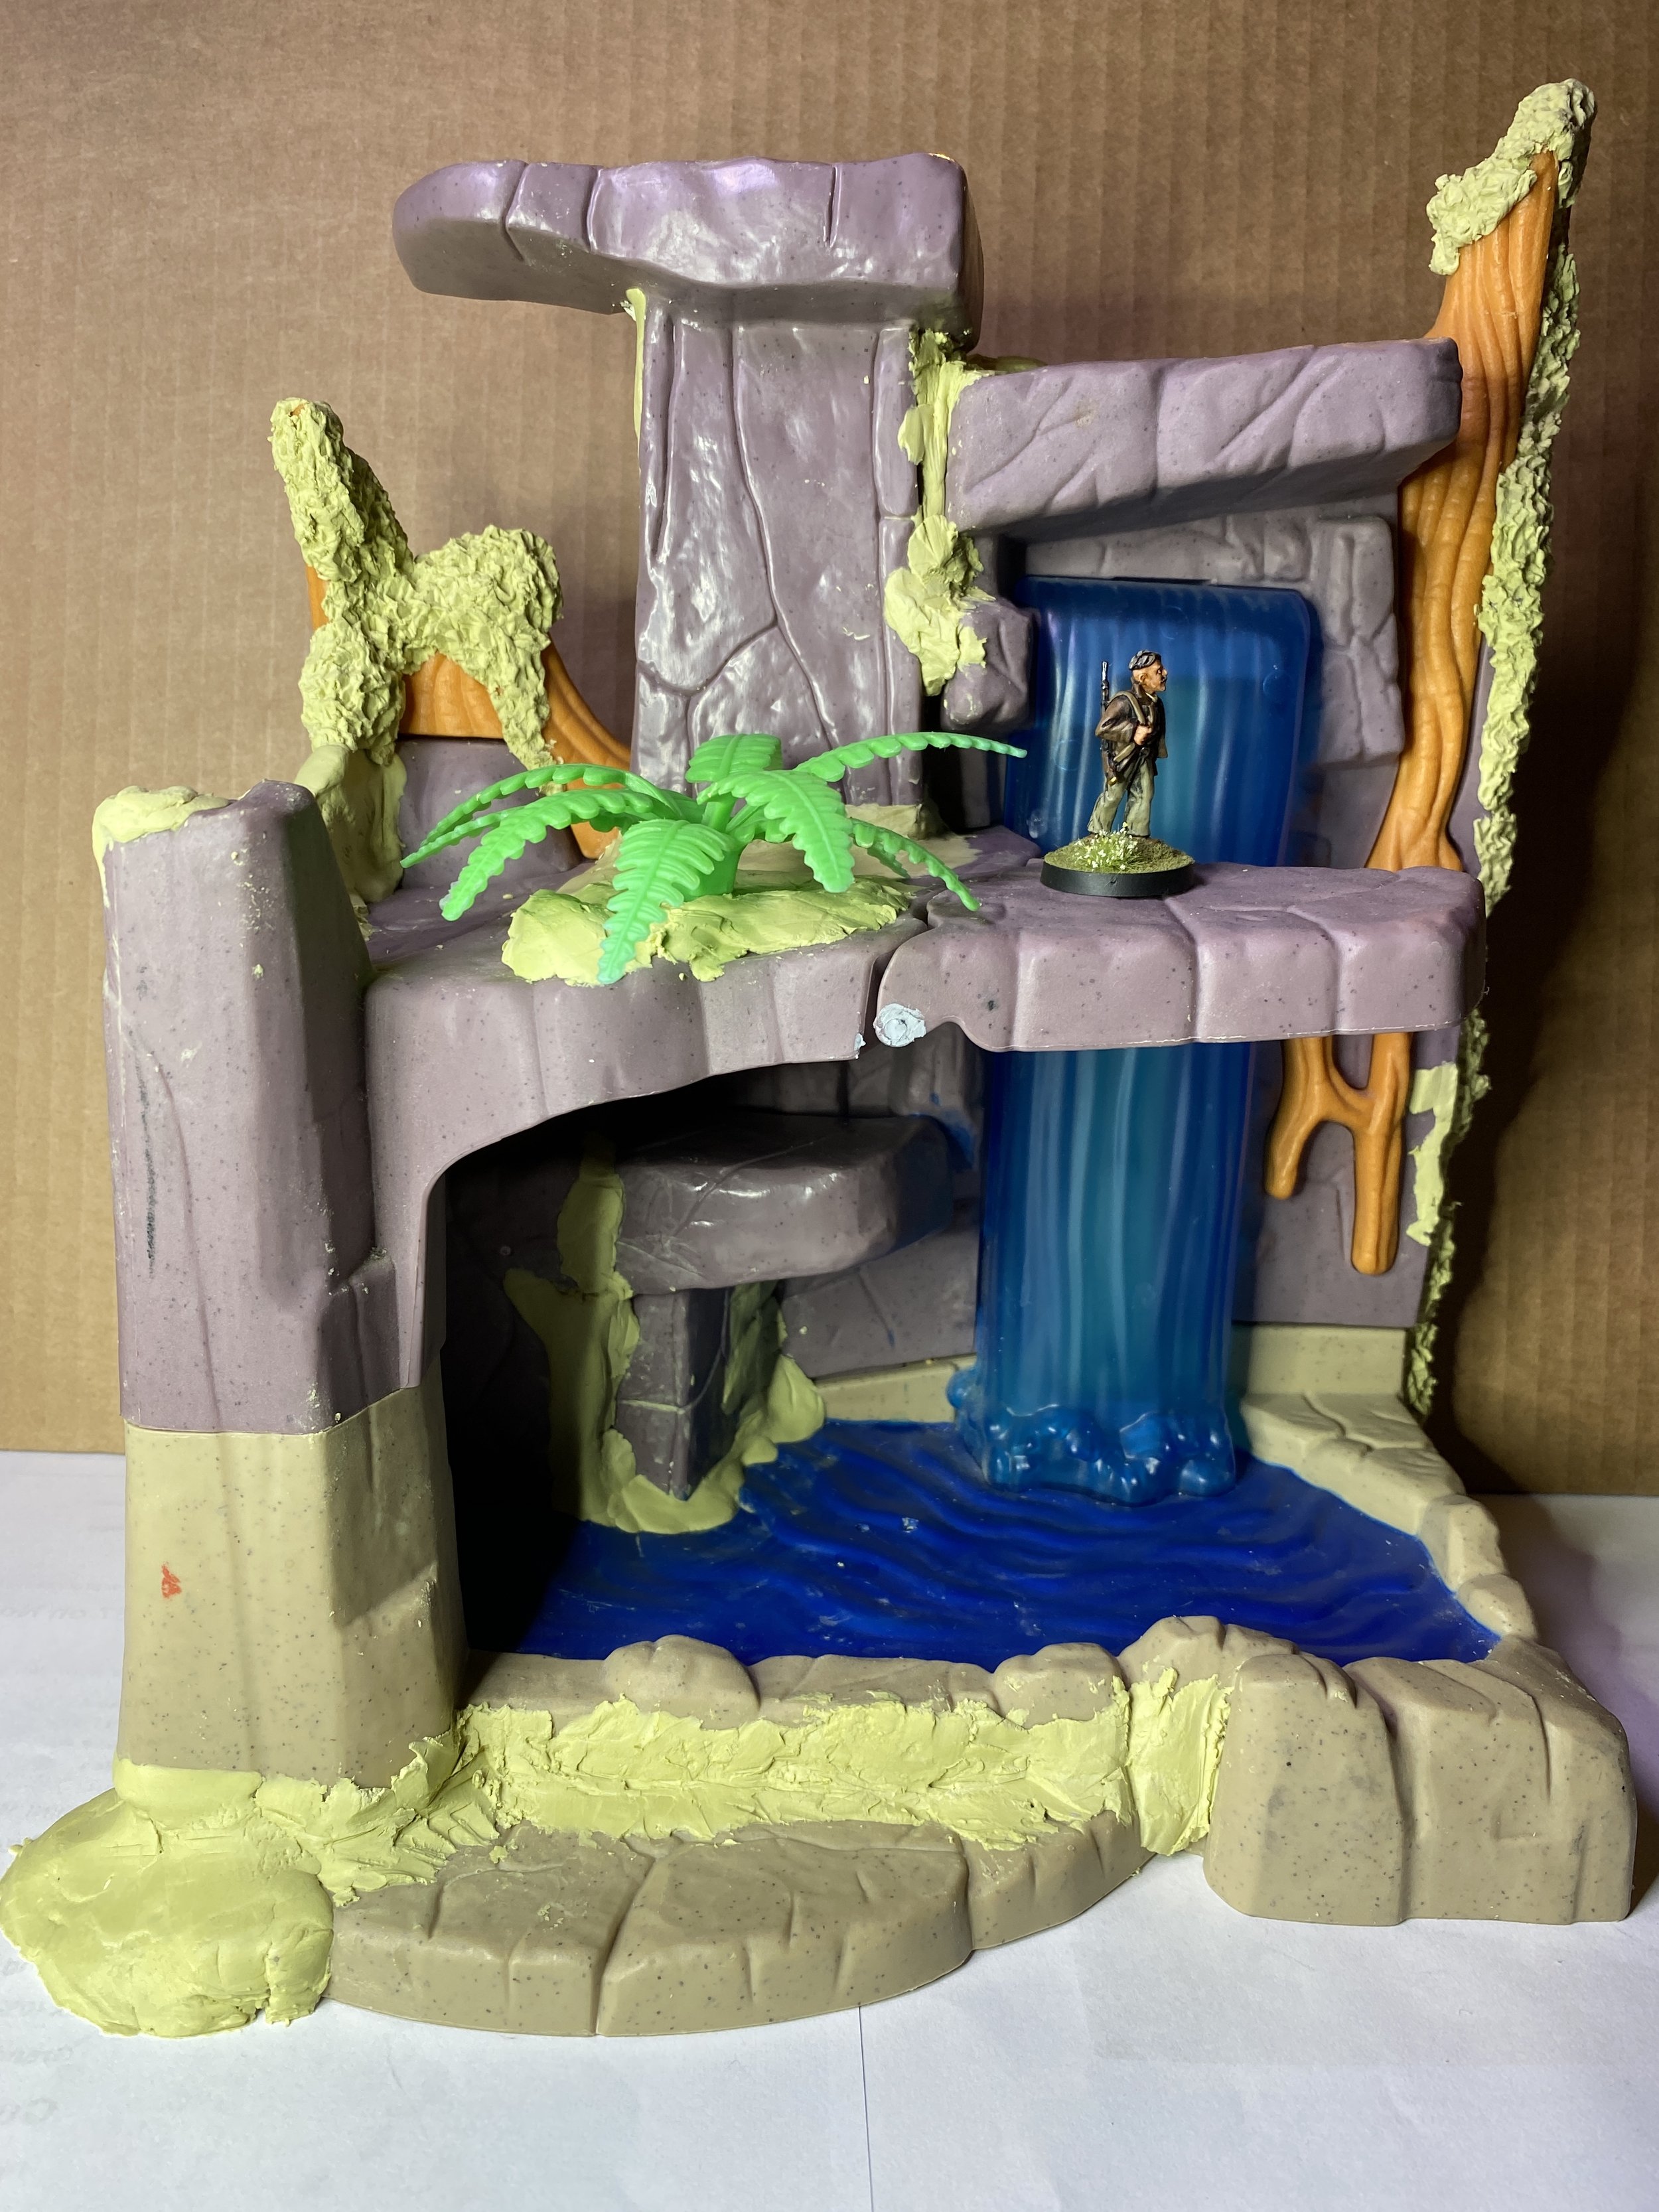
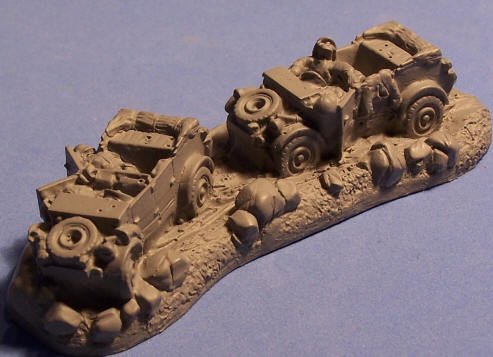
I have been repurposing toys for use with my 28mm figures for years. I get them as broken cast-off toys at the swap meet, and so they are cheap. They offer me interesting terrain pieces, and I enjoy the repurposing process. When I decided to do a collection that involves the Gordon Institute’s search for the origins of the legend of King Kong, I thought that the Fisher Price Gorilla Mountain would make a great entrance to the realm of Kong. Several years ago these playsets were relatively common at the swap meet and tended to sell for between $3 and $5 each. I bought two… one to serve as the front of the entrance (the native village side) and one to serve as the reverse side (the Kong side of the island). I had a lot of fun doing it and in the process decided that the playset’s leaf canopy could be repurposed to serve as the leaf canopy for the Ewok trees which come with only trunks… the Ewok village was once relatively cheap at the swap meet, too (about $10 each prior to Covid). I have several of them, but that’s a story for another day. Over time I bought several more Gorilla Mountain playsets just for the leaf canopy, and last week I bought another, but in cutting off the canopy I decided I really liked the waterfall. So the King Kong entrance led me to the Ewok tree canopy and that brings me to this posting which is the waterfall that is part of the Gorilla Mountain playset that I hadn’t paid much attention to until I was taking the playset apart yesterday and decided I would purpose the now cut up waterfall section and see what I could do with it. I had added a couple more large stone sections that came from a smaller toy that was probably Fisher Price as well… I added those to fill in some empty space created when I removed the leaf canopy. As is pretty common with these projects, I used a lot of Milliput to fill in gaps, provide strength and cover things destroyed in the removal of the leaf canopy. I haven’t painted it yet, but I think it’s going to be a very interesting piece of terrain when done… I like waterfalls.
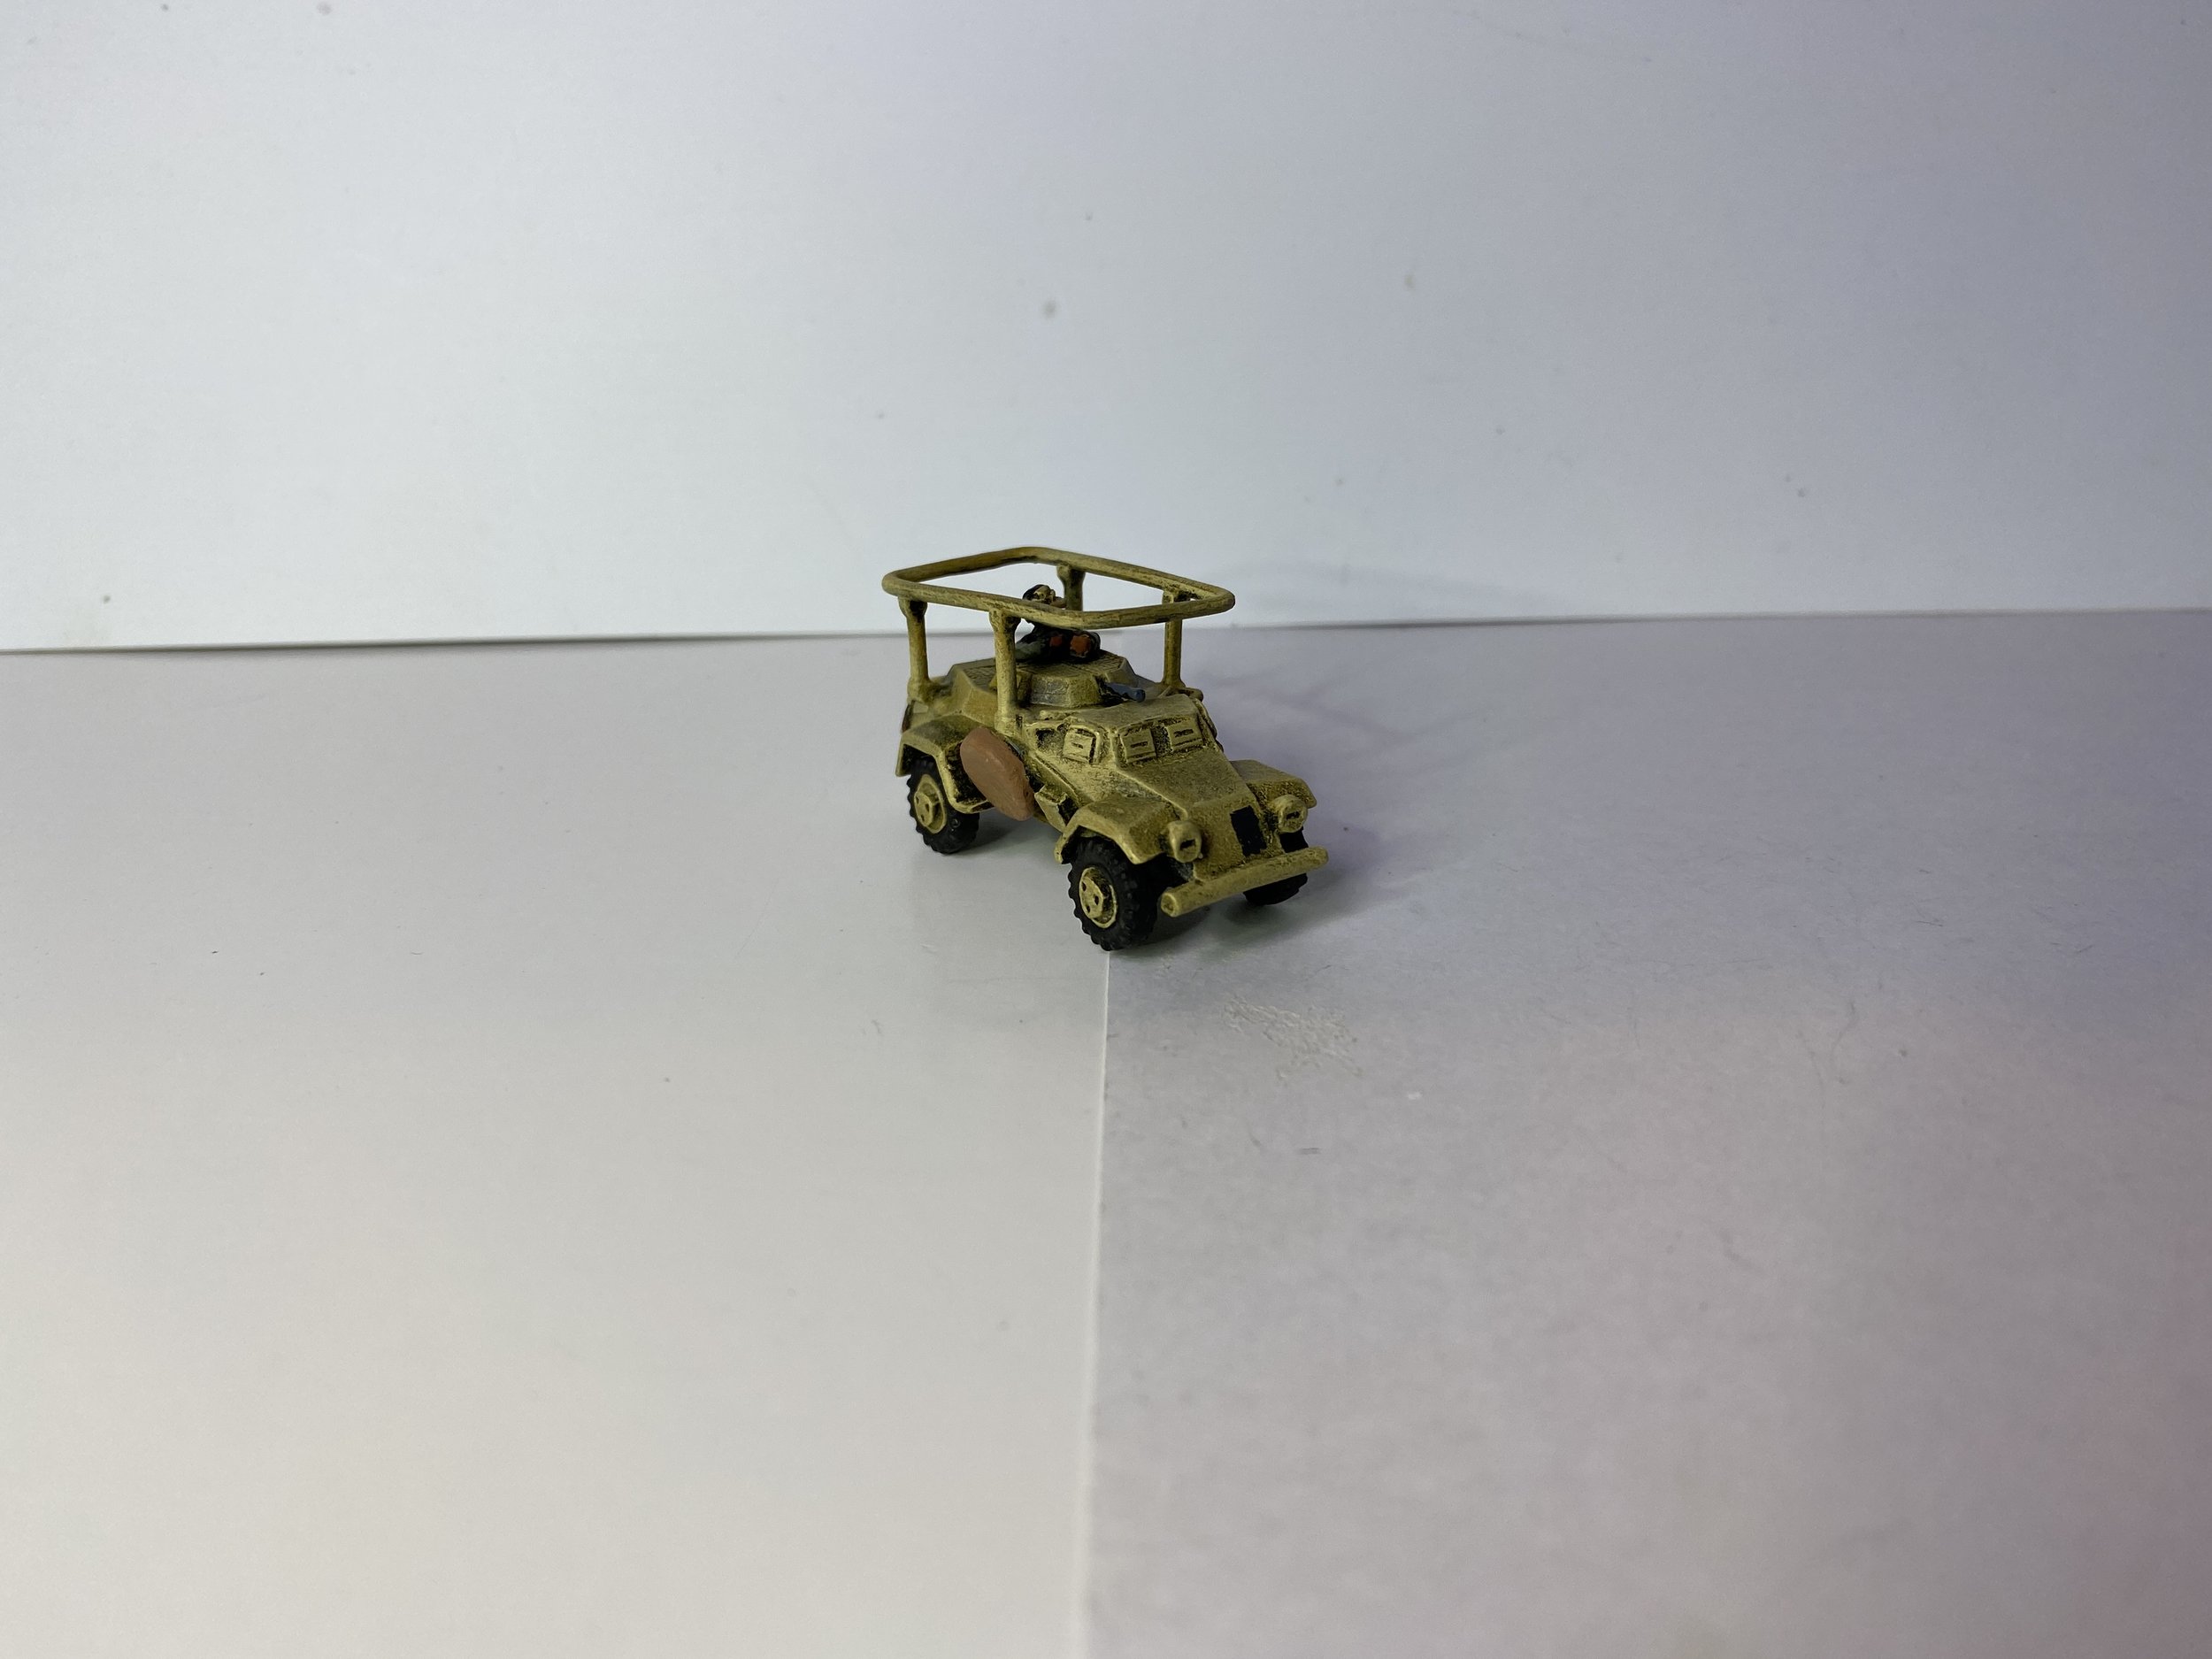
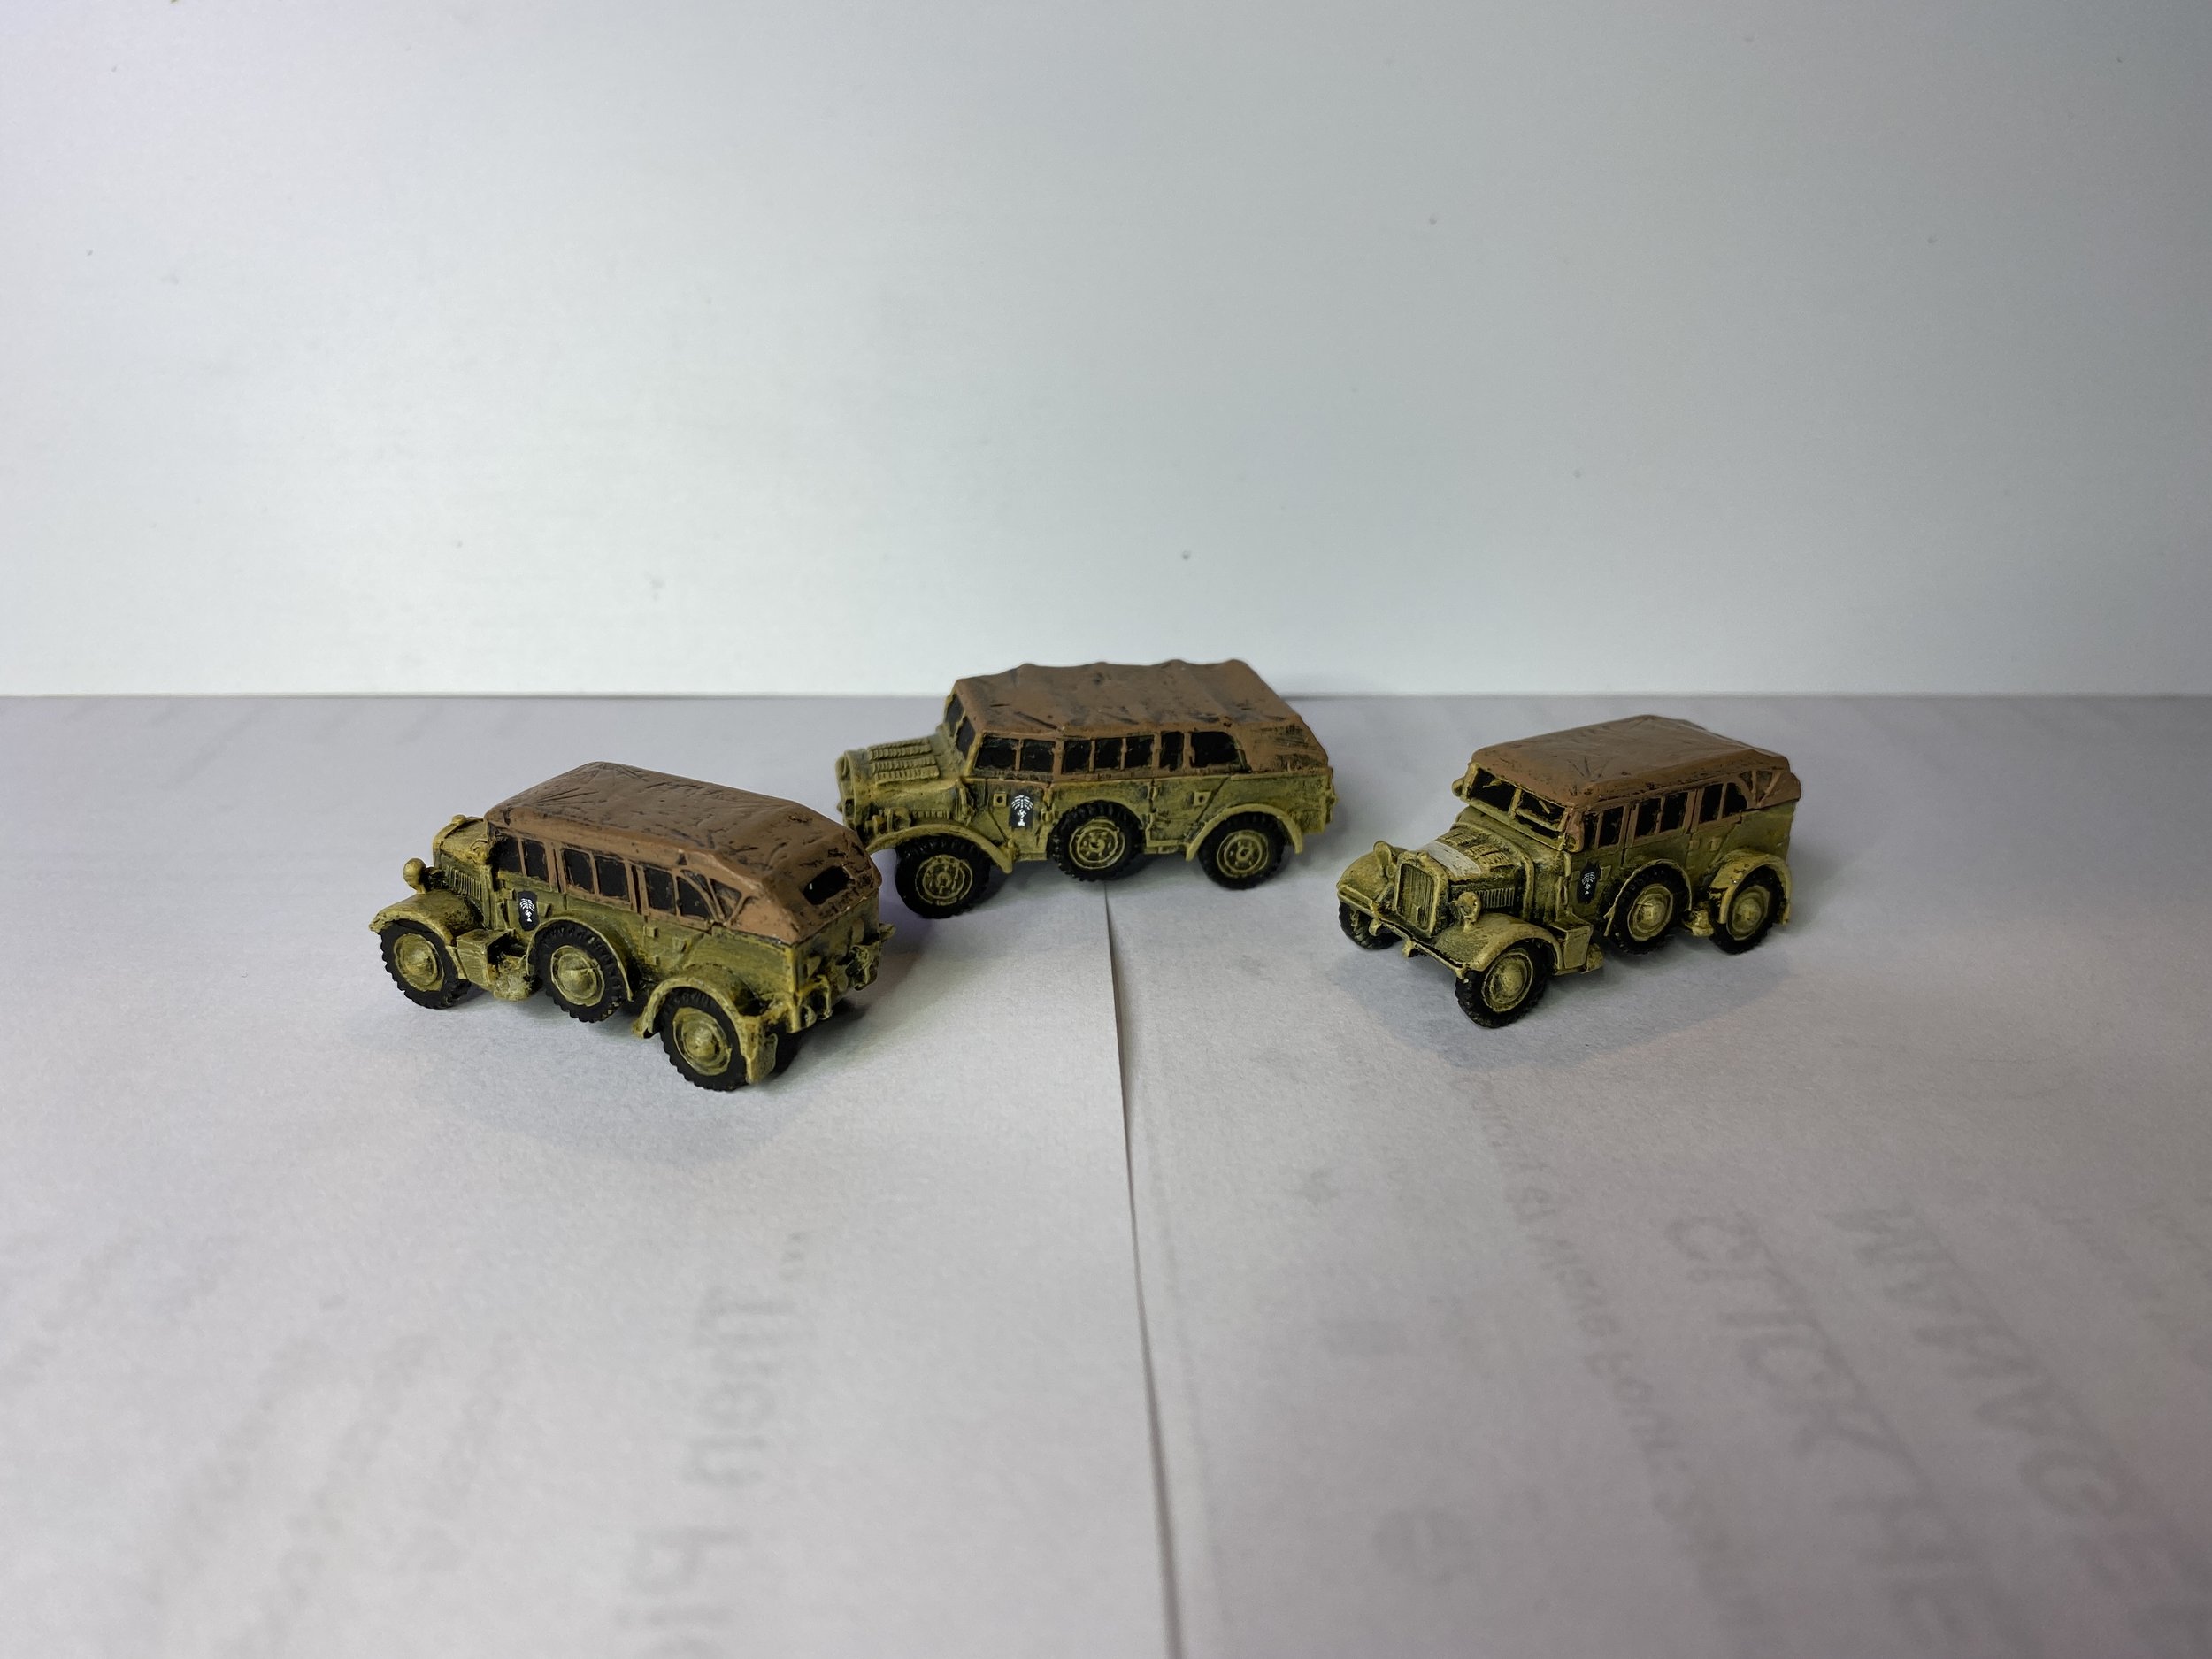
With that detour taken and completed I returned to my 15mm North Africa collections and the Germans. I began with two Pz. I command tanks/Panzerbefehlswagon and moved on to staff cars… one Horch Kfz 69/70 heavy field car and two Kfz 16 light field cars. These are all by Command Decision. The one unique thing I did with one of the Kfz 16 light field cars is add a wide white strip across the hood for air identification. I got the idea from a great book I purchased this week at Brookhurst Hobbies. The book is entitled D.A.K. Profile Guide Afrika 1941-1943. I have a lot of books on German equipment, but this is probably the best I’ve seen for North Africa.
Next on my list was to begin the painting of my German armored cars. I began with the painting of nine Sd Kfz 222 by Command Decision. At the same time I painted three of the Peter Pig resin destroyed Italian 13/40 medium tanks that I had previously modified. This was actually a test case for the color I was thinking about using for the Italian vehicles in this collection… Vallejo Model Color Desert Yellow highlighted with Beige. I liked it.
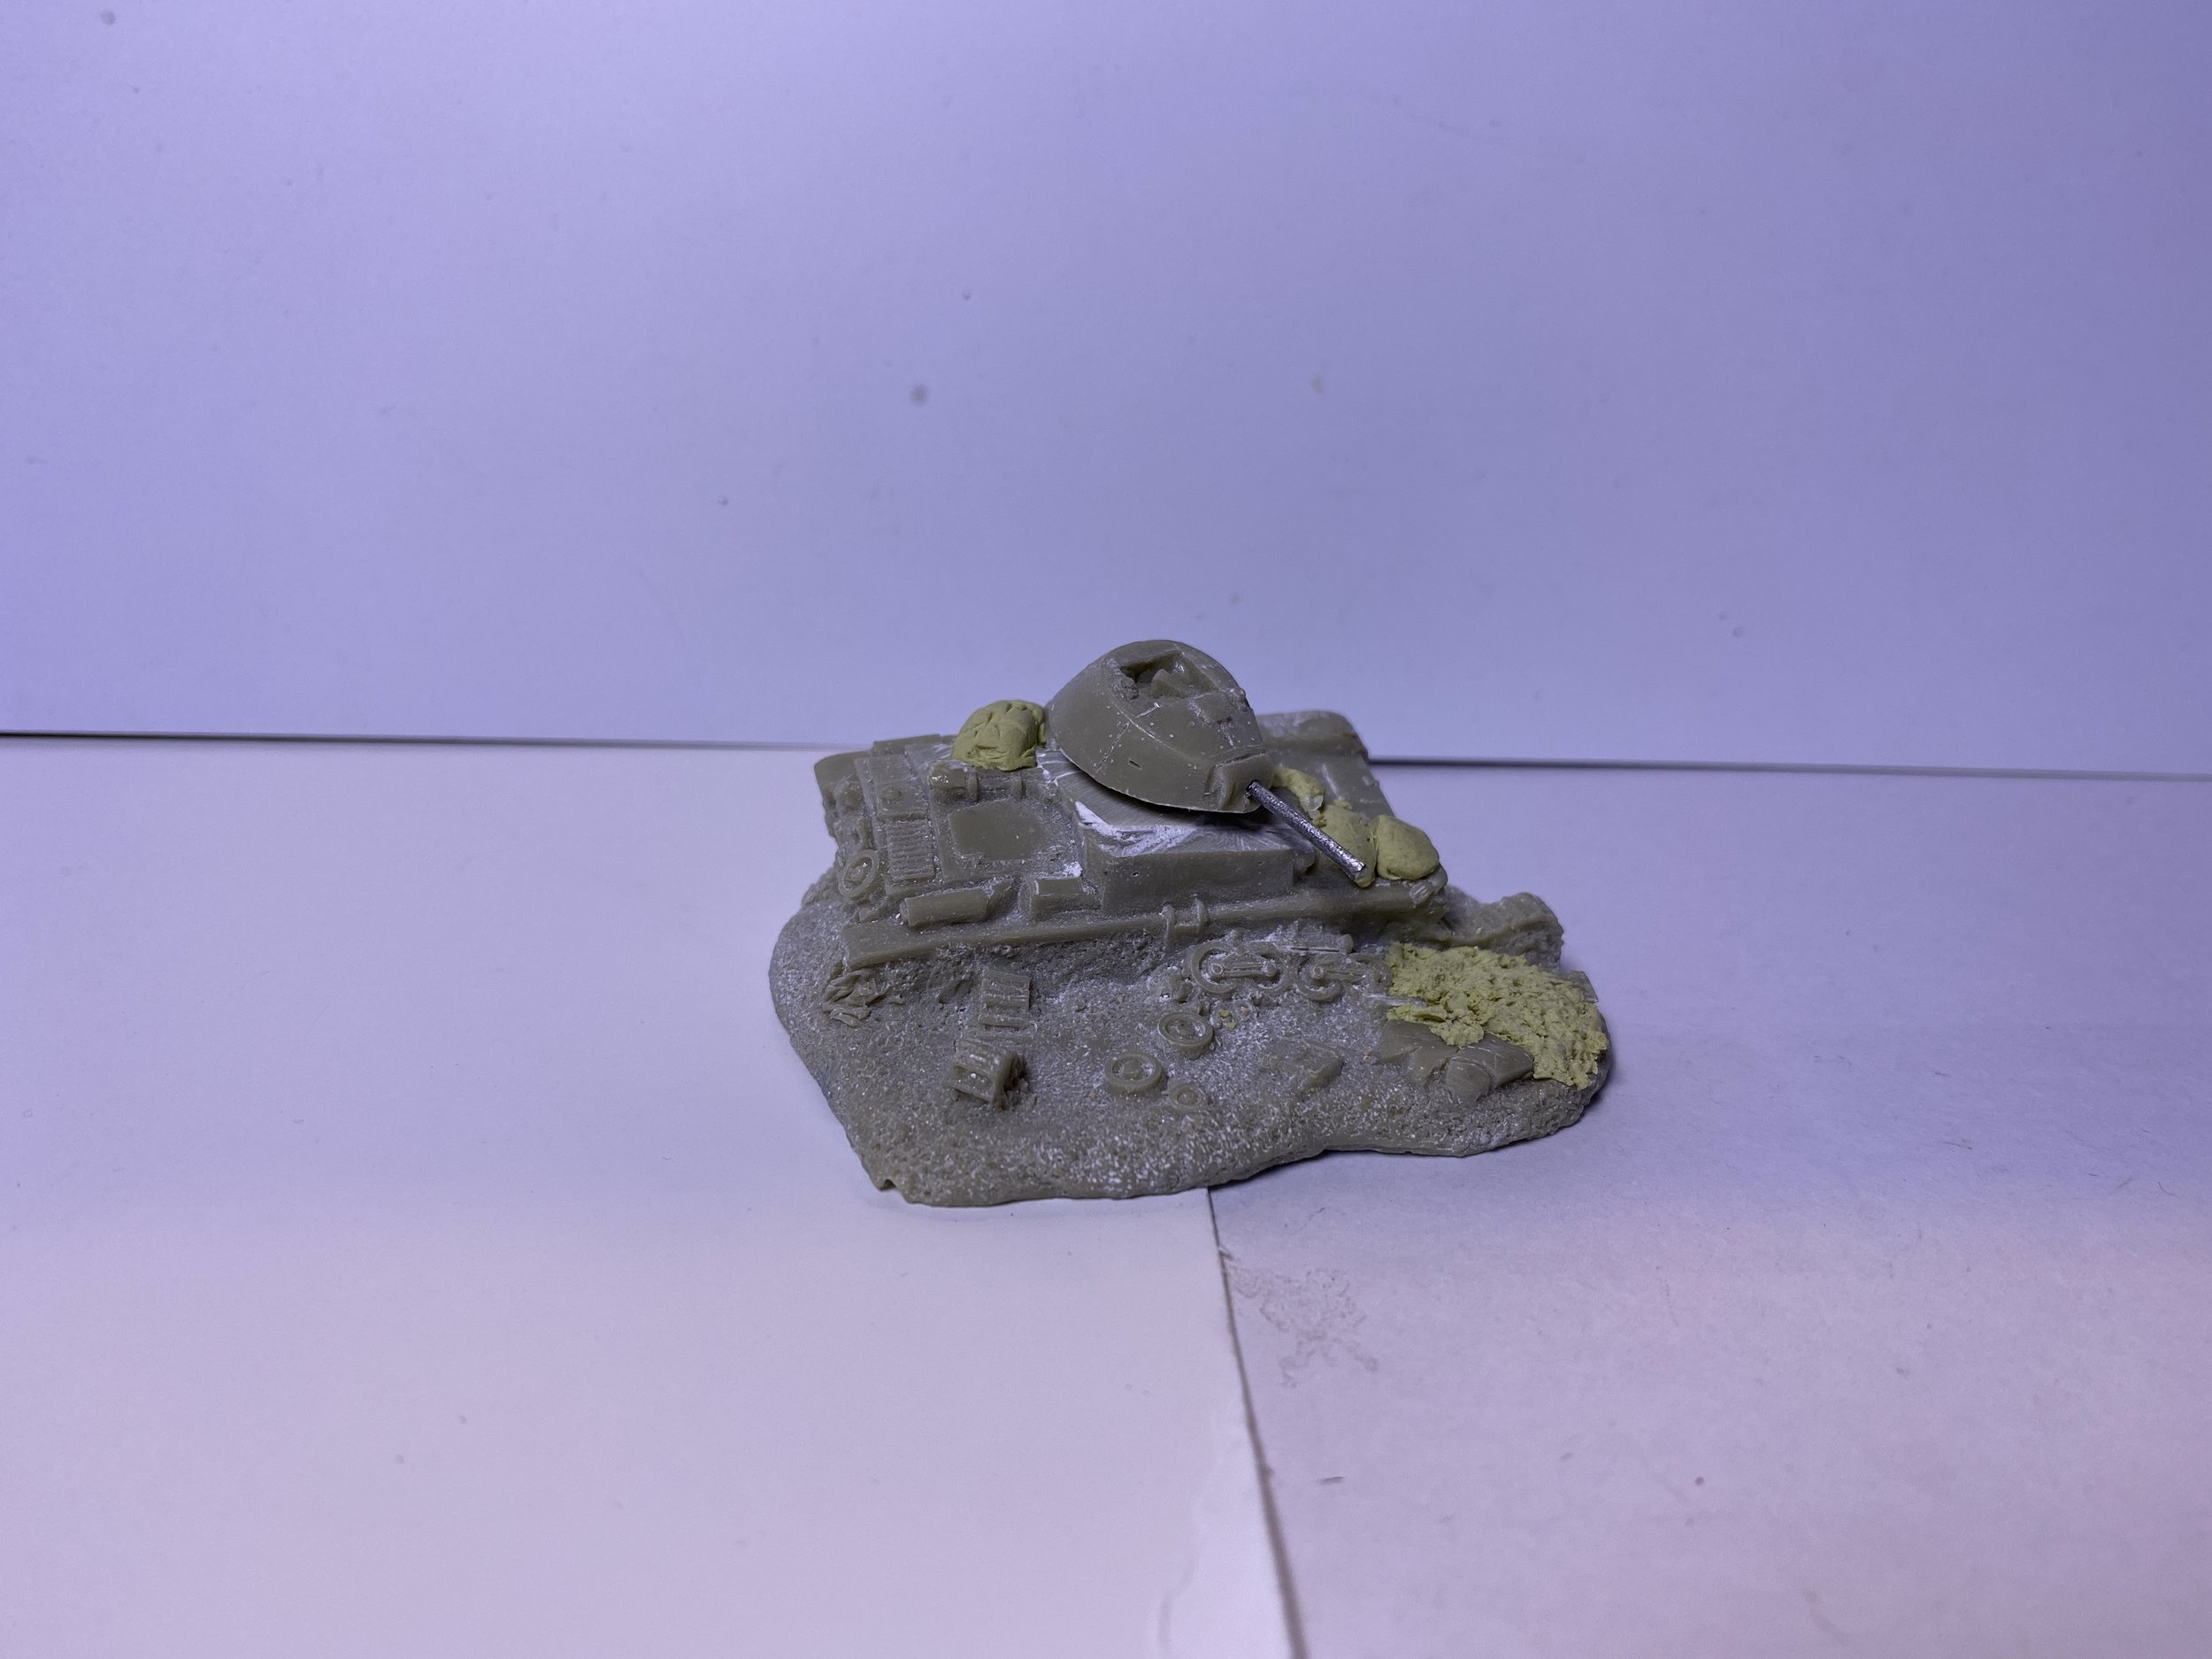
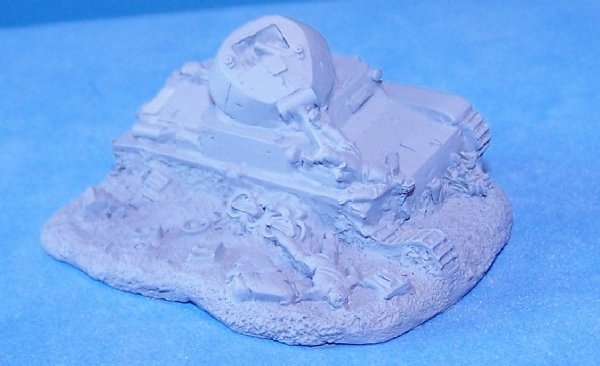
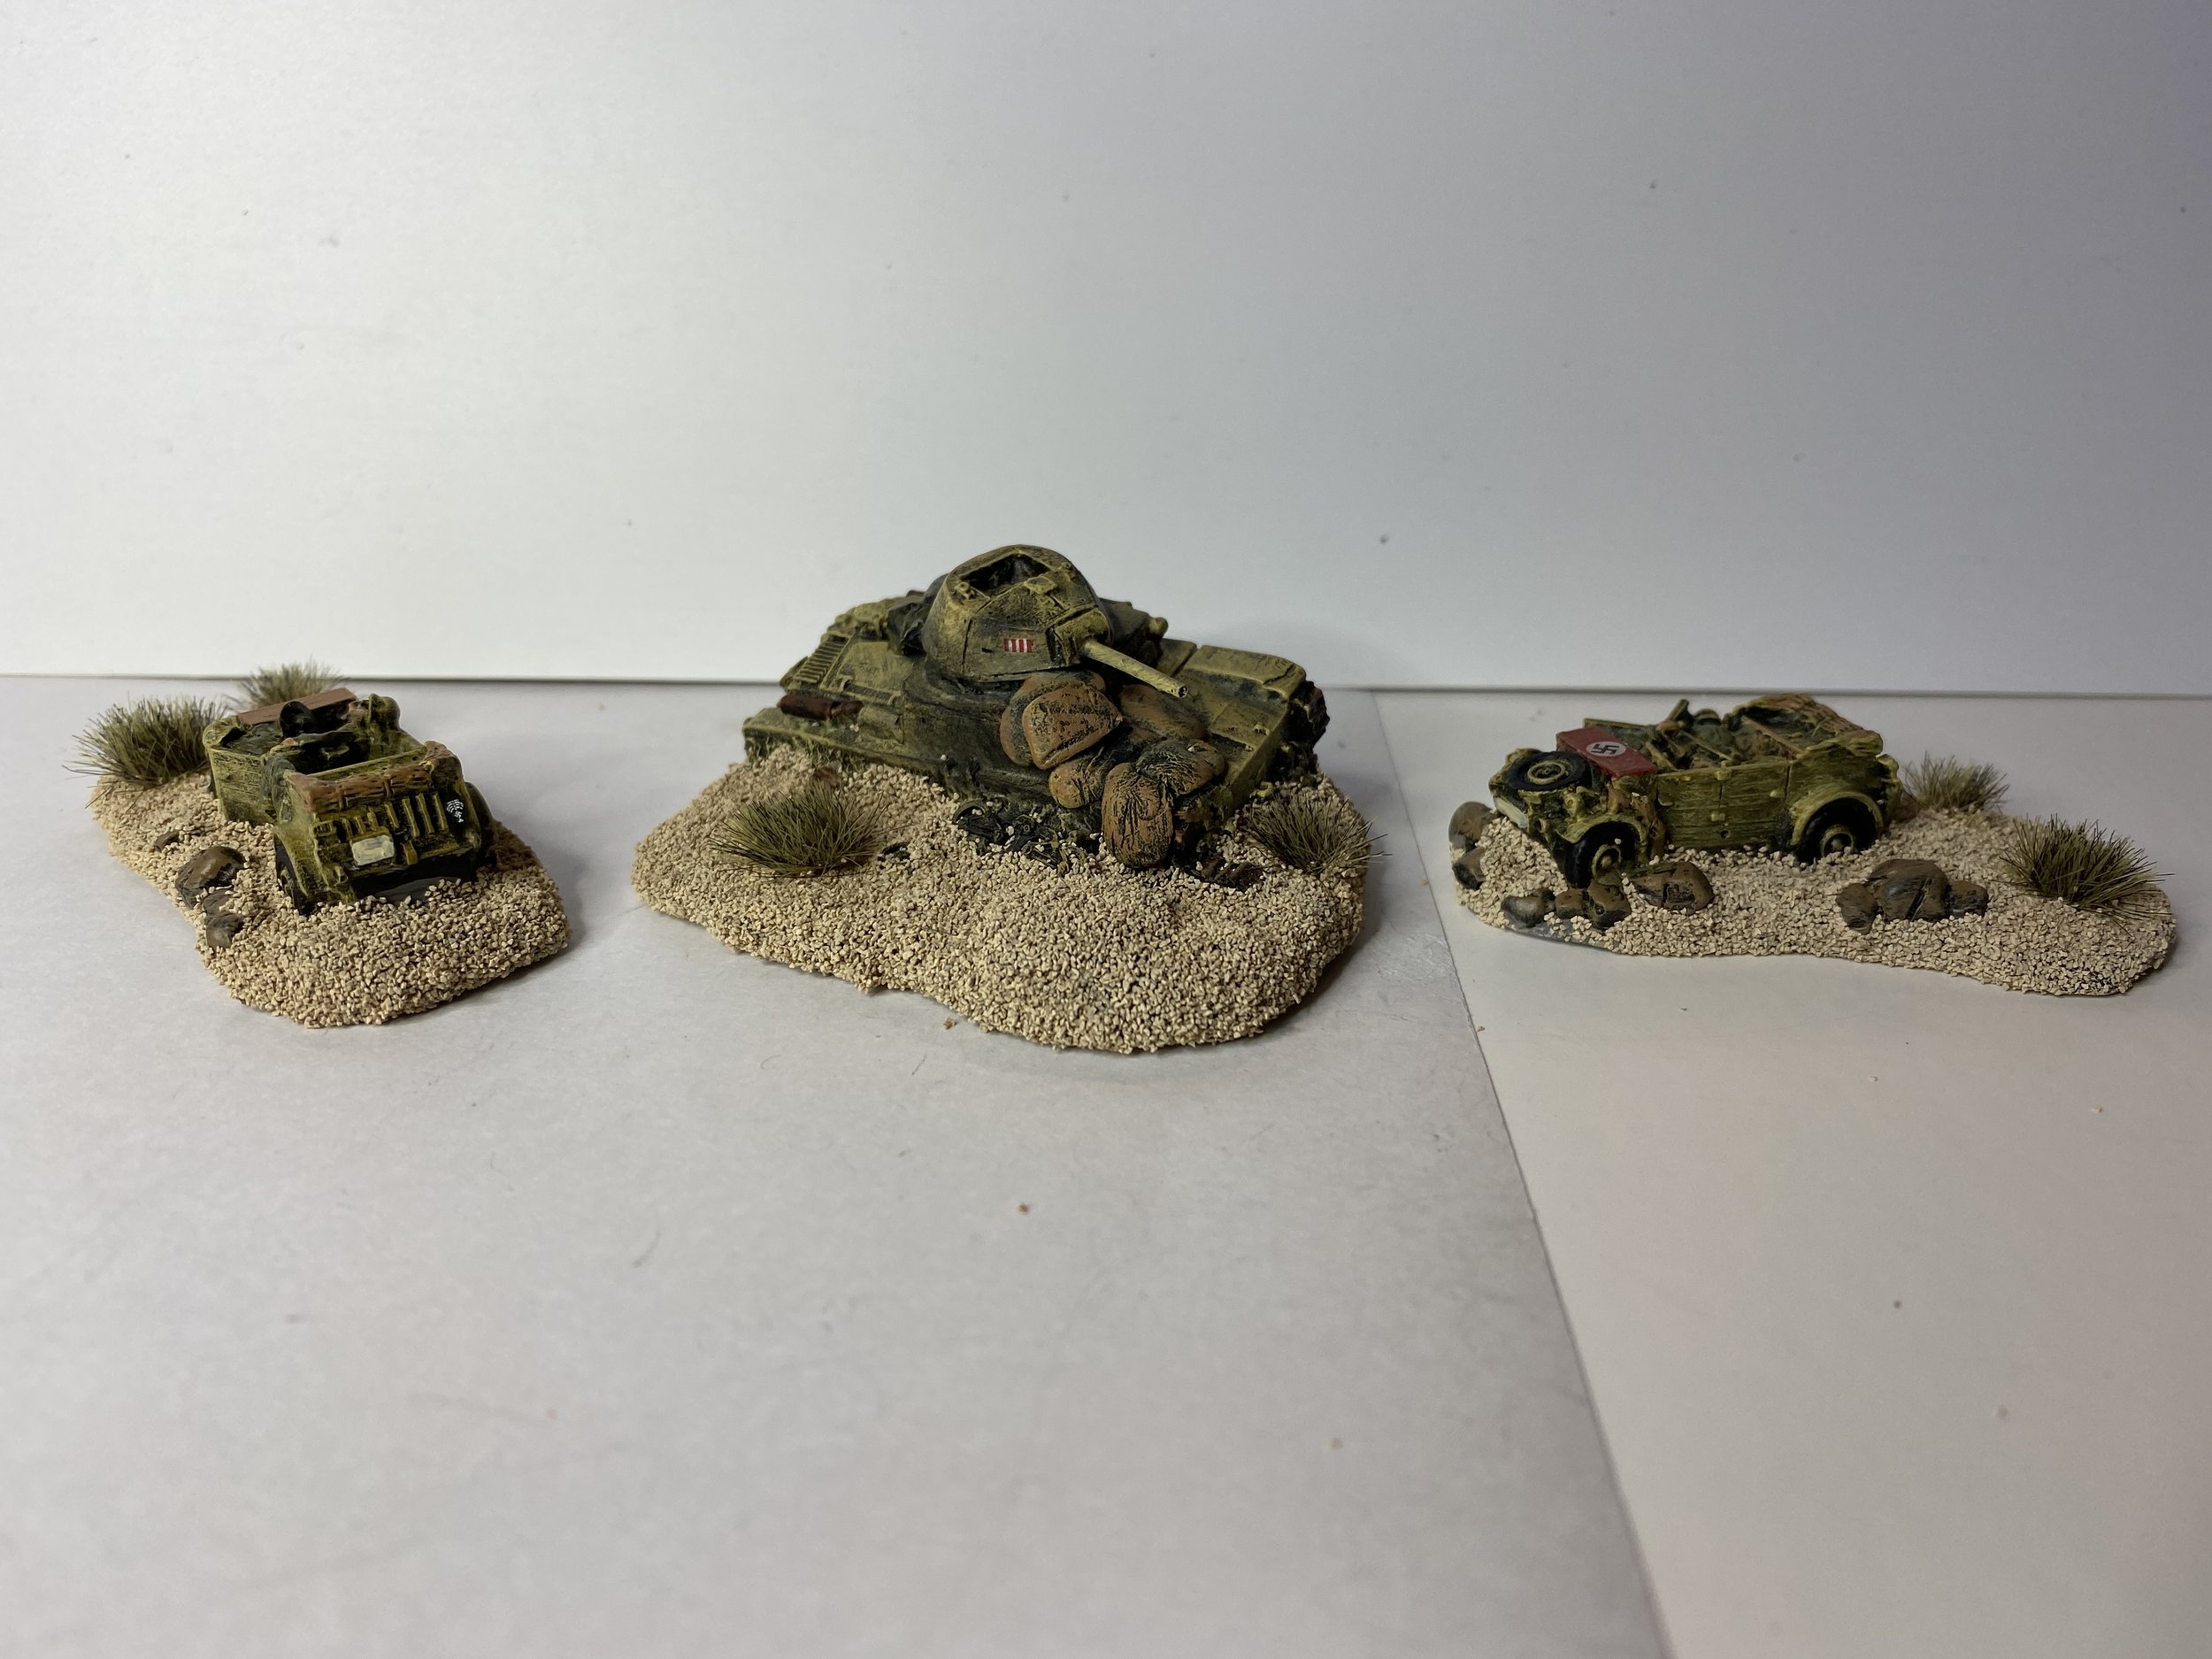
With those completed, I still had another day left in my workbench week, so I decided I would turn my attention to more Peter Pig destroyed vehicles… Kubelwagens and one last 13/40. I got a hot deal on these because they were broken which is to say that the base they were on was broken thus providing two separate Kubelwagens instead of two on the same base. I extended the broken bases with Milliput thus giving them a more finished look. Quite honestly, I prefer them separate. I then modified the fourth Peter Pig 13/40… cut off the turret and reset it; removed the dead and added a new gun tube; added some Milliput sandbags and a bedroll. Once that was done, I gave it a paint job to match the previous three.


November 14, 2021
This week the workbench was completely devoted to my 15mm WW2 North Africa collection. I began by painting two packs of resin vehicles by Flames of War/blister pack Flames of War. I did two Steyr Kfz 70 trucks and two Sdkfz 11 prime movers… back in the day, they came two to a blister pack.
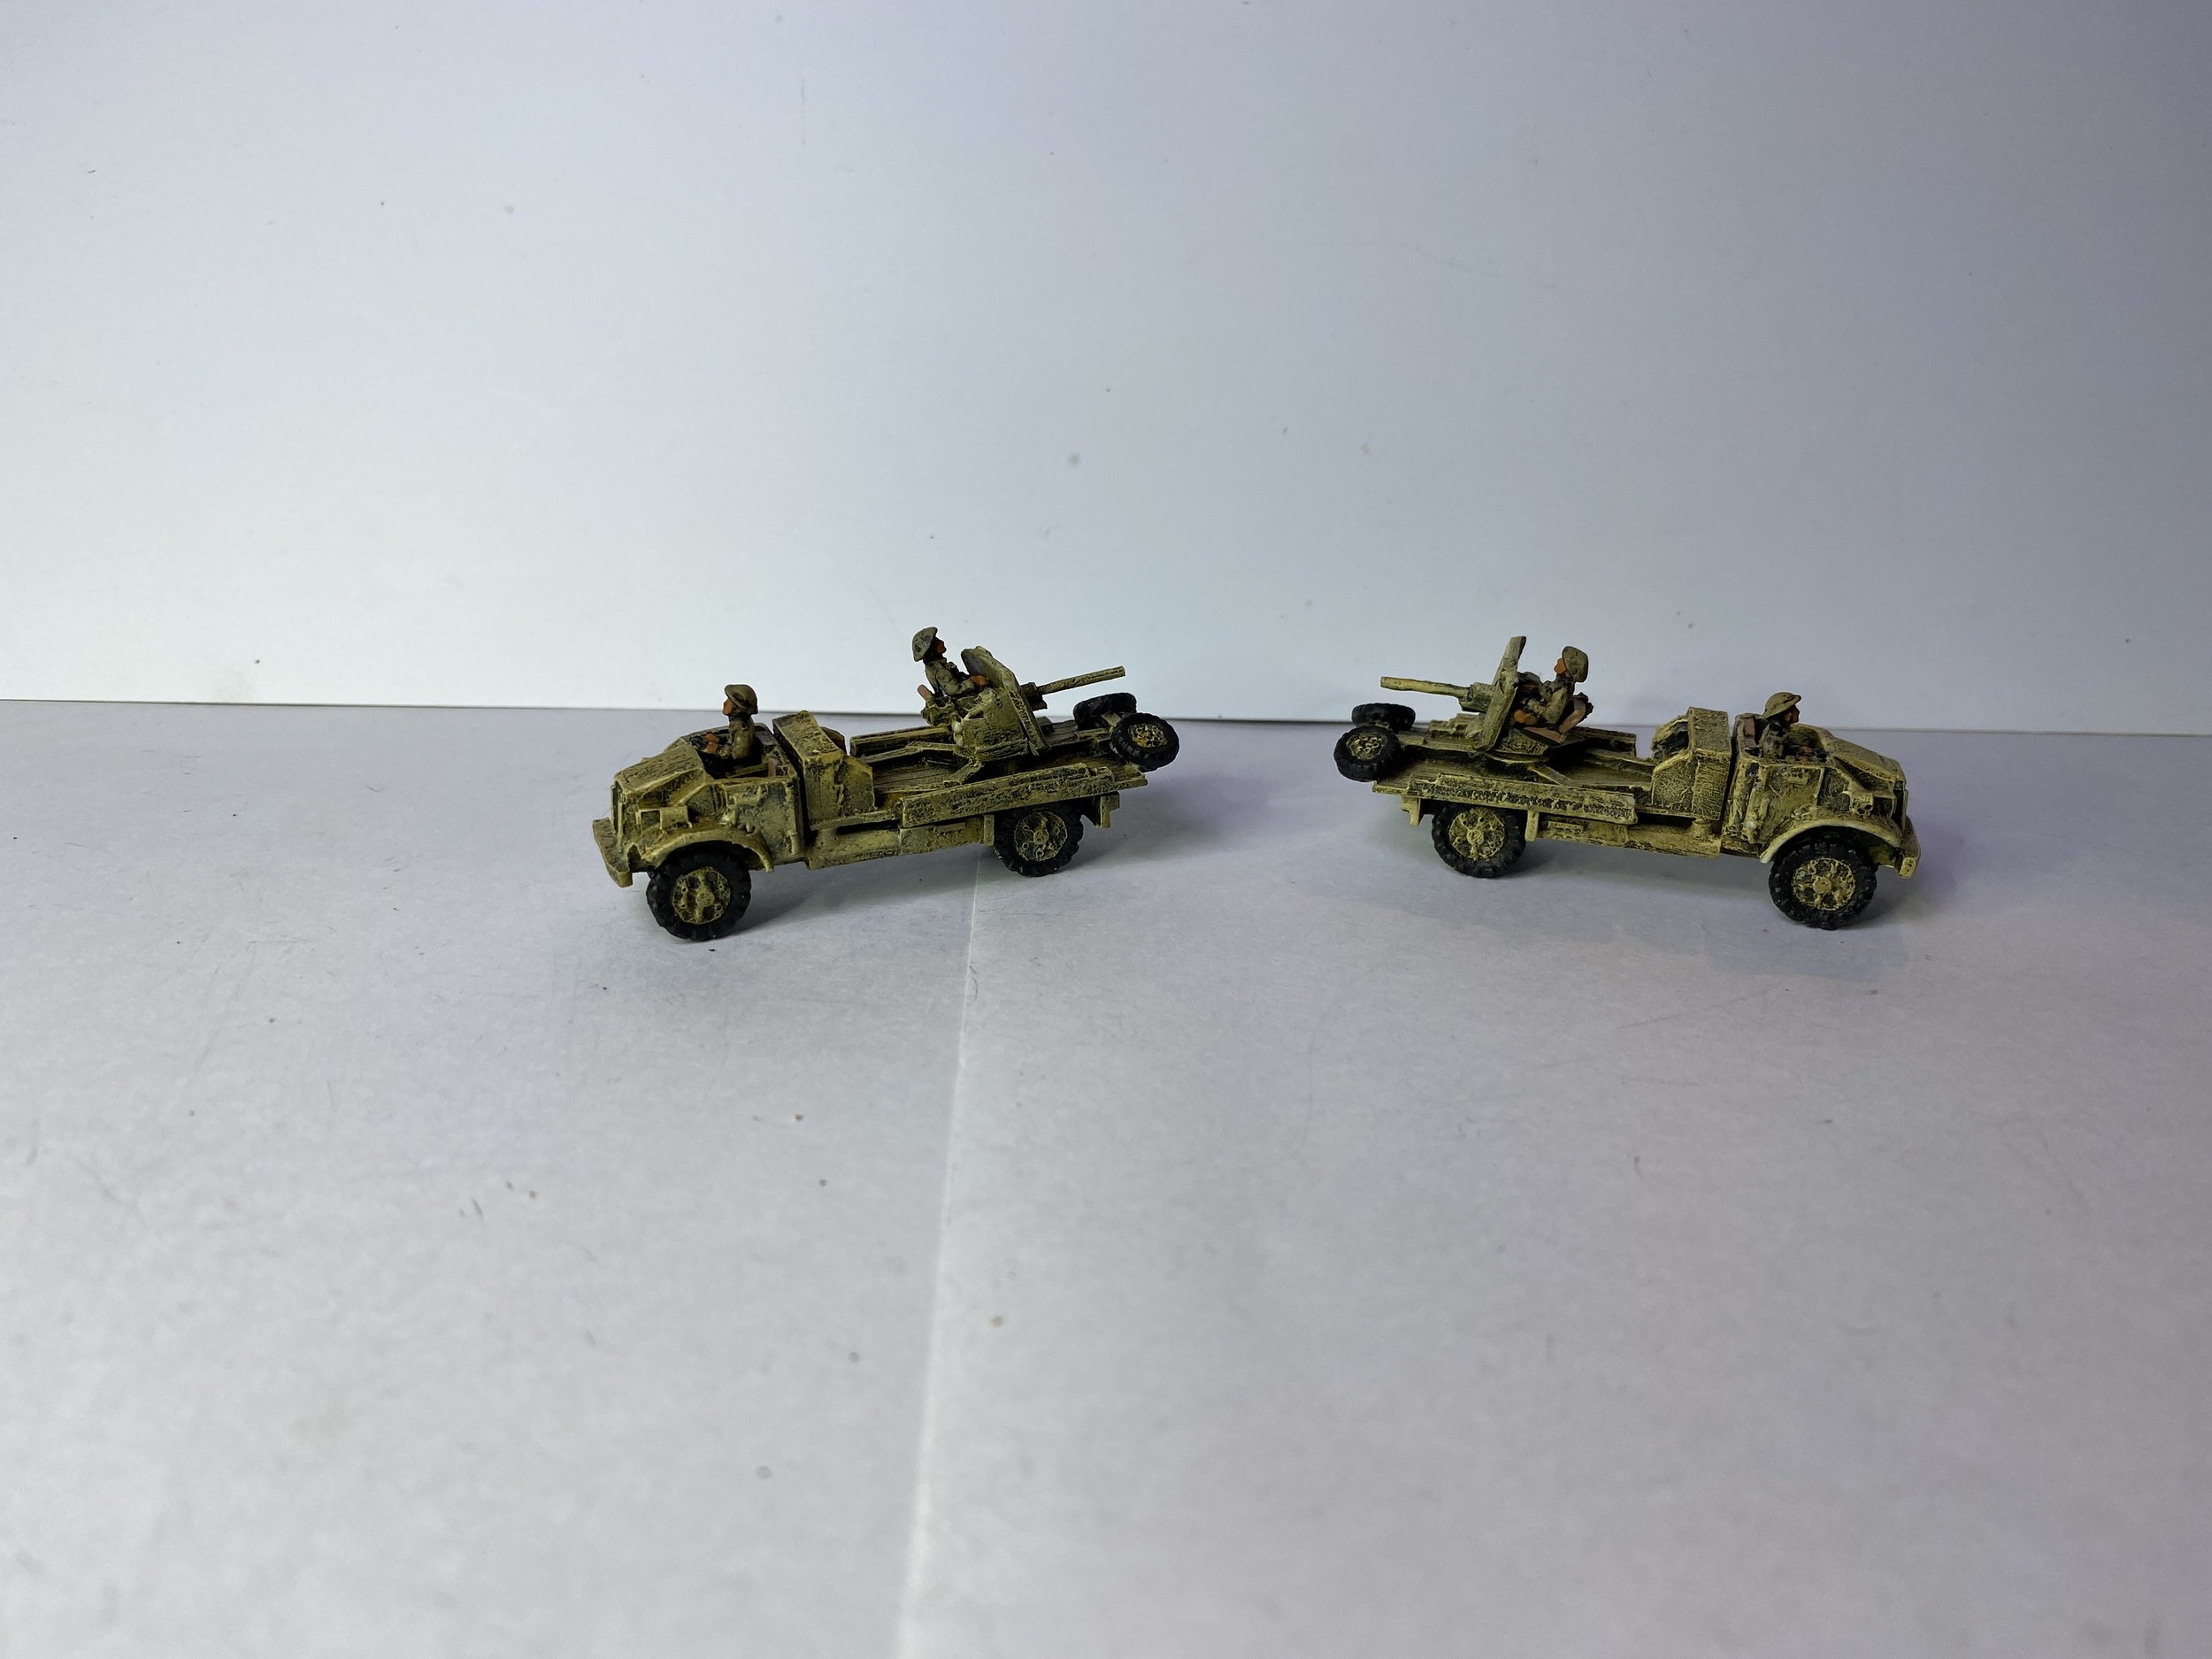
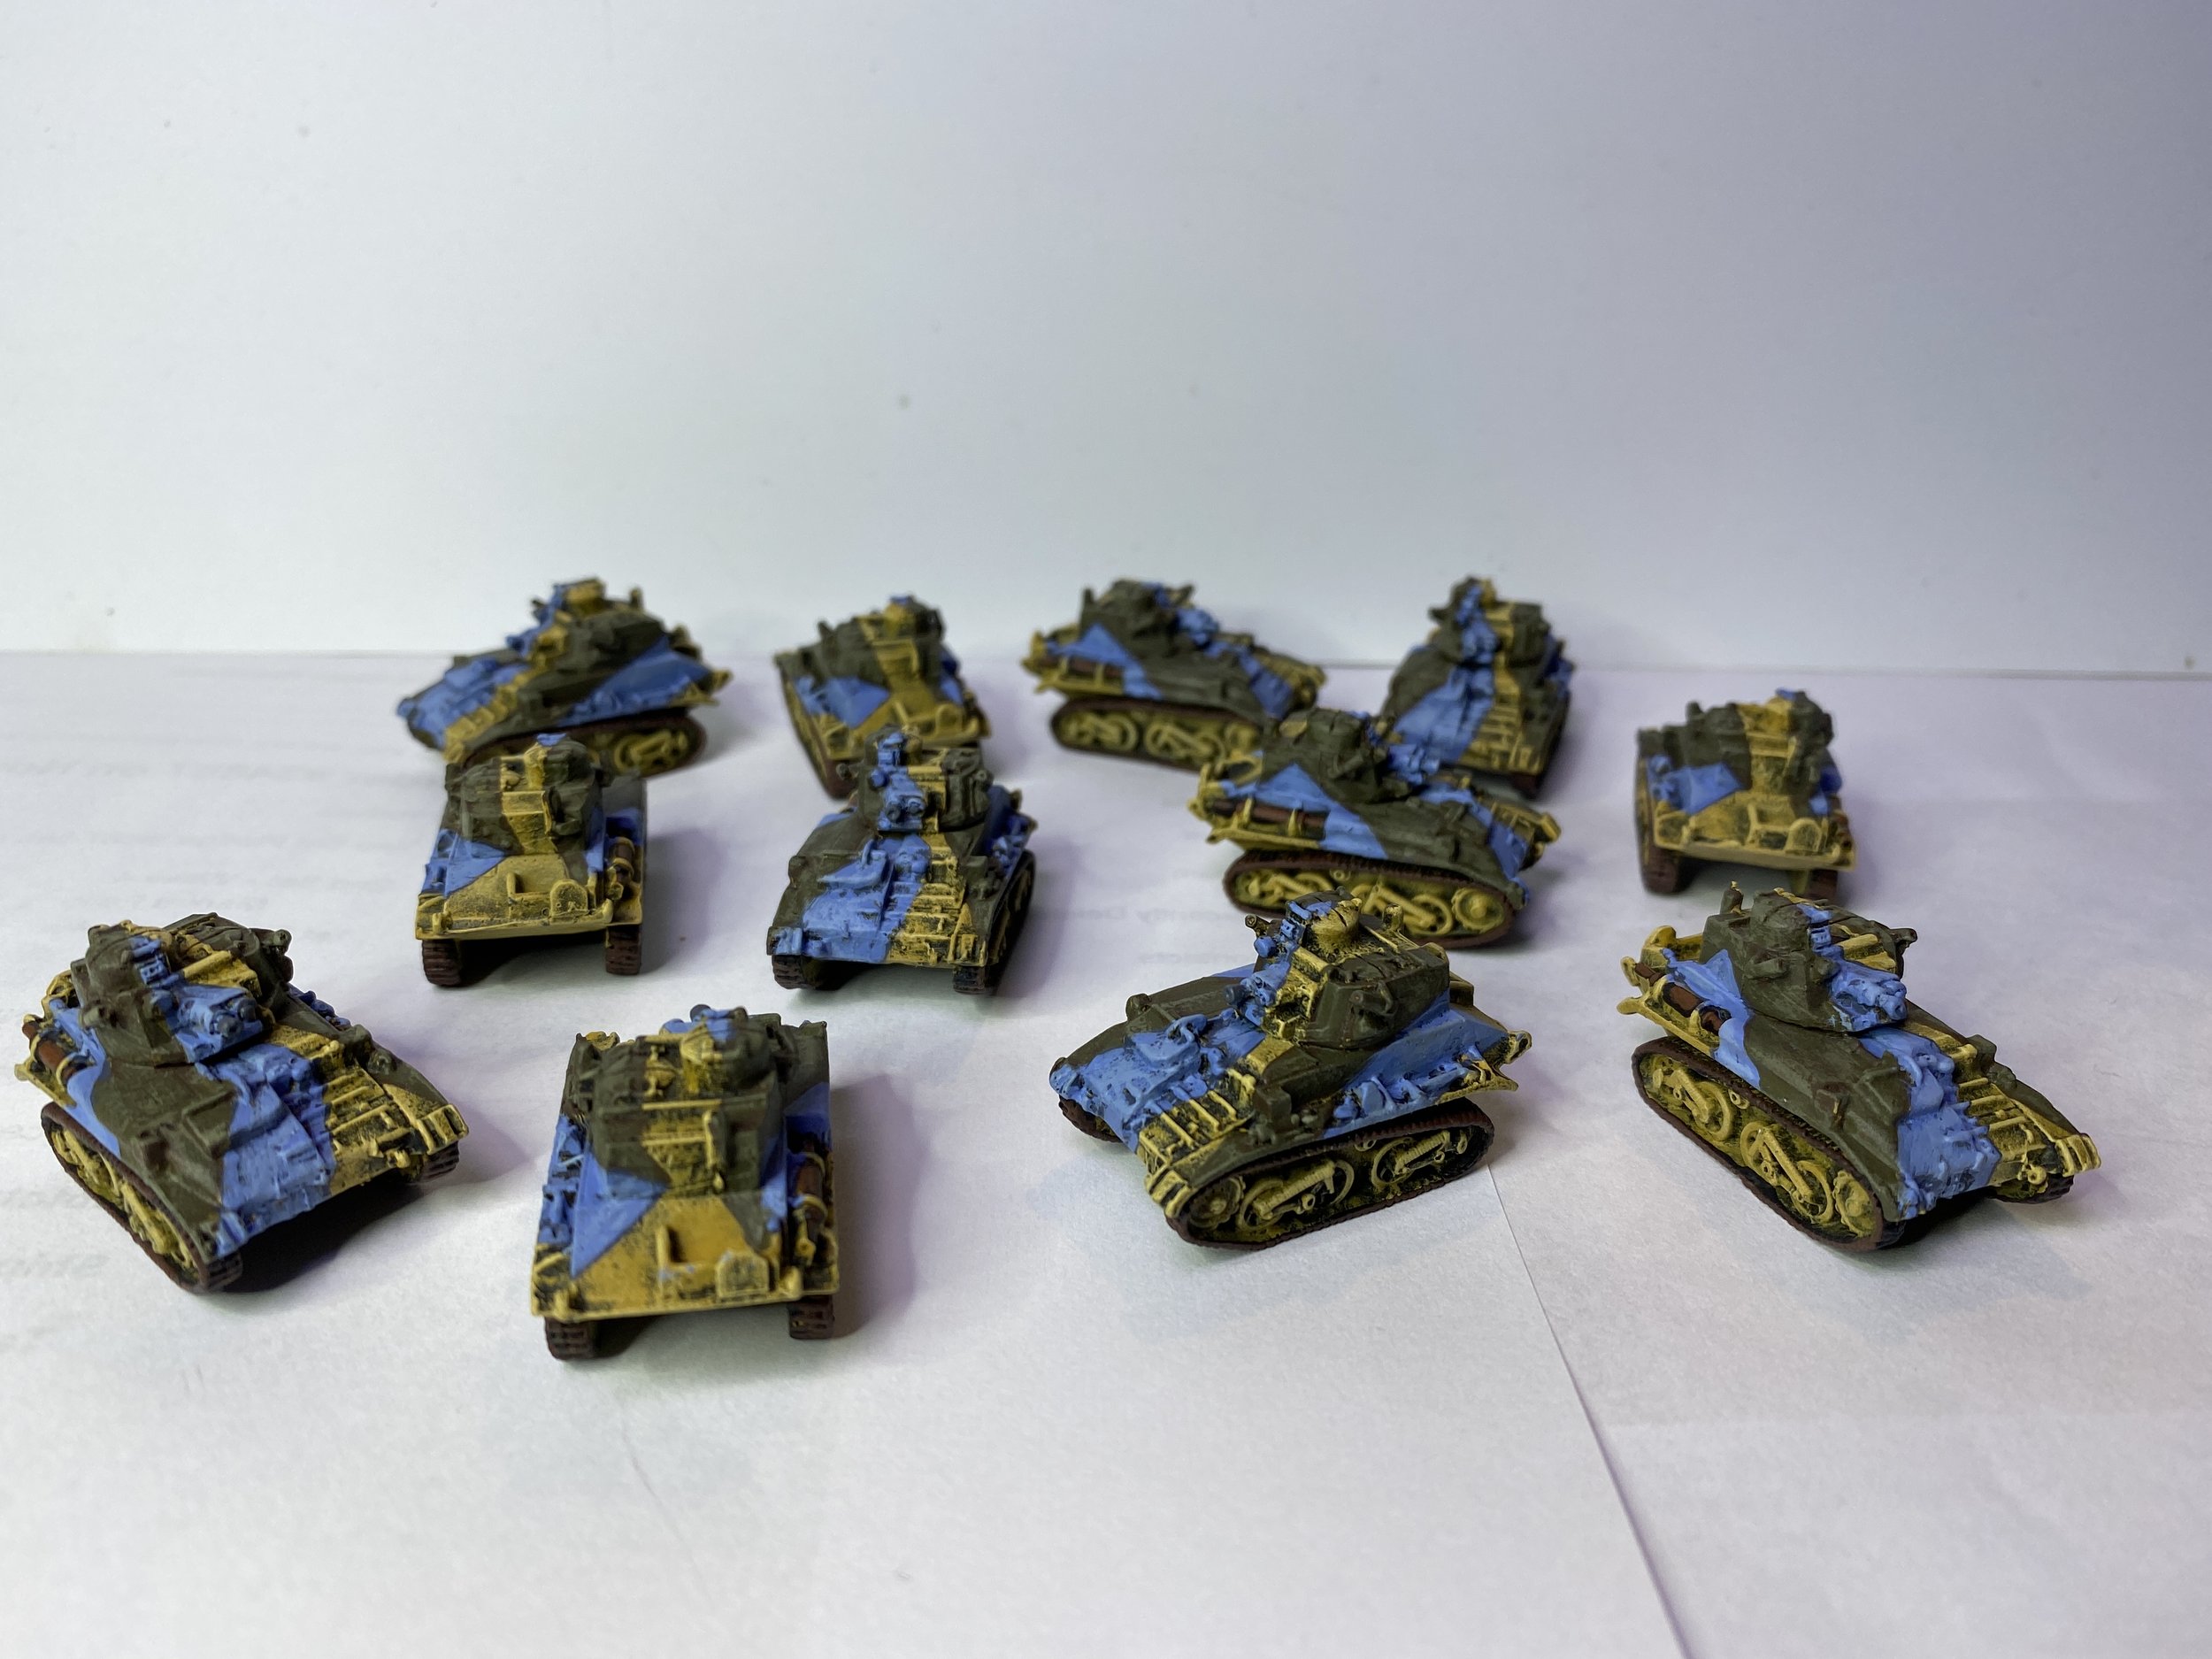
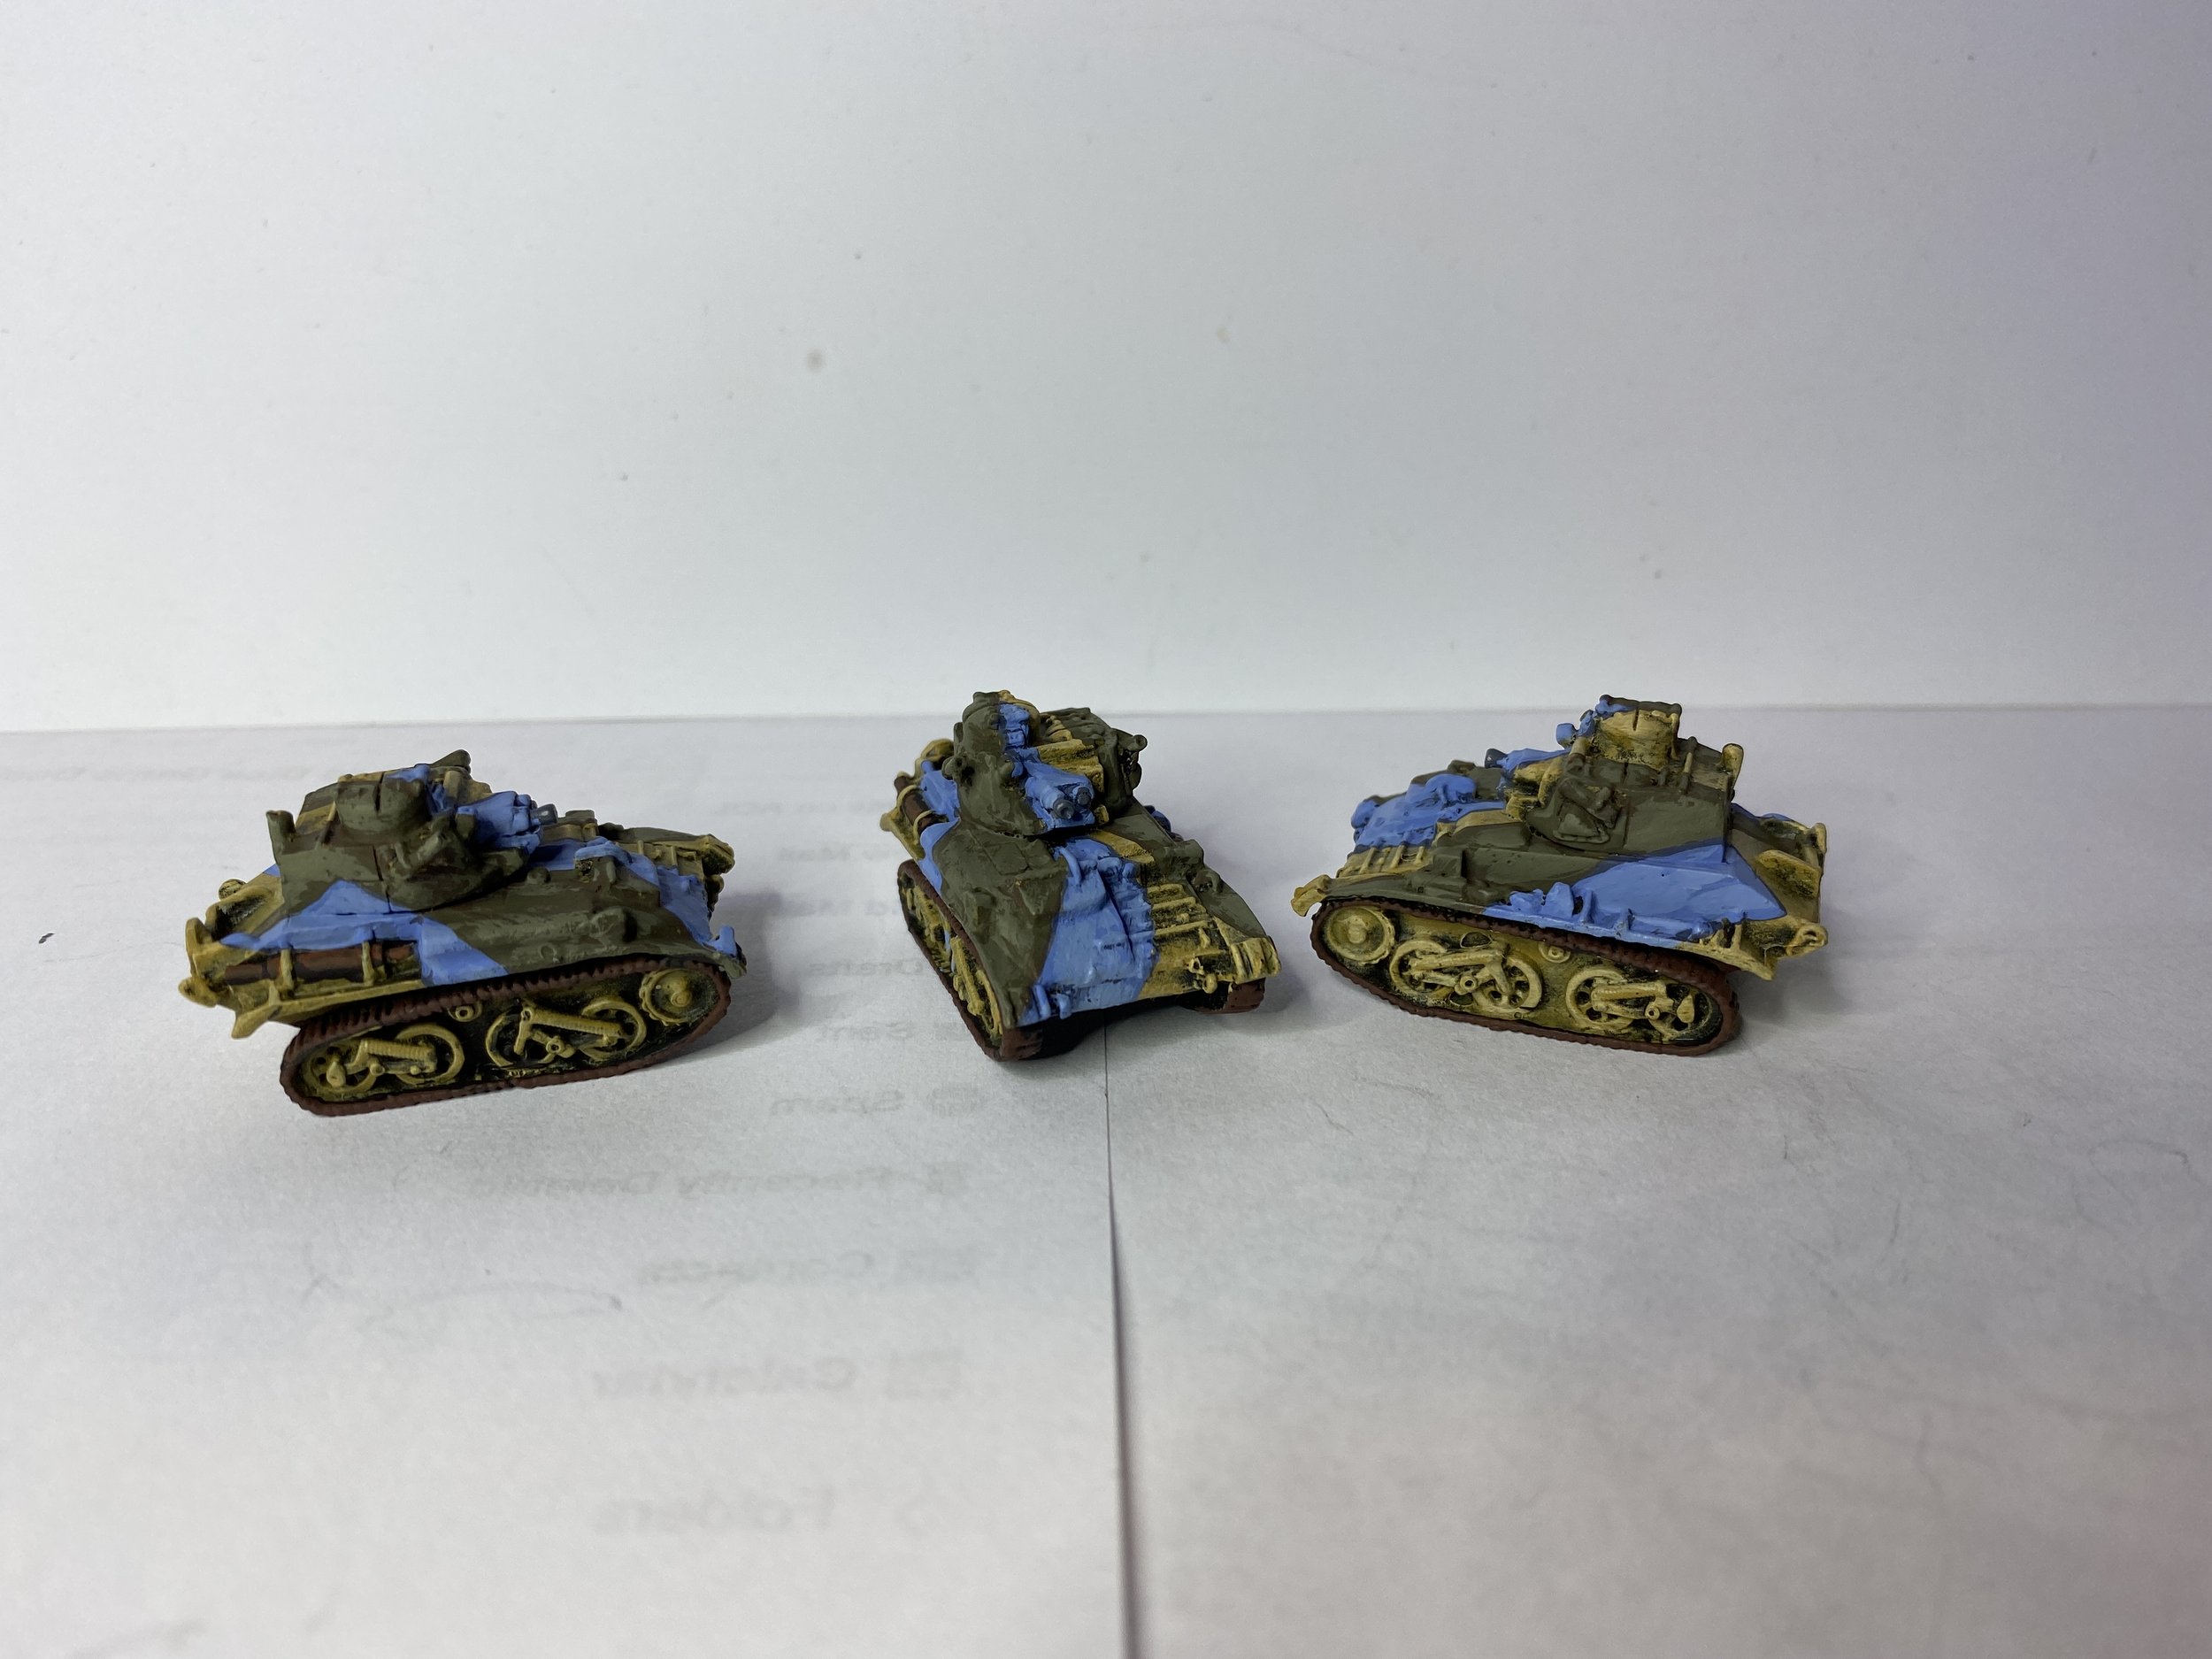
A huge portion of my time this week was devoted to painting two orders that just recently arrived. My attention went first to three packs of Opel Blitz trucks from Command Decision. I love soft skin vehicles. With those done I turned my brush to painting 15 Peter Pig British Mk. VIb tanks that I had on order with Brookhurst. With the 9 Opel Blitz trucks I painted this week the number of Opel Blitz transports I have is 30. The additional 15 Mk. VIb tanks bring the total of my Mk. VIb tanks to 30… I completed the last three of those on Saturday evening.
November 7, 2021
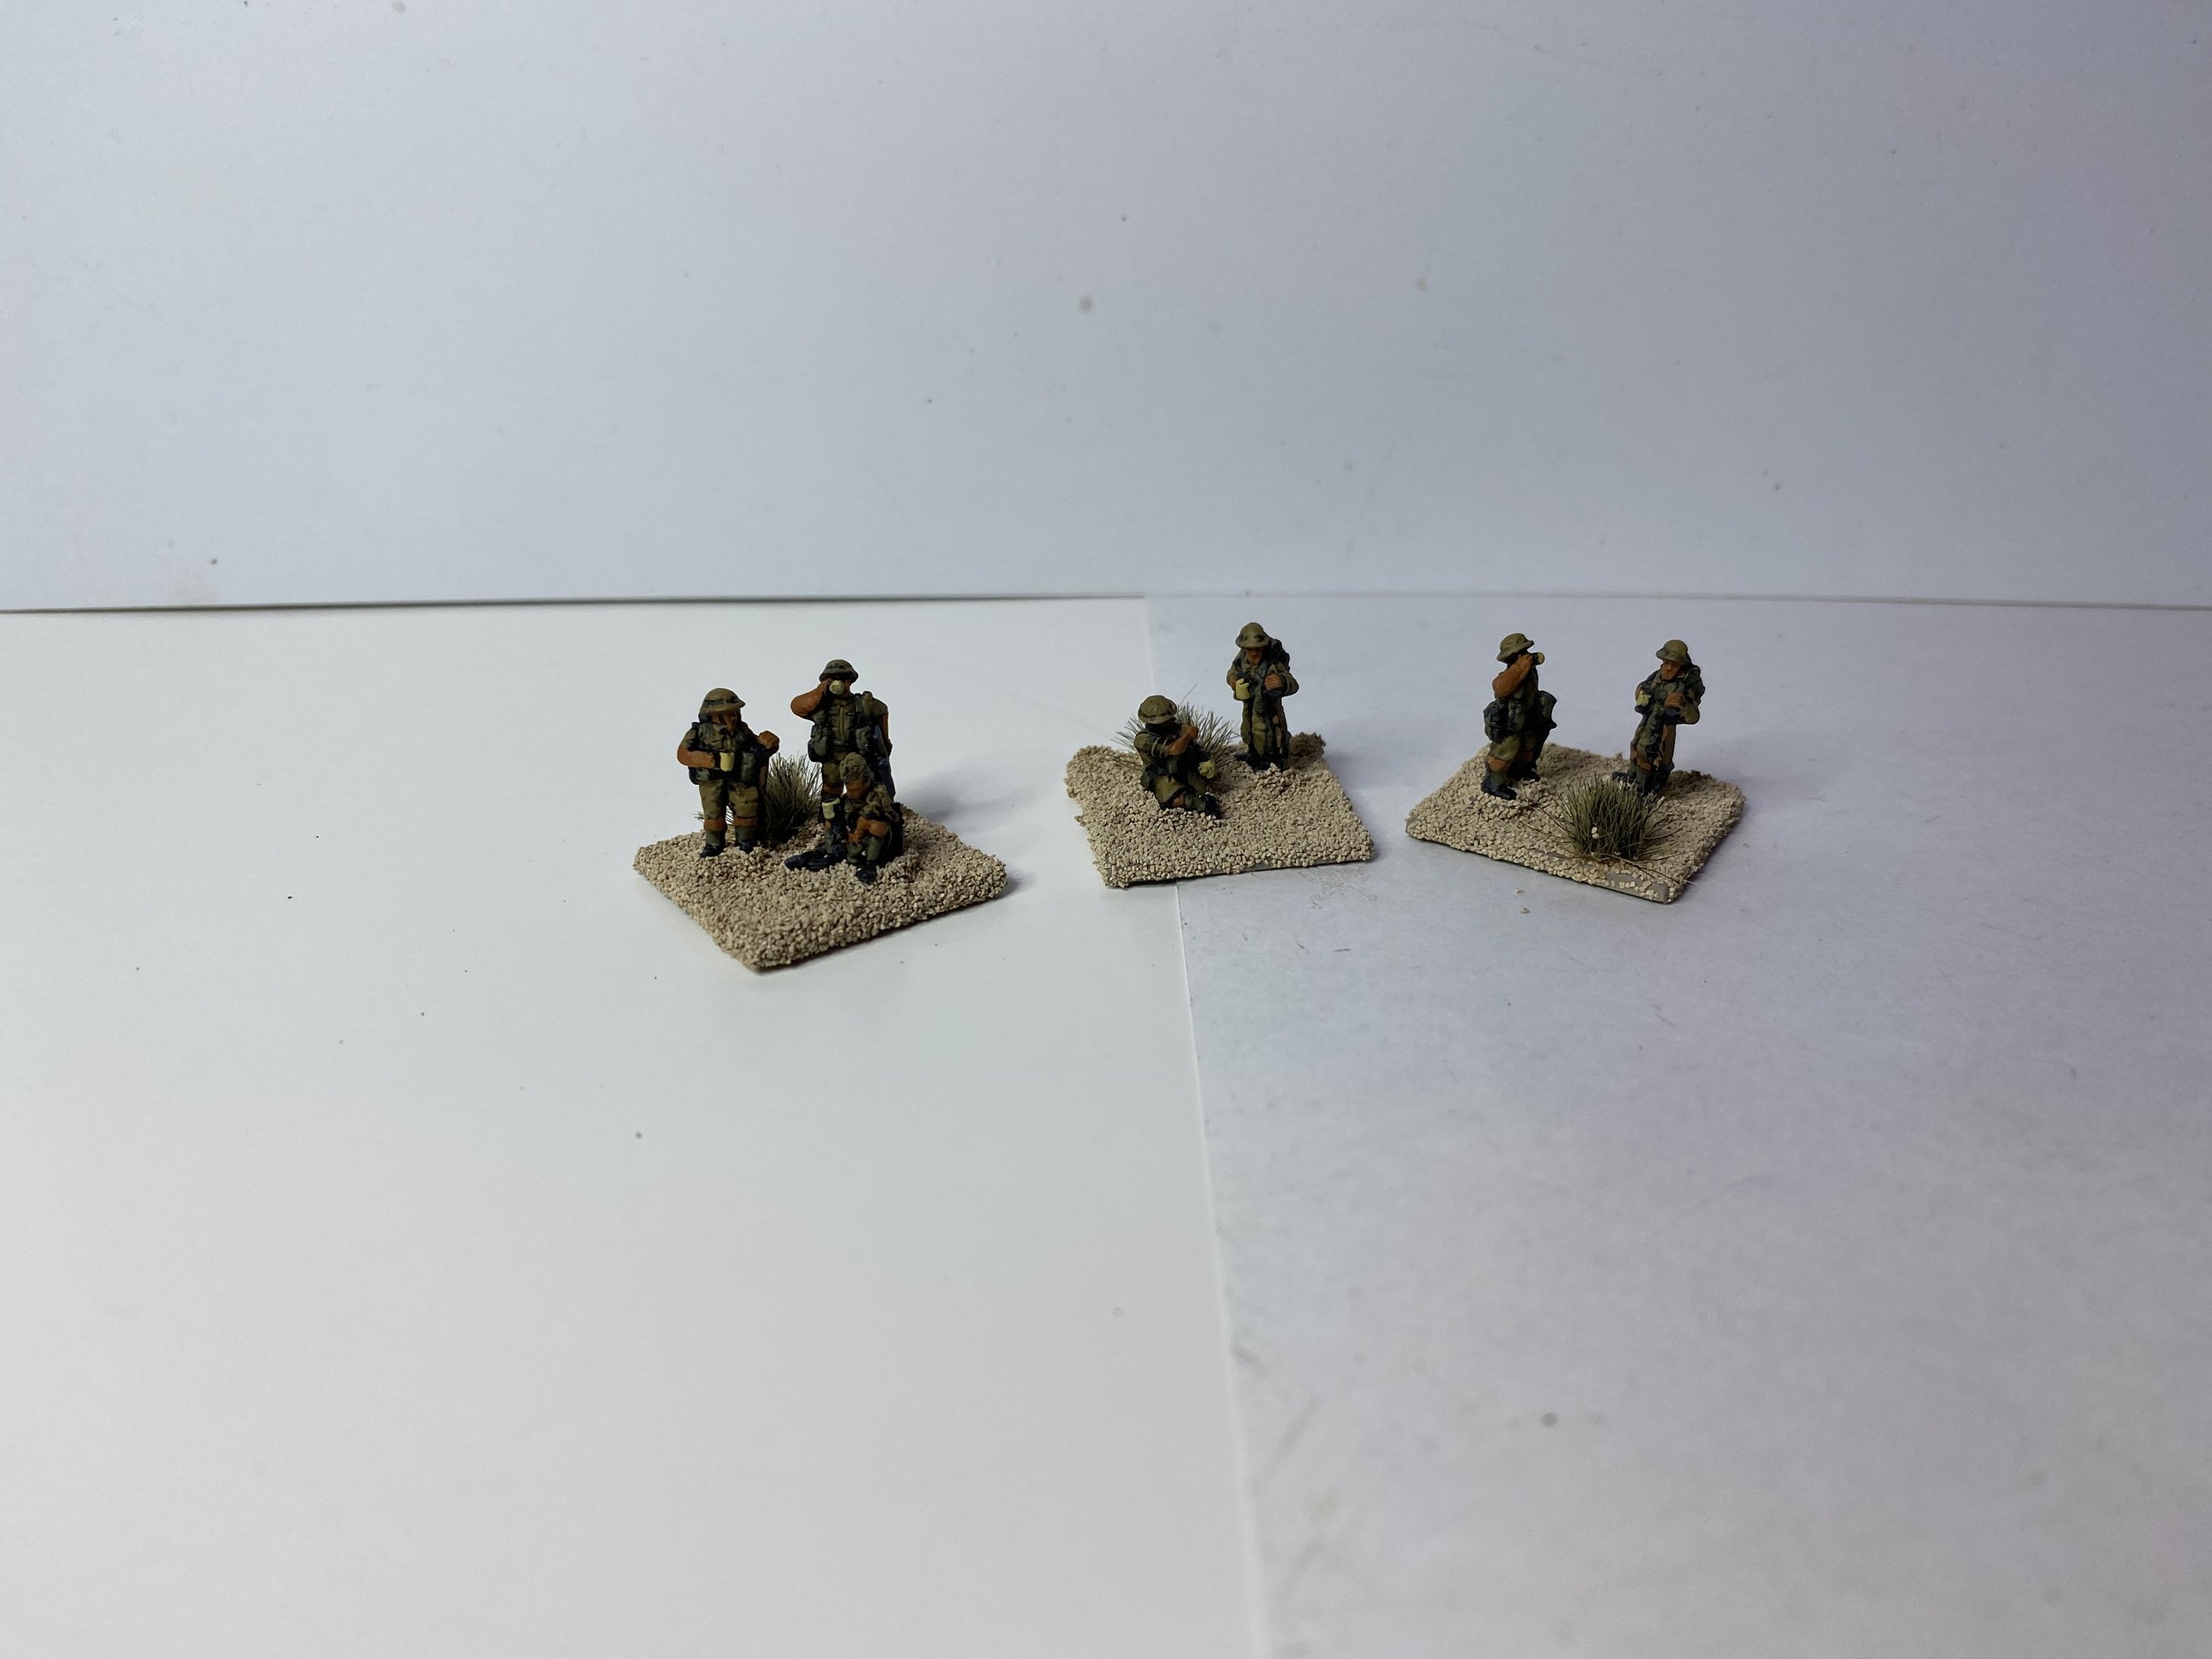
I opened the workbench this week painting and decaling tanks for the 15th Panzer Division. By the end of the week, I had completed the last of the tanks for that unit which brought my combined total for both the 15th and 21st Panzer Divisions to 60 tanks. I also painted two of the Gaming Models British 2 pdr in portee. They are not as finished/finely made as the Flames of War version, but they are much cheaper, about the same size, and most importantly they are still being produced while Flames of War’s are not. I also painted up another set of Peter Pig British having a brew and modified a Peter Pig resin destroyed Italian tank… cut the turret off and reset it in a different position so that I can use several of the same pieces yet have them with a somewhat different look.
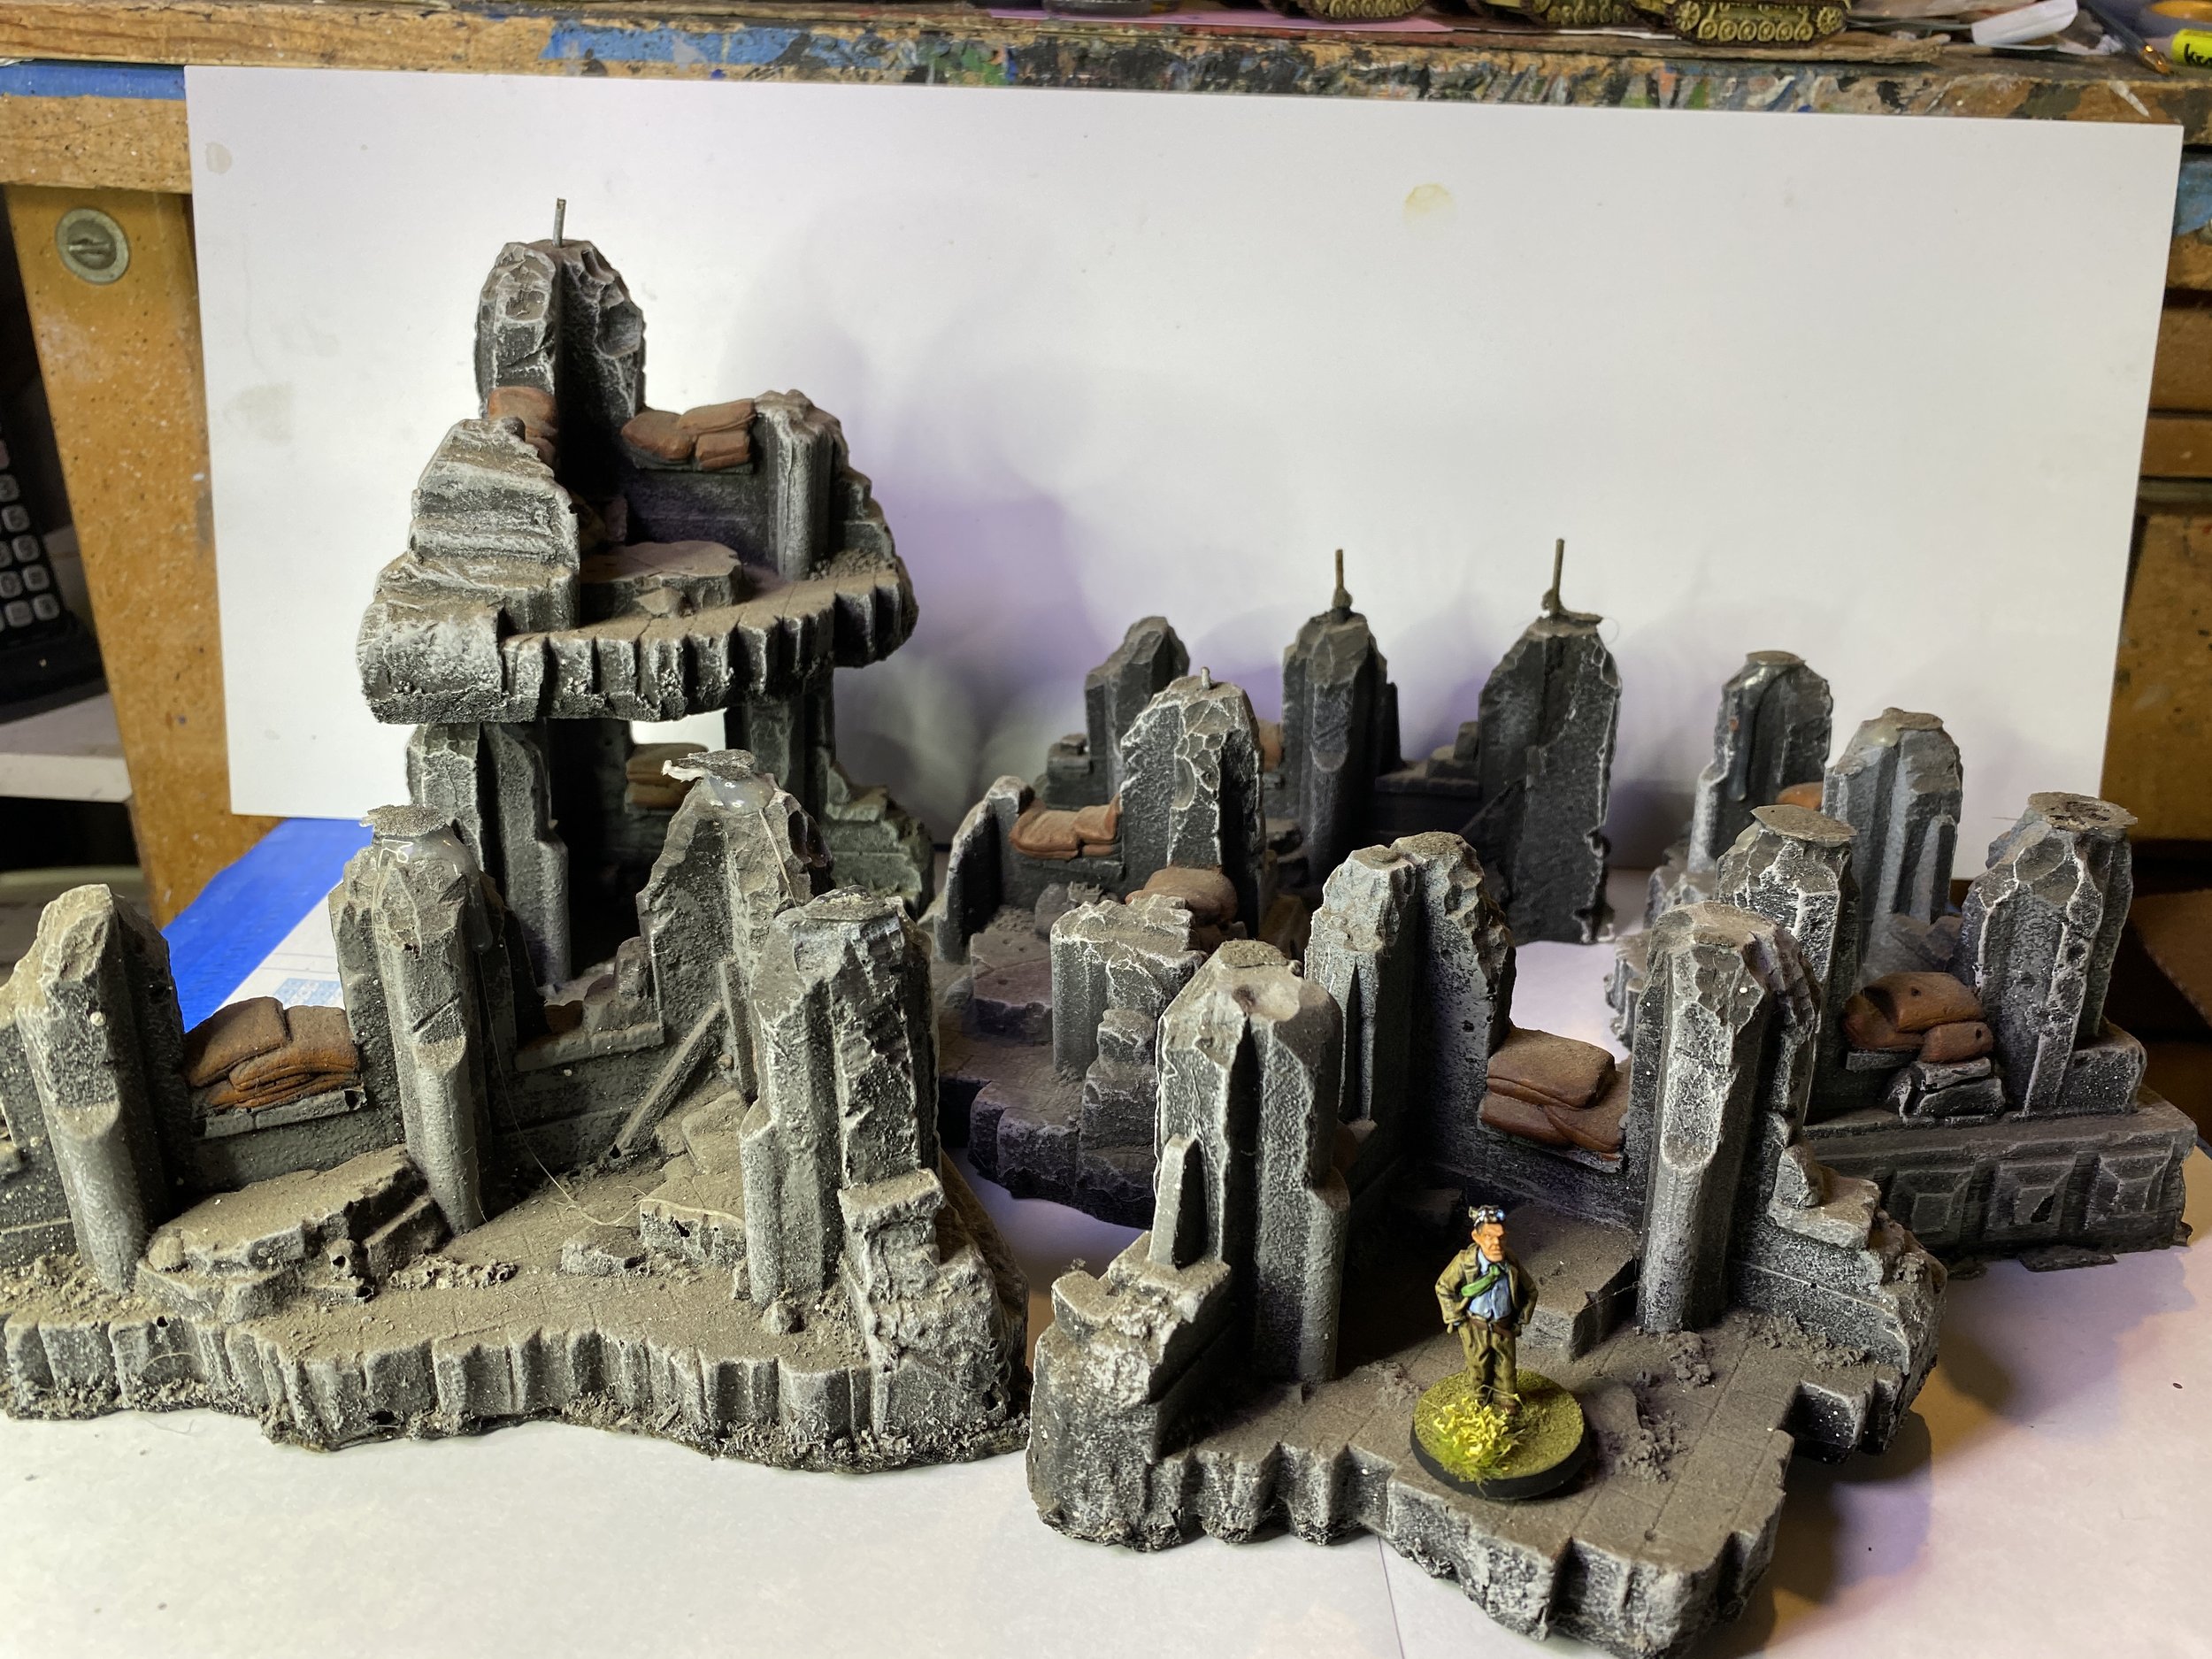
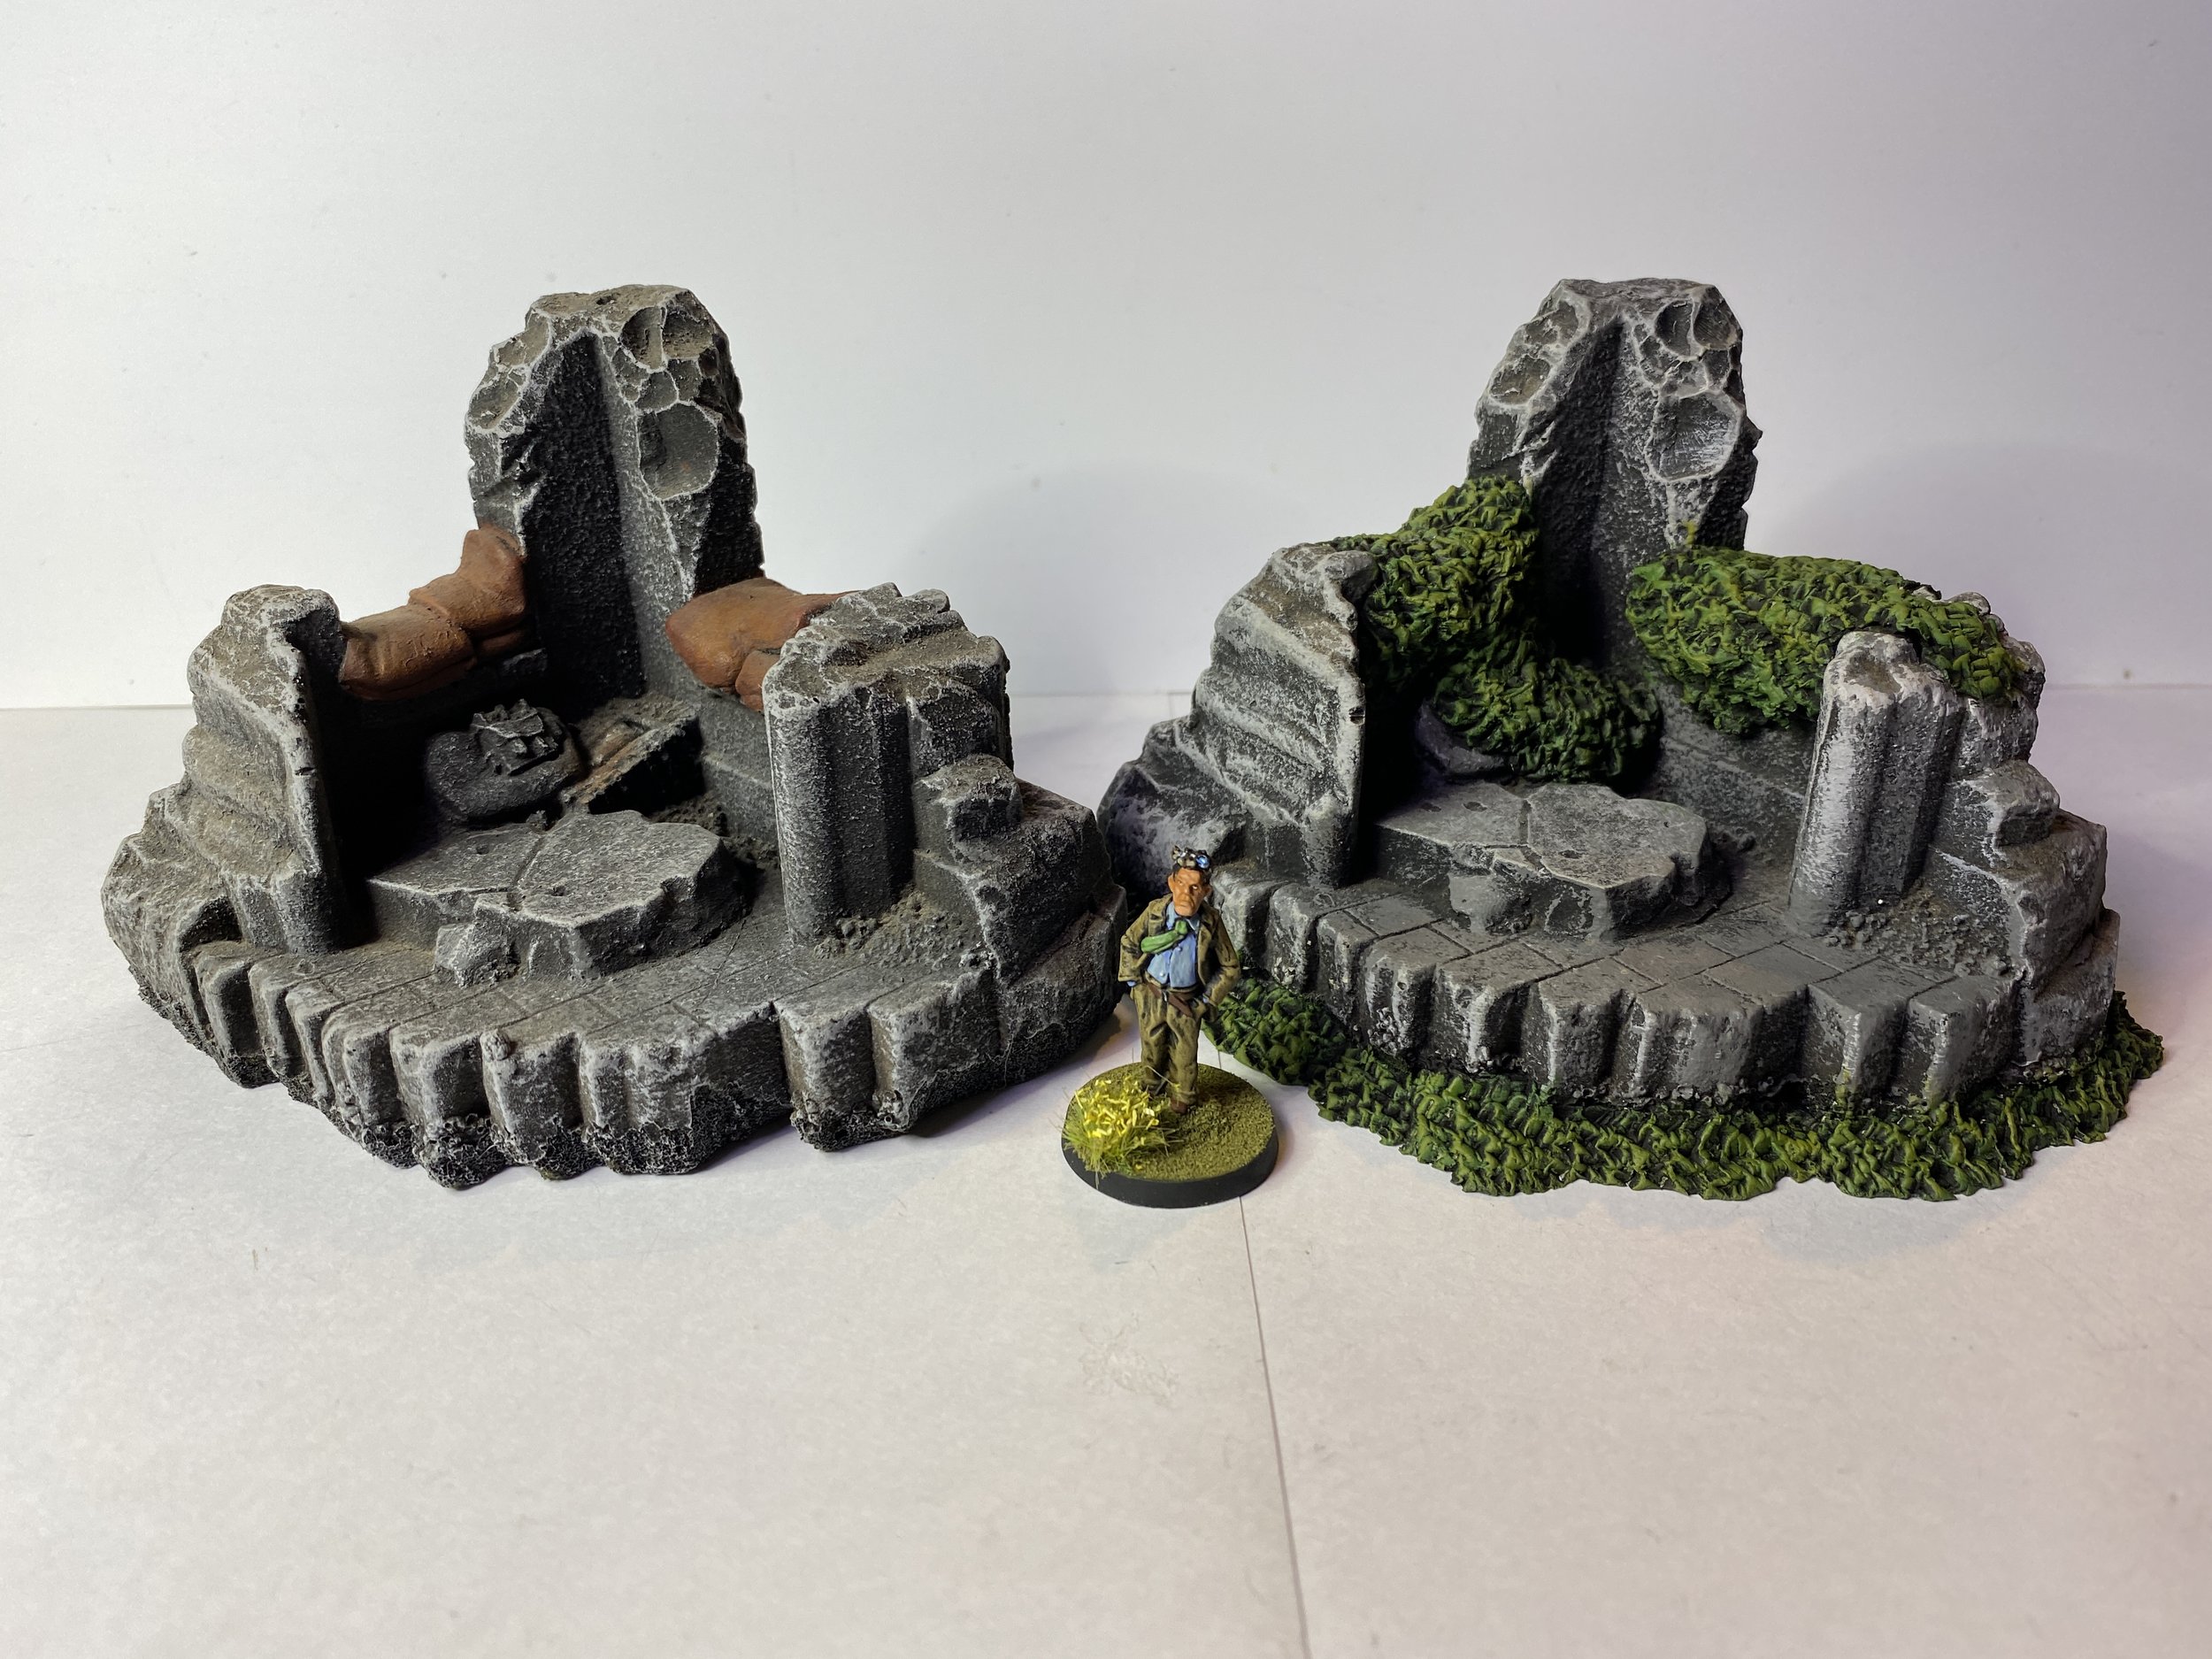
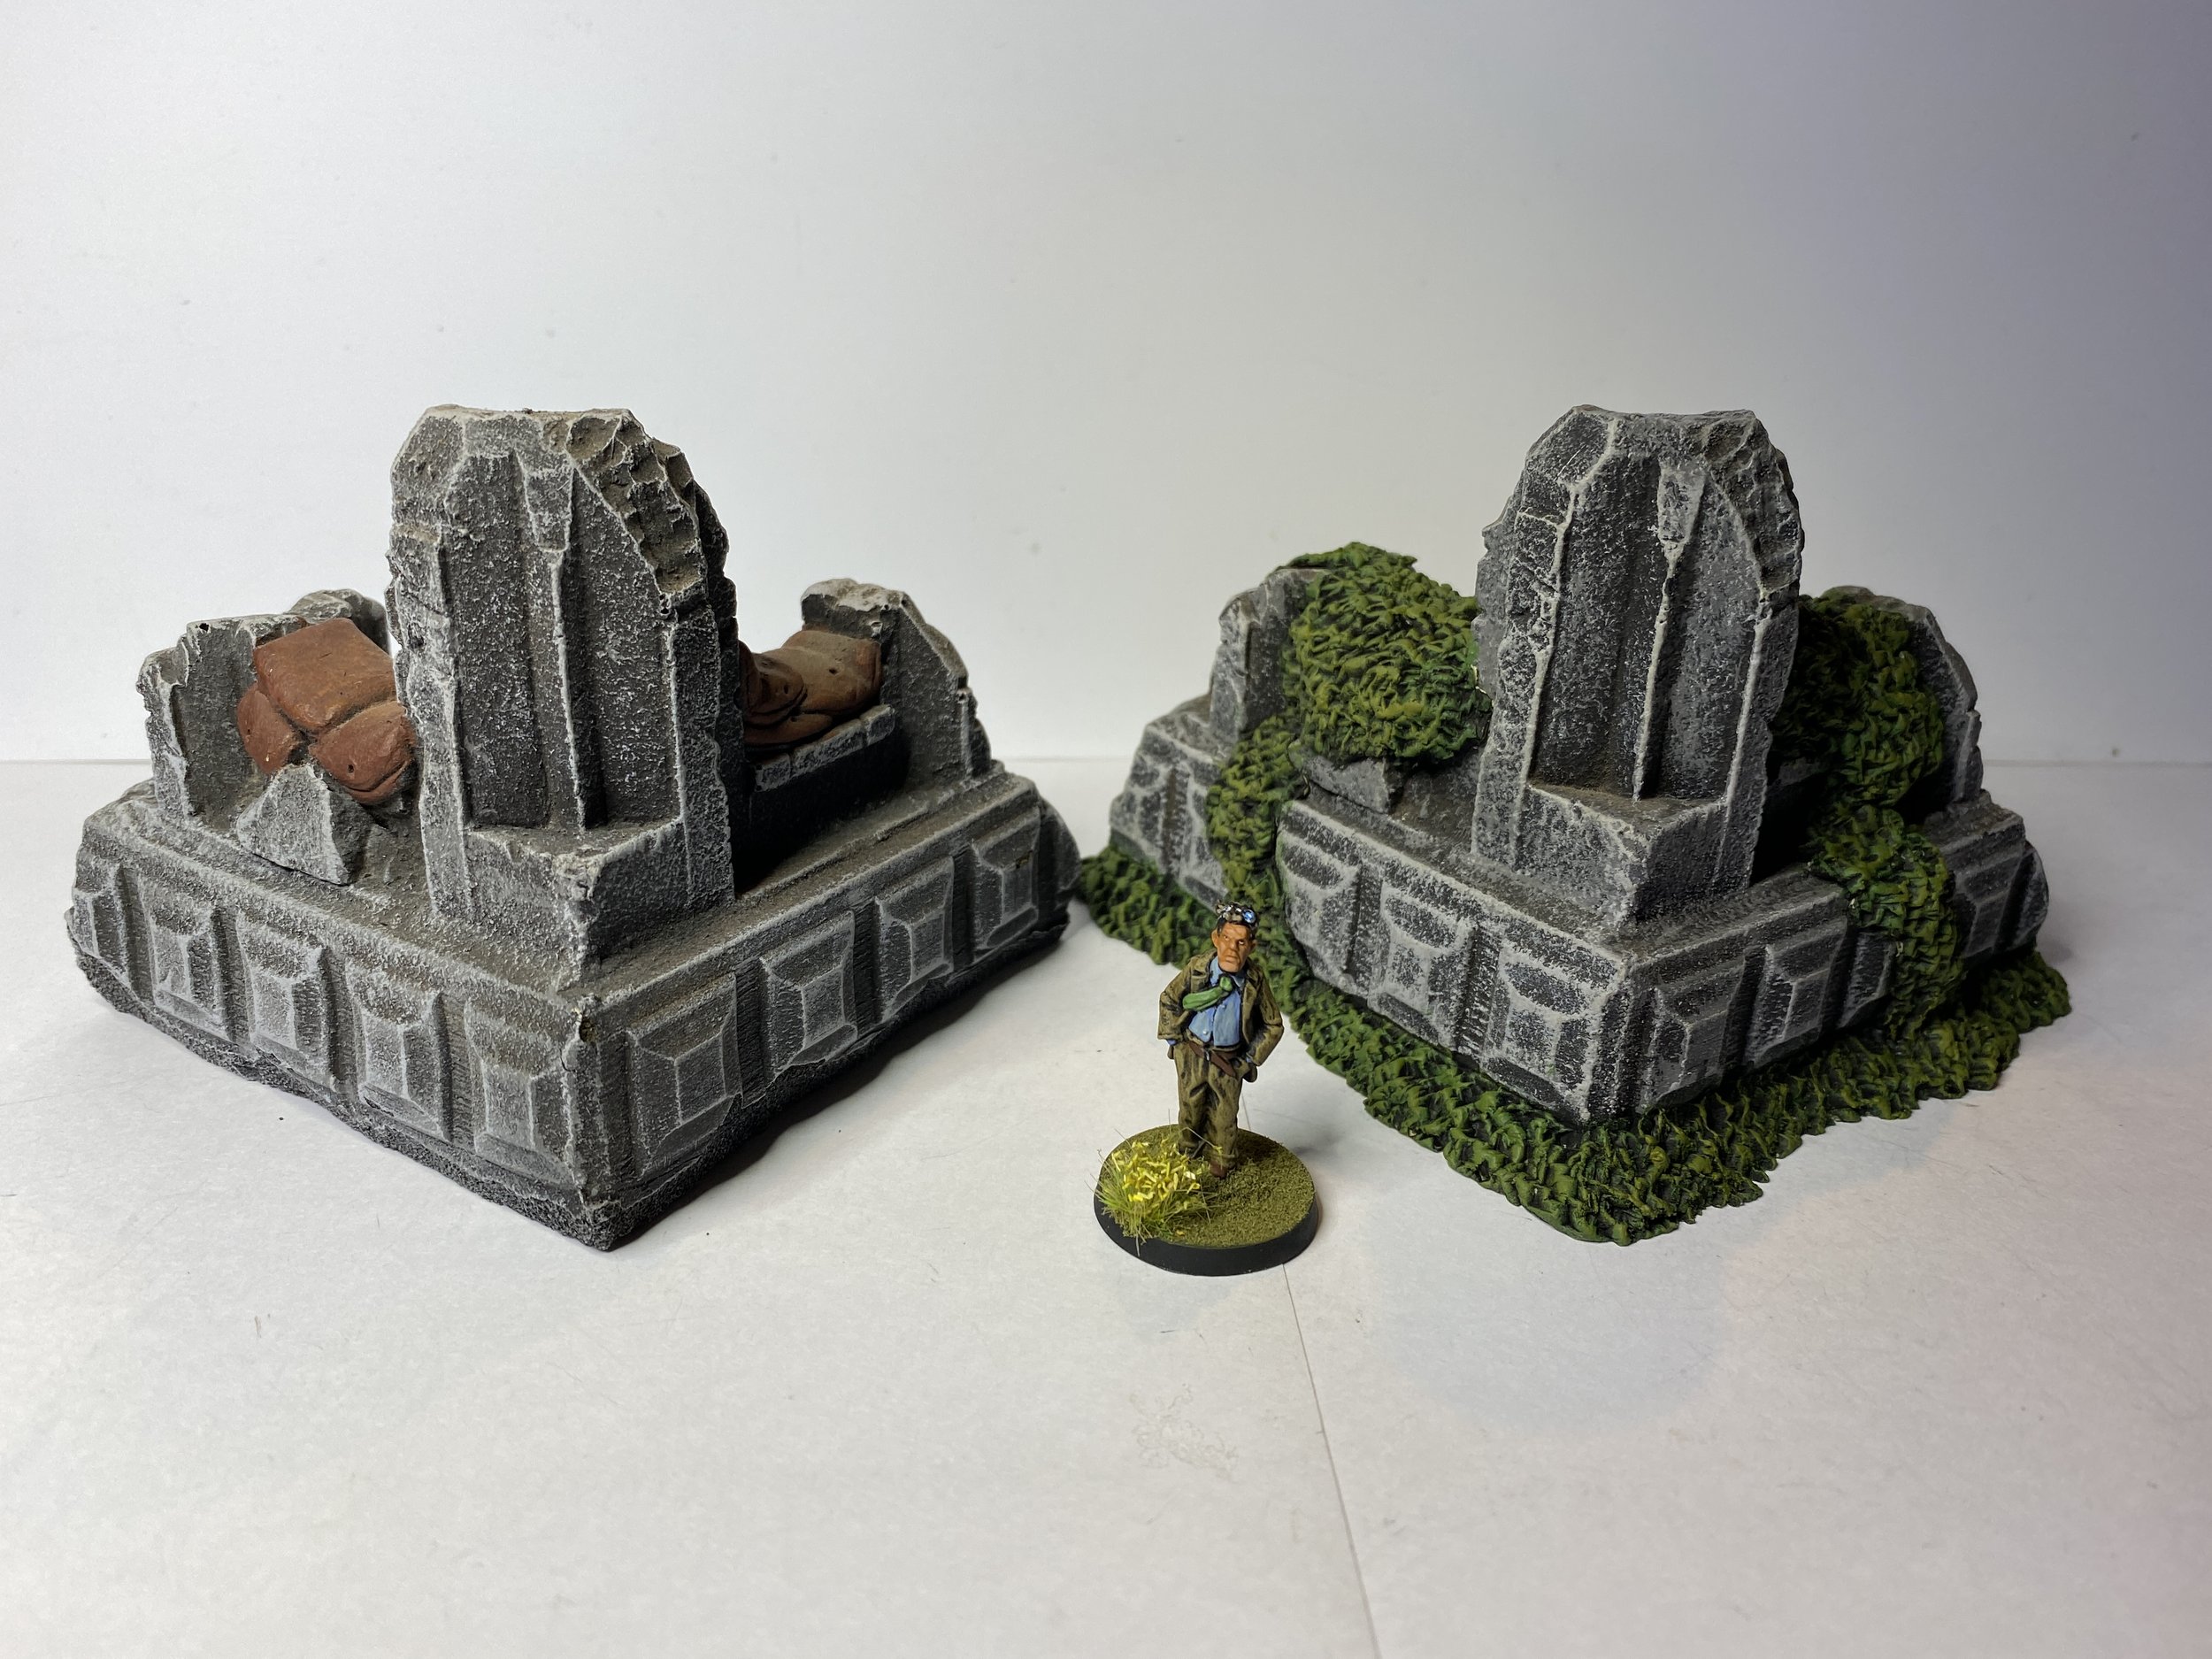
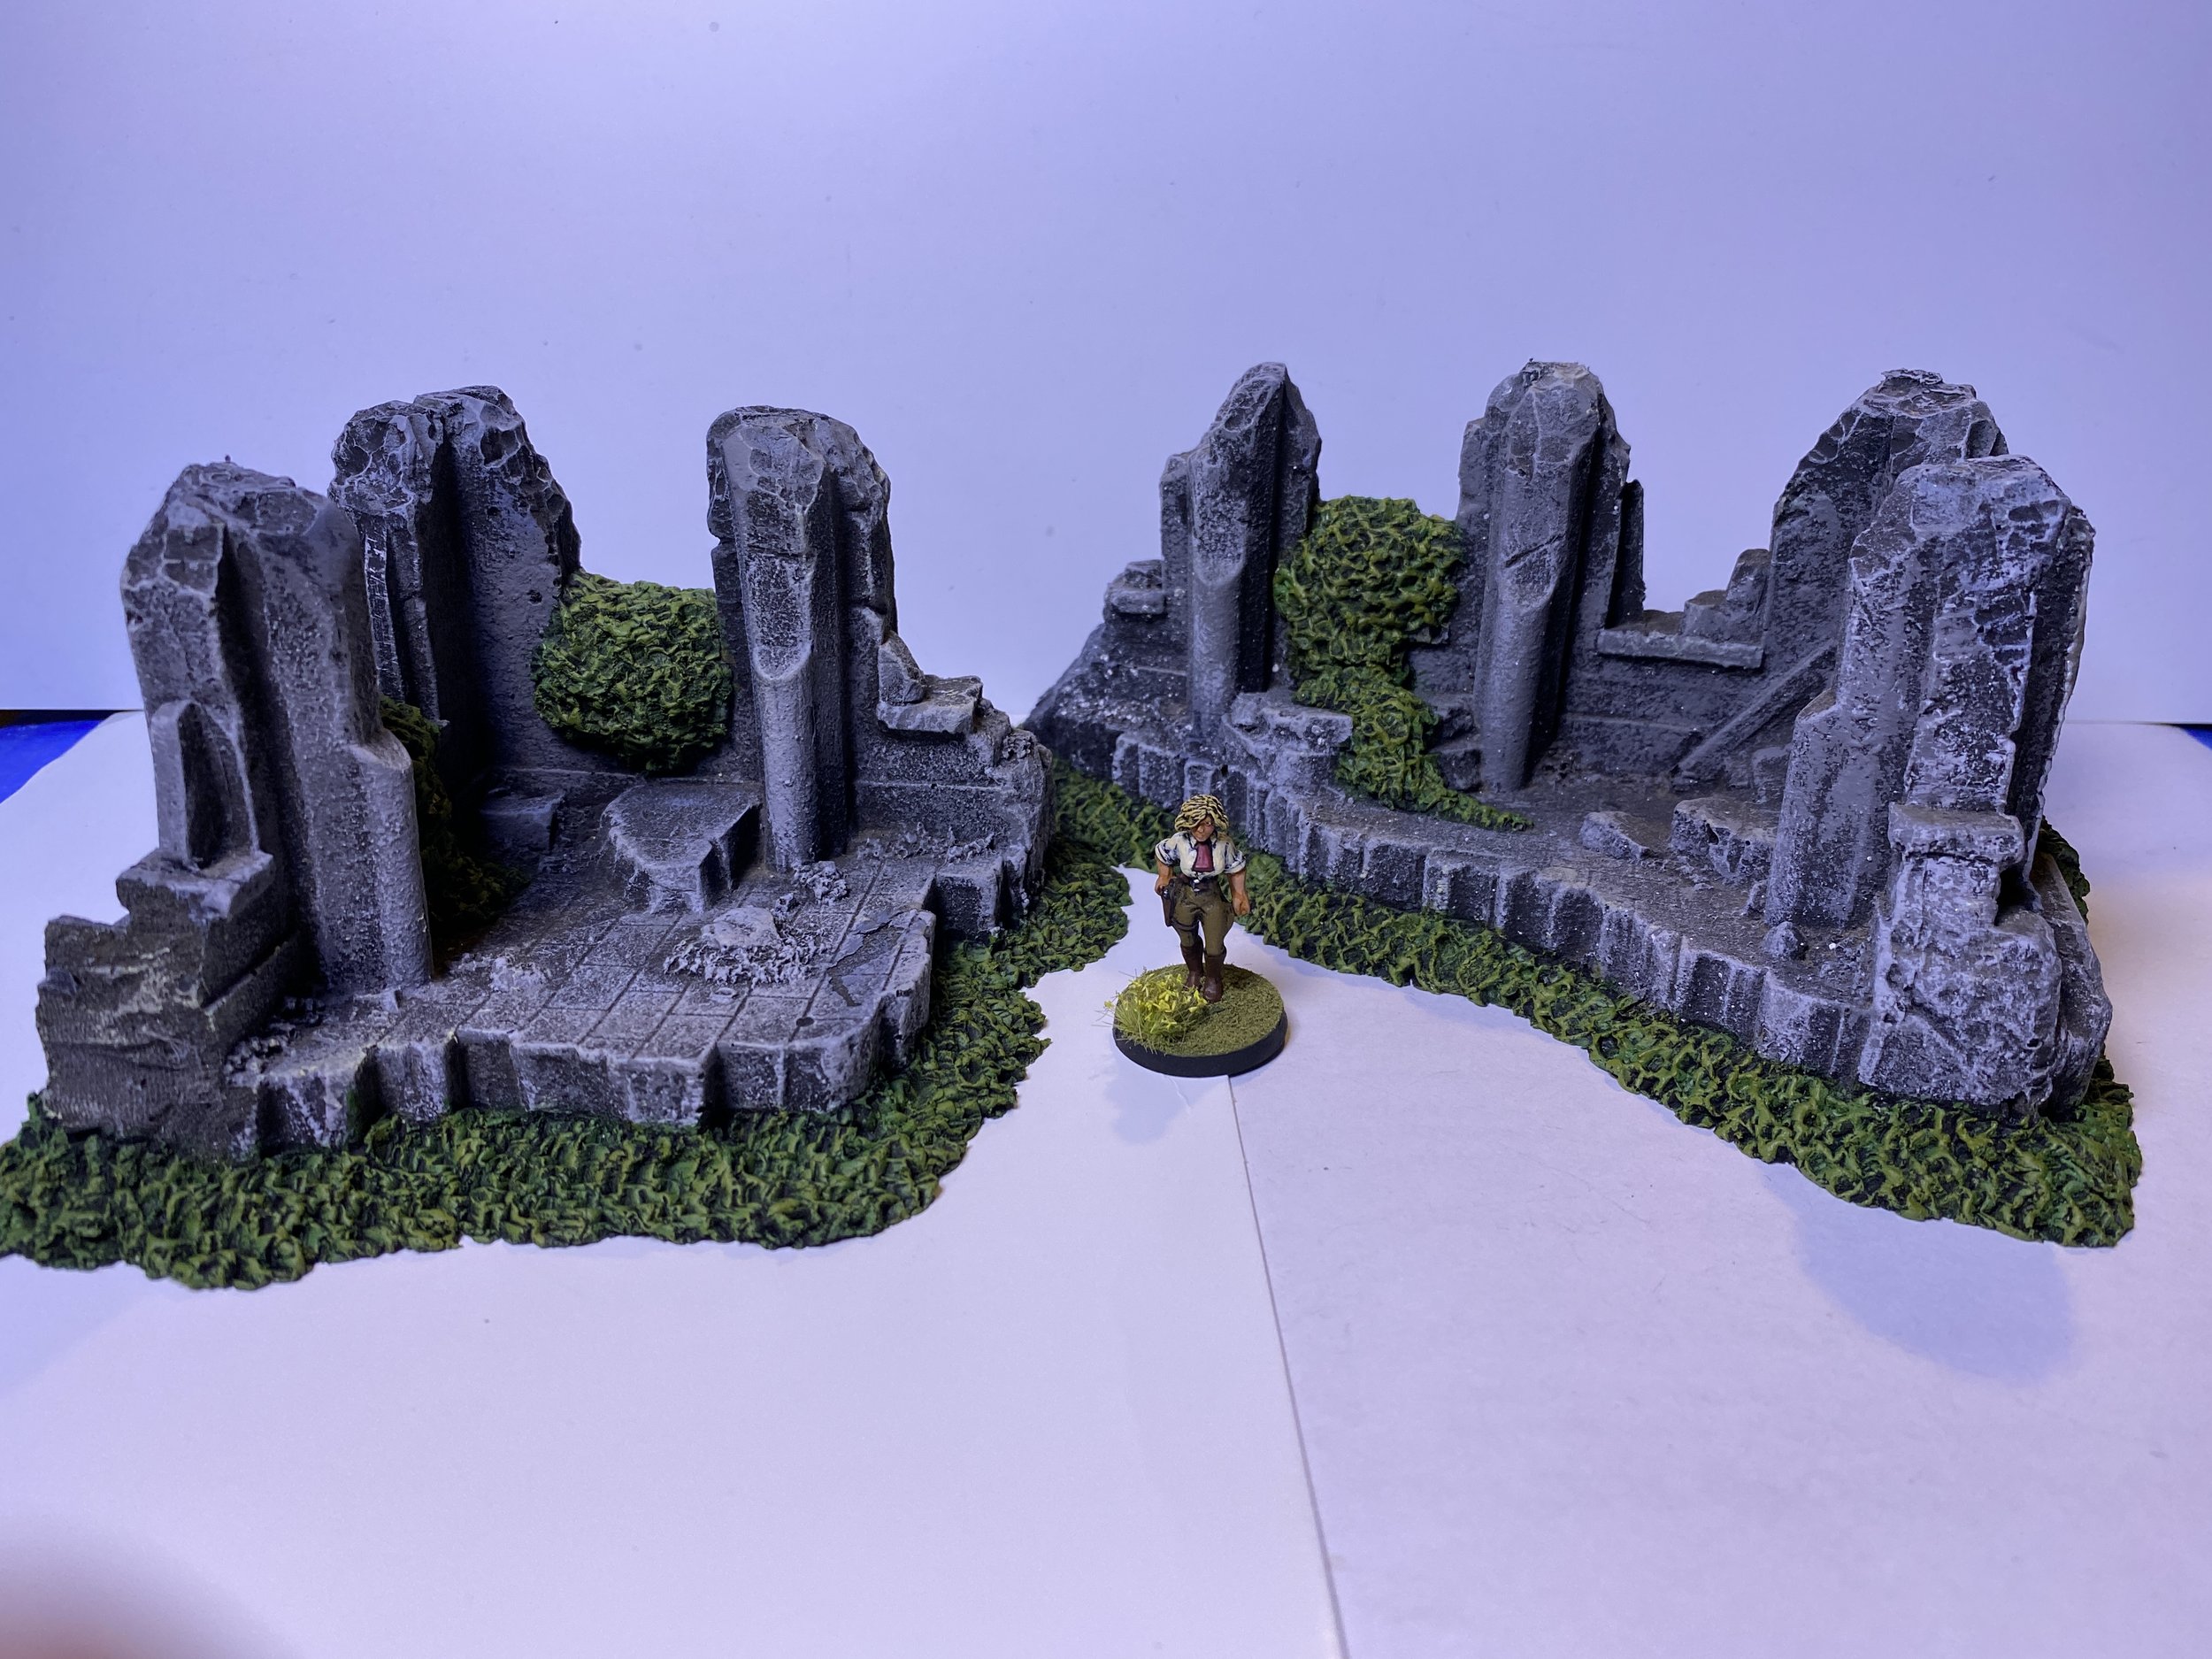
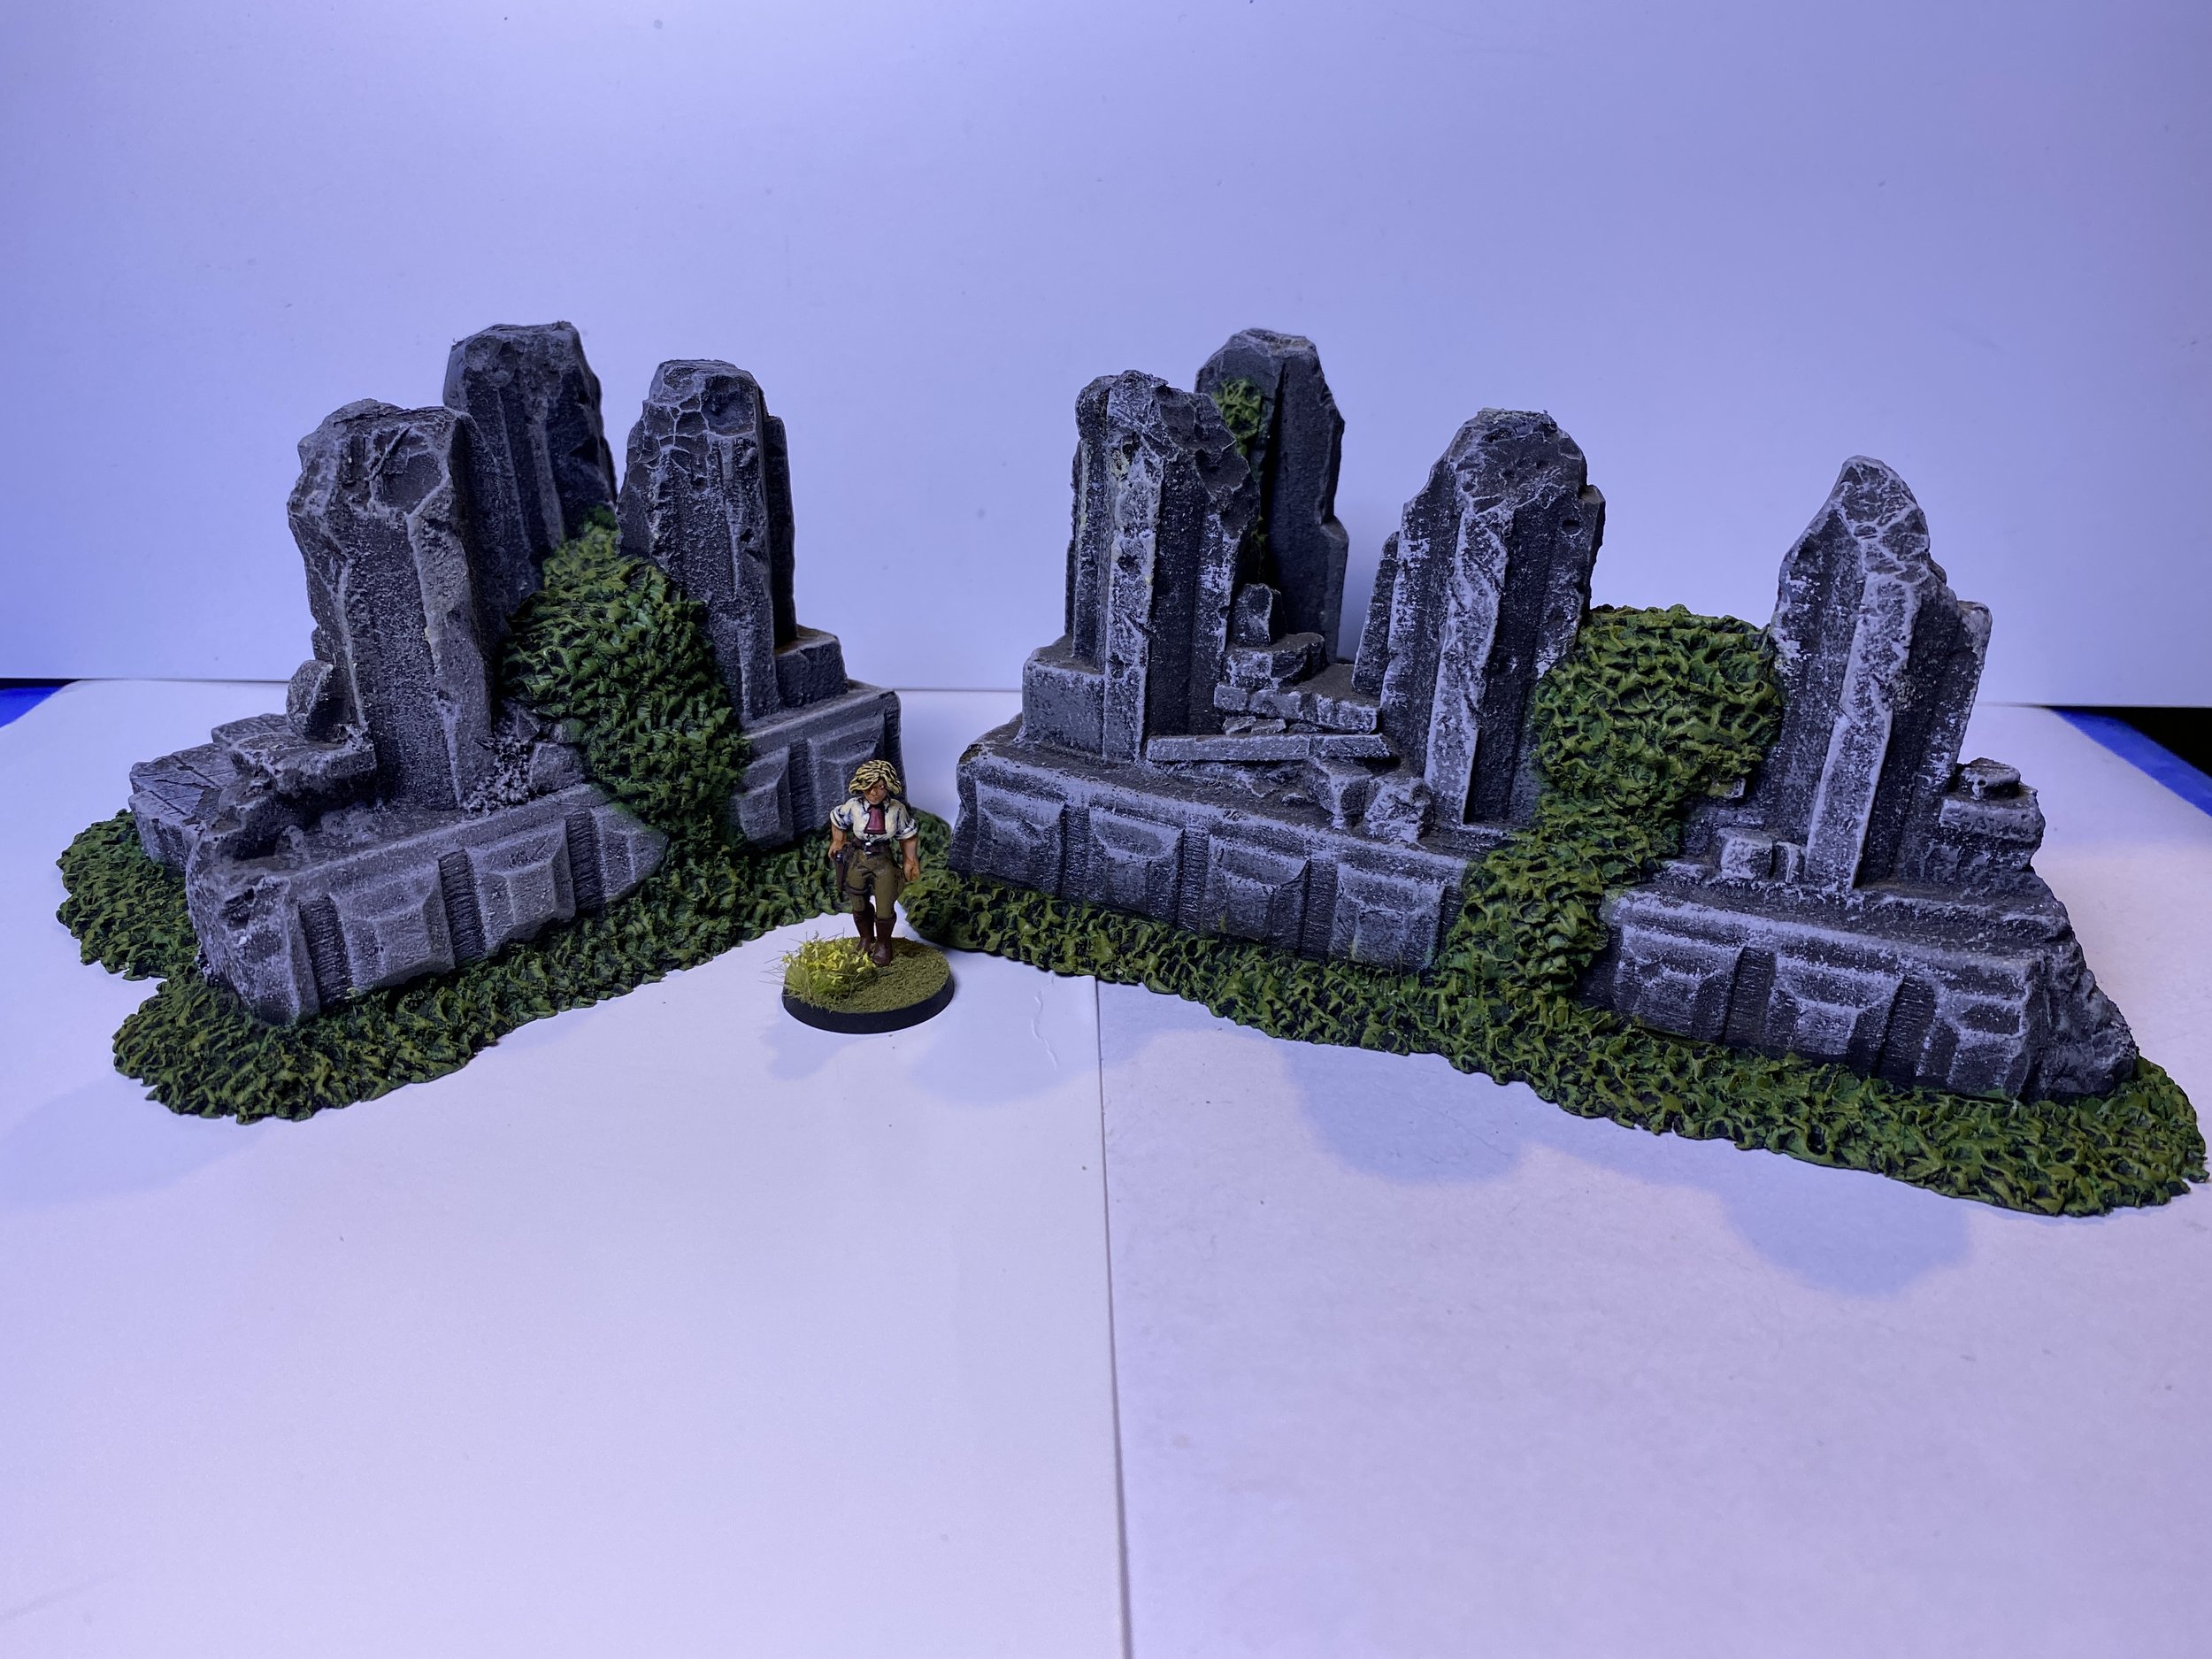
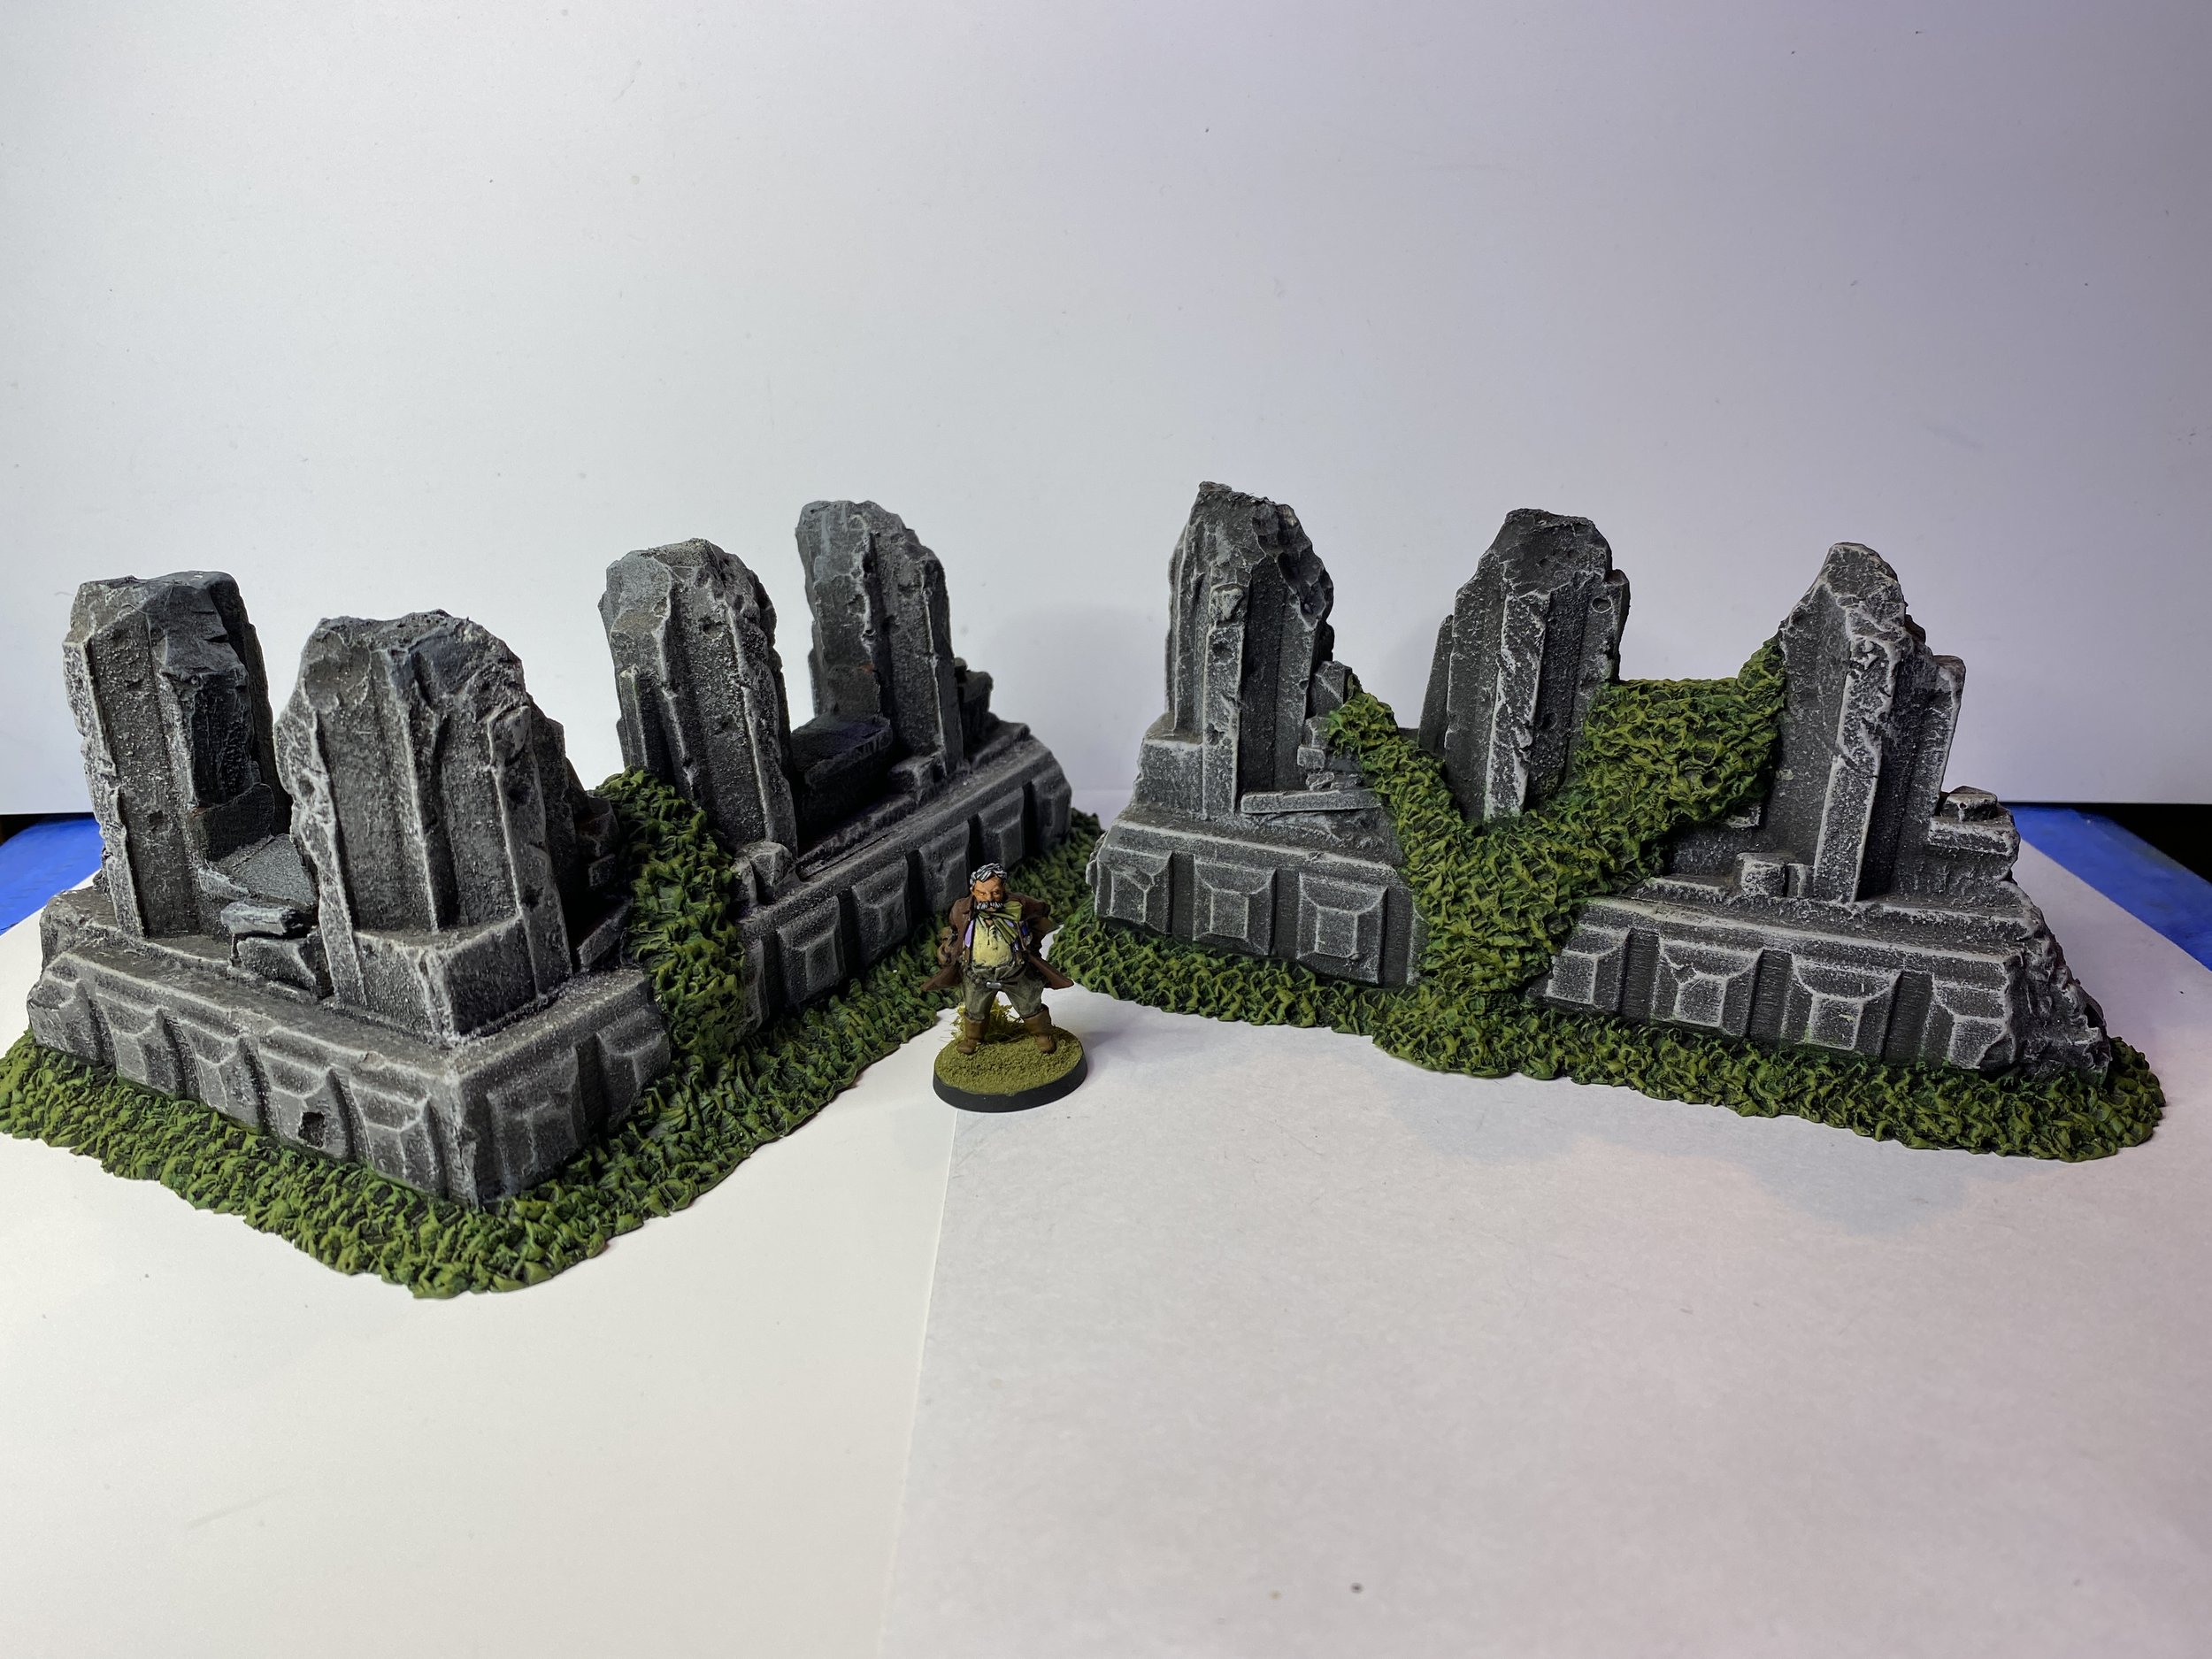
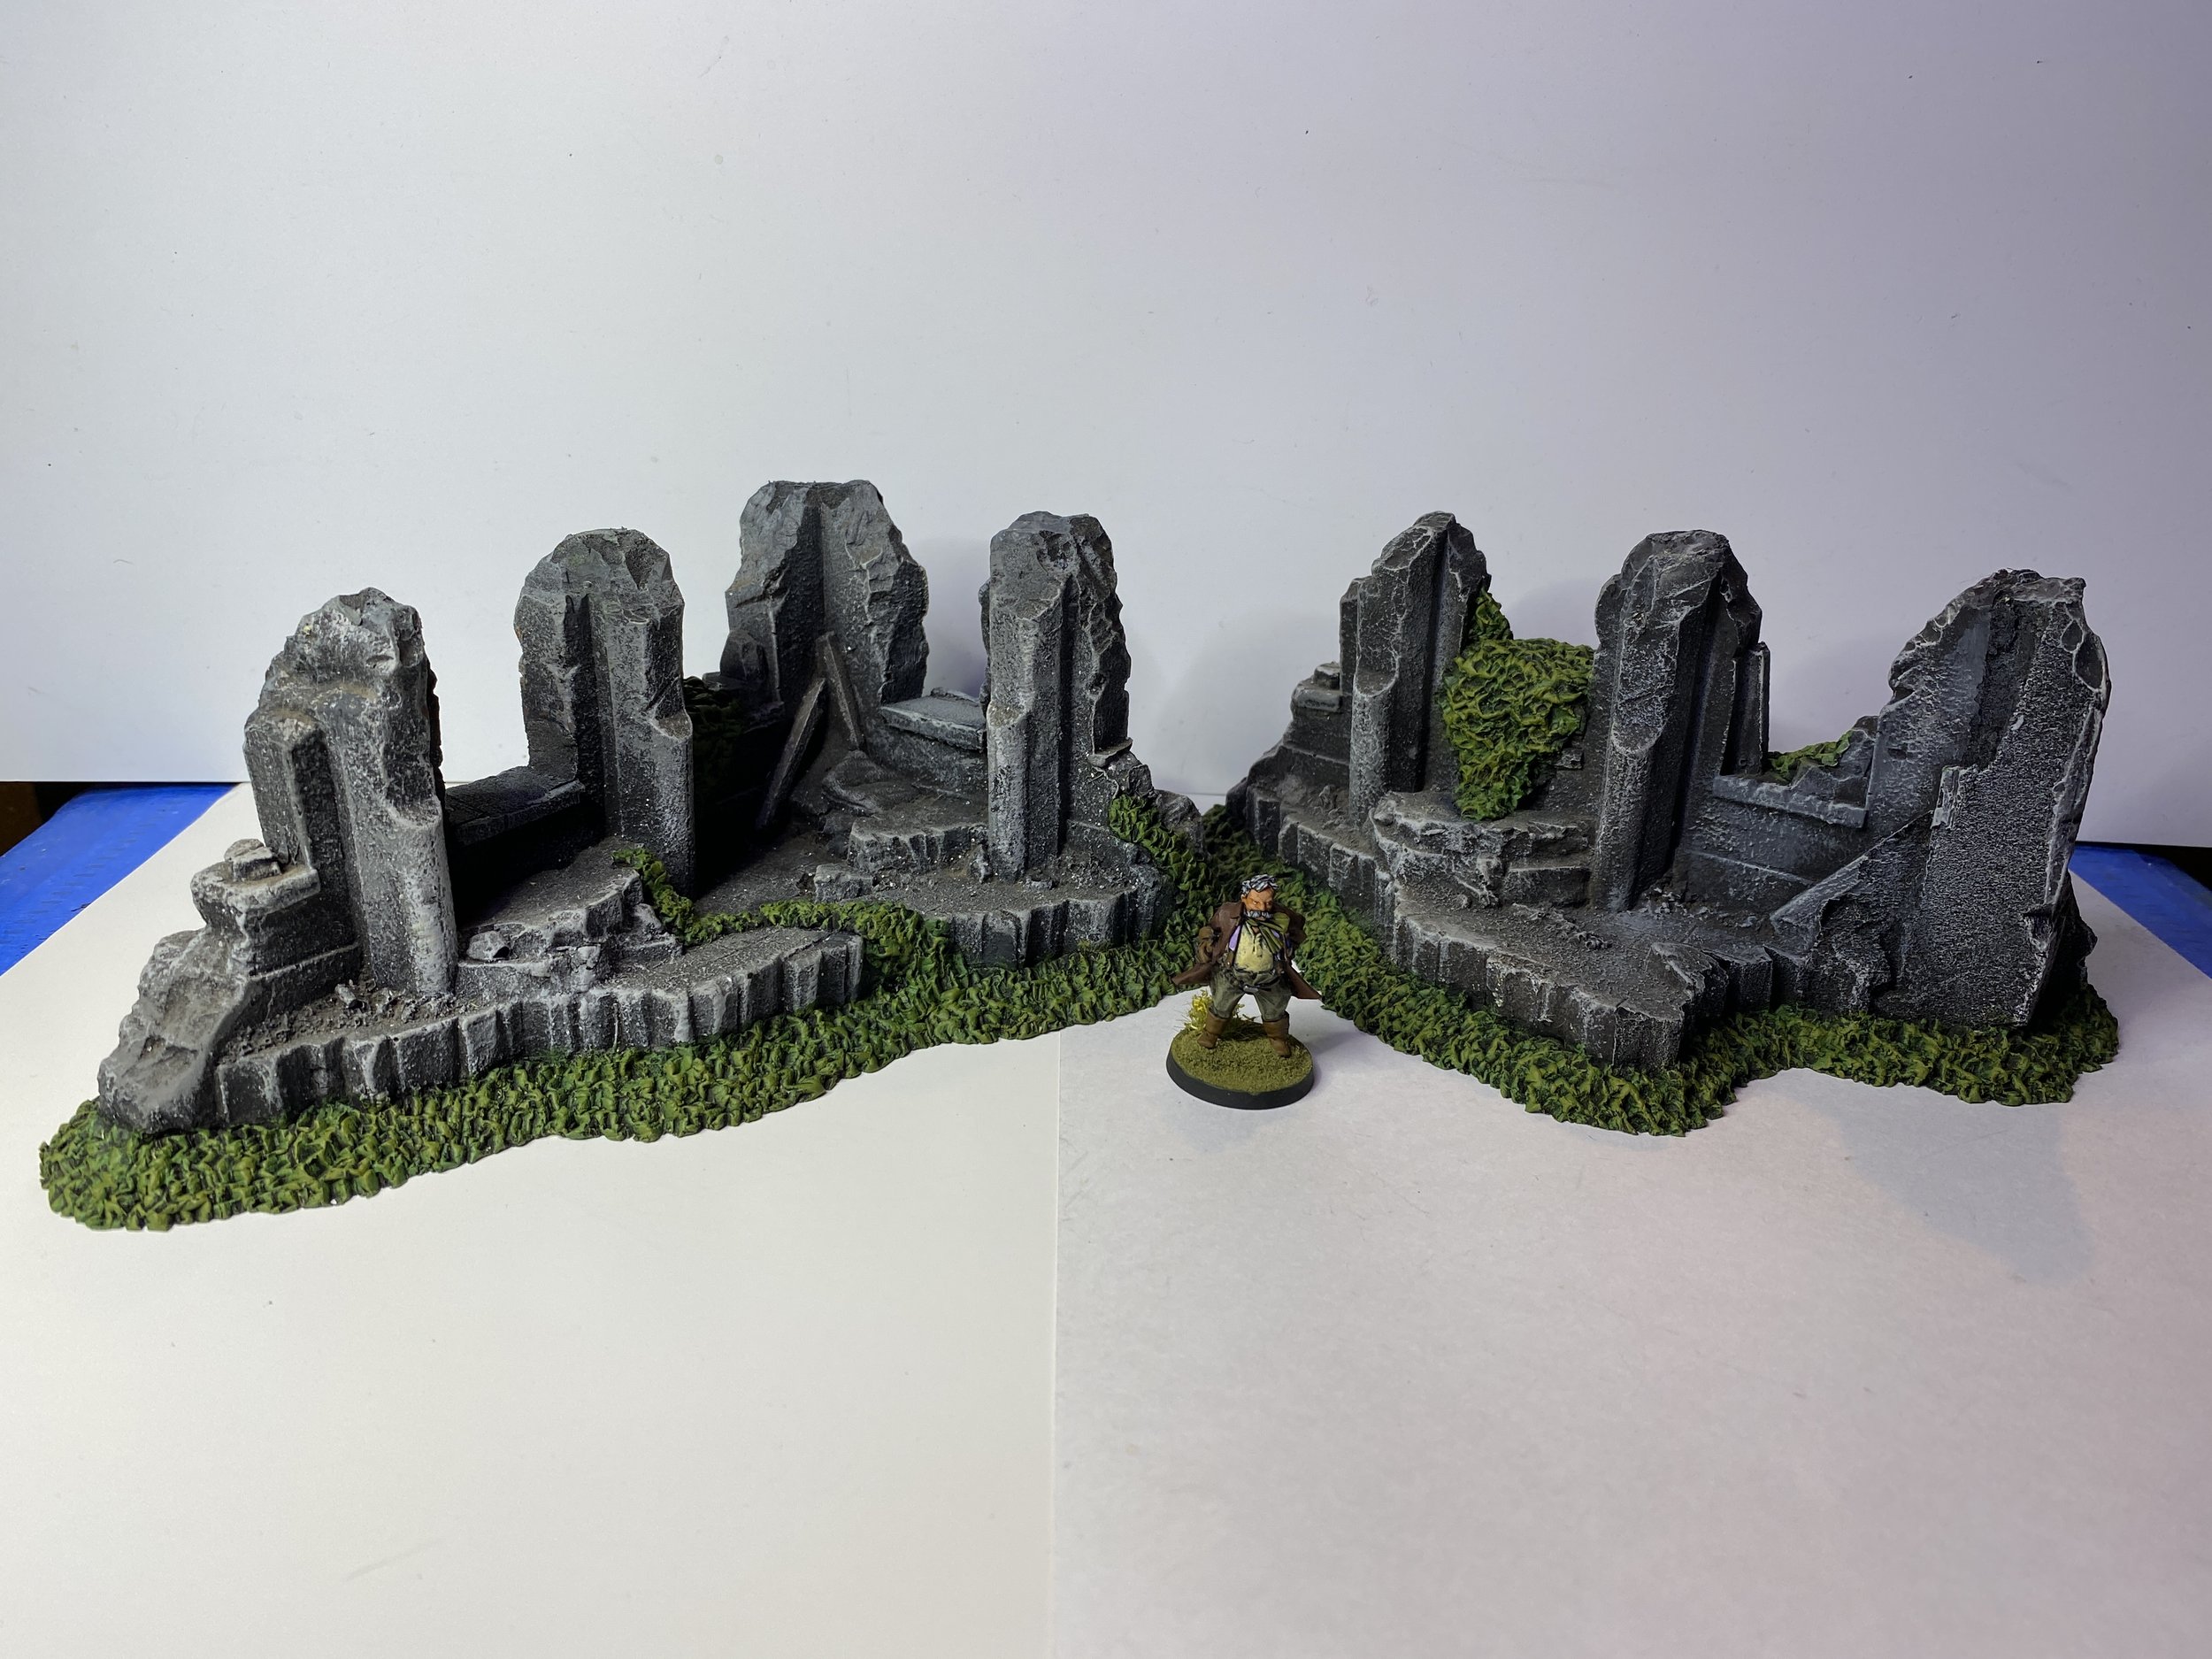
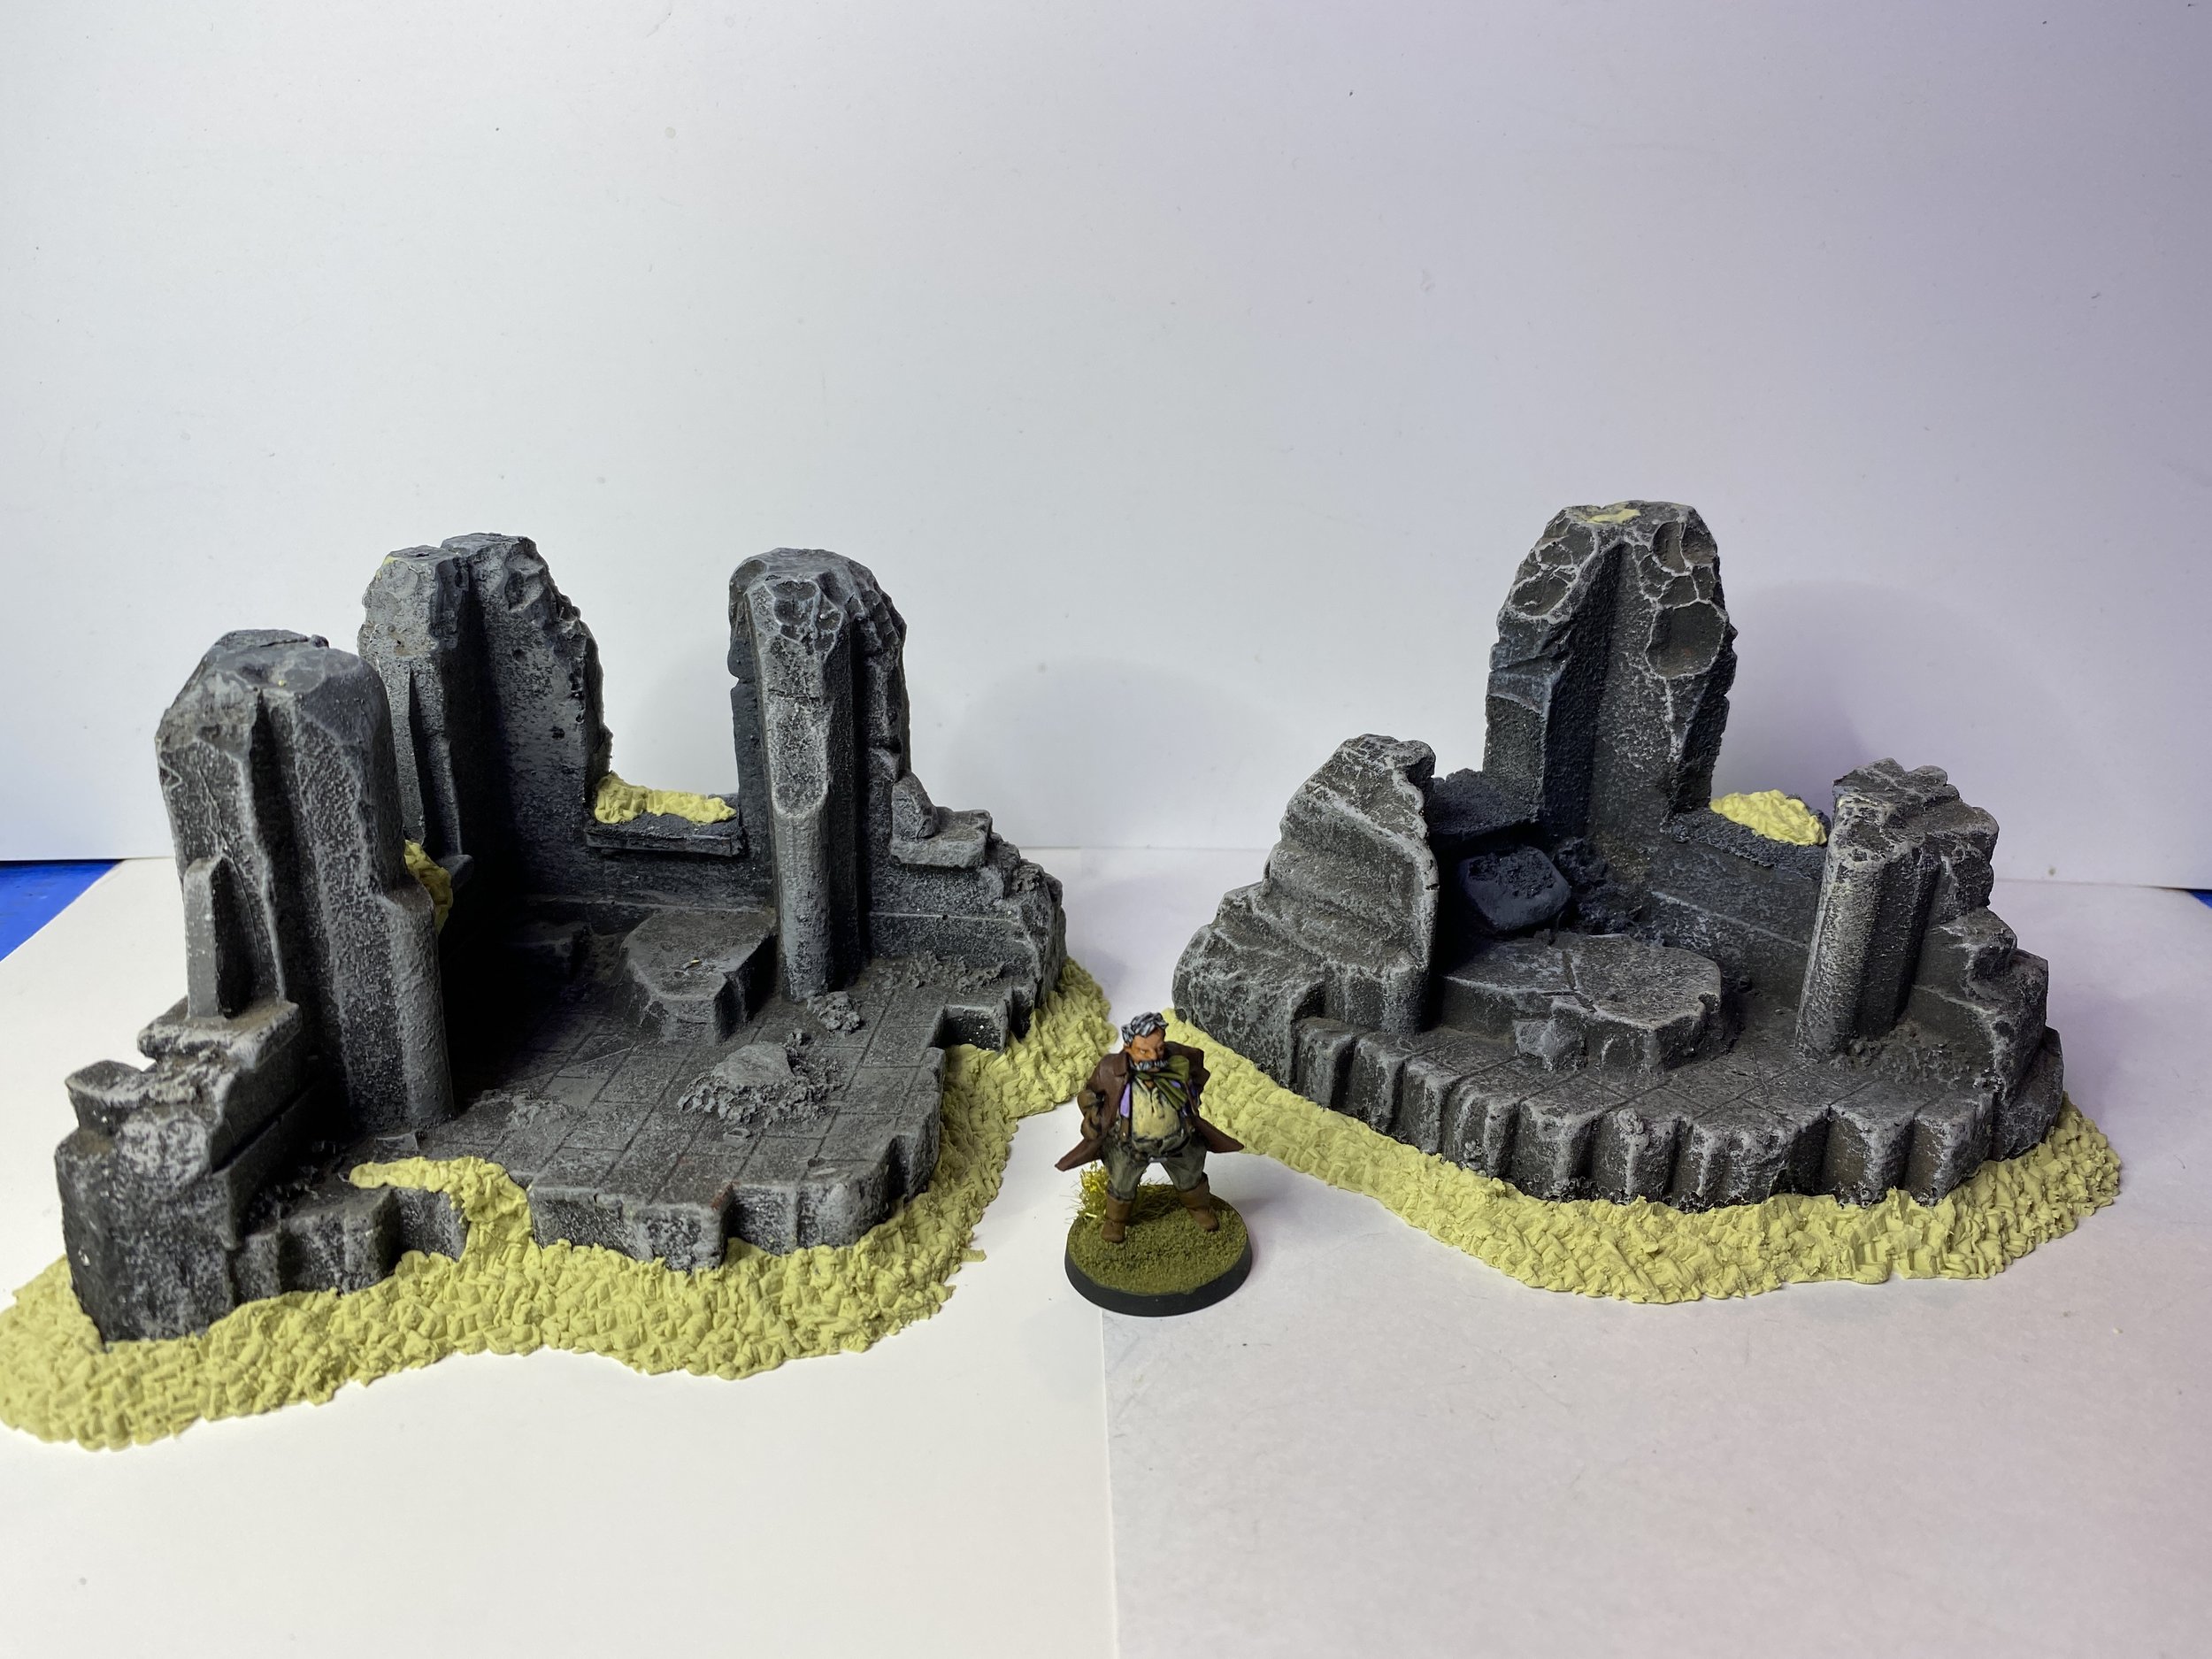
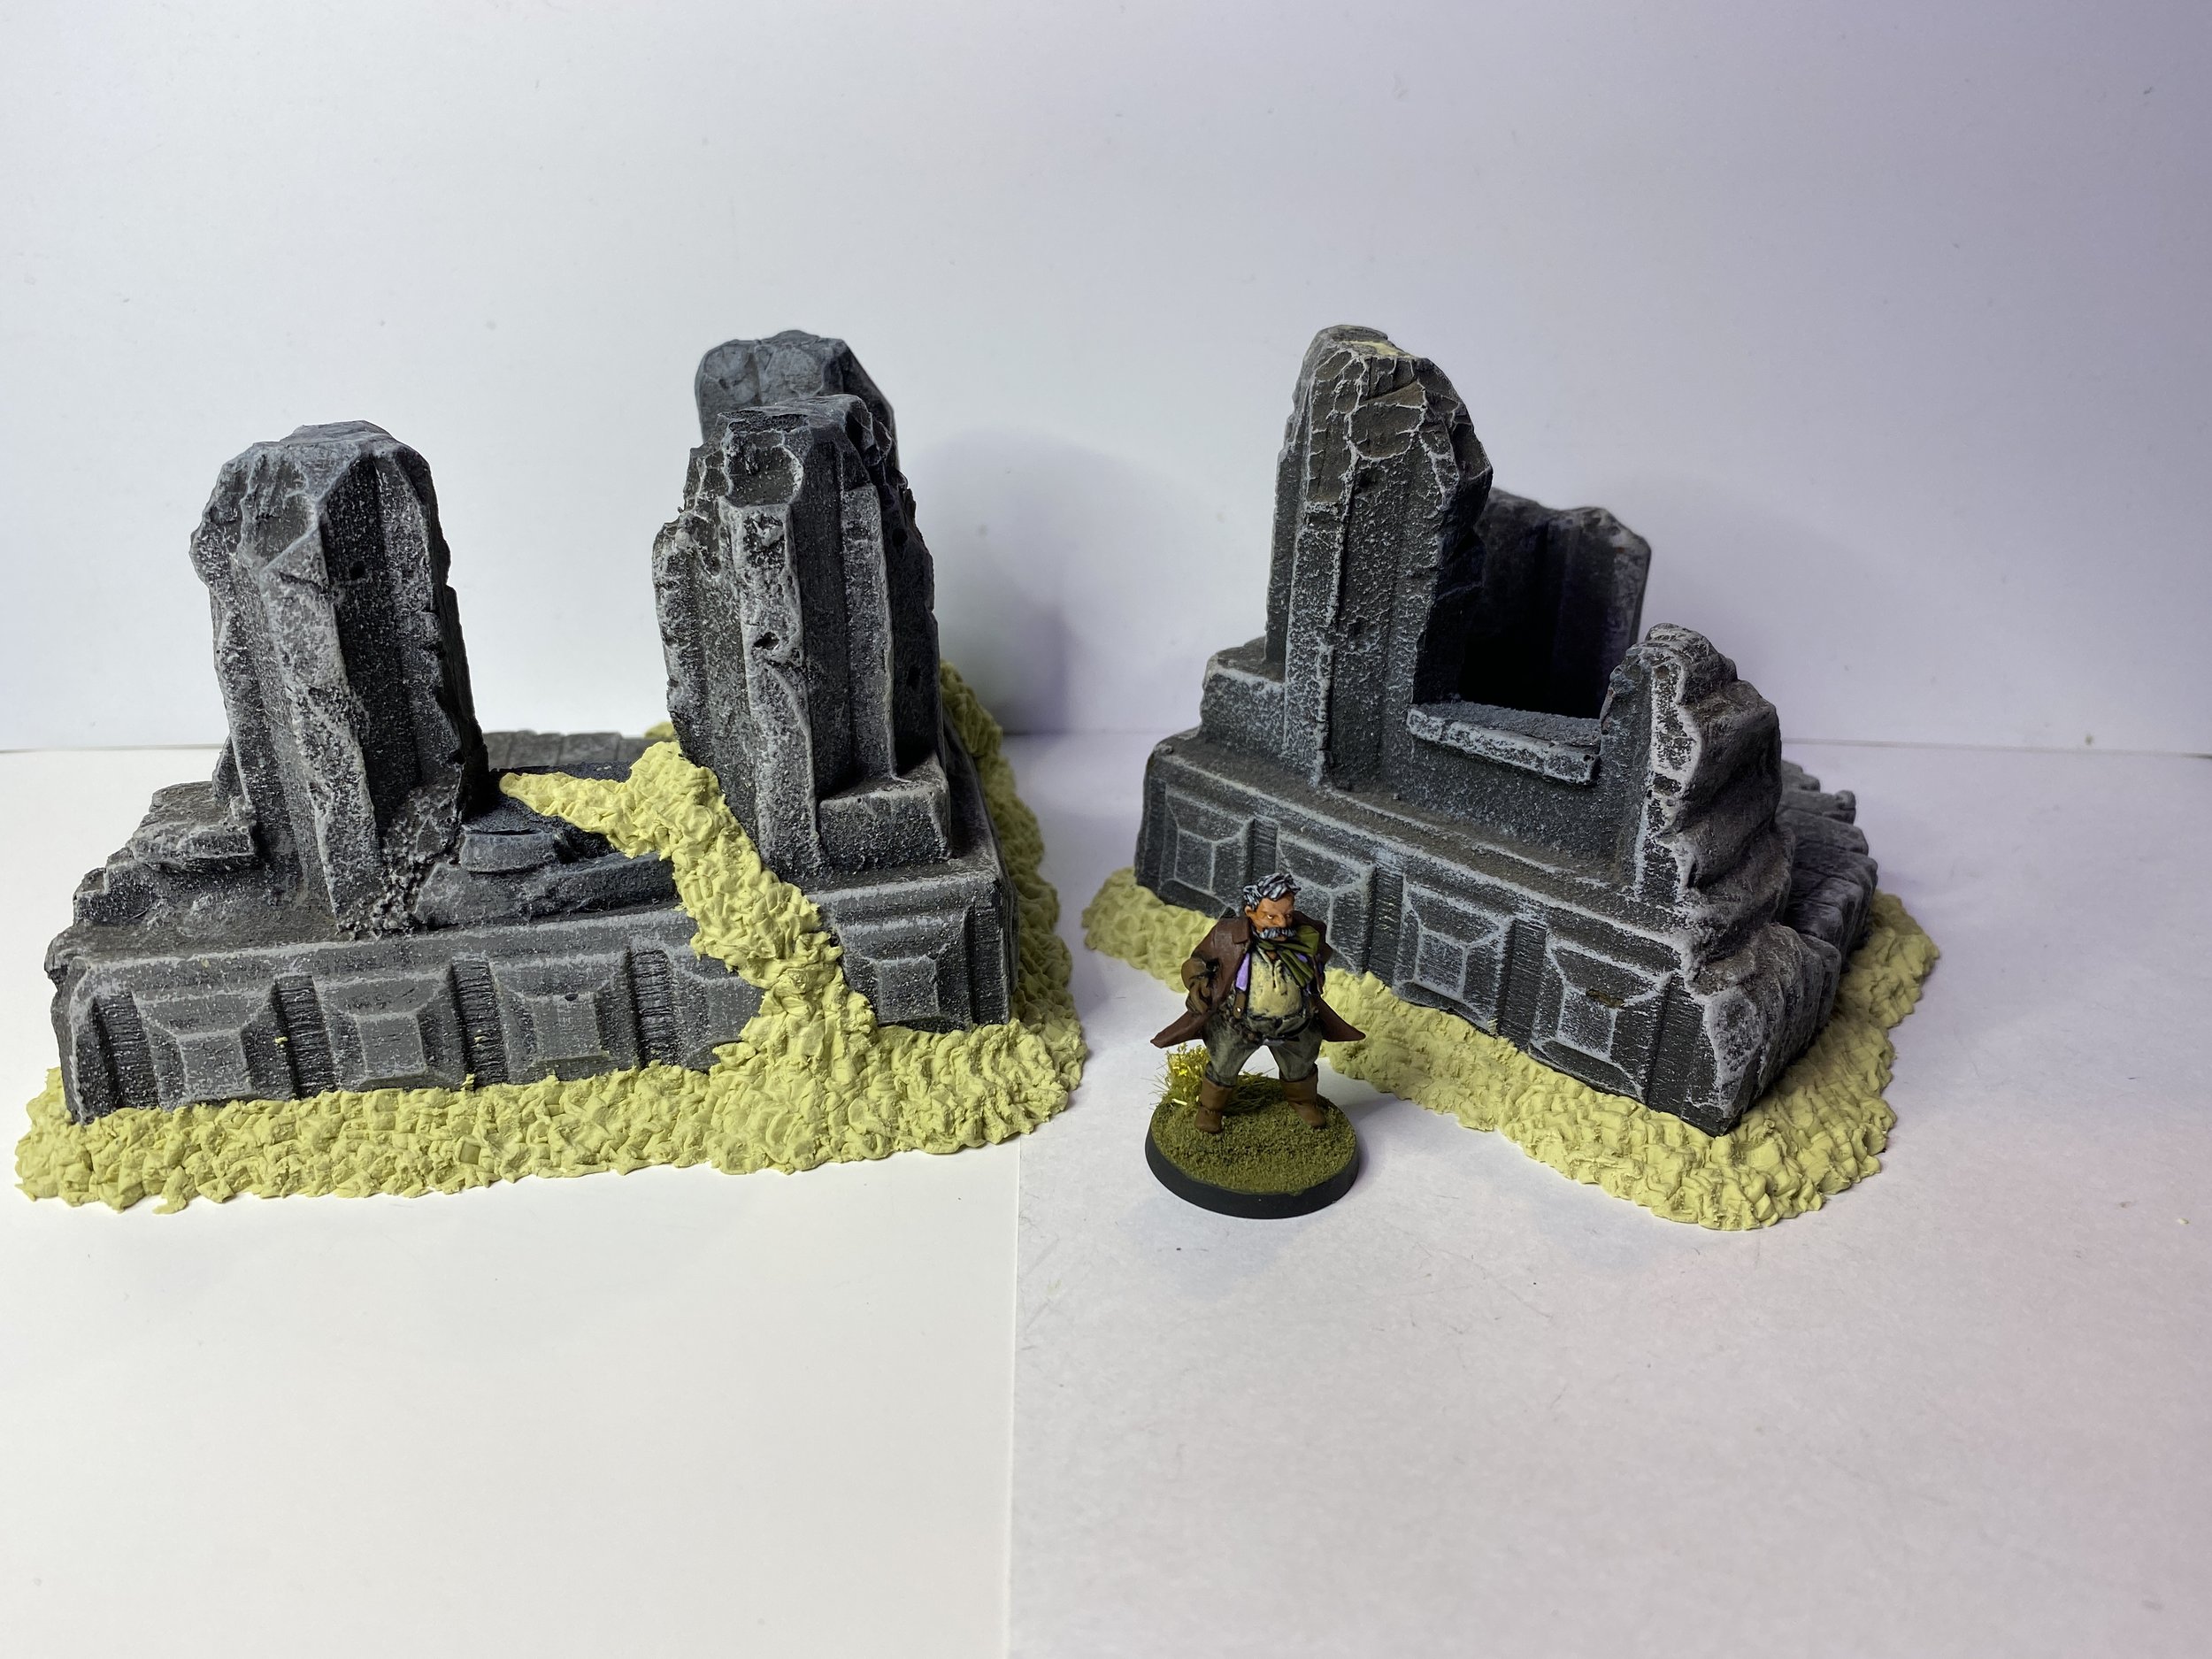
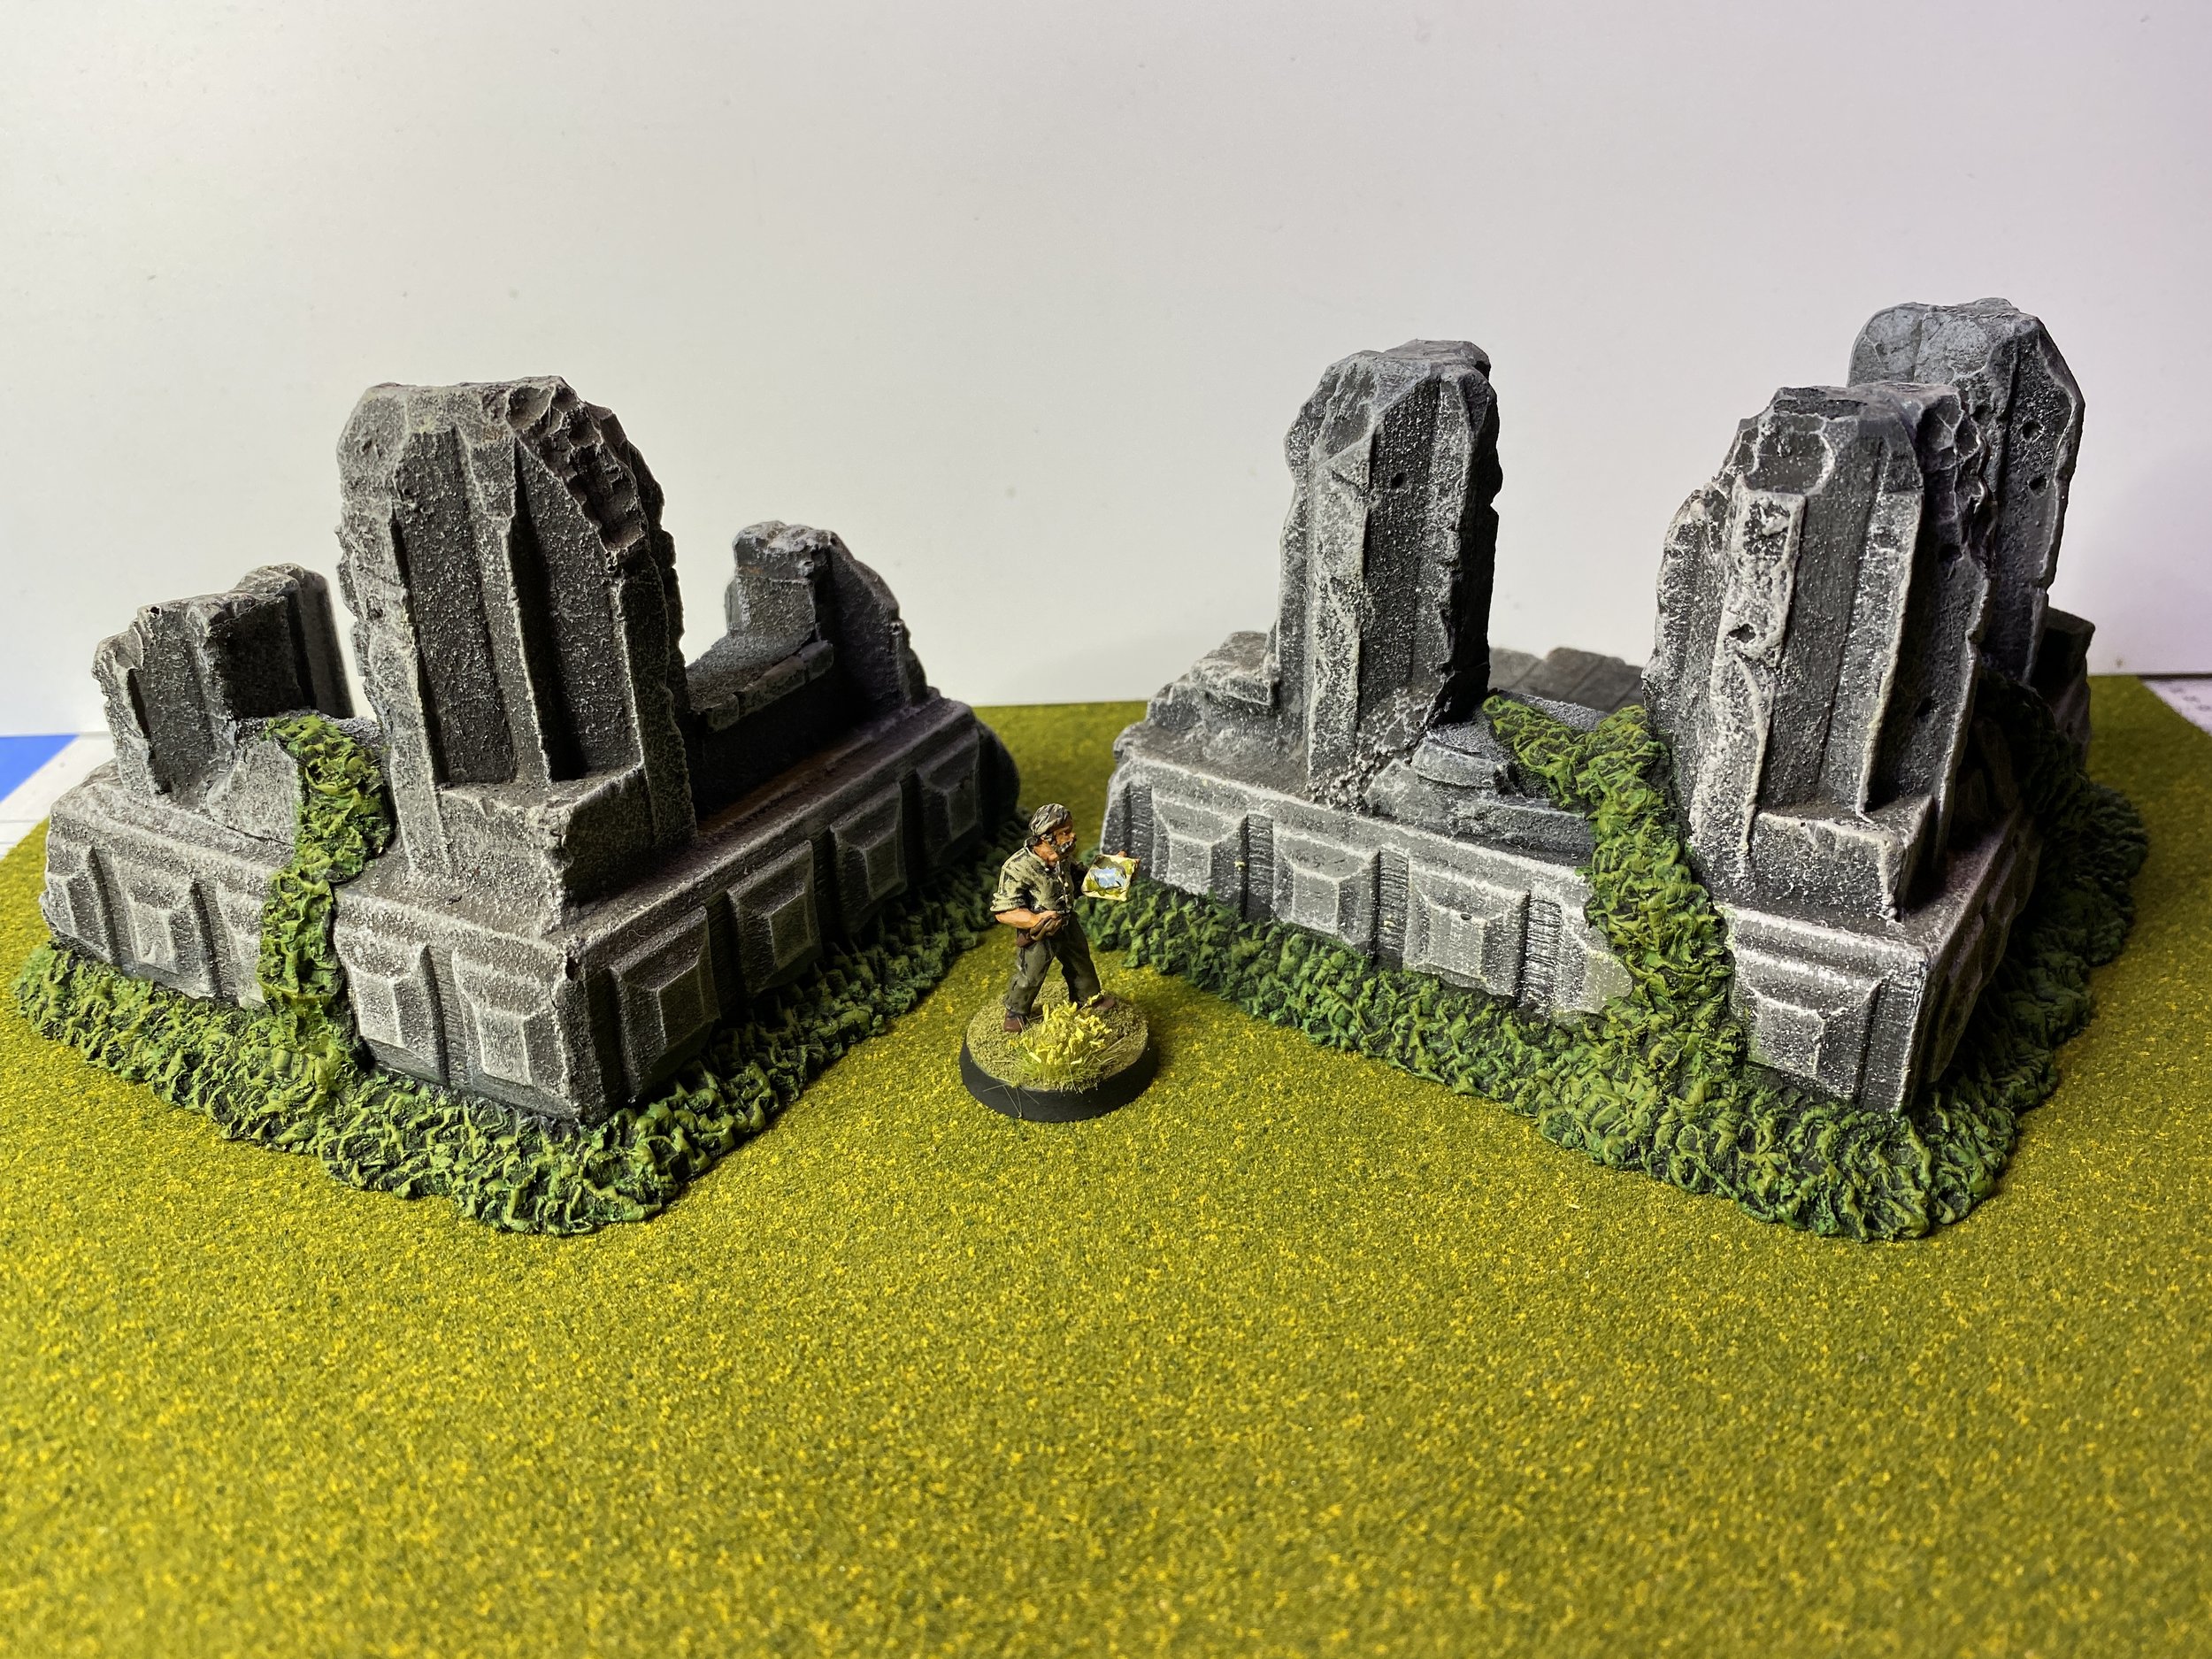
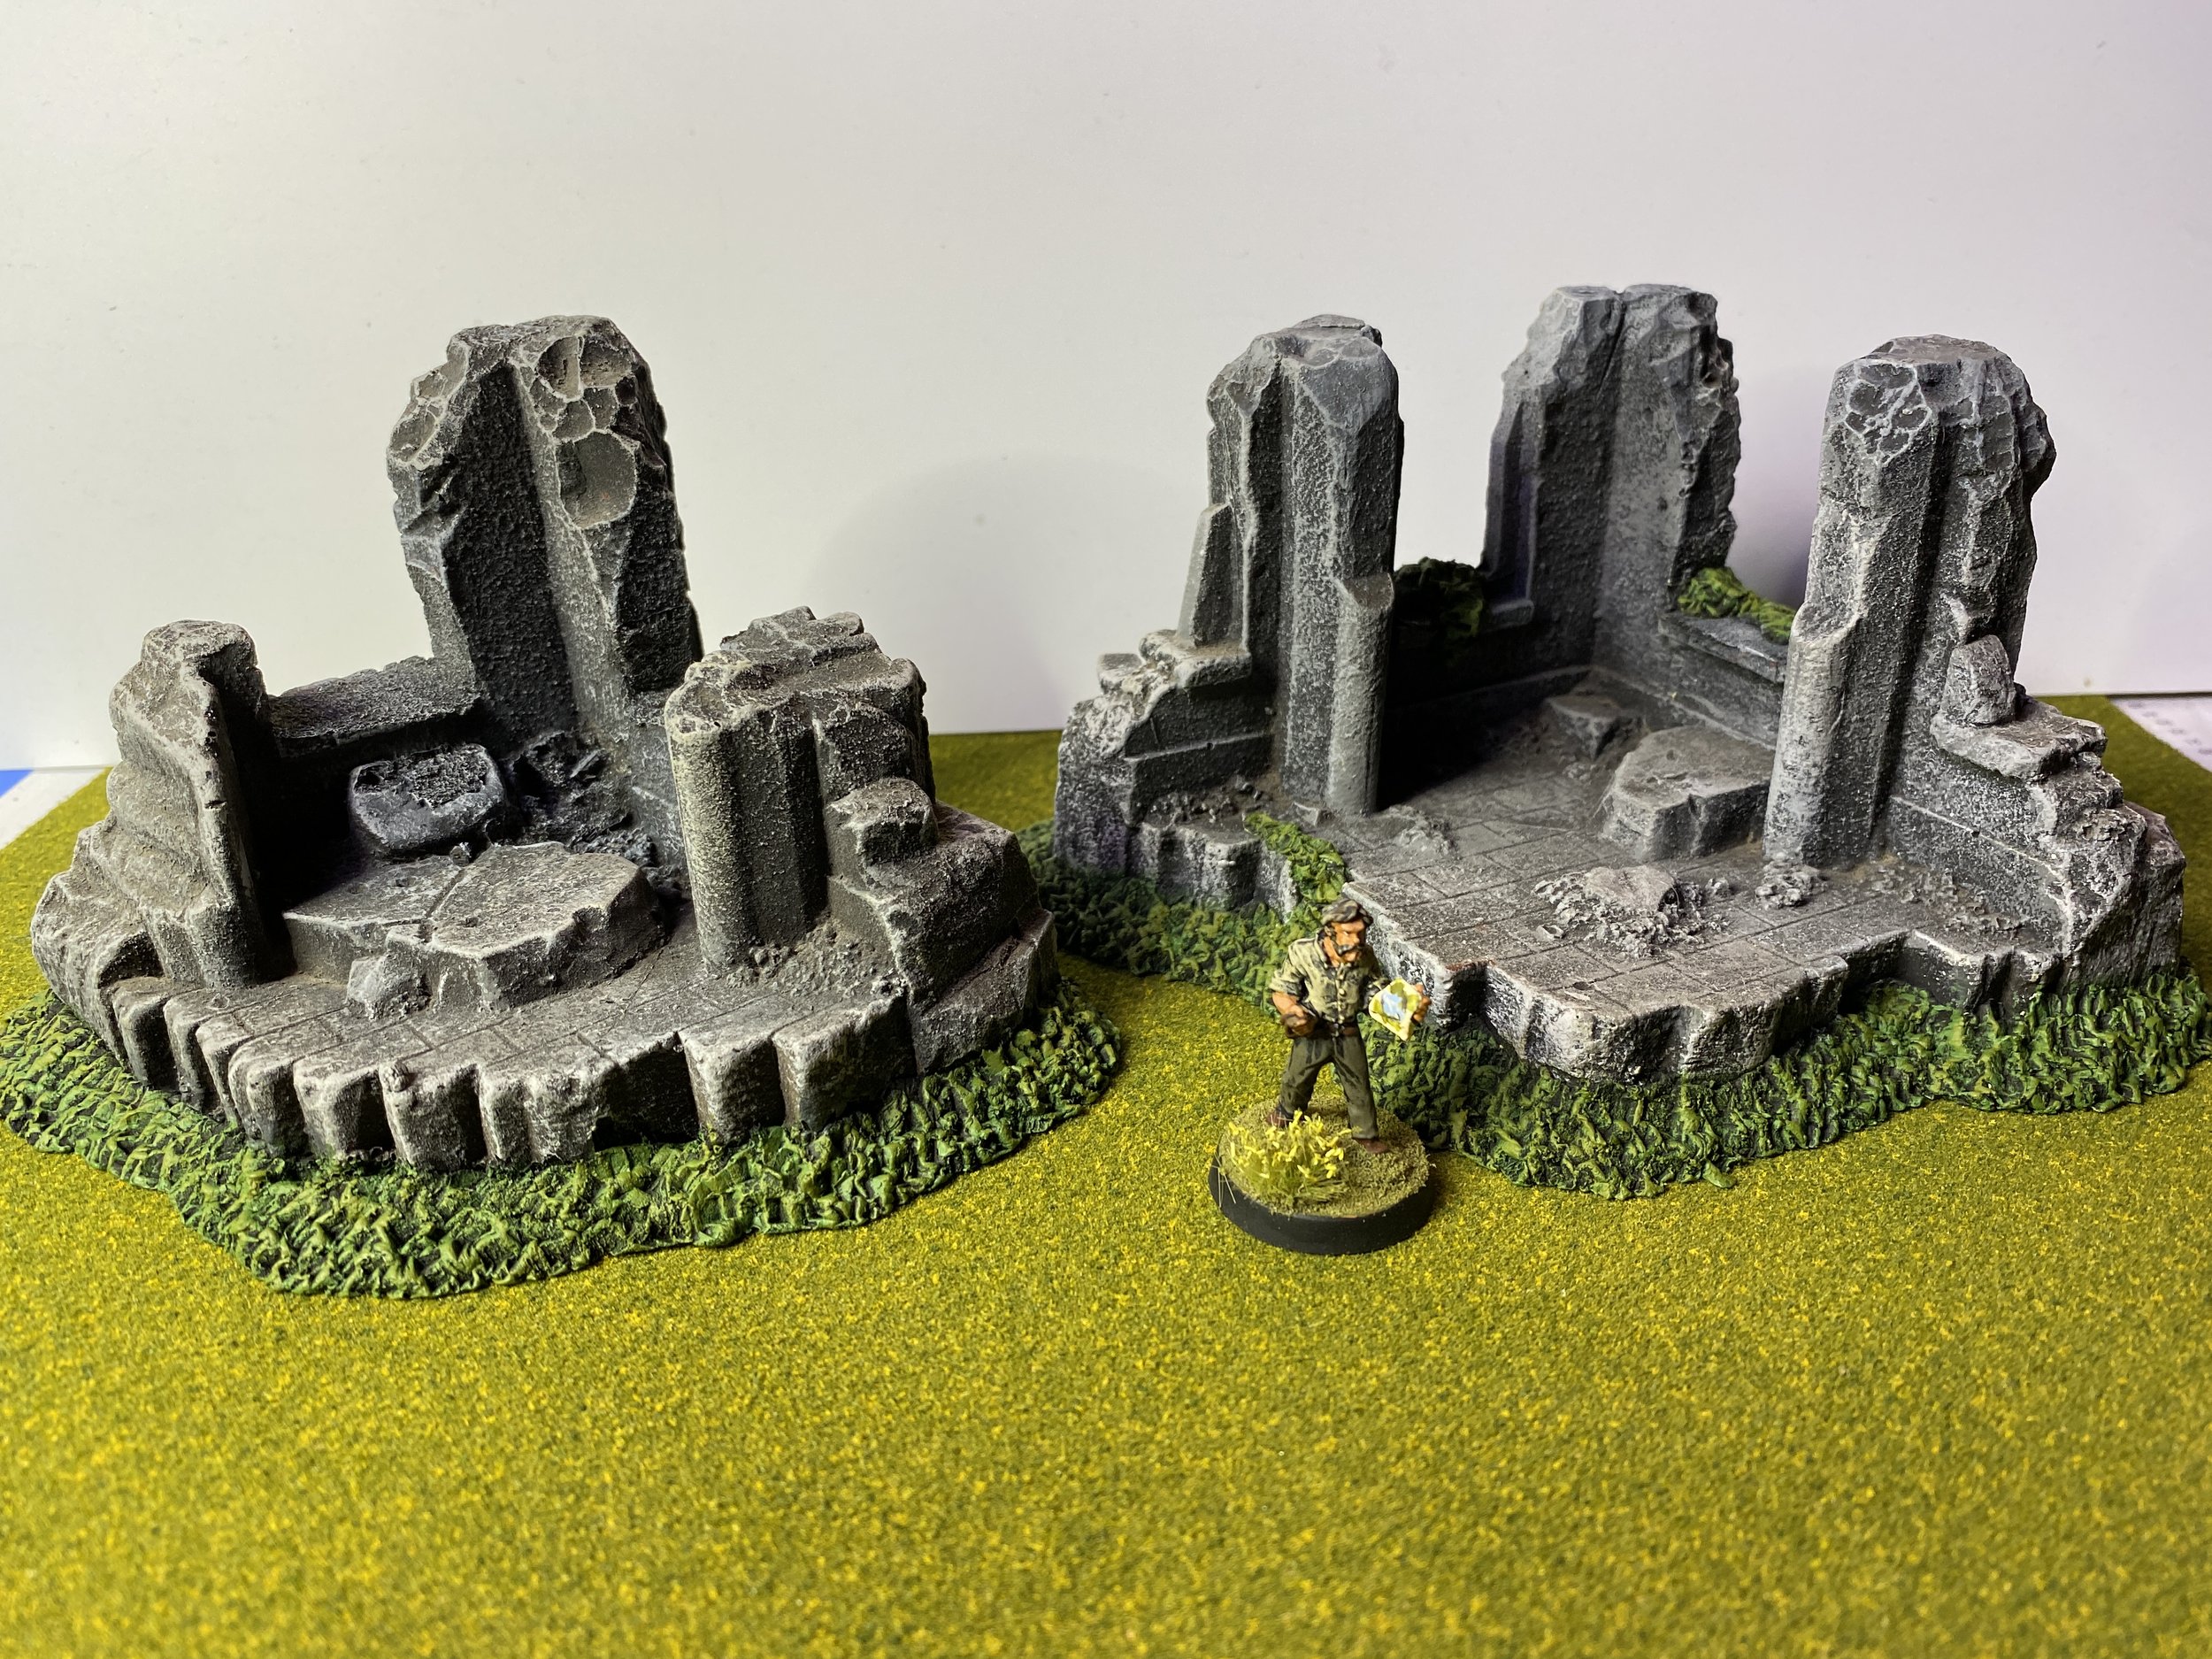
A week ago (last Saturday) Brookhurst Hobbies held a Bring and Buy, and one of my purchases was what turned out to be a set and three quarters of a long-out-of-production group of Games Workshop foam ruins from Cityfight. I decided to transform them from being bombed-out ruins serving as defensive positions to ruins in decay being reclaimed by nature. I did this by adding lots of shrubs made of Milliput. All I did was stick the Milliput in the spots I wanted it and score it with a piece of Evergreen plastic. I like the new look much better than the original. I painted the shrubs Vallejo Uniform Green and highlighted them with Yellow Green… both Model Color.