June 28, 2026
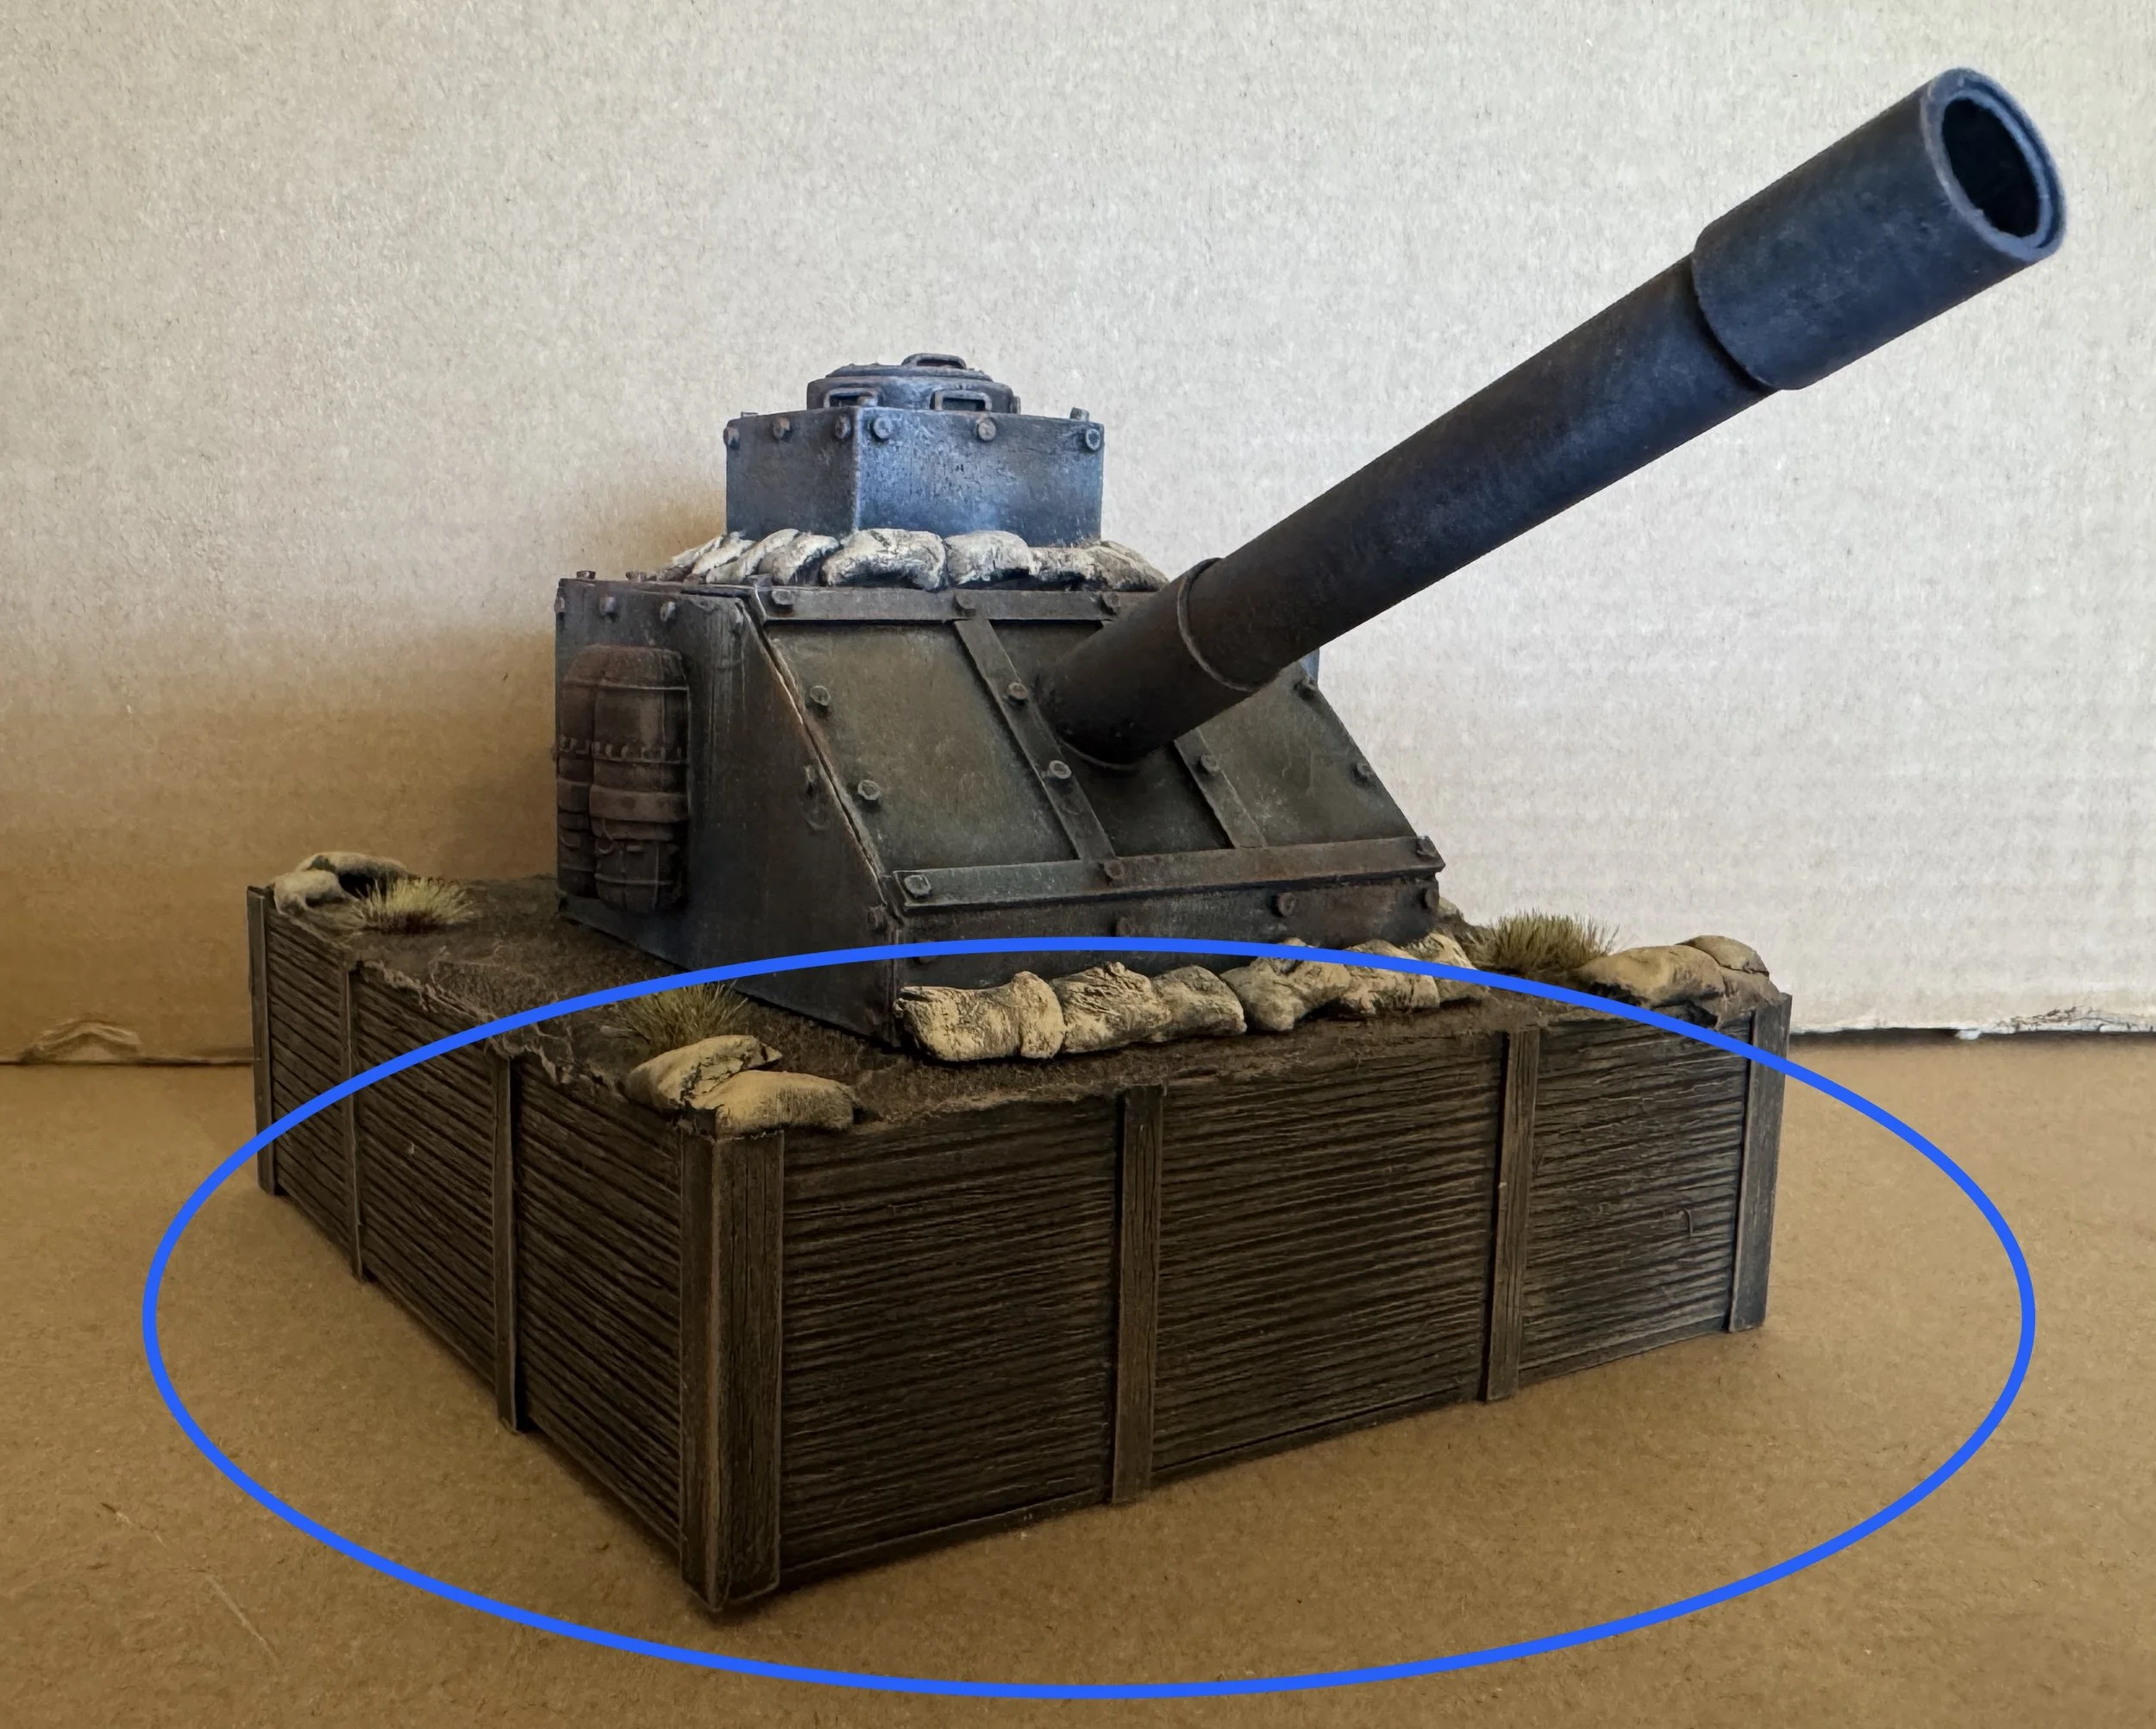
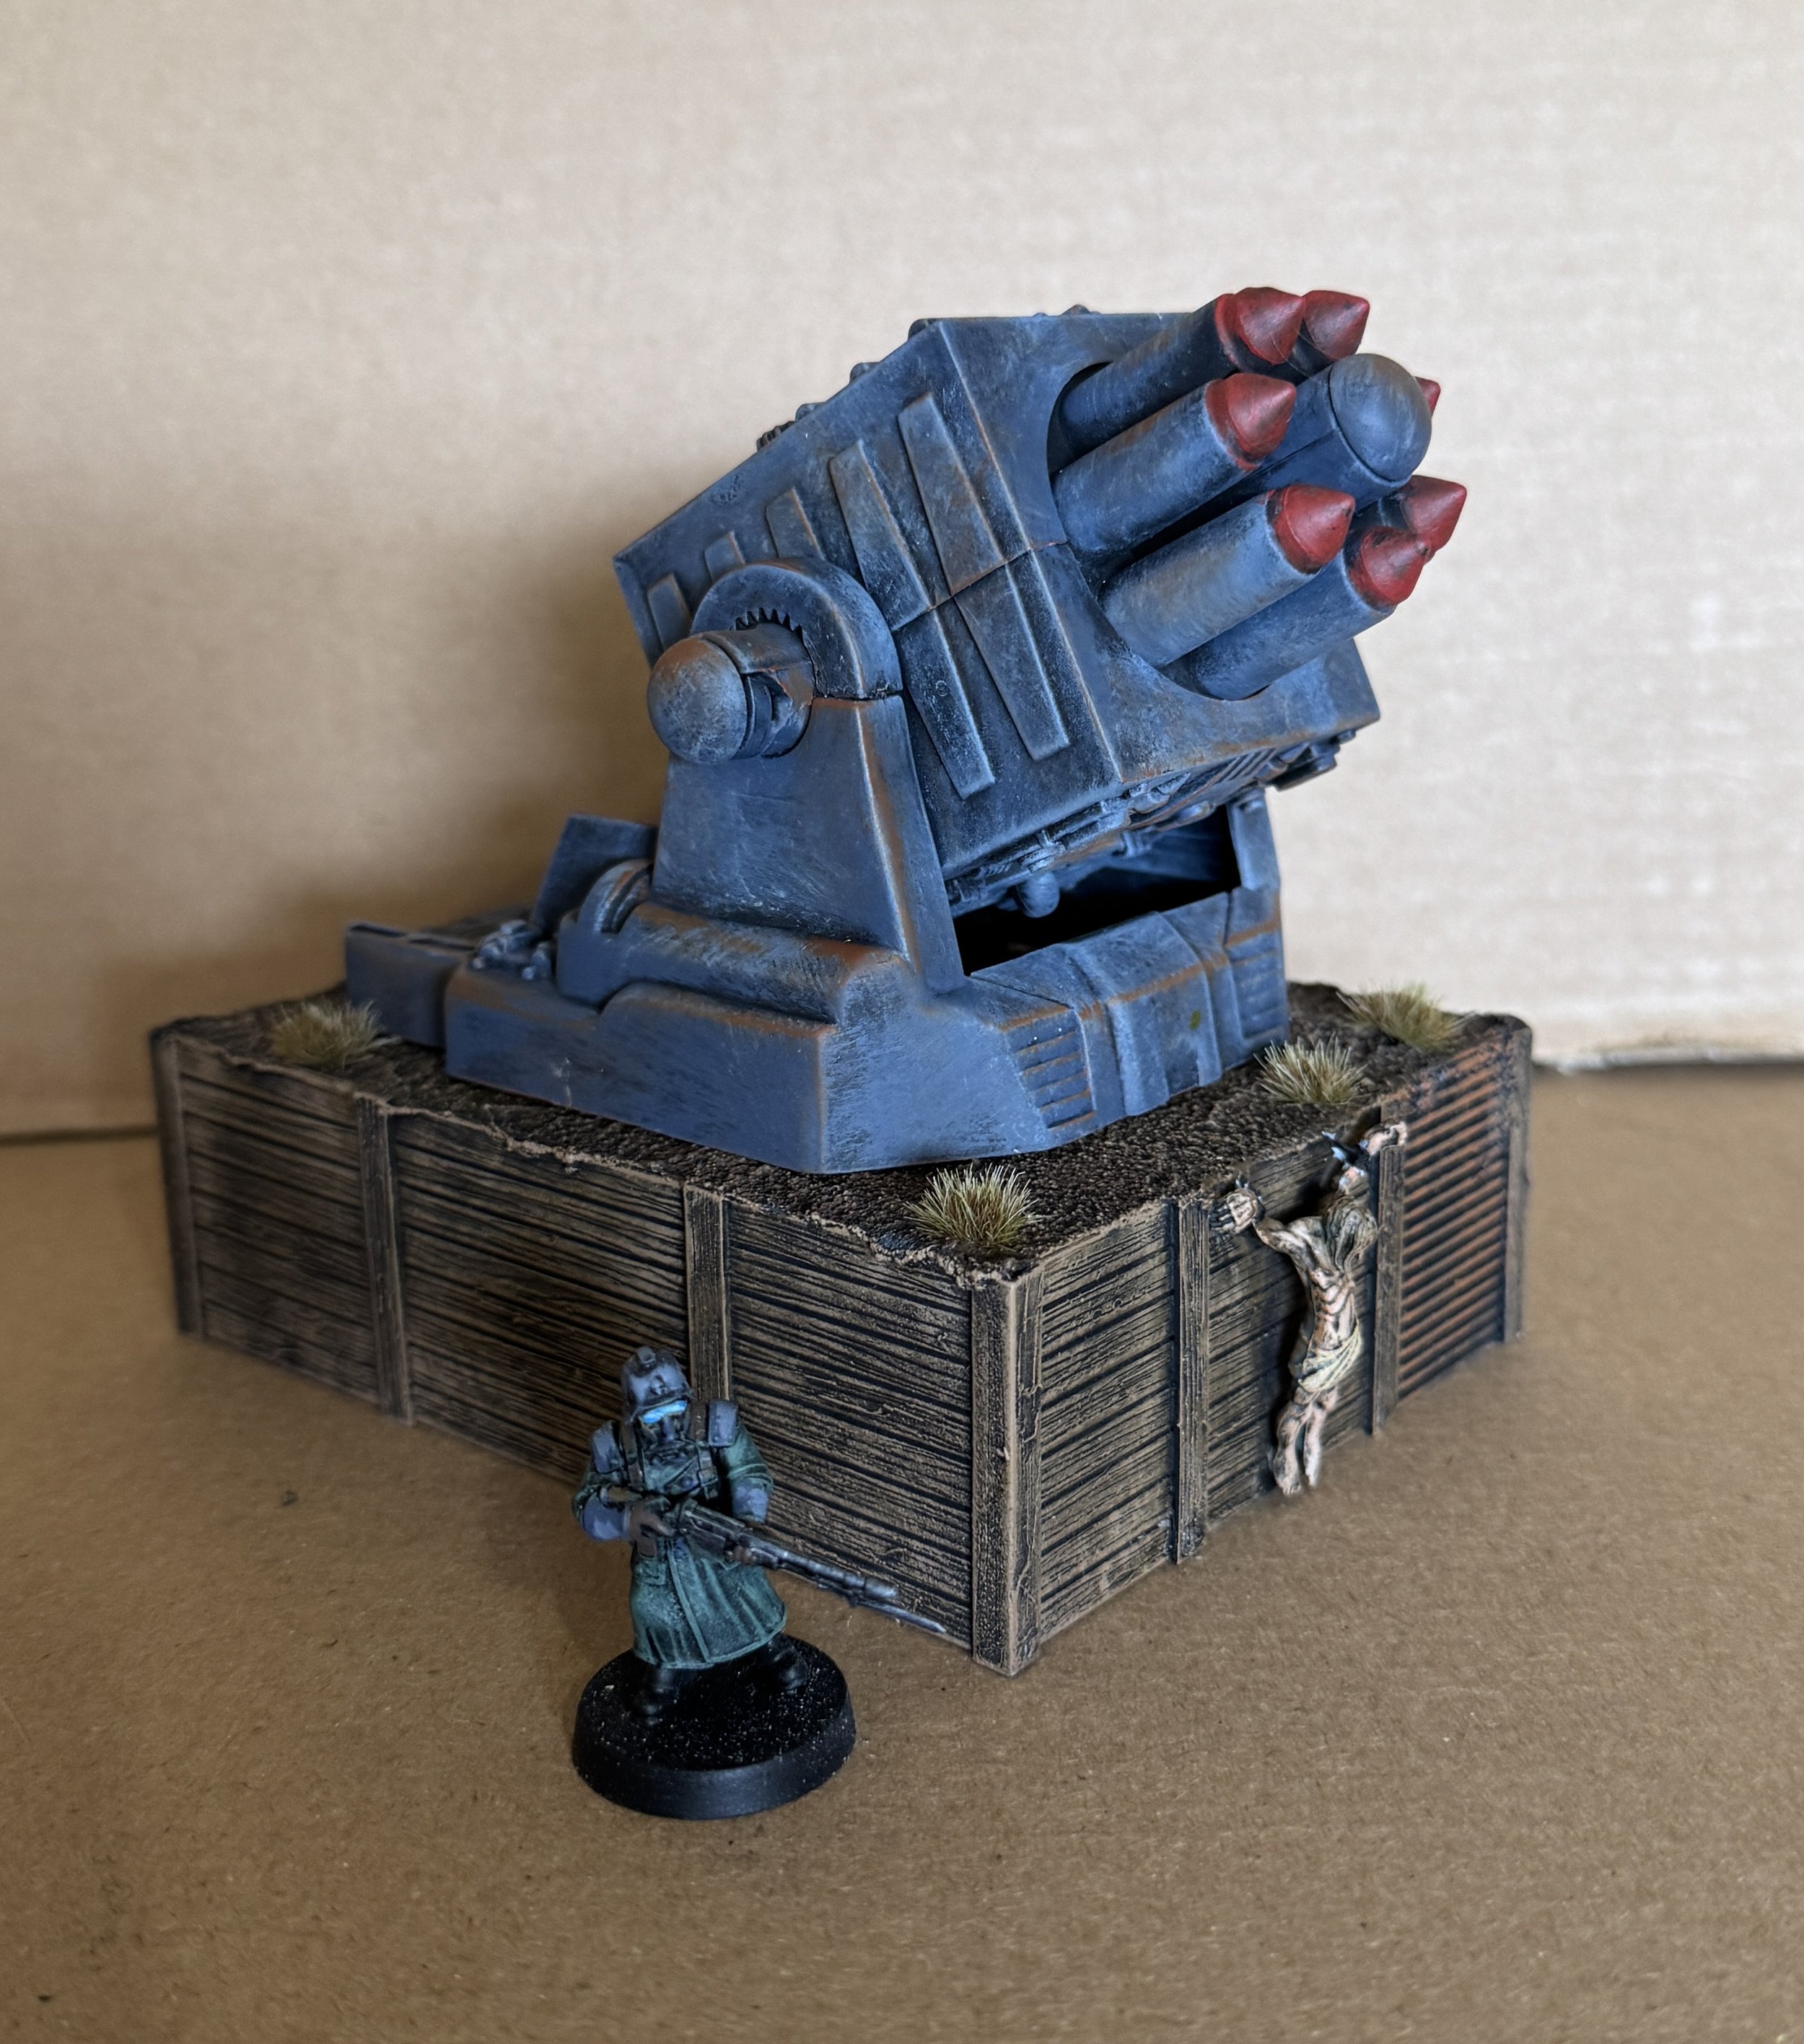
The week began with repurposing a revolving cannon gun mount I found at the swap meet this past weekend. I constructed a trench base for it using Evergreen plastic around a core of Duplo blocks. I added a figure from the Reaper Tree of Despair to the front of the trench base. This gun mount will serve the Heretic trench line.
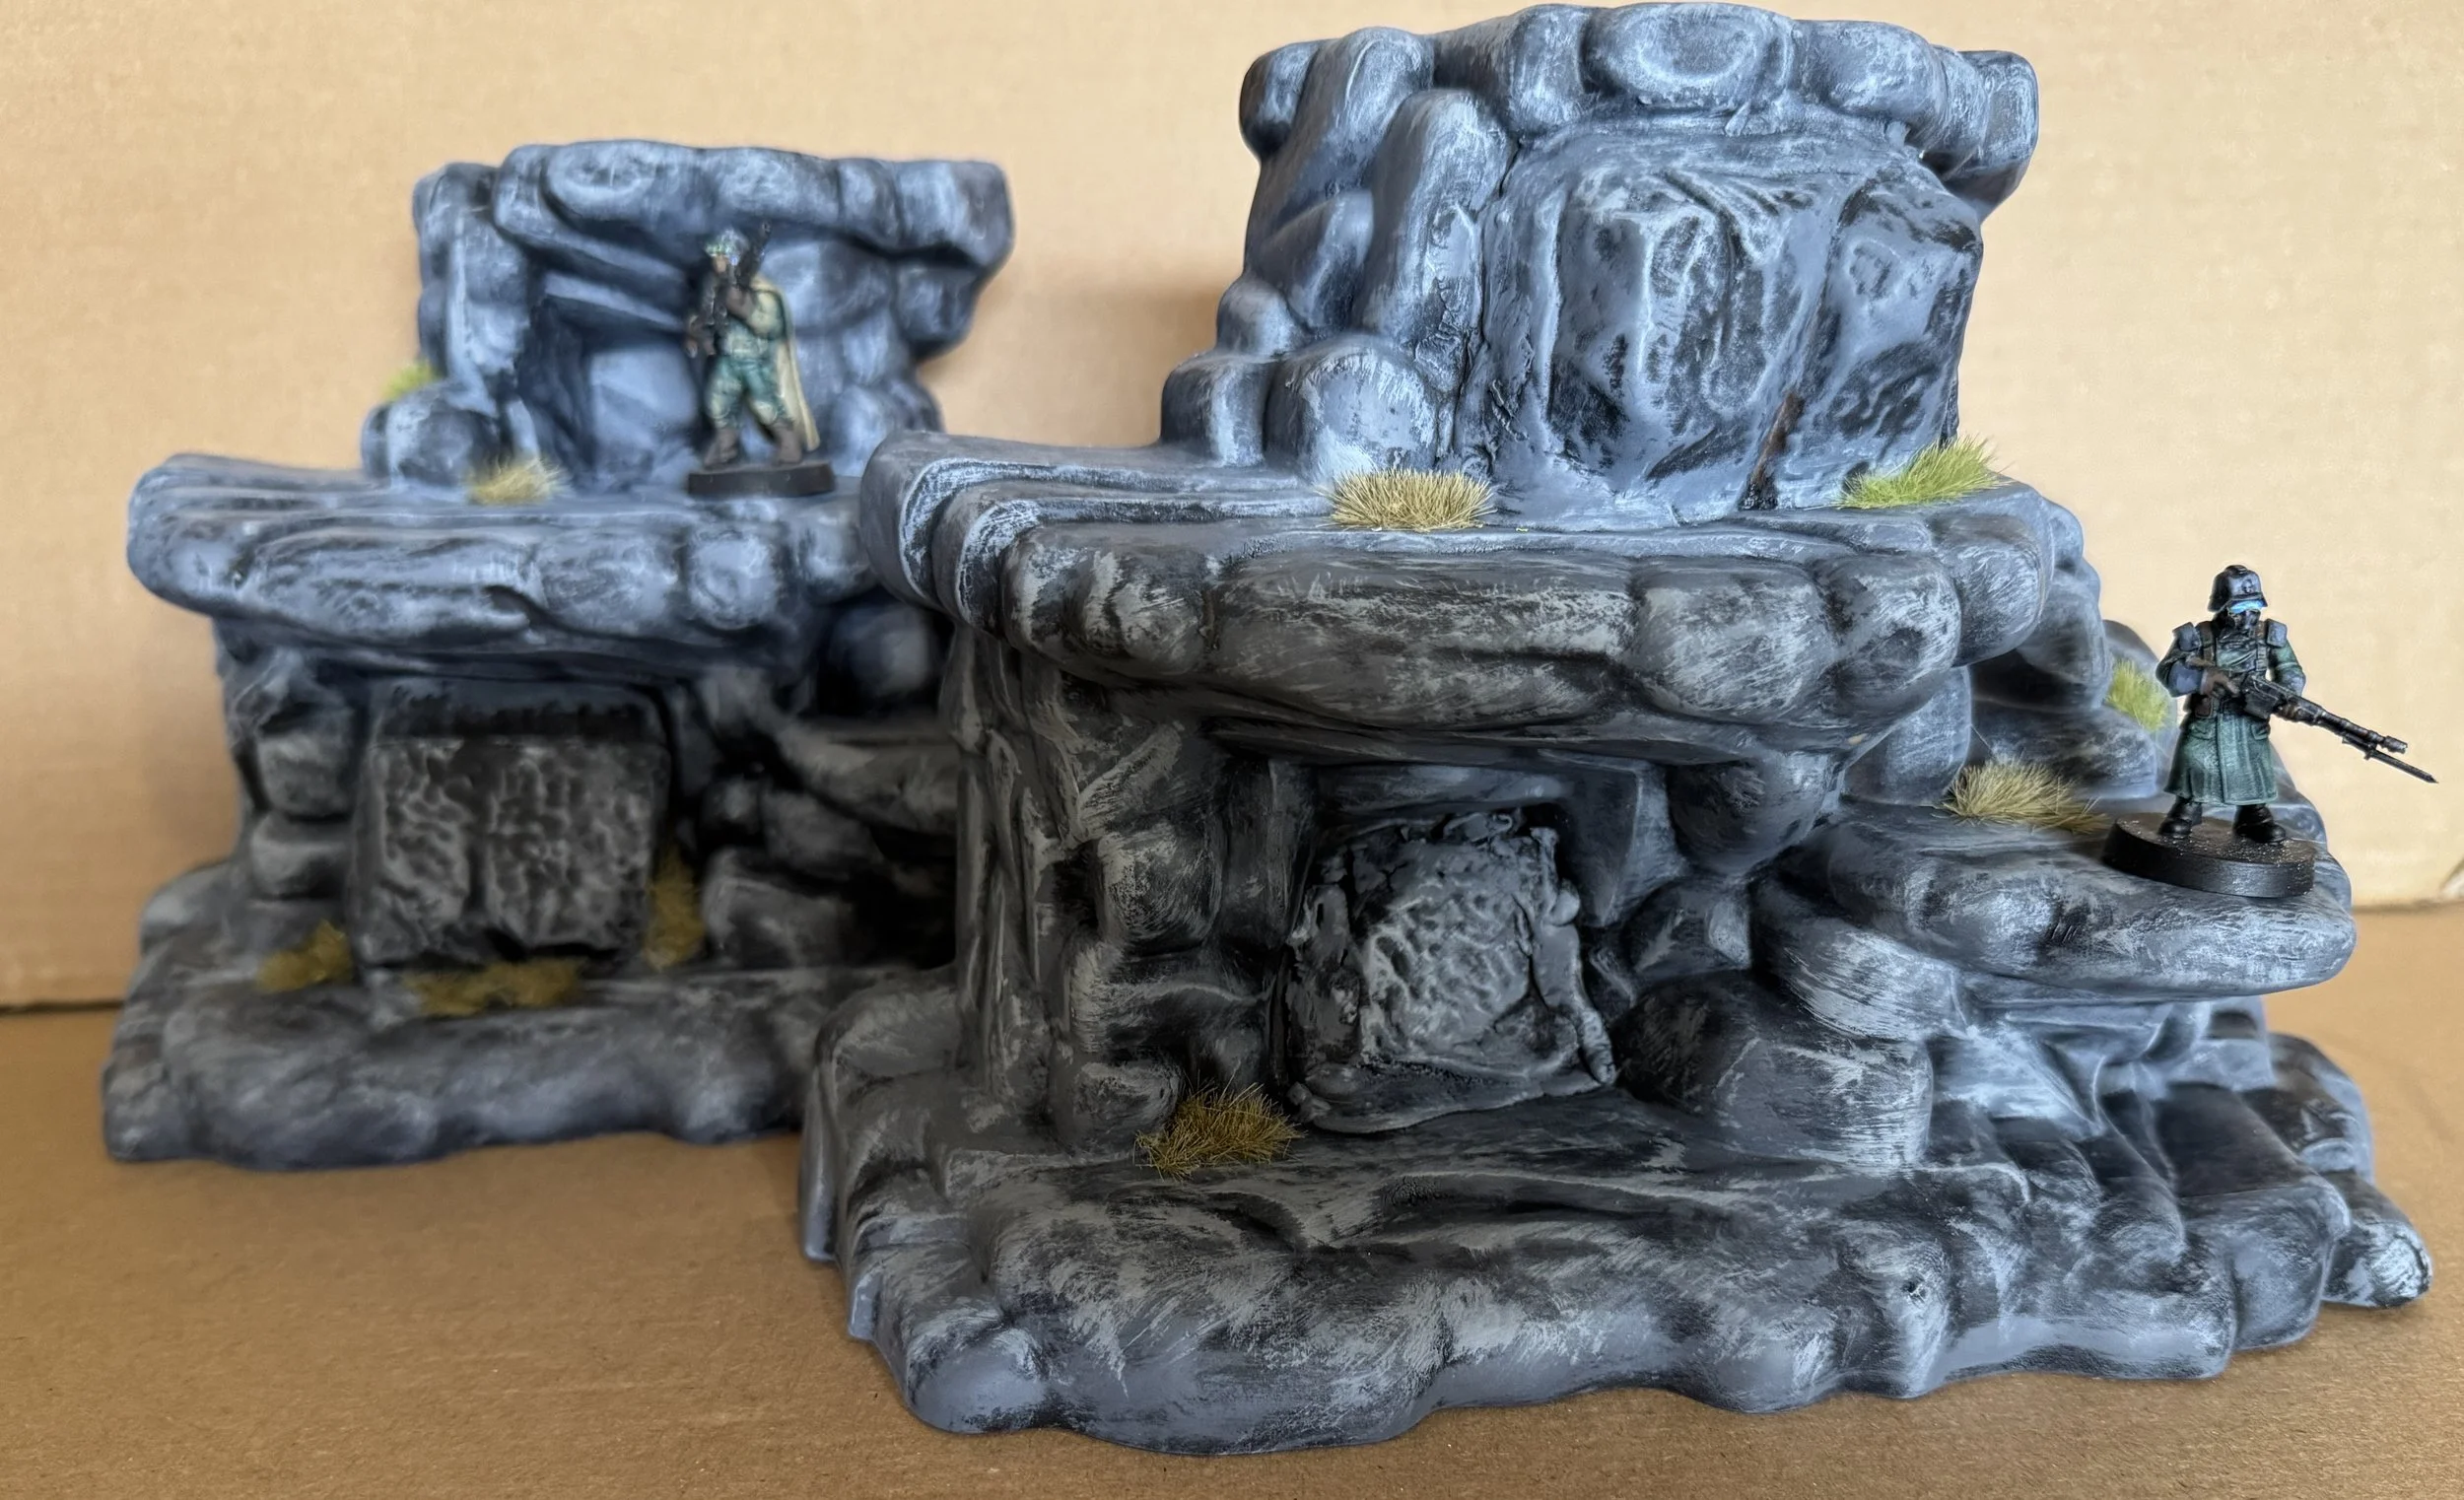
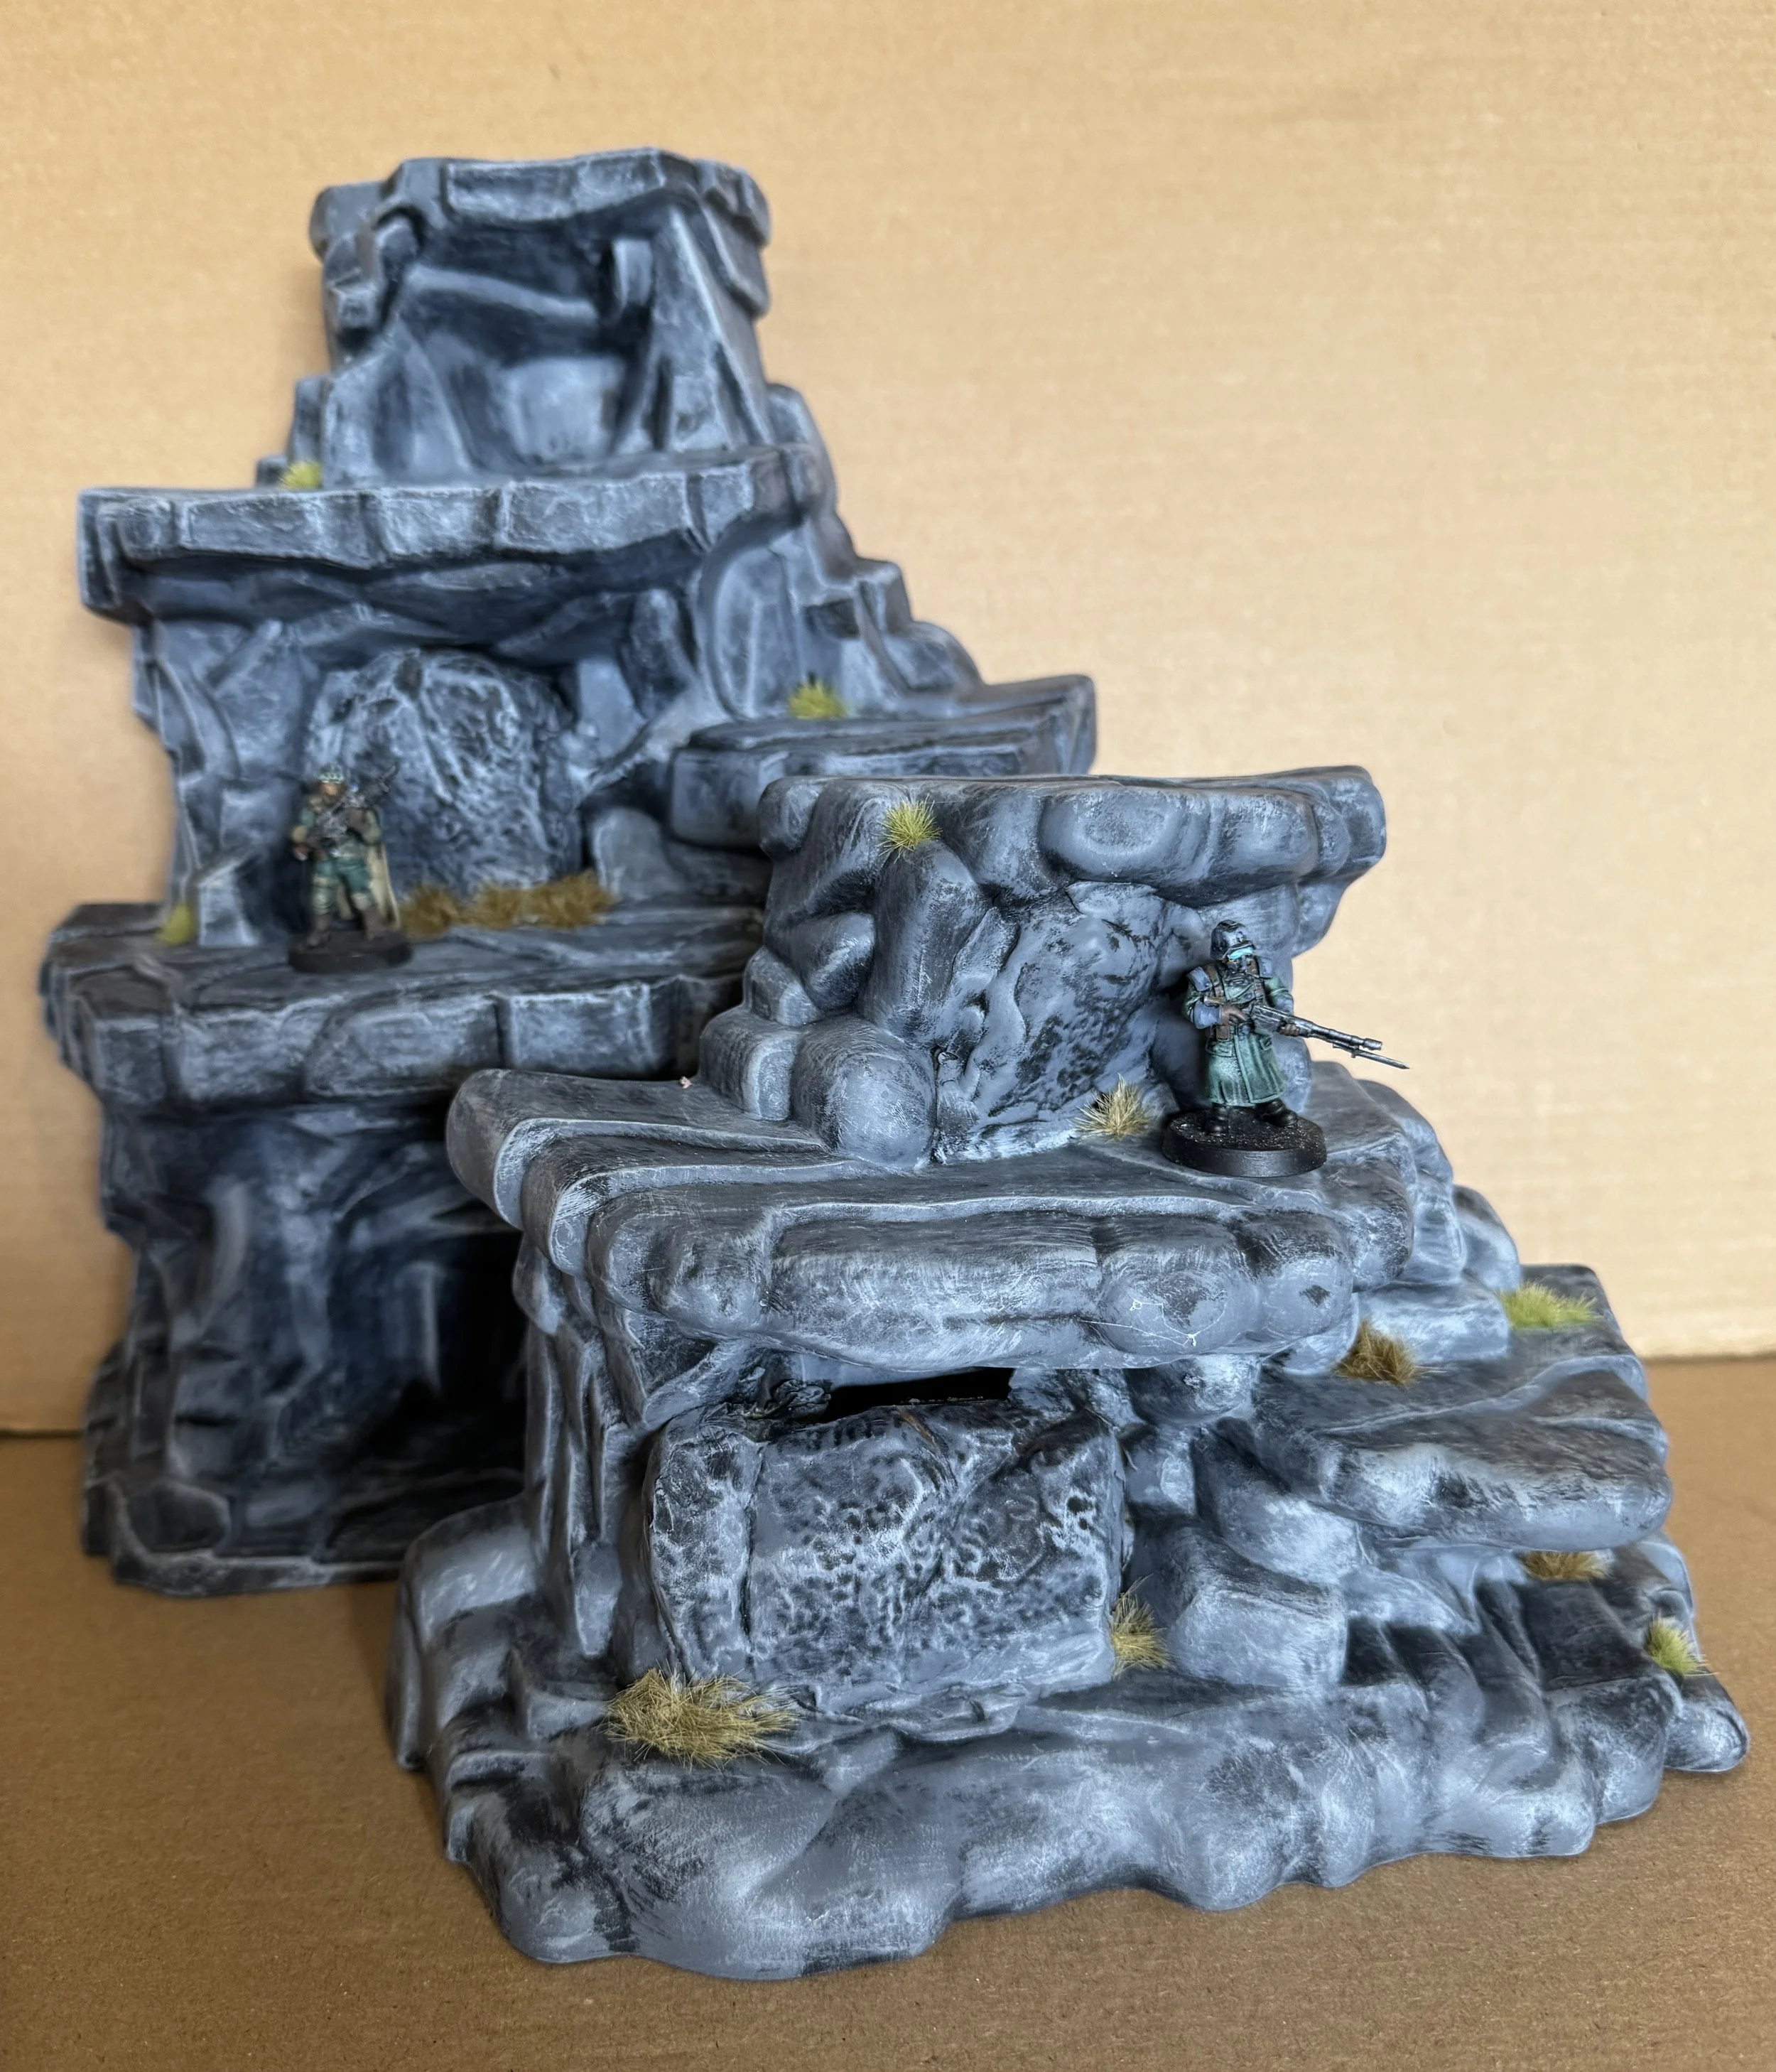
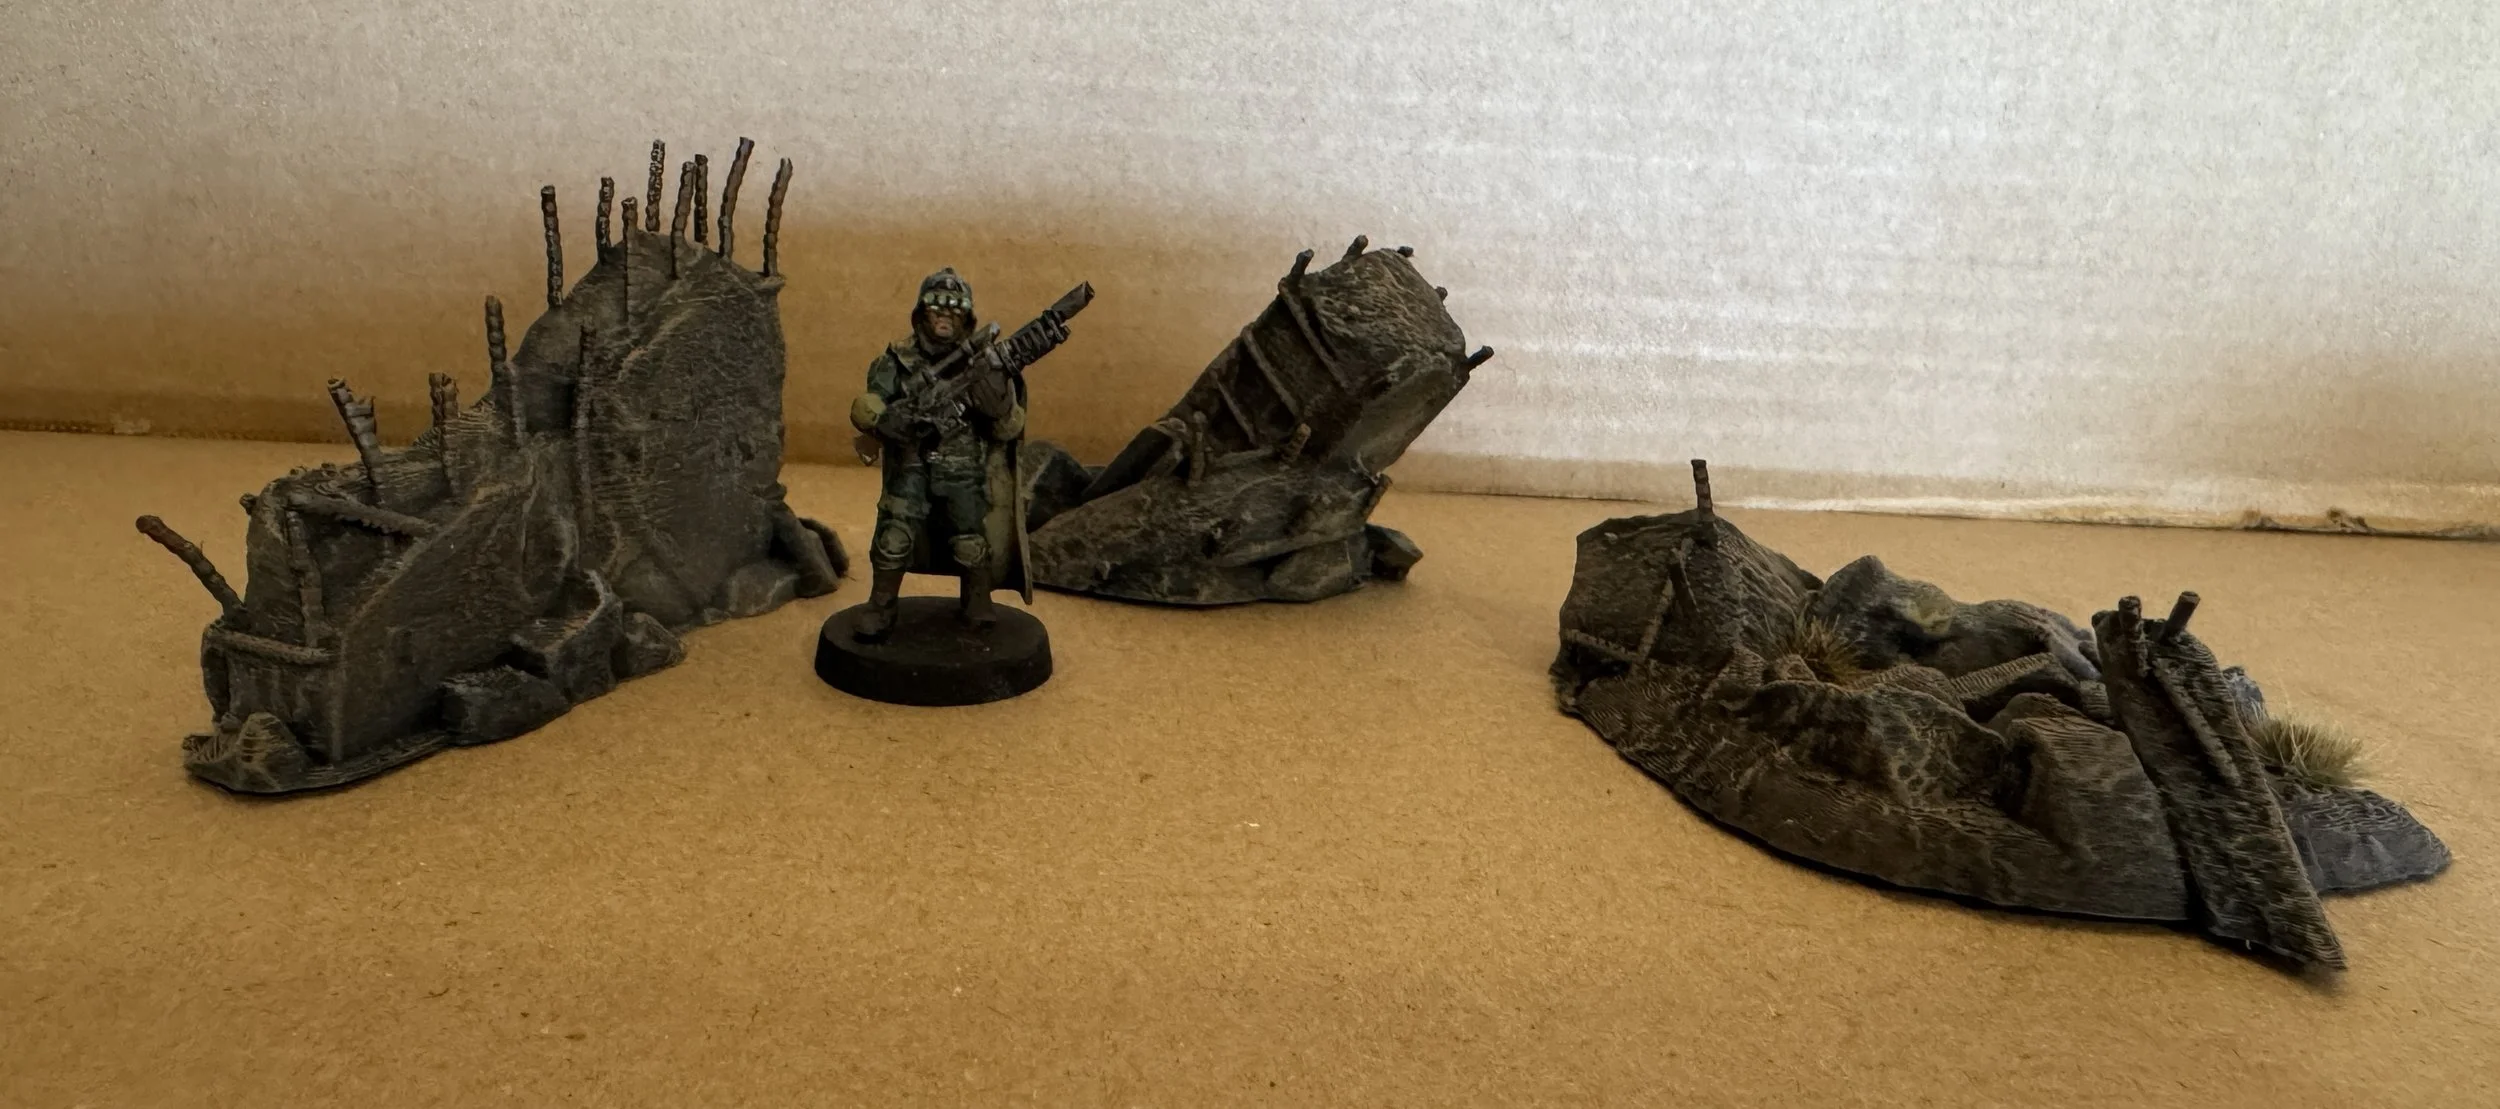
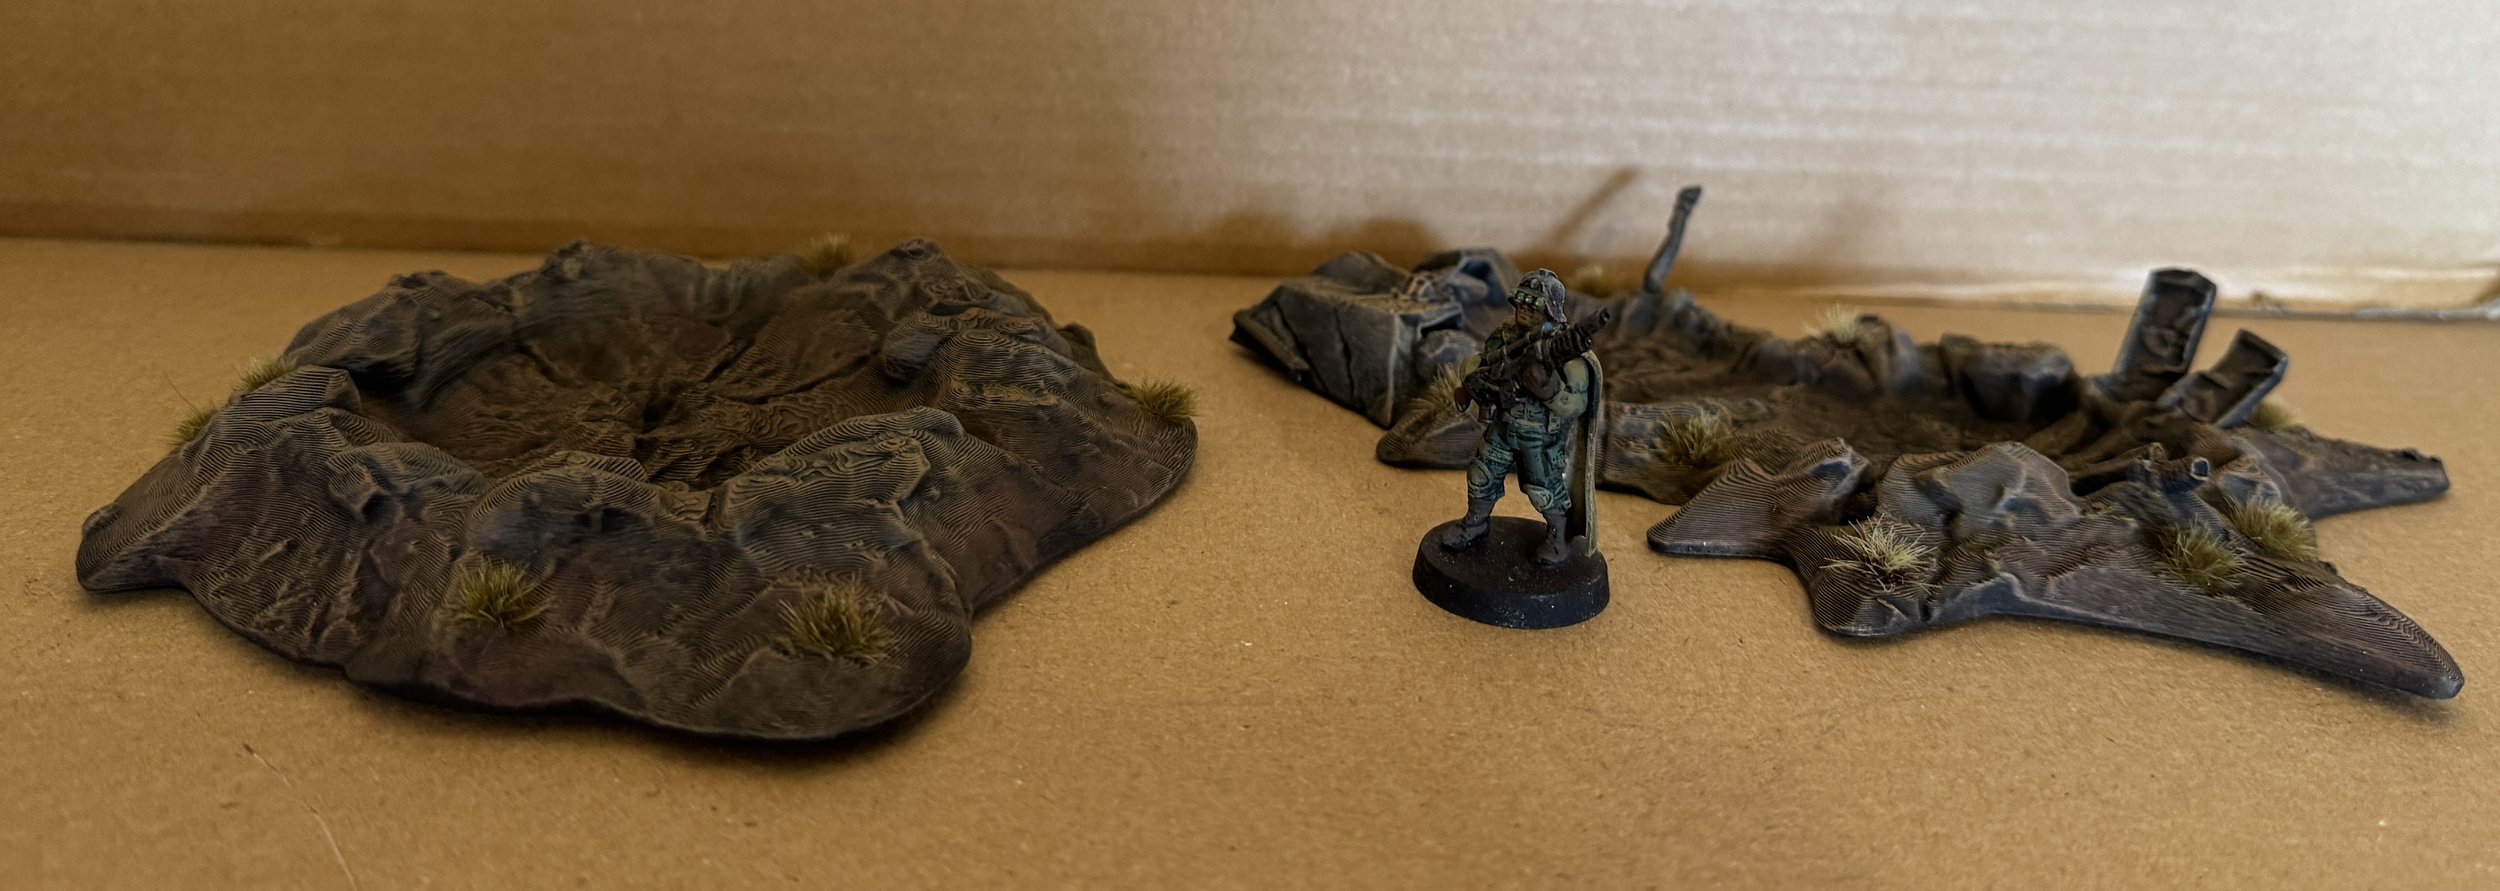
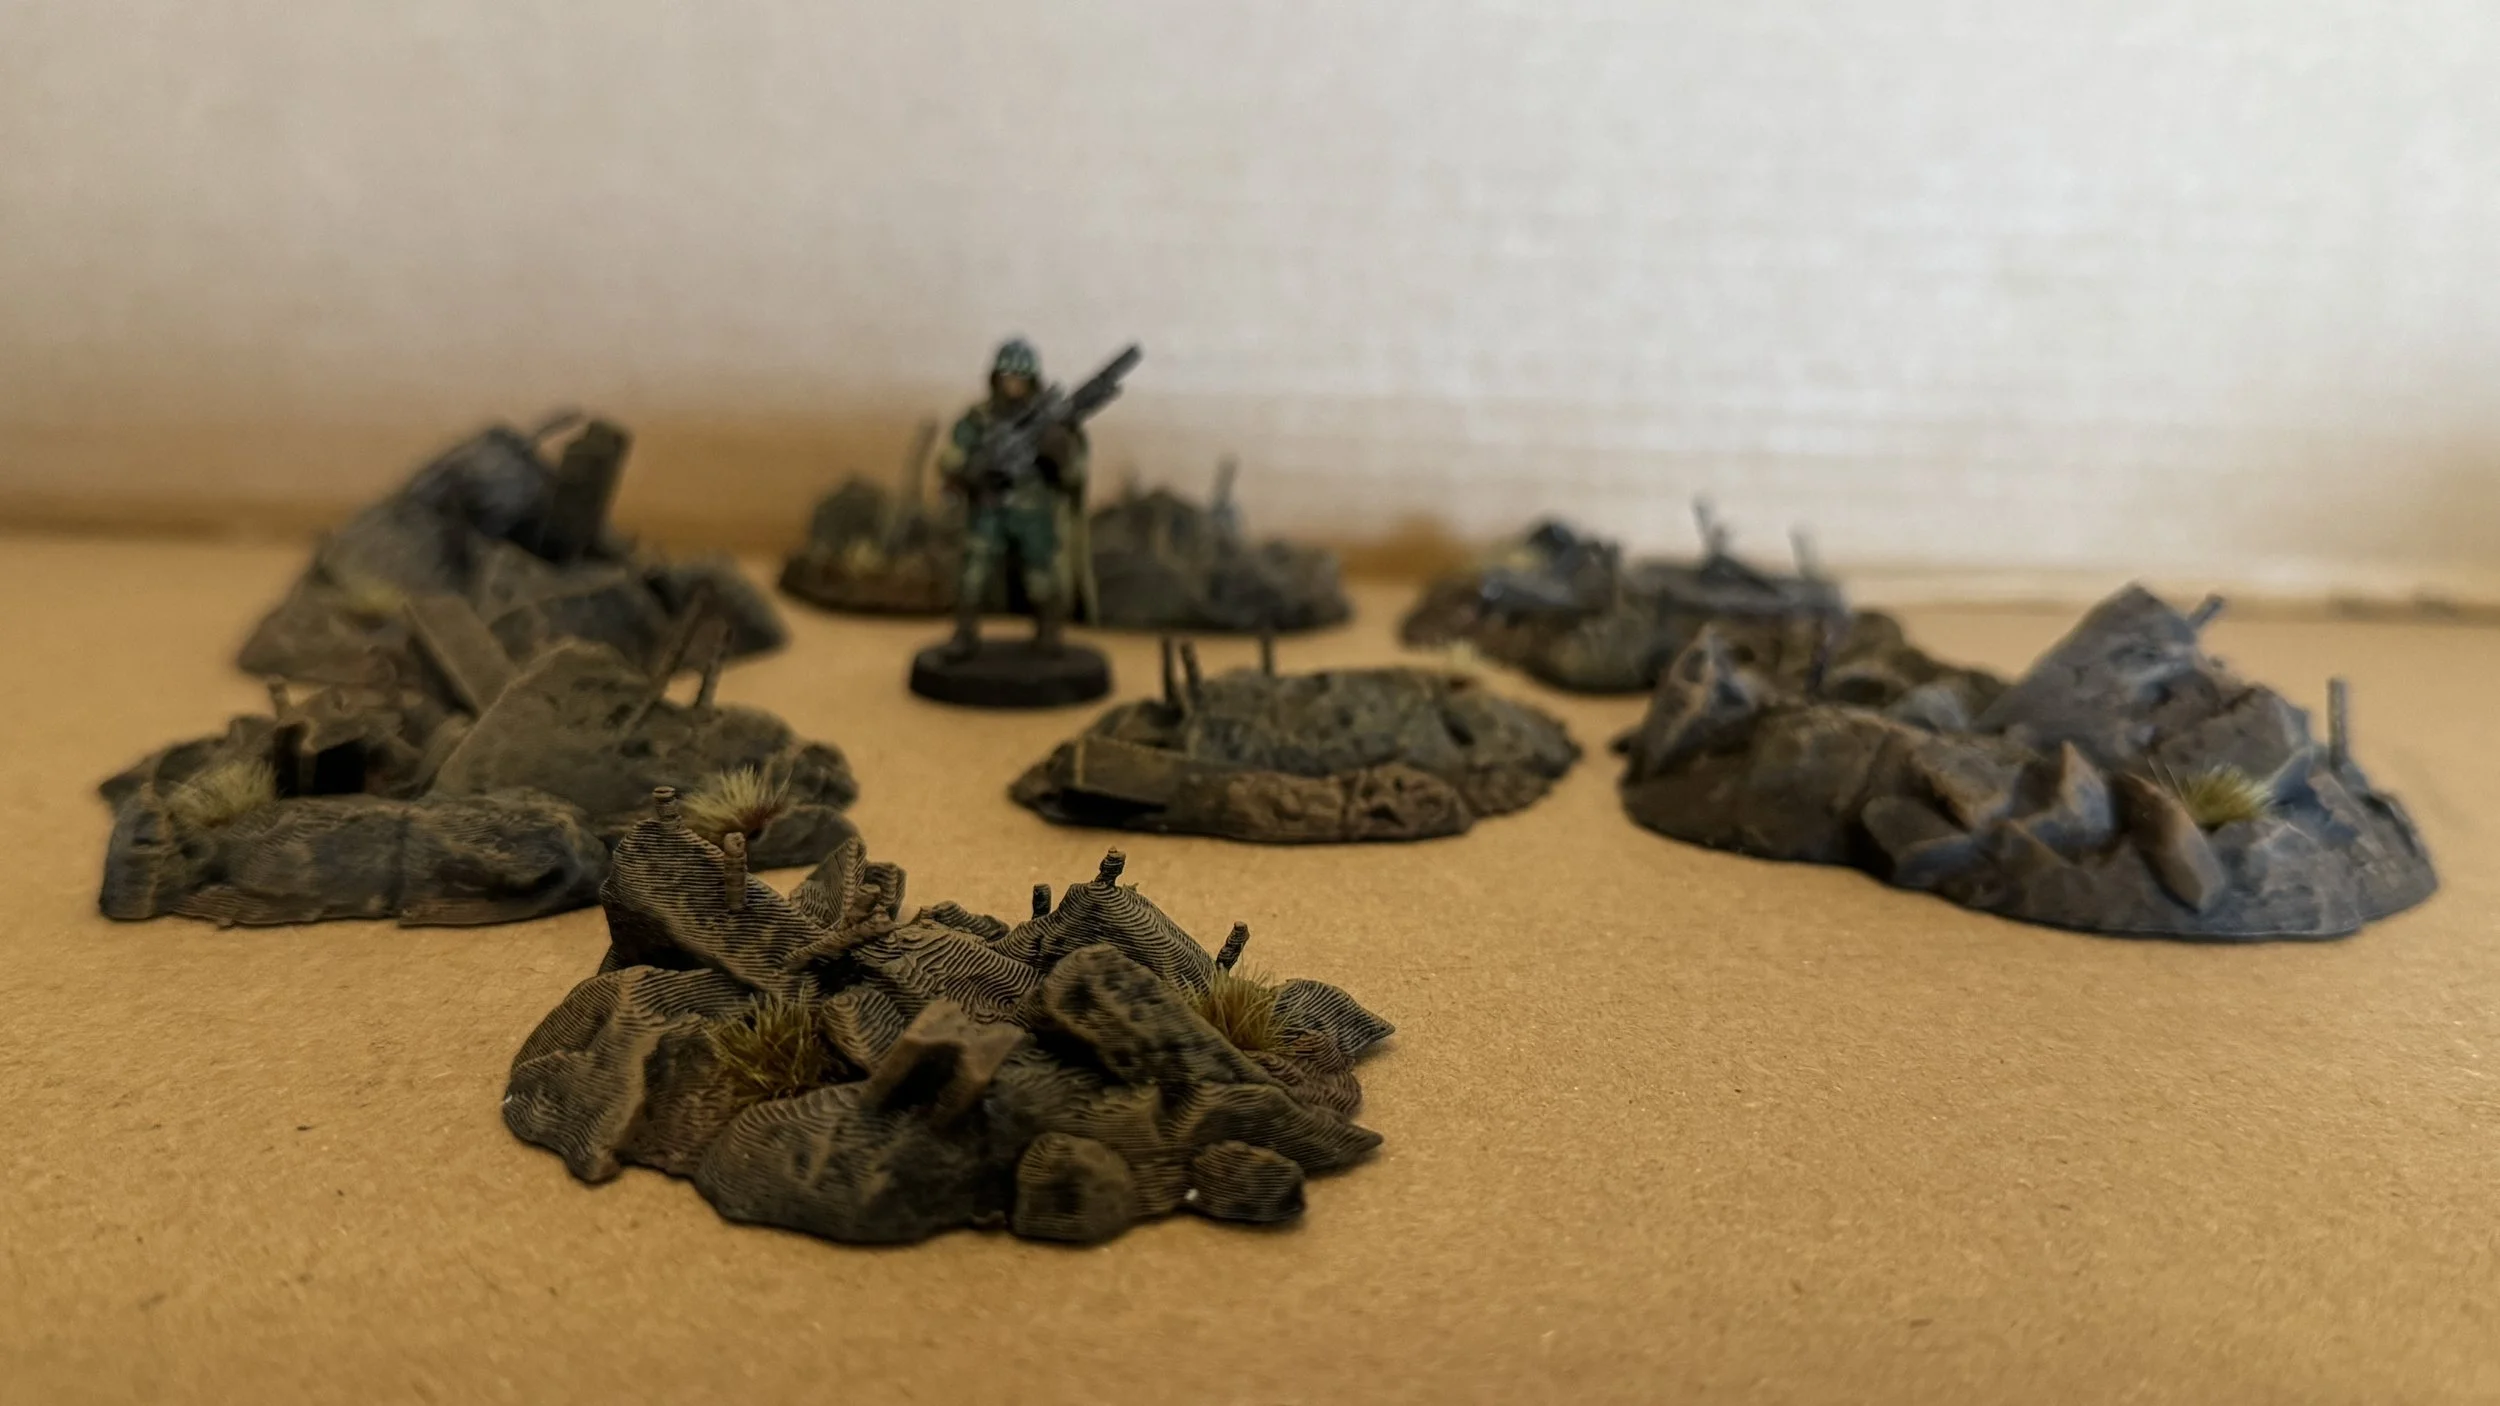
Out next gallery photo shoot with be the Gordon Institute’s Search for the Origin of the King Kong Legend. I have the episodes written and the pictures taken, but I ran across some rock formations I had intended to use as background but had forgotten so I did a little modification to each formation and painted them up.
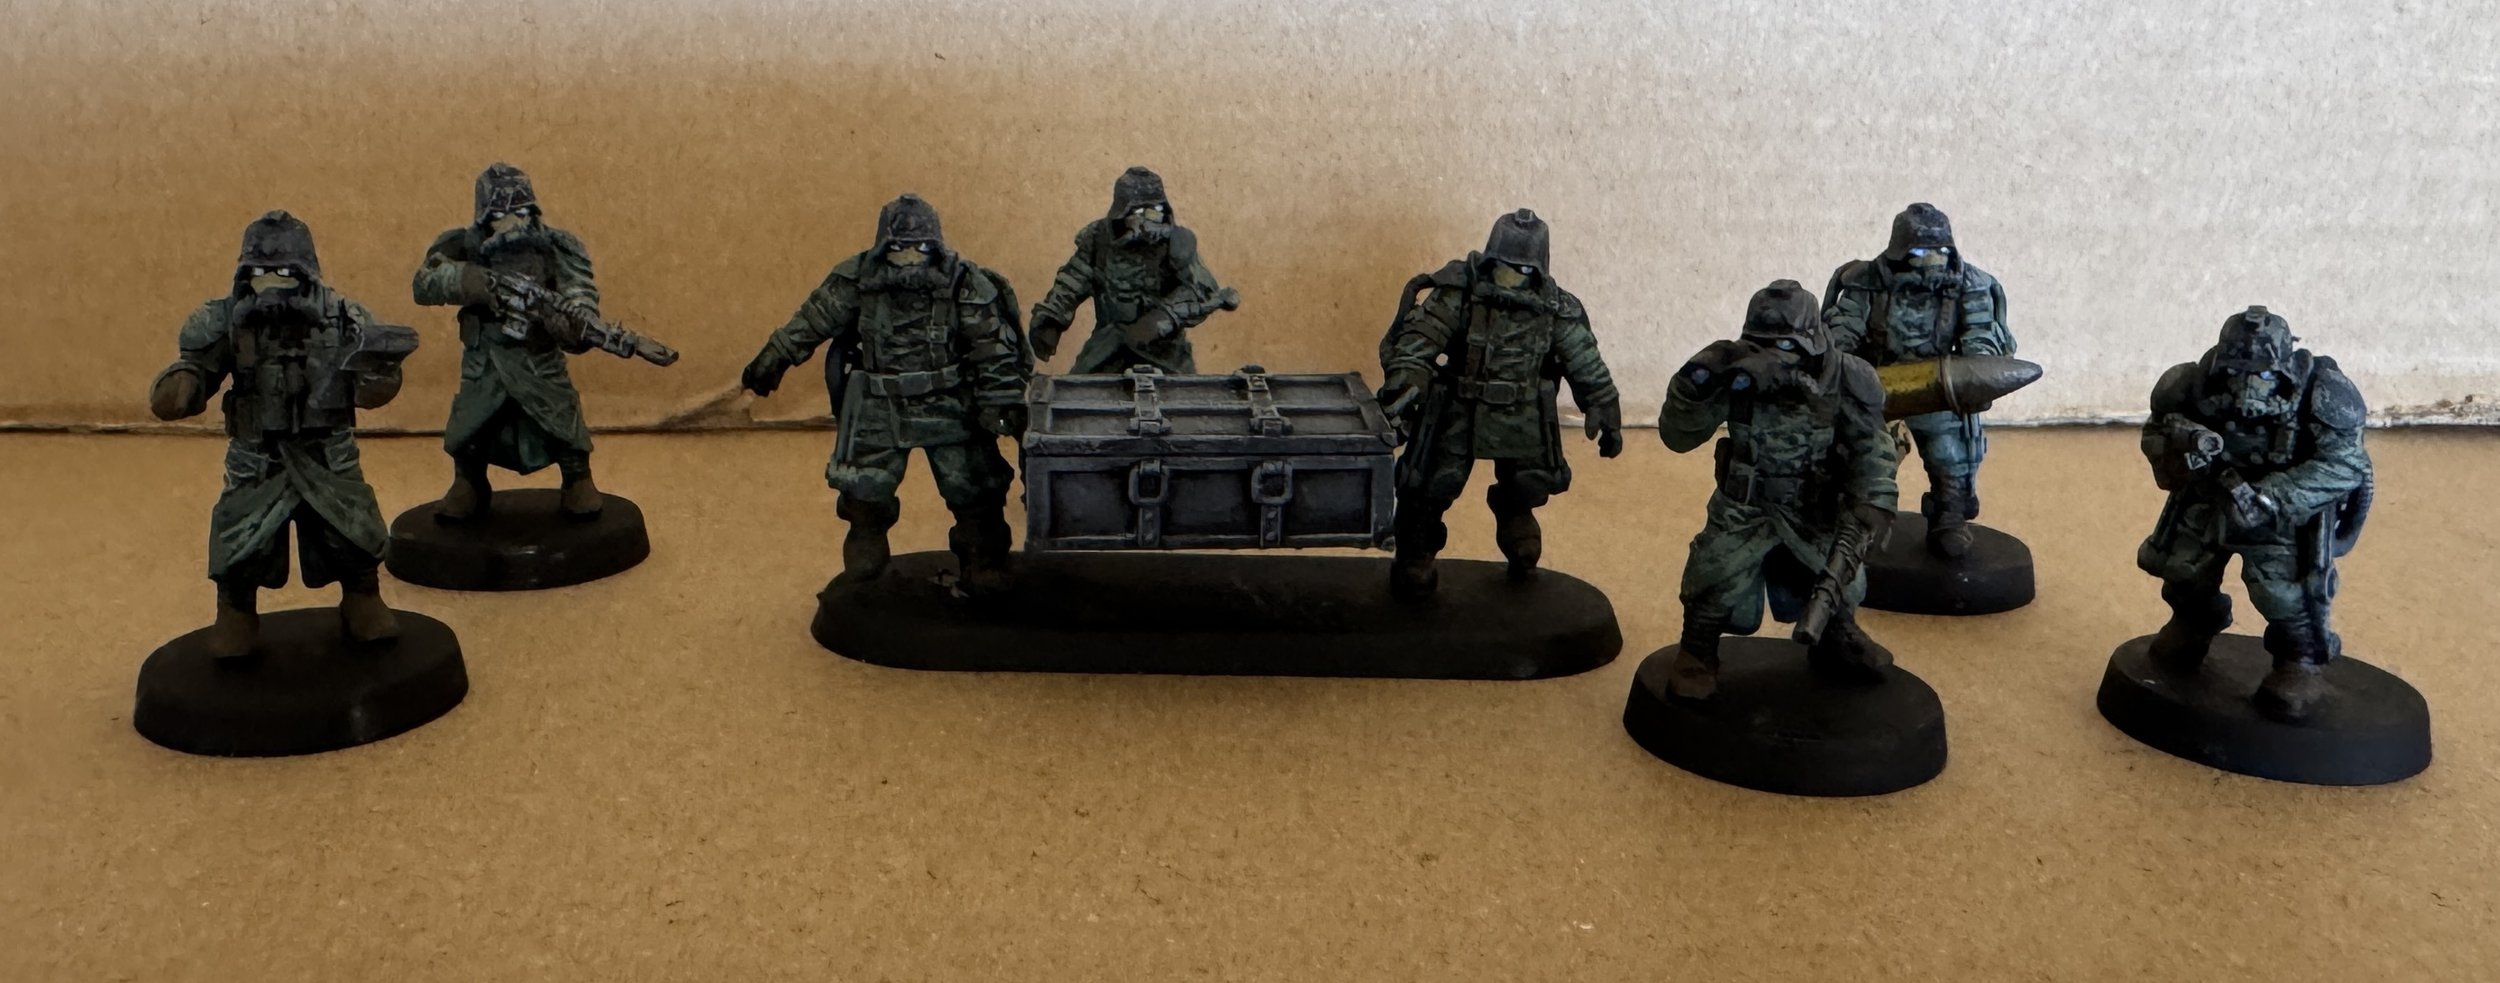
I finished the week painting an artillery crew by GrimGuard. Artillery crews that are separate from guns are difficult to find in terms of fitting out my Trench Crusade collection.

June 21, 2026
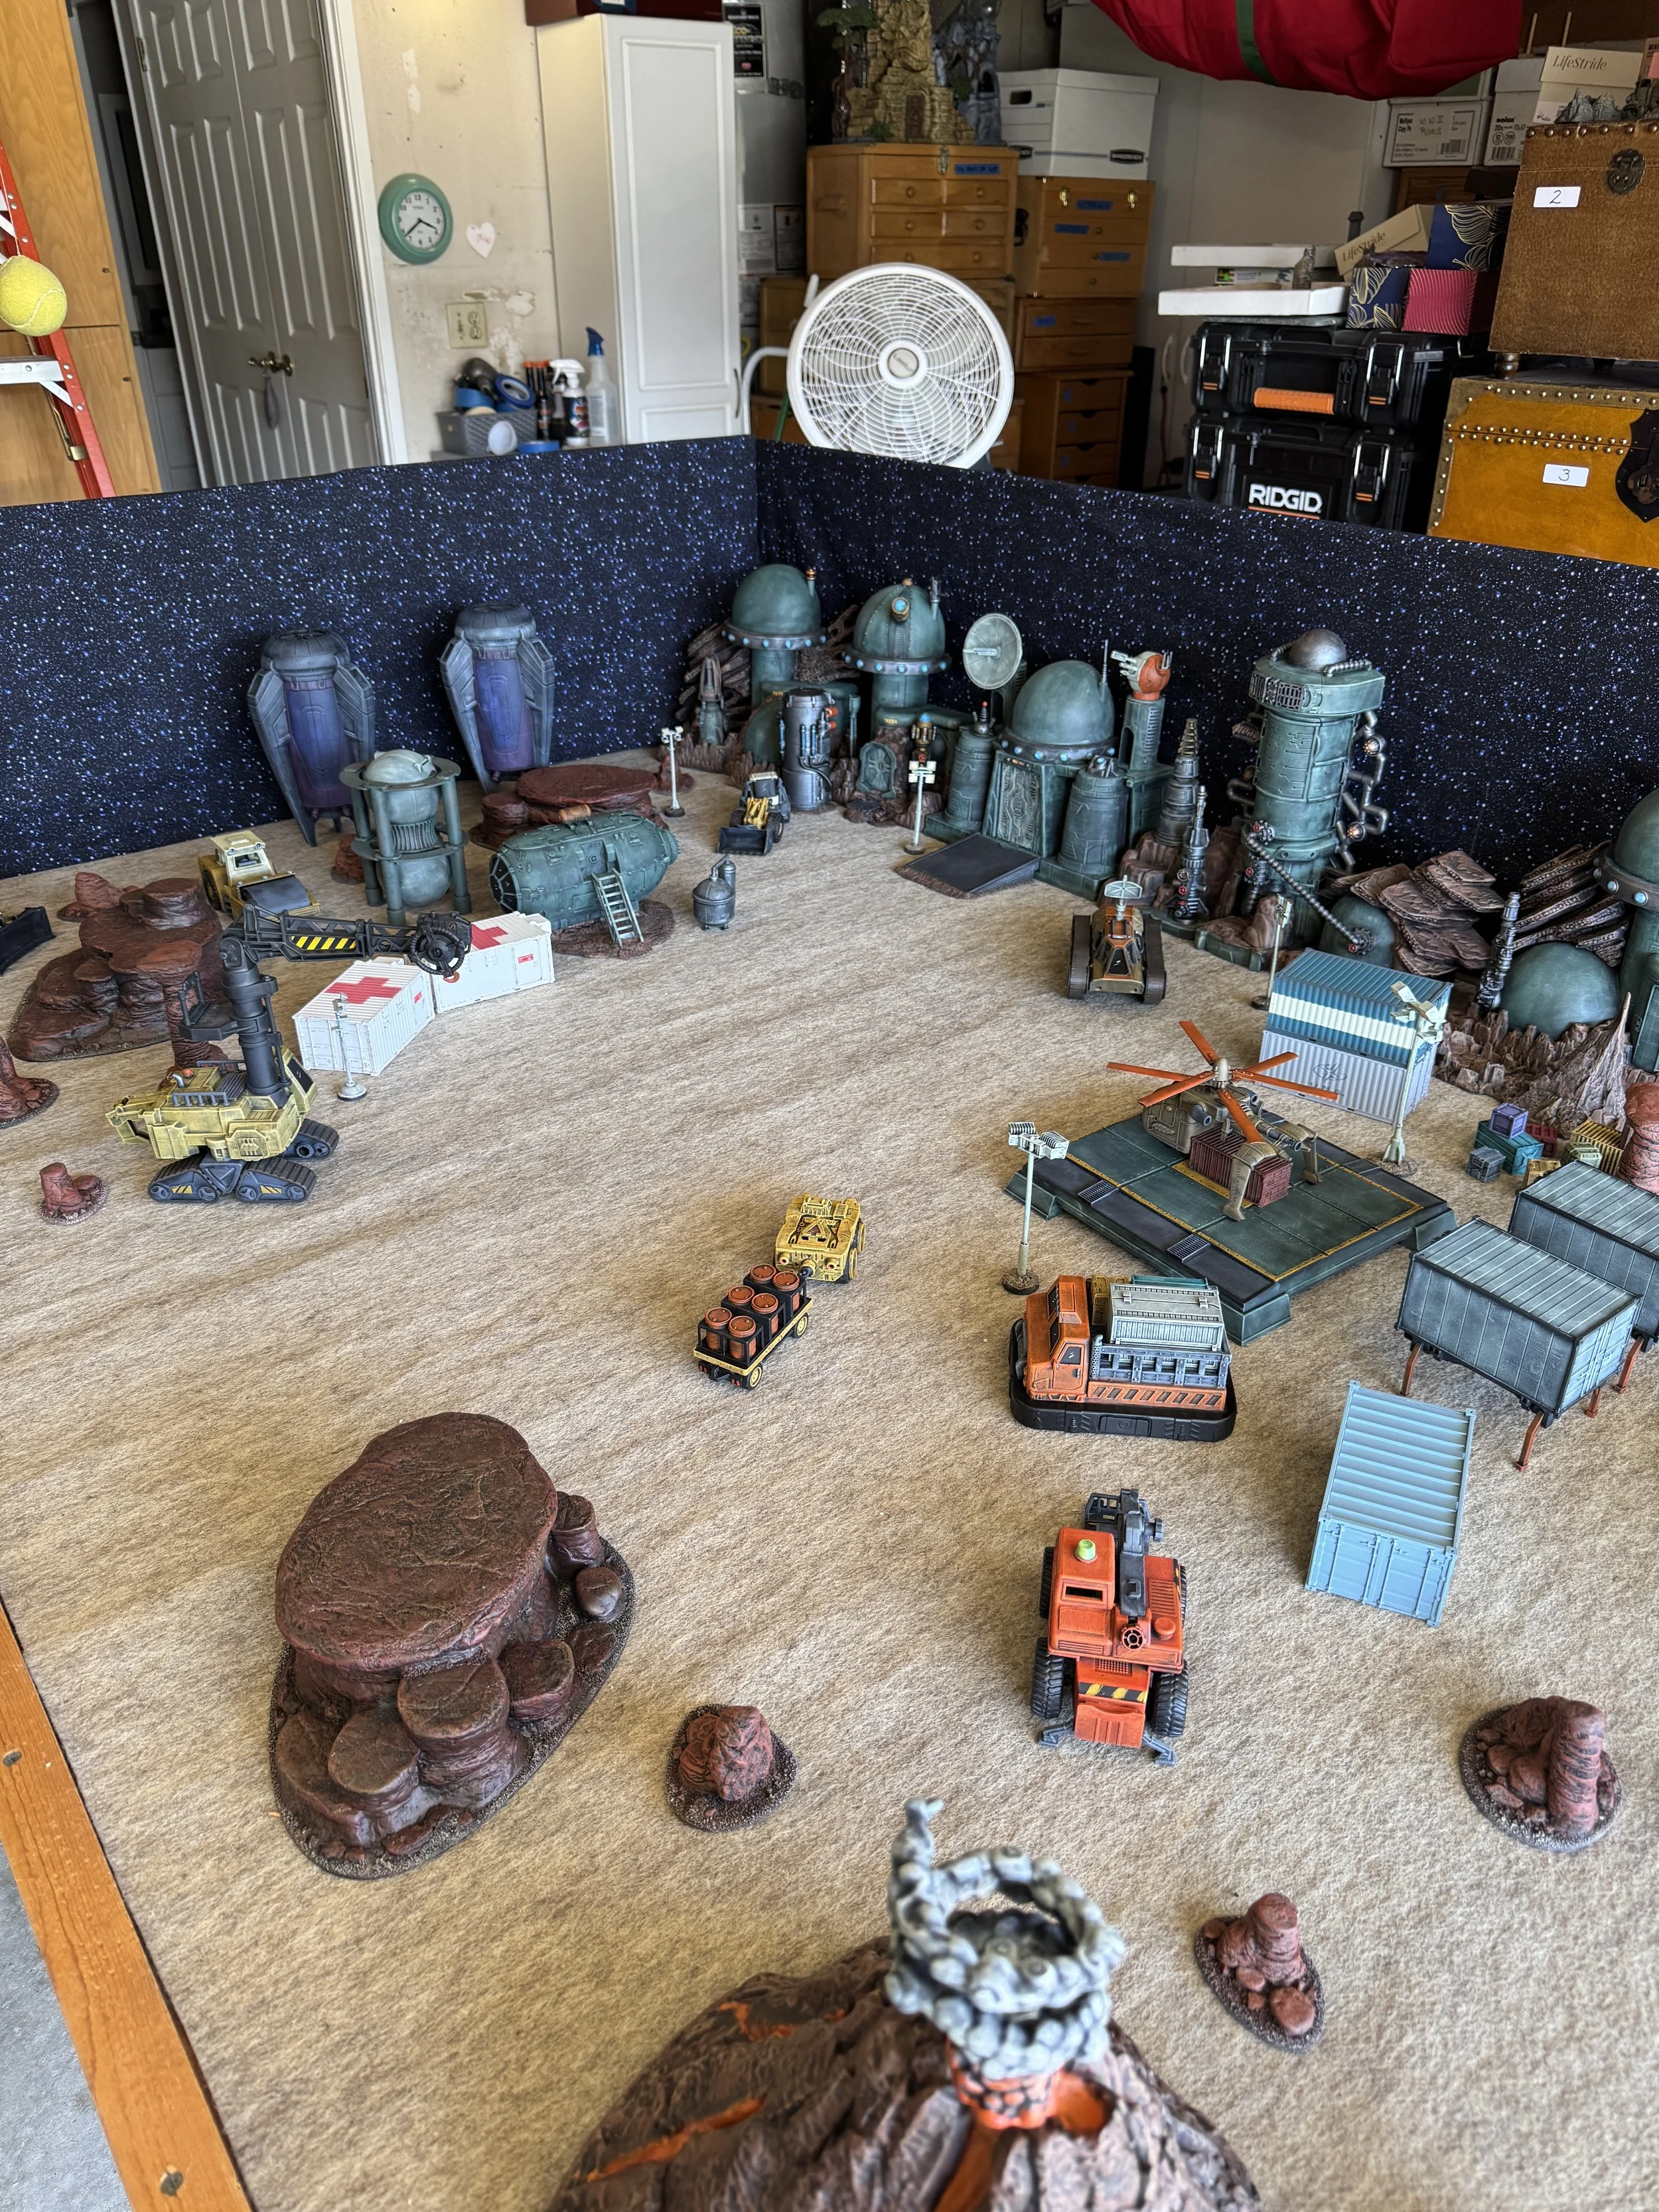
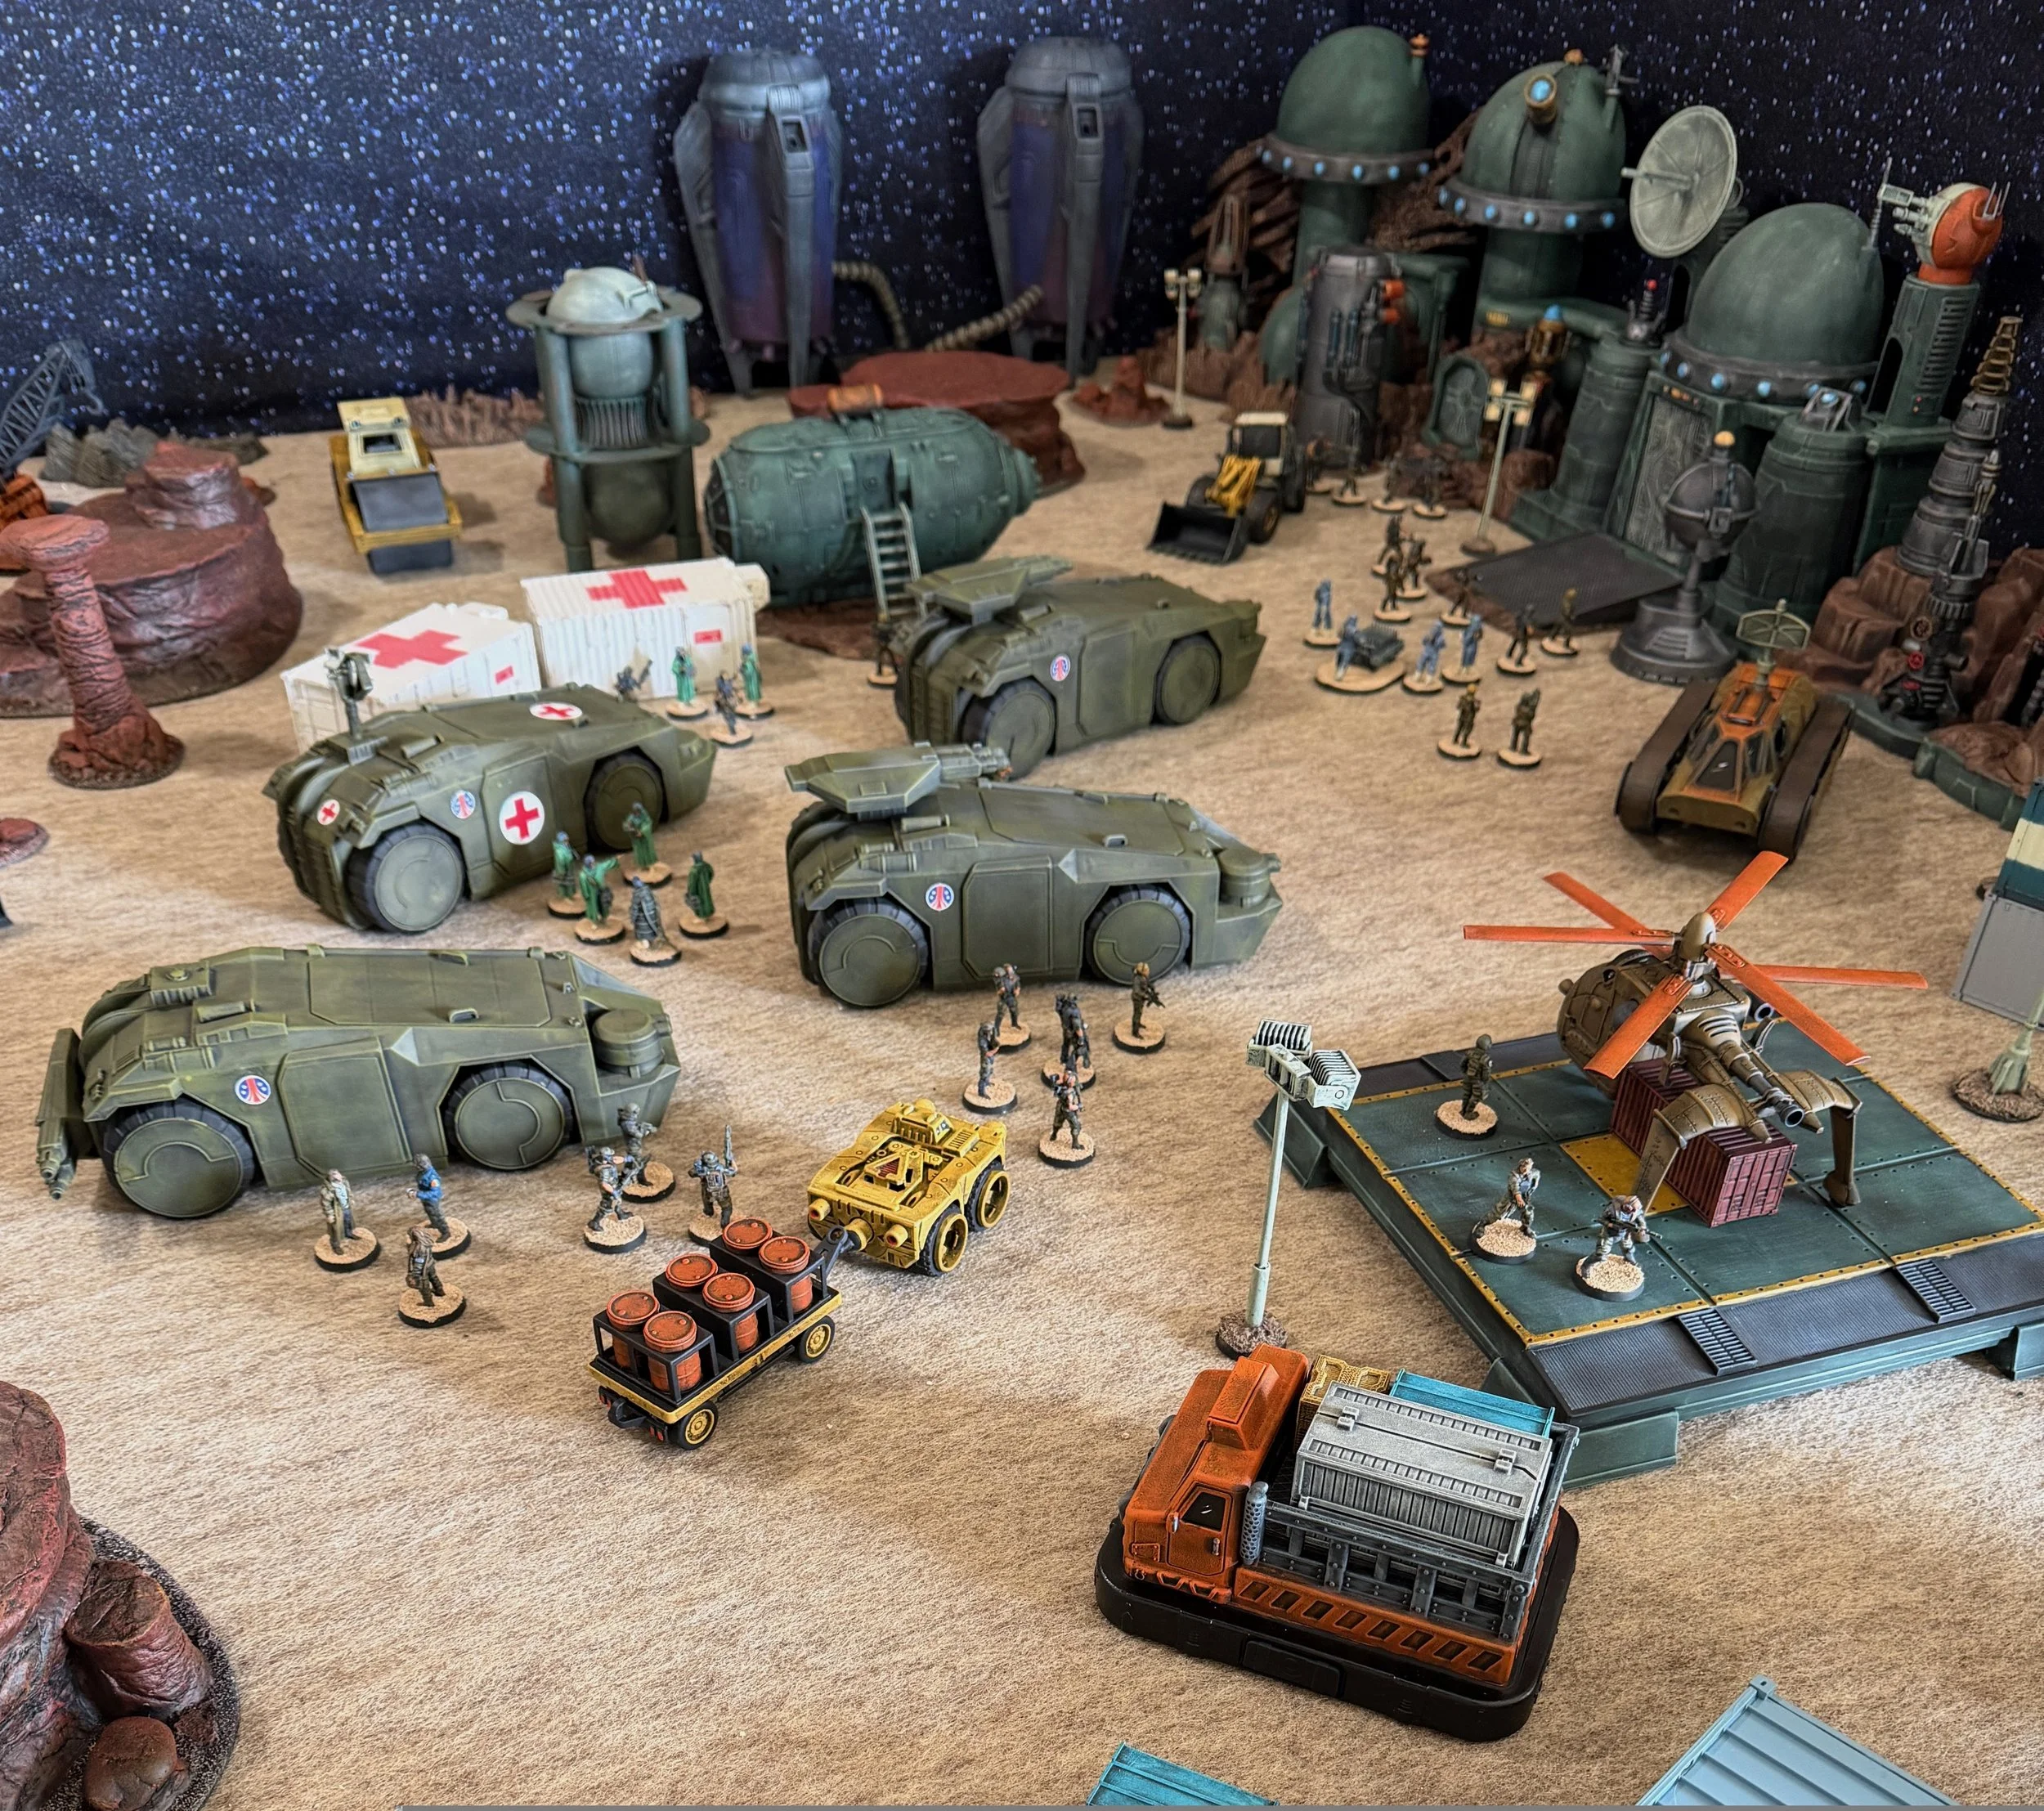
This workbench week was devoted to bringing together the layout for my “Aliens” terraforming space station collection. I have more than six months invested in the building and painting of this project. It sits on a 5 feet x 7 feet table. The ground cover is a tan indoor-outdoor carpet I bought about 30 years ago for use with my displays. The background is a fabric covering that slips over Masonite panels. The fabric is titled Galaxy and the work of making the coverings was done my talented wife. This is not an attempt to recreate any of the films, but rather to use the films as a concept jumping-off point for my own creation.
The six main buildings are repurposed/highly modified Fisher Price toys. One stand-alone structure is a modified large scale TIE fighter cockpit that I am using as a science lab. The landing pad is probably from a GI Joe playset. The reason I’m not sure is because like a large percentage of the space stations vehicles and structures, it was found on a pile of castoff/broken toys at the swap meet. The cargo chopper and some of the cargo containers and the two med centers are by Dust Studio/AT-43.
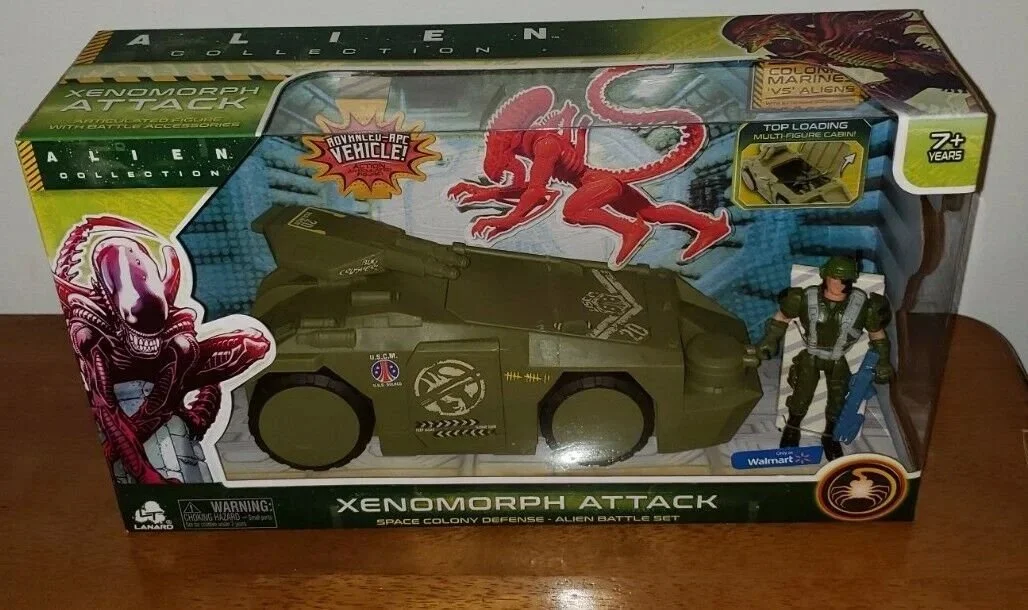
The Colonial Marine APCs are Walmart toys. The med APC is a modified version as is the APC with its main gun in the travel position. The figures I used for this project are all 3d-printed 32mm figures I got off Etsy and eBay. I used 32mm because the marines looked more to scale with the APCs than 28mm, and scale is not a big issue with the size of the xenomorphs.
The rock terrain is by Battlefield In A Box… nice stuff; prepainted.
The basic concept of this collection is that the terraforming station has gone silent for years despite the fact that a Marine Recon unit had been sent out to investigate concerning reports. The opening scene is the station as a ghost with structures in place and equipment left where they were last used… no sign of life. The next scene is the arrival of the Colonial Marines coming as a much more powerful force and accompanied by science units, a film crew, and reps from the terraforming company responsible for the station. The third scene is the assault of the xenomorphs. The final scene takes place inside the terraforming complex. All photography was completed by my wife and granddaughter.
June 14, 2026
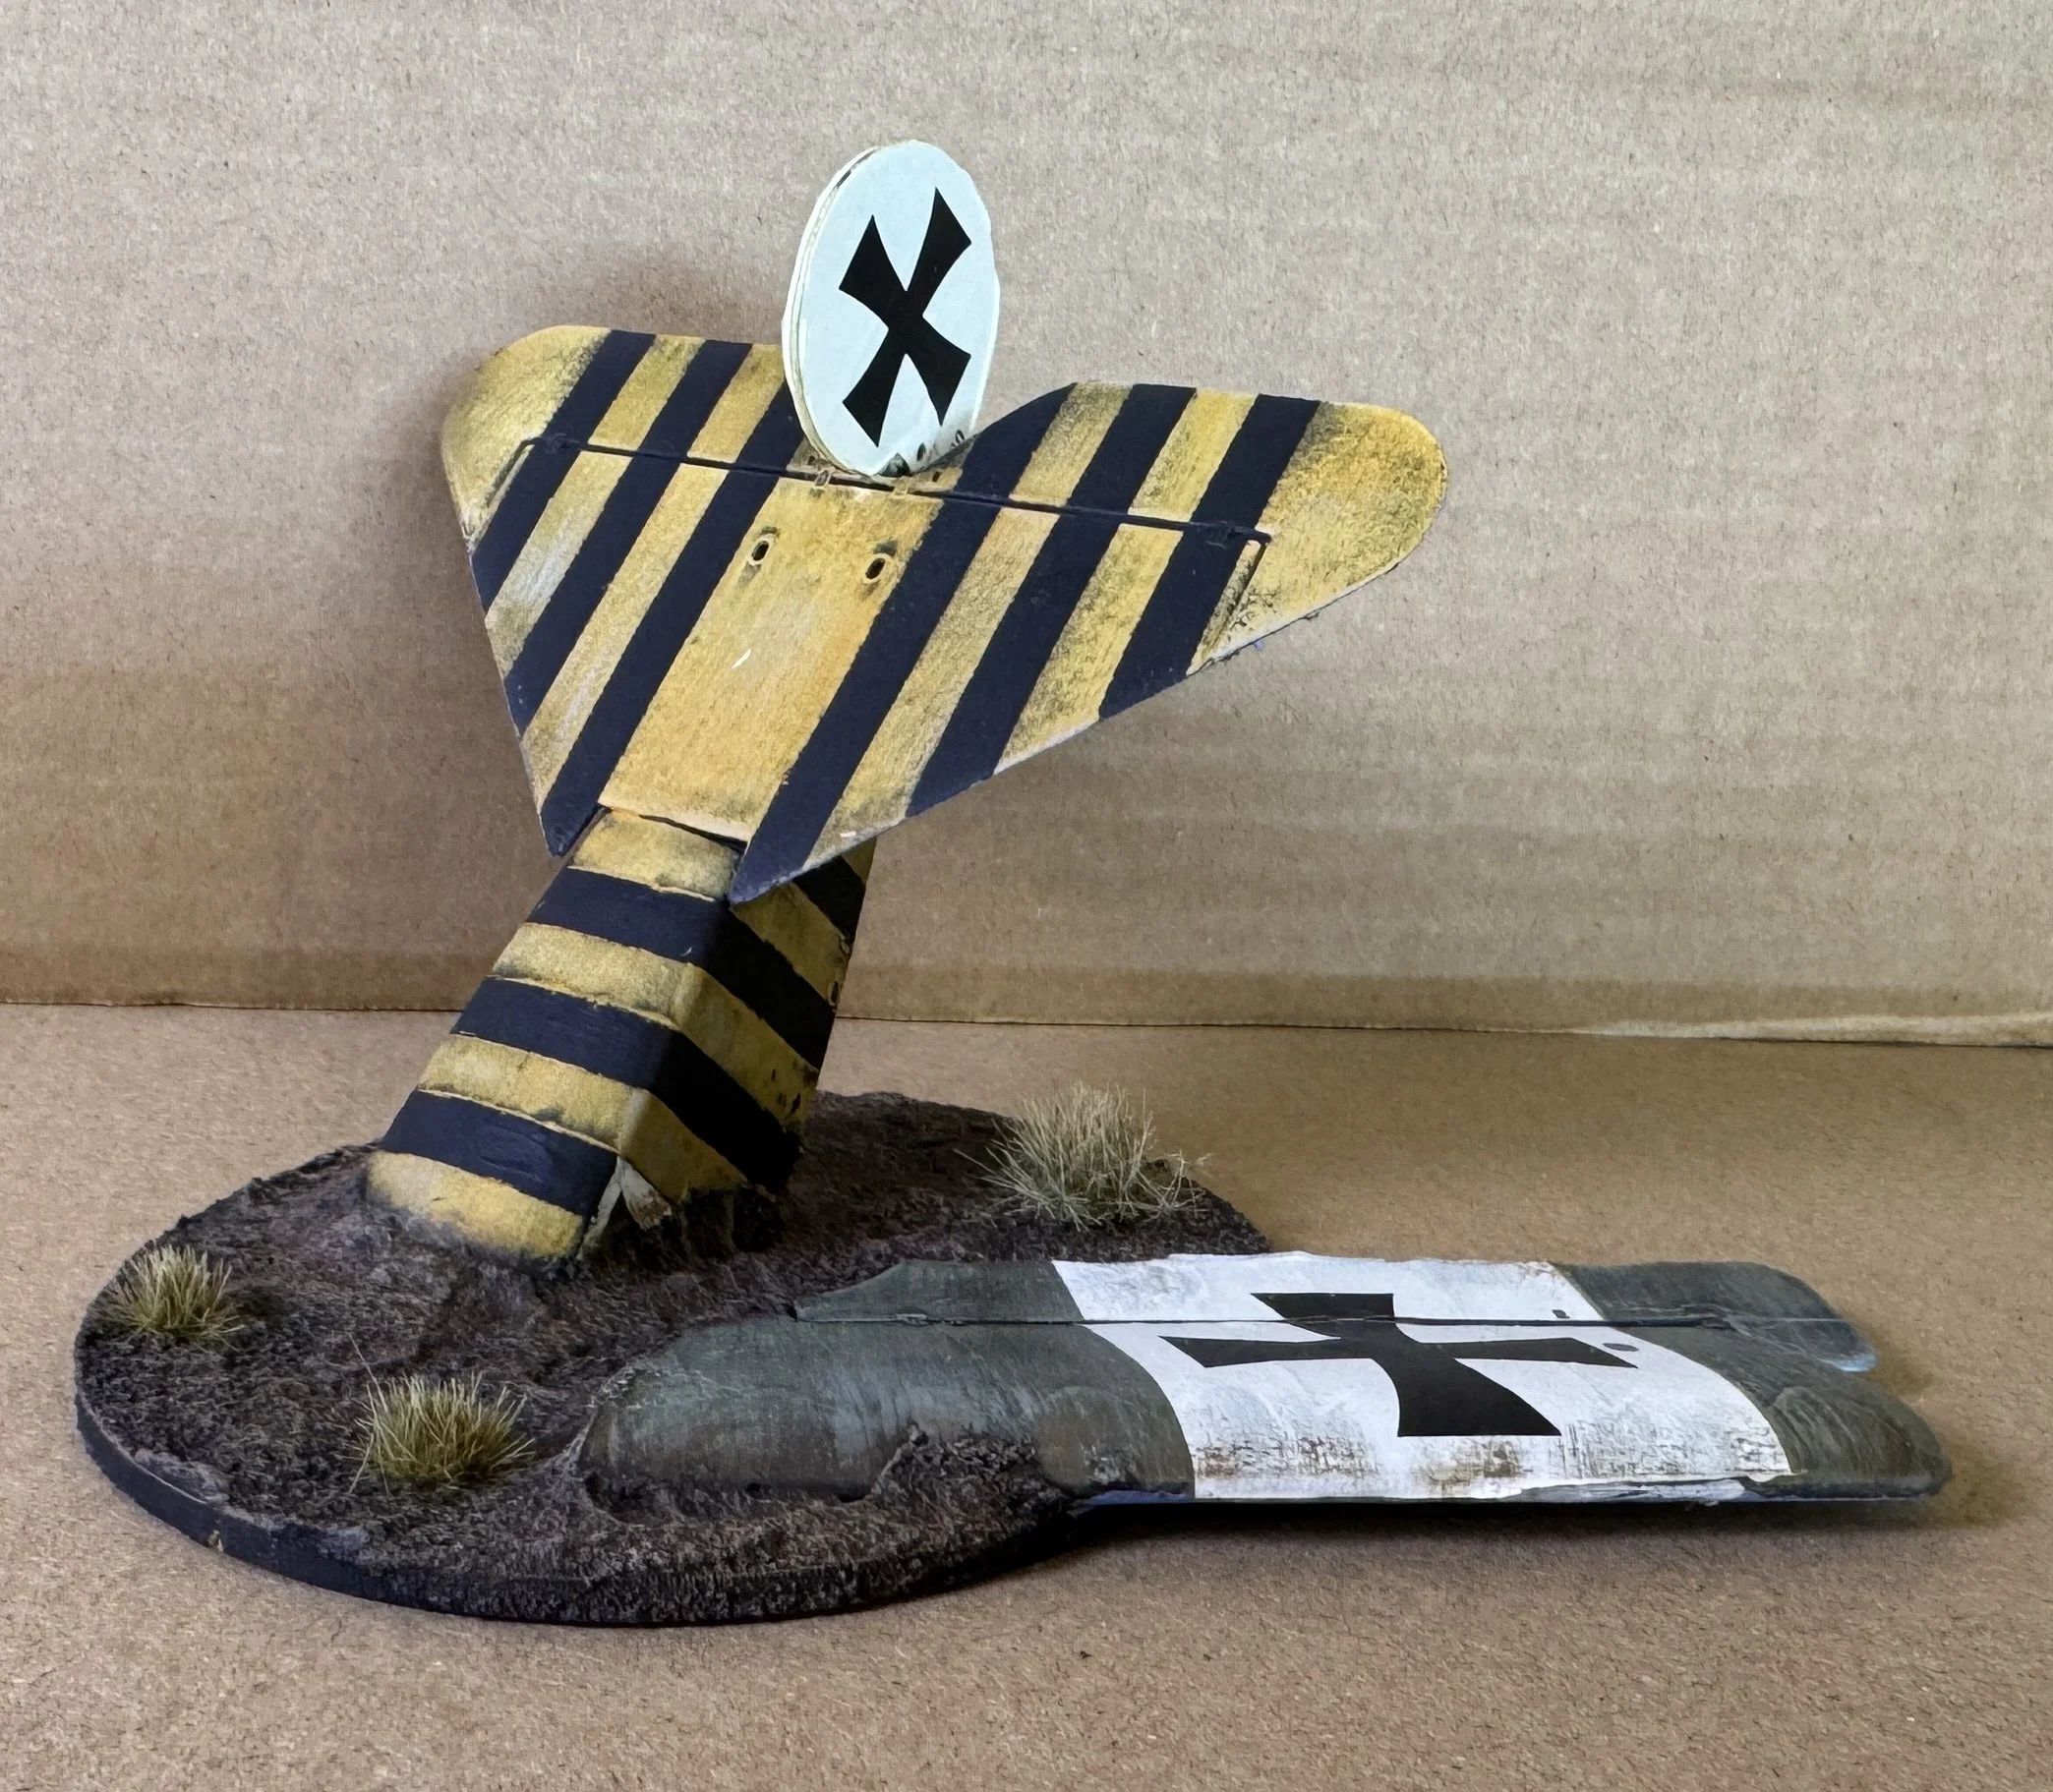
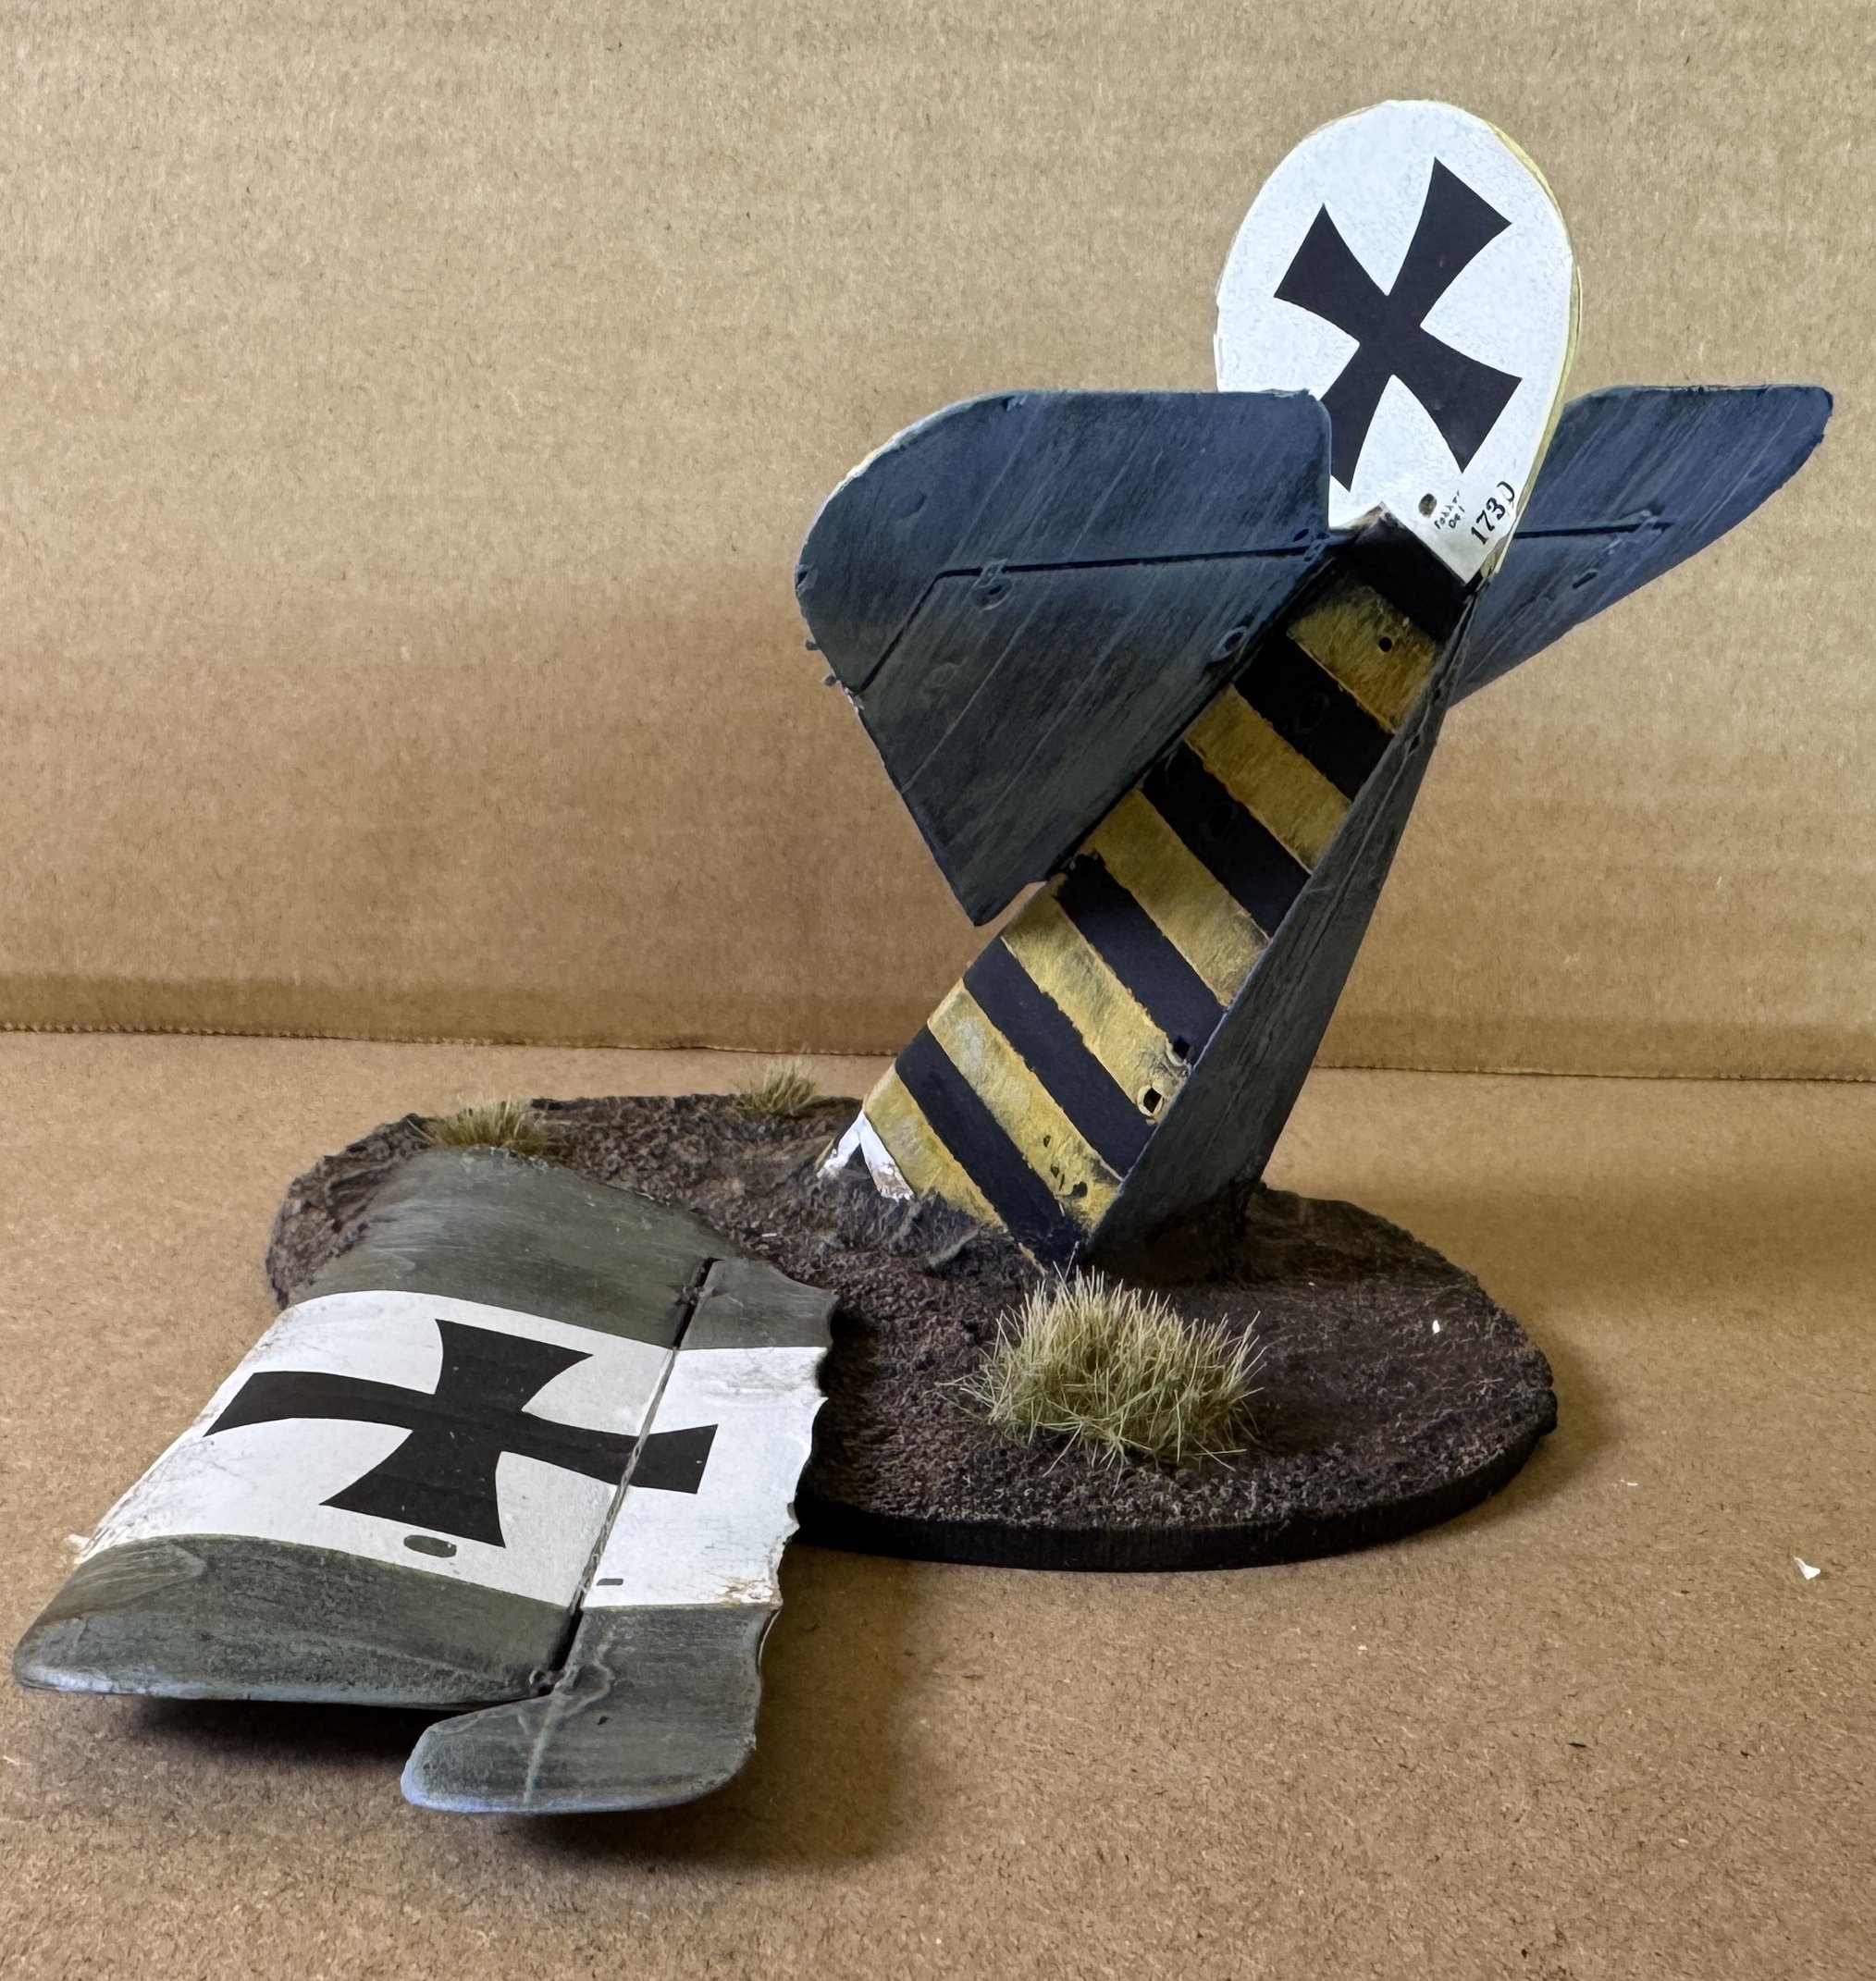
I’ve been looking for a WWI airplane to use as a crashed plane on my Trench Crusade battlefield. My obvious choice in terms of scale is 1/48 but those can be expensive. I hoped to find a broken one at the swap meet, but so far no luck with that. Last week I found an incomplete 1965 Revell model of a Fokker Triplane. It is what some call a box scale which means Revell did not offer a specific scale for the model. That said, it was only $4.95 on the clearance table. Since it was going to be a battlefield wreck, I decided it would serve my needs… plus it still had its decals.
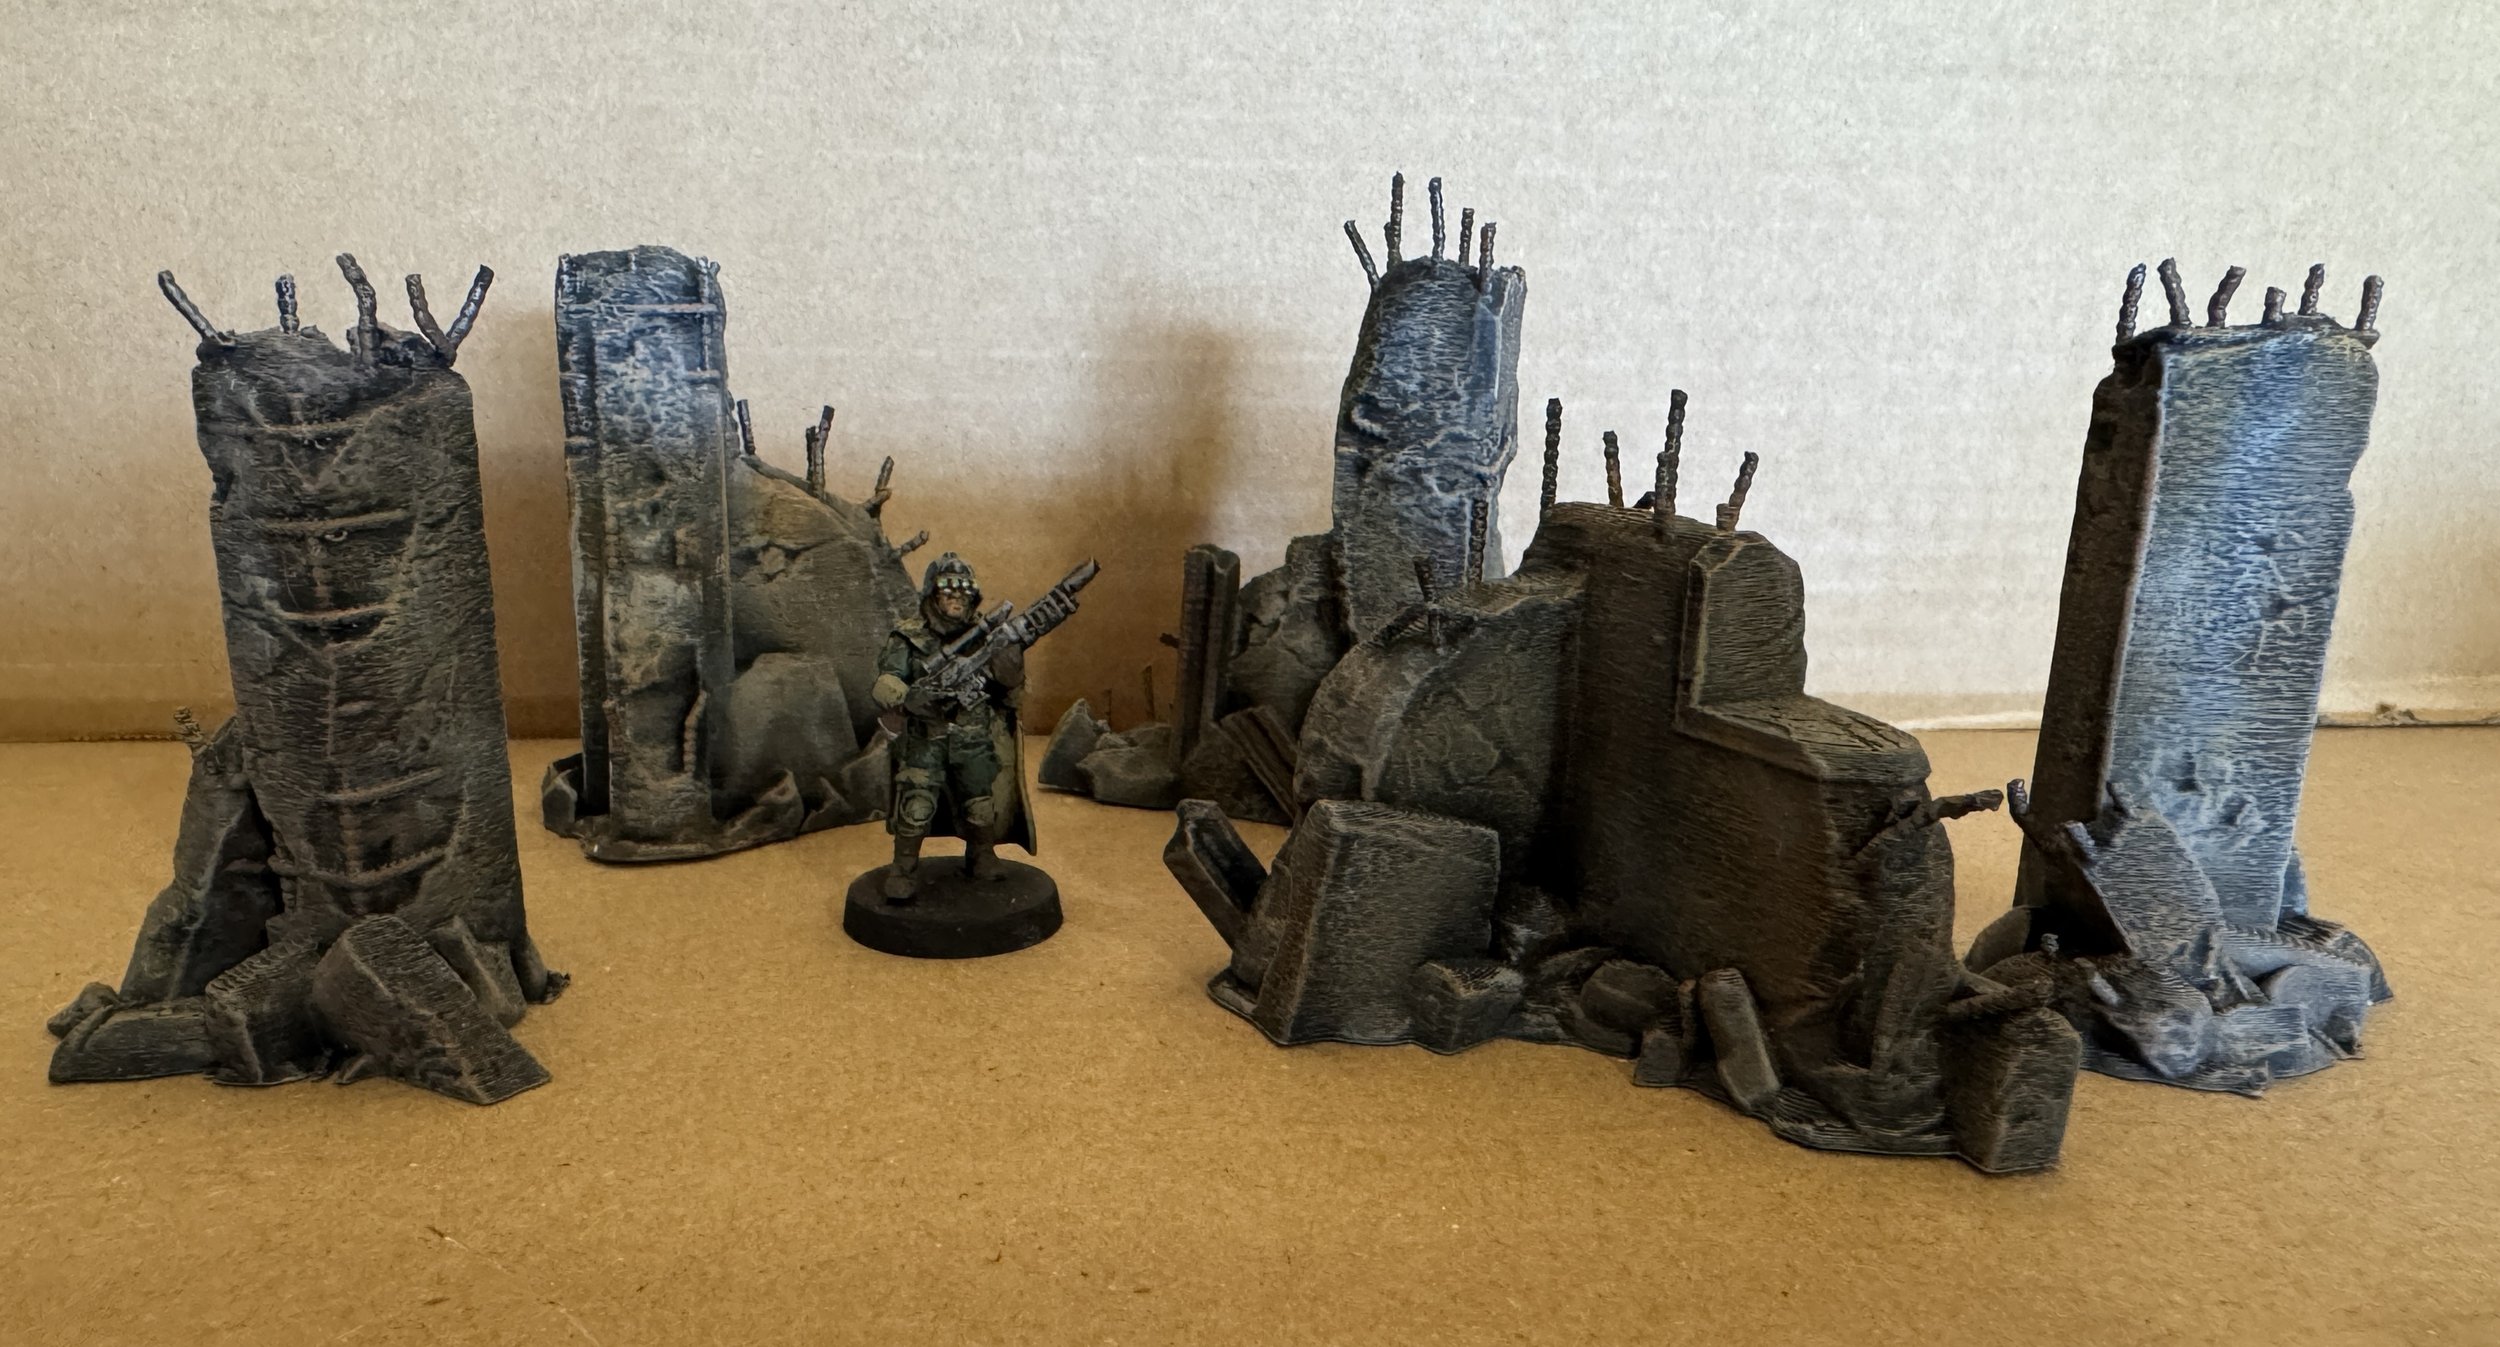
My order for some very reasonably priced large shell craters and ruins for my Trench Crusade no-man’s land arrived just as I finished the wreckage of my Fokker Triplane. No additional work was needed on the craters or ruins… just an easy paint job.
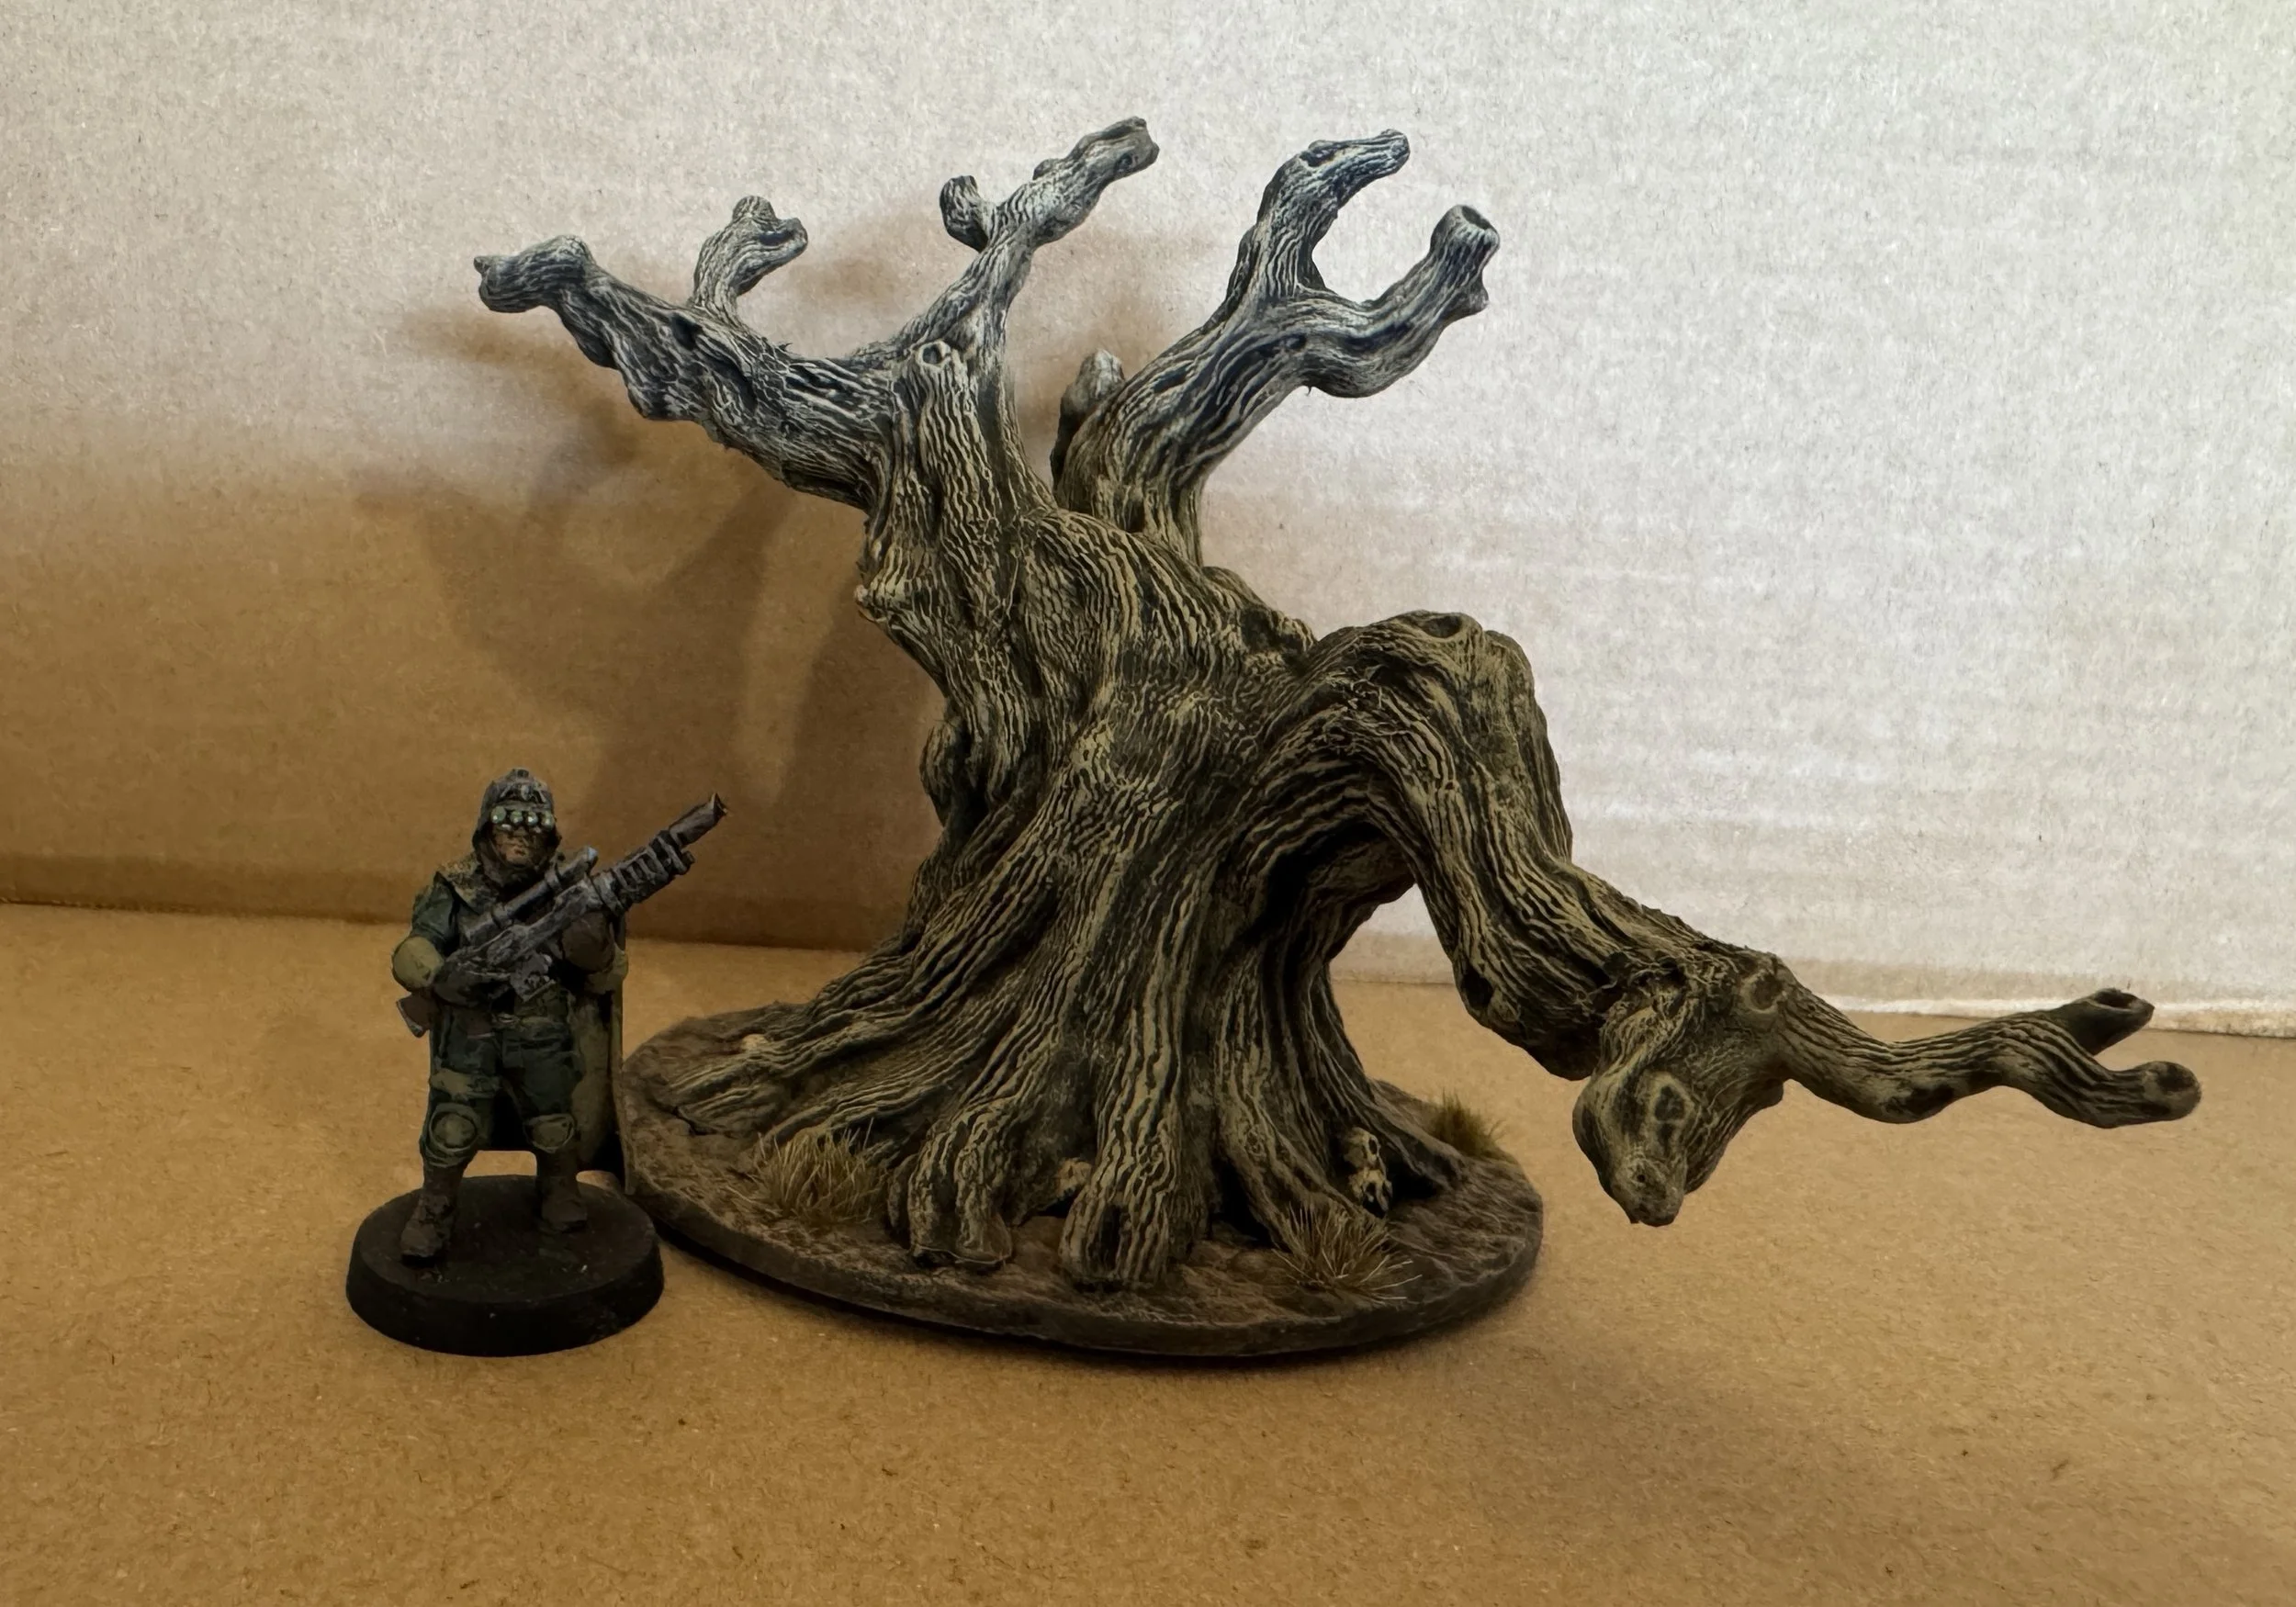
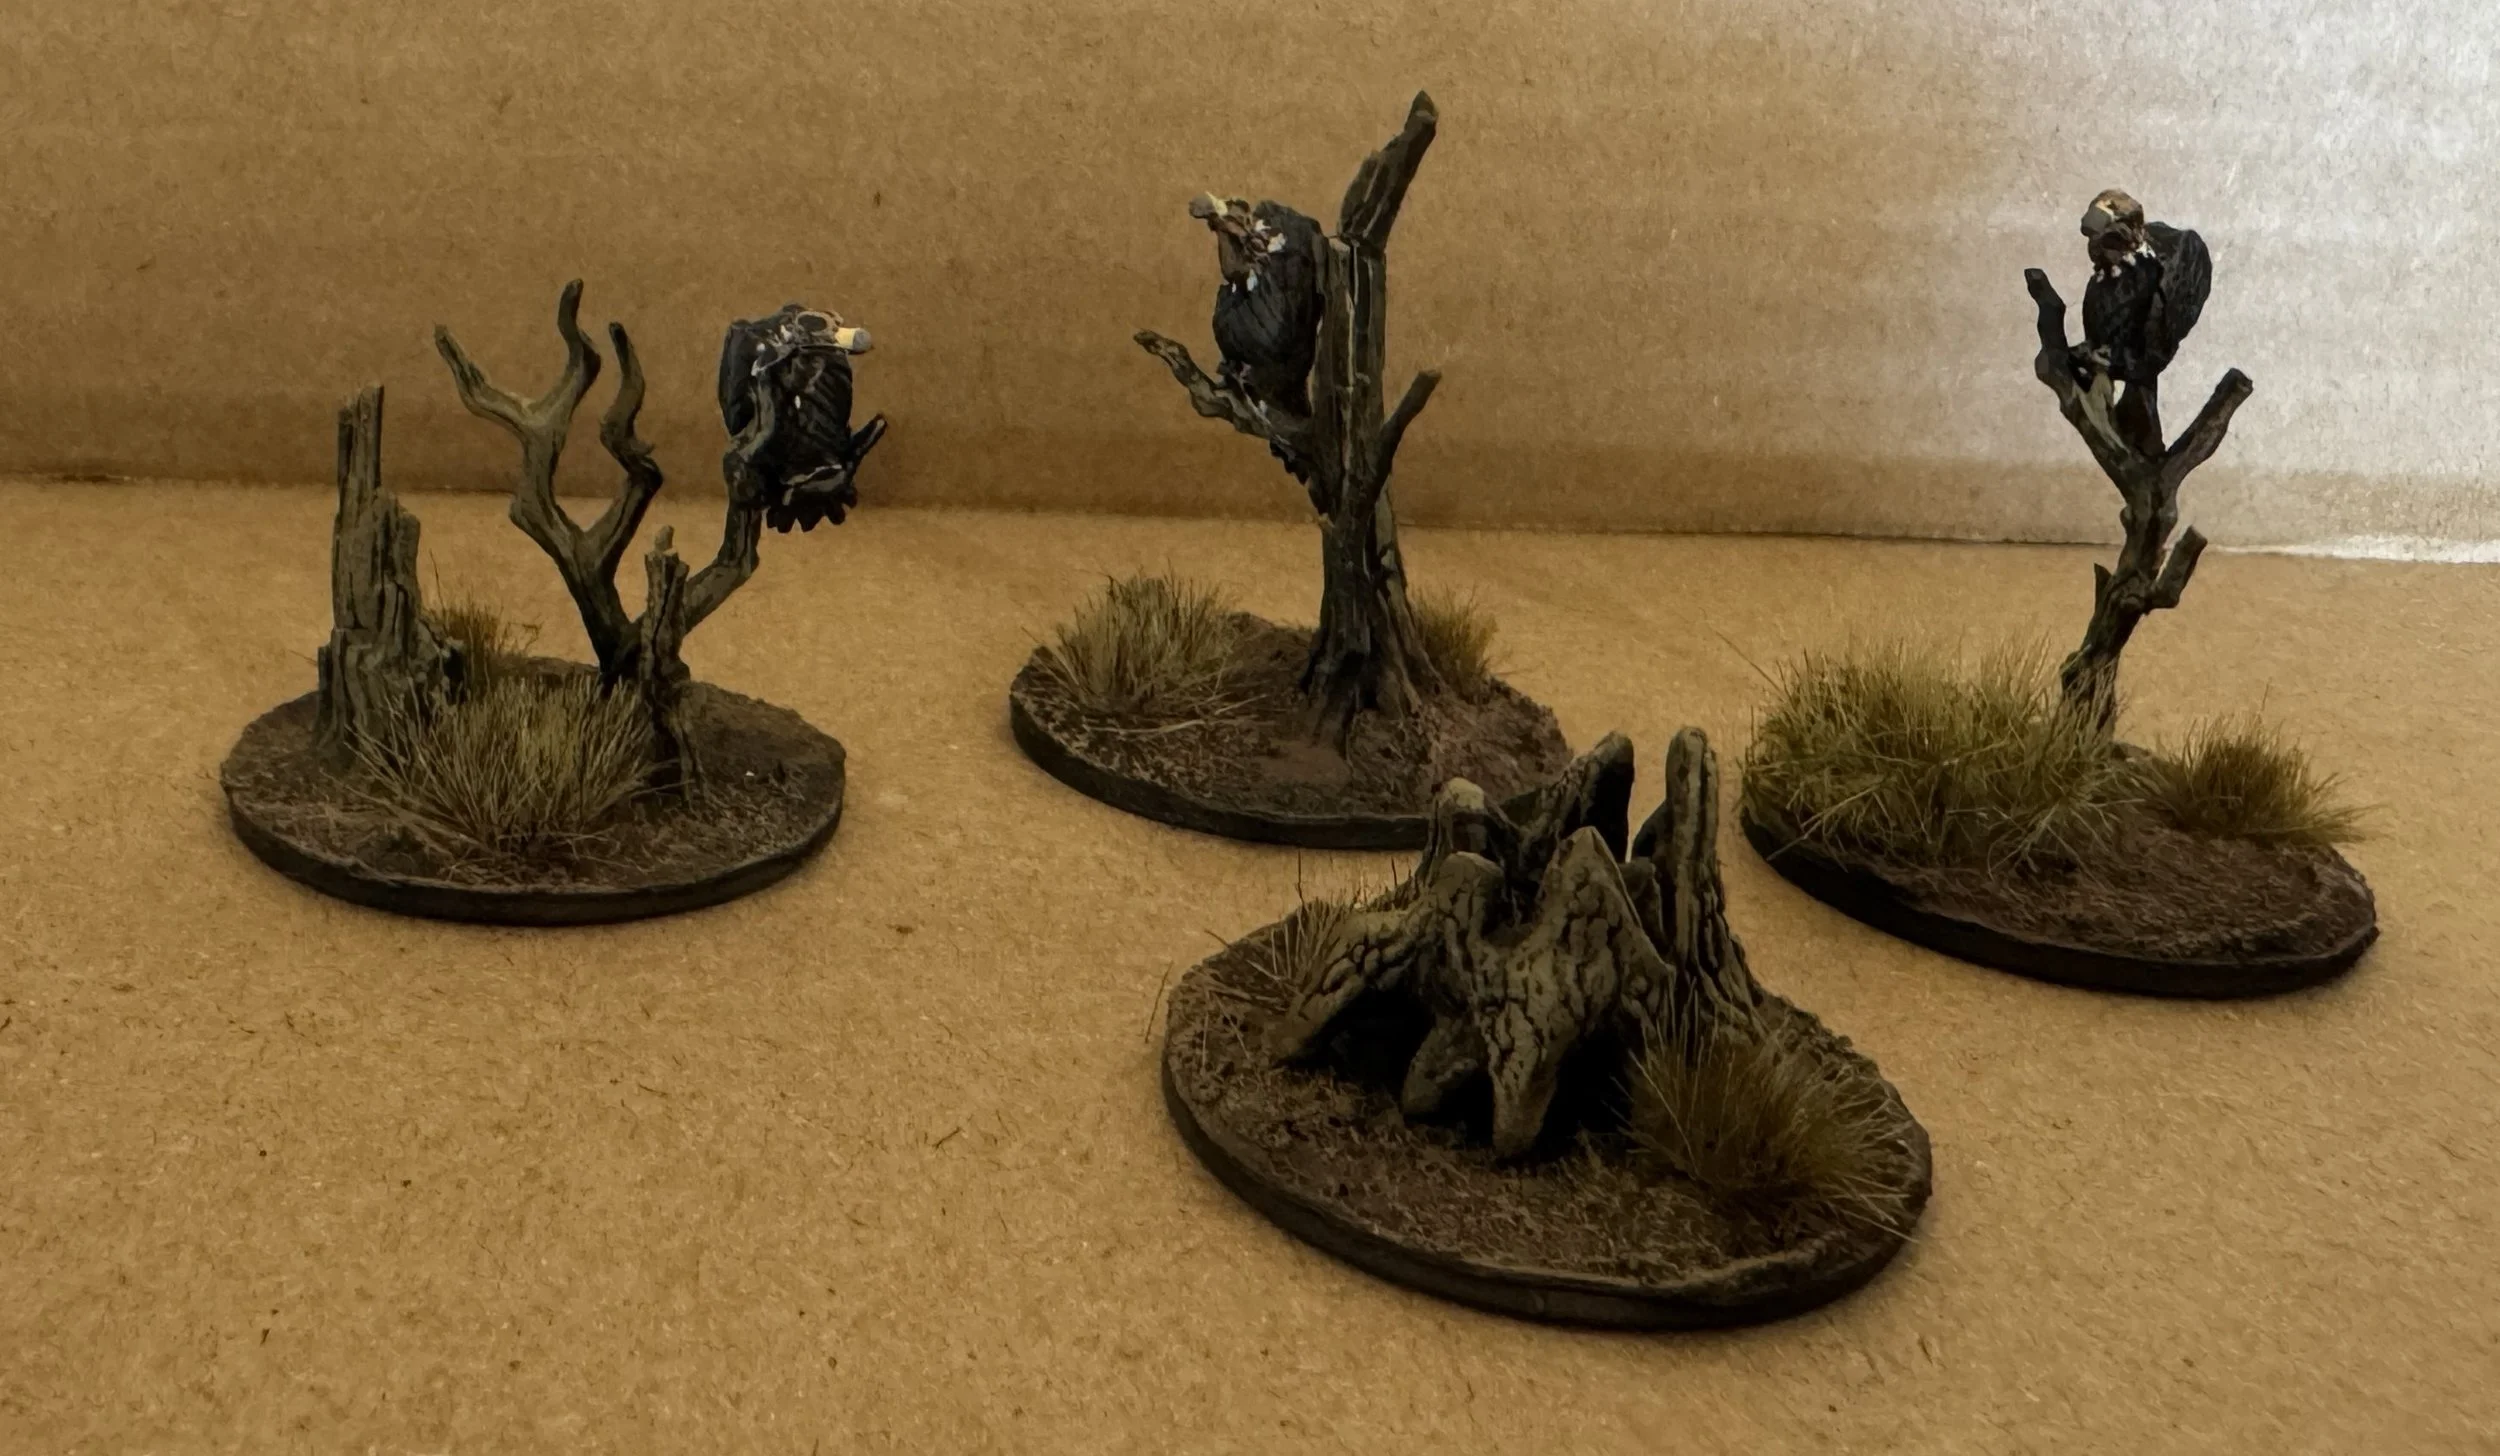
I closed out the week with the Reaper Tree of Despair. I wasn’t happy with the way the figures that came with it fit on the tree so I left them off and carved off the ropes and chains so I was left with just the tree. I really like it and think it will be a great addition to my Trench Crusade no-man’s land. It came with six vultures… good looking vultures. Rather than put them on the tree I added three of them to some of the MungosMarvelousMinis stumps I have left, and they will be a part of my Trench Crusade no-man’s land.

June 7, 2026
The week began with painting the trench base for my third scratch-built Heretic gun turret.
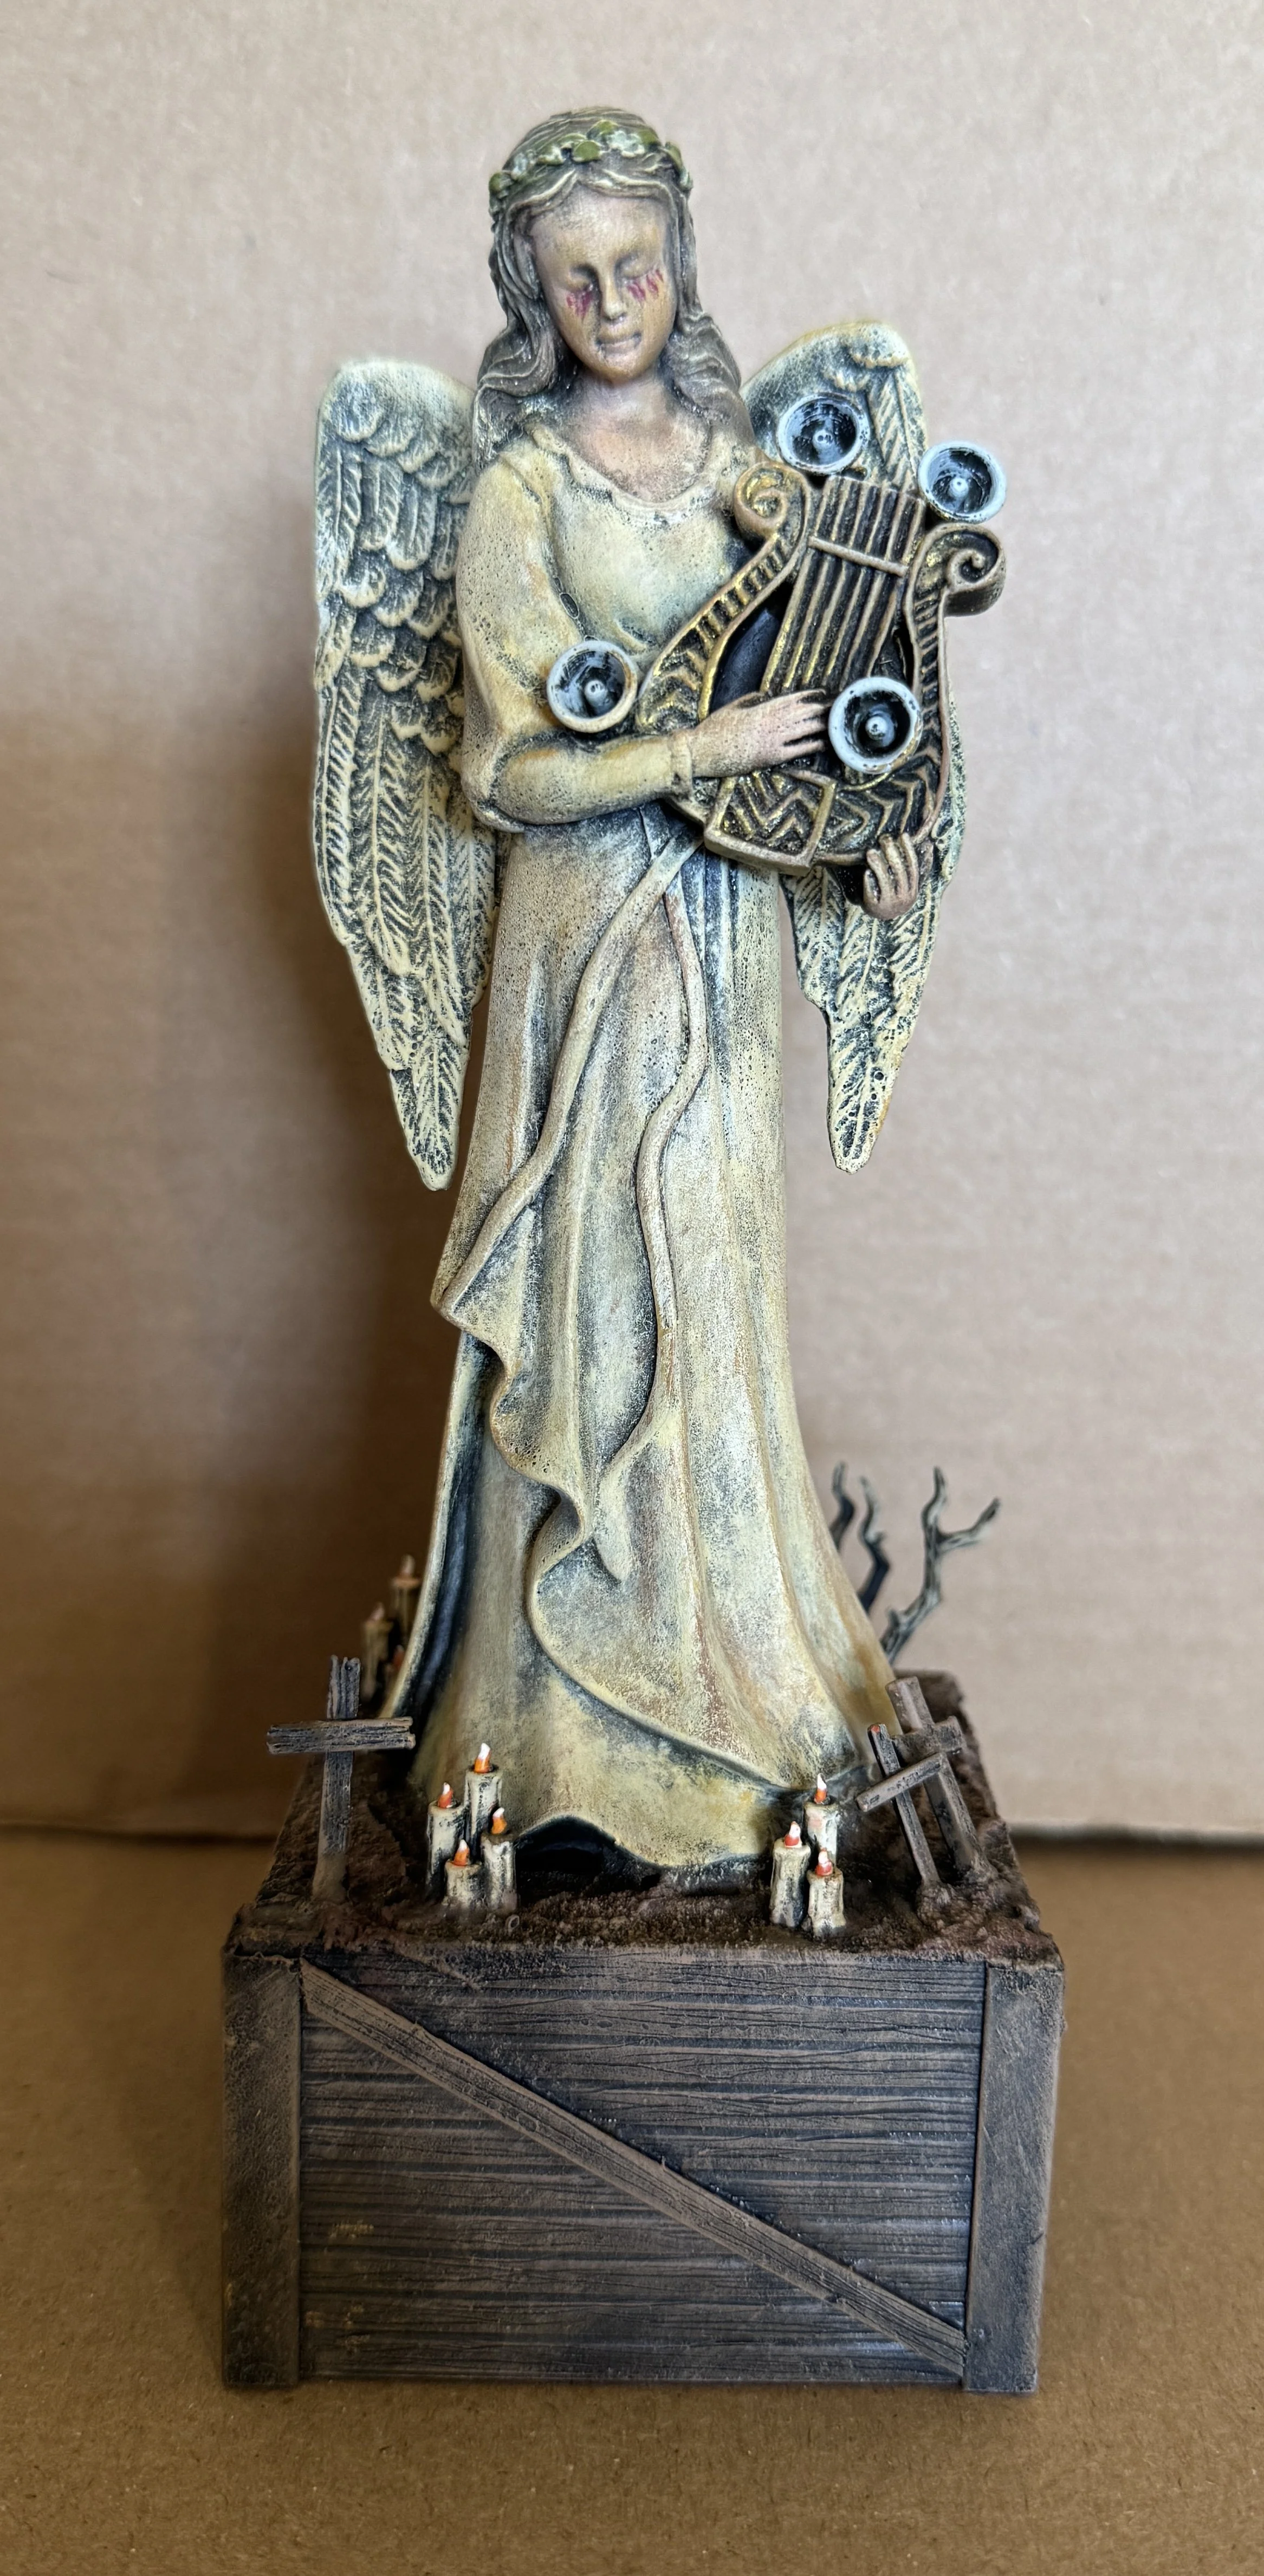
I found a plastic angel at last week’s swap meet. It cost me a dollar, and it looked like it had interesting possibilities for becoming a Trench Crusade shrine. I built a trench-style base for it to stand on, added some speakers, candles, and crosses around the base, and then gave it a dirtied paint job.
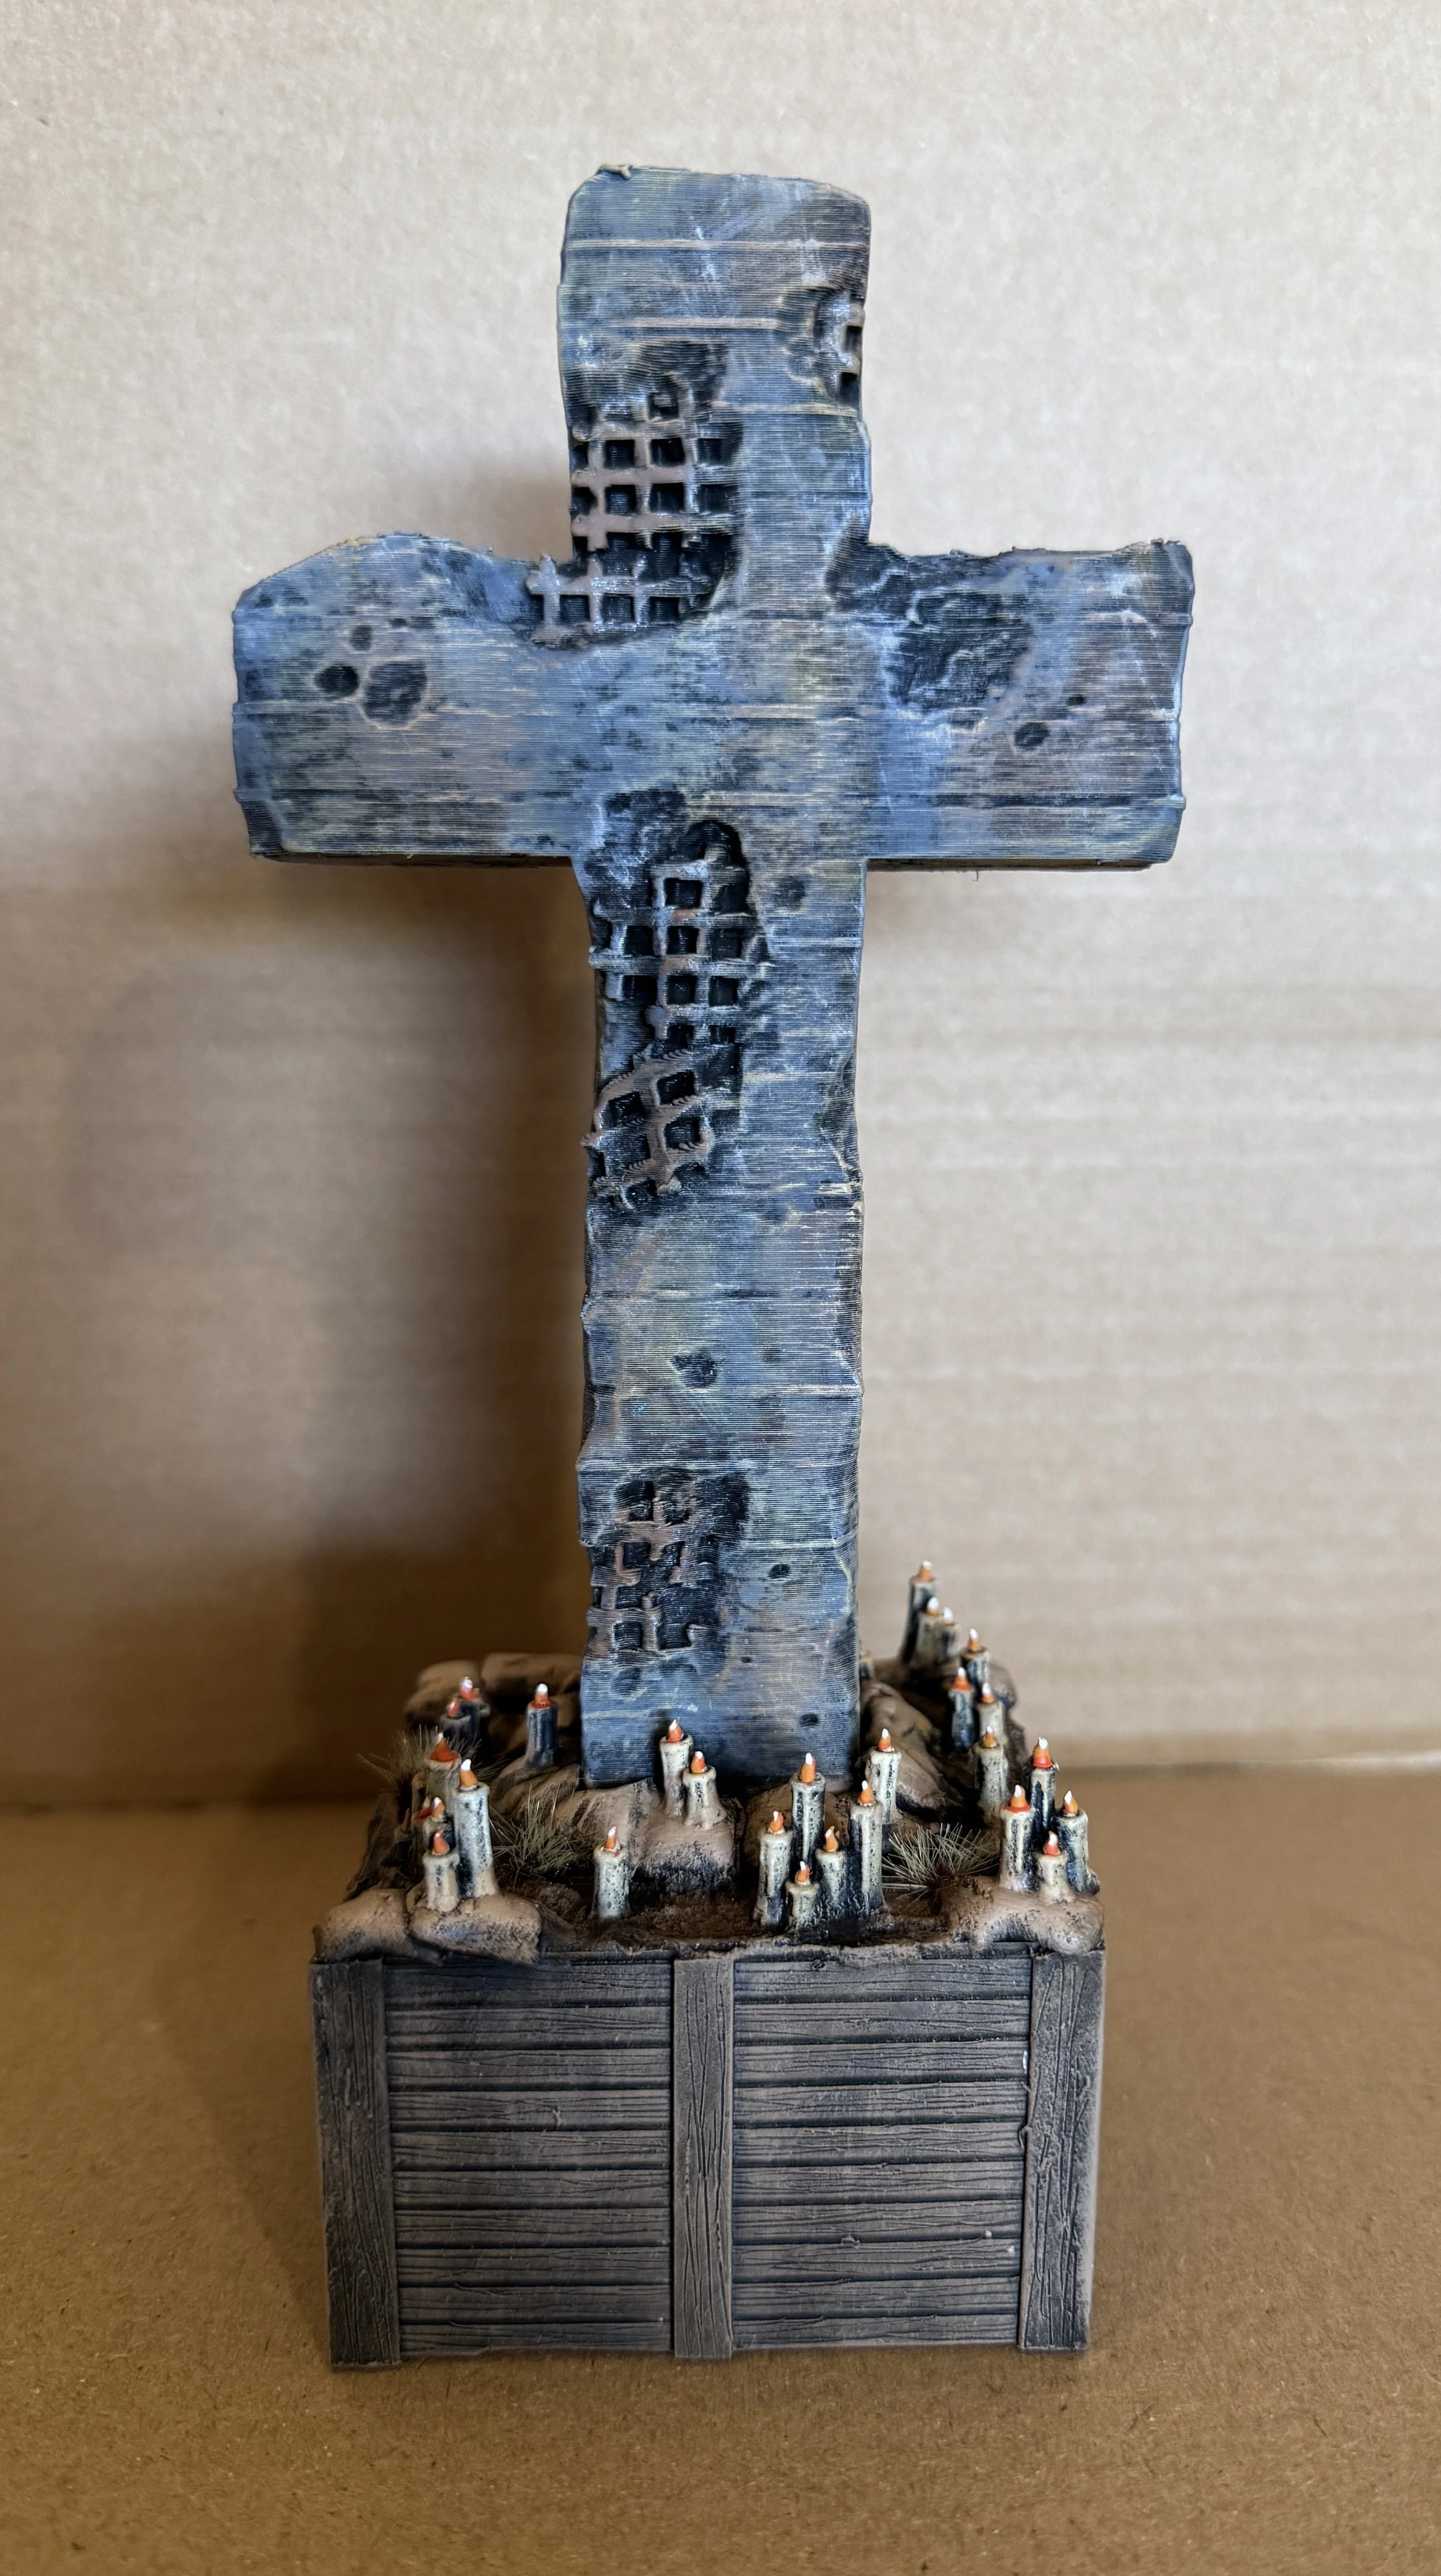
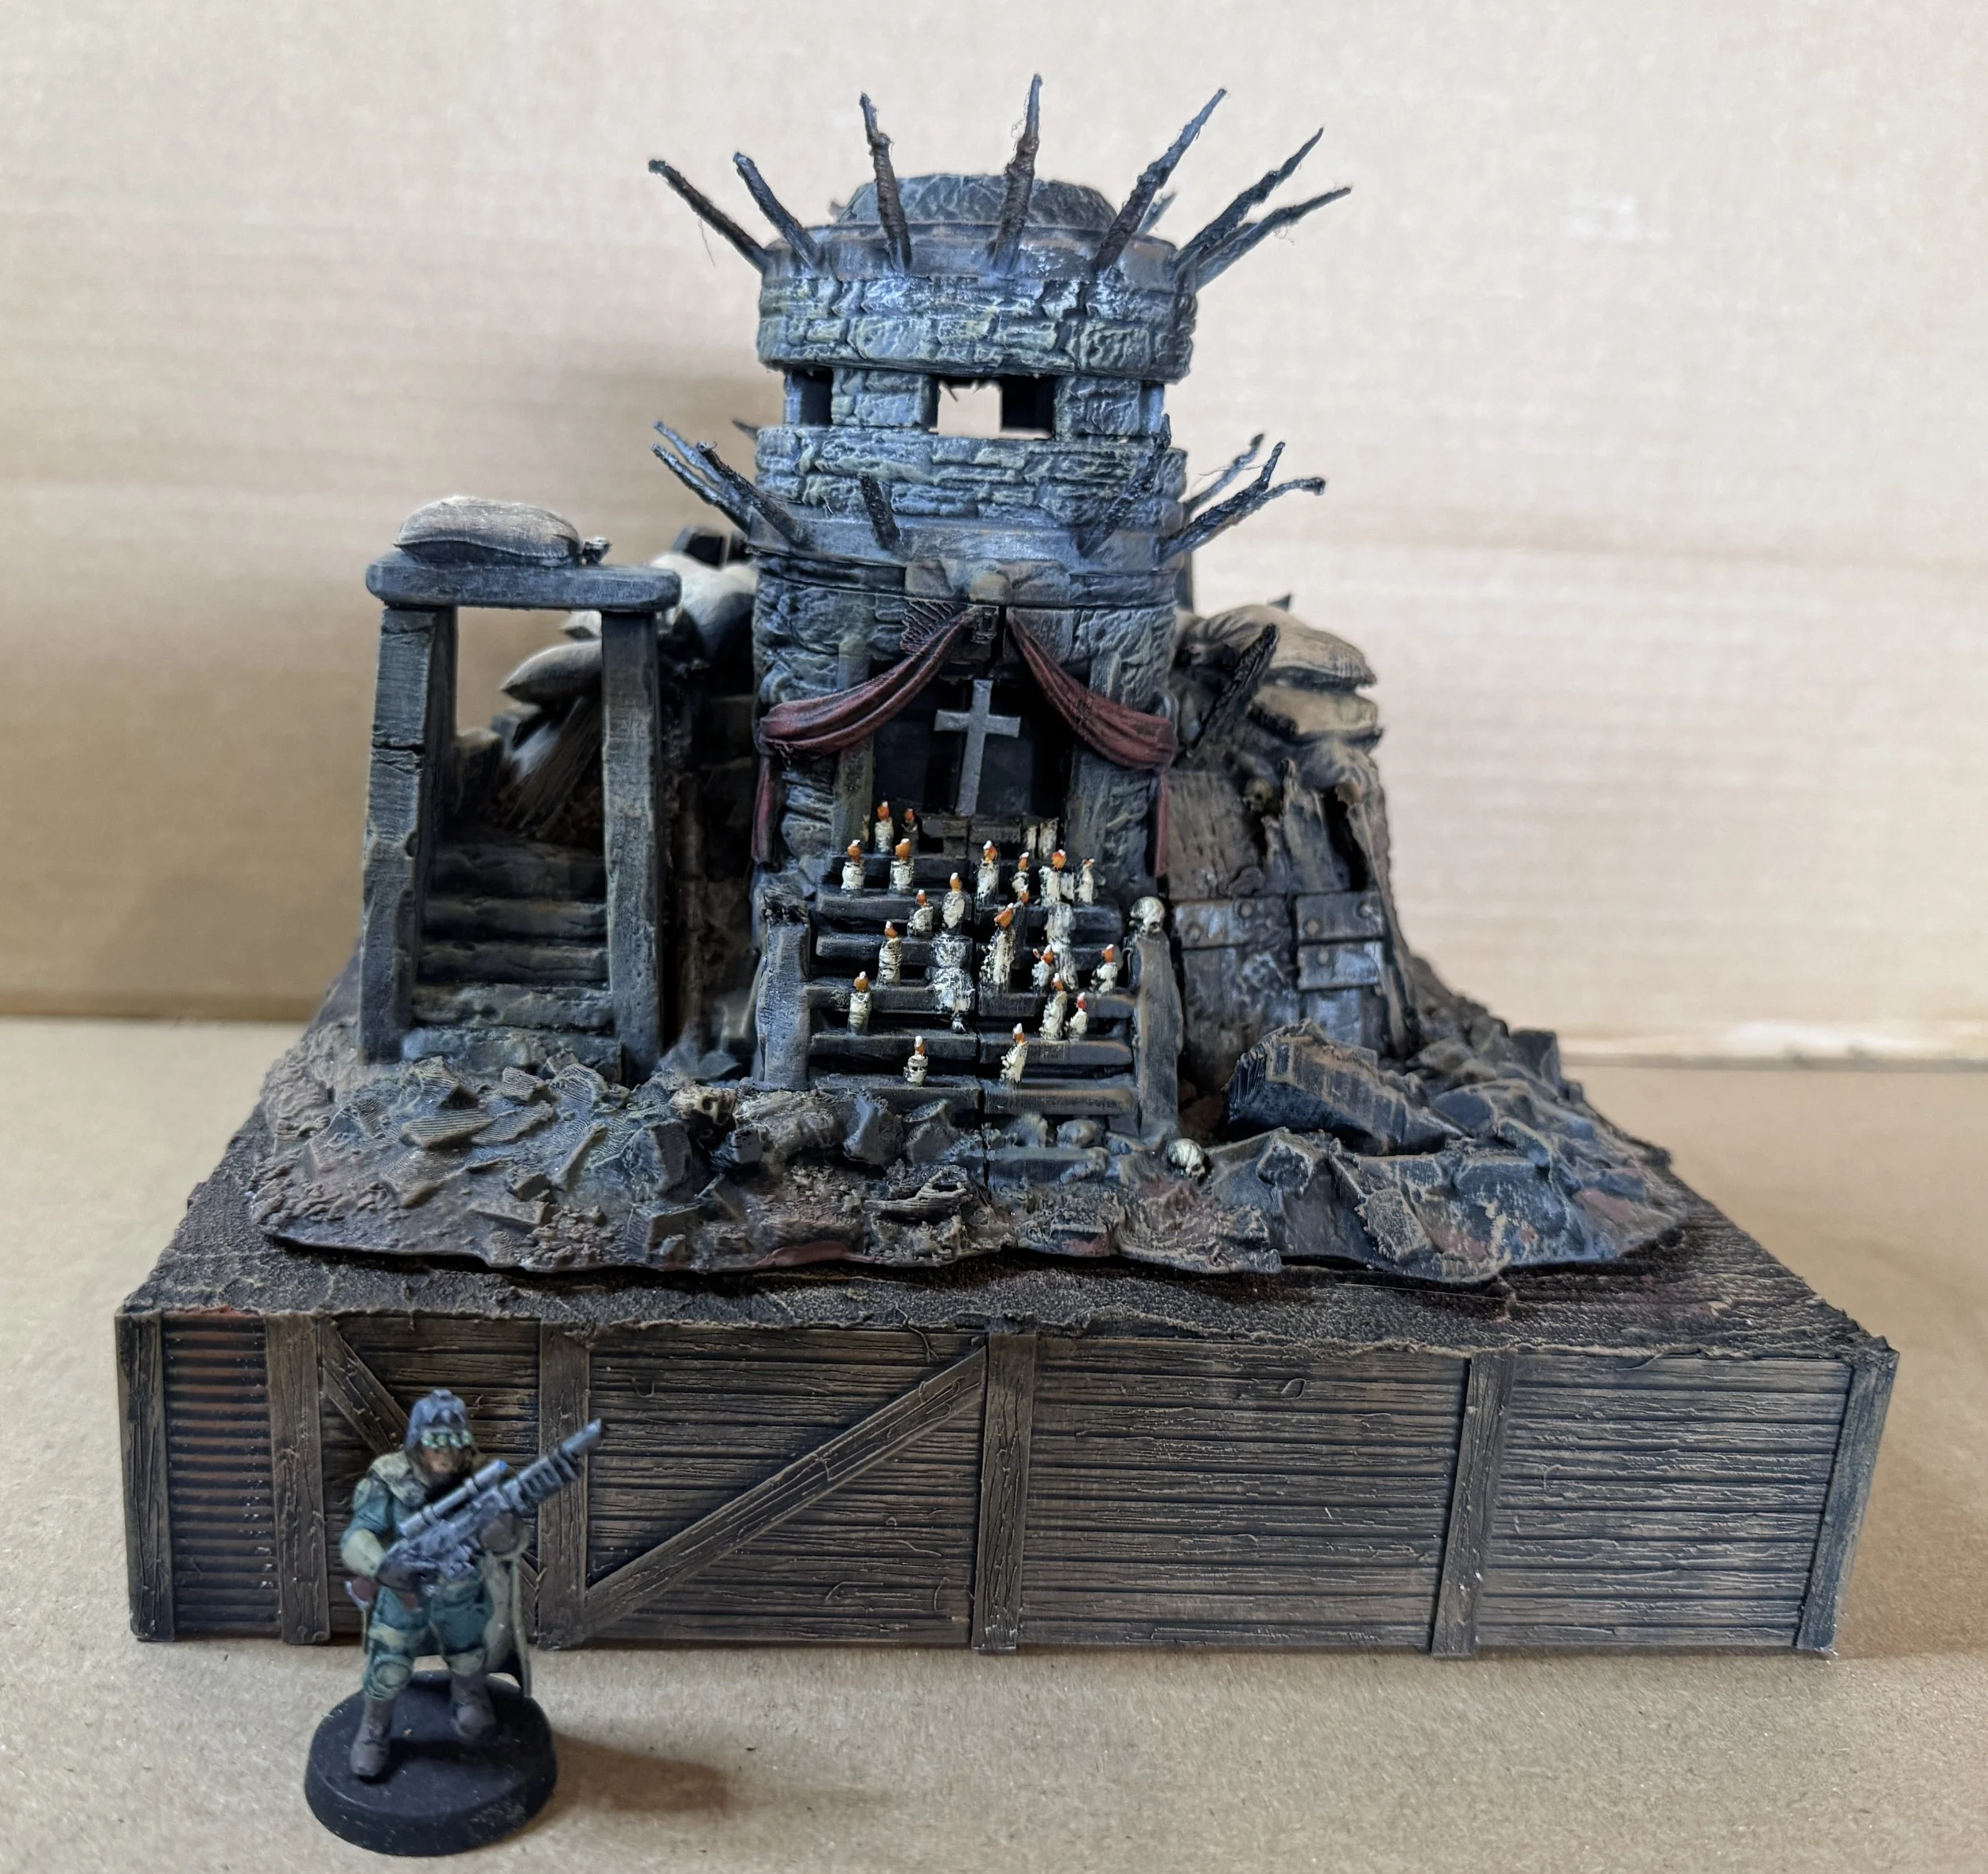
I recently ordered the Trench Dice Tower not for throwing dice but because I consider it one of the iconic Trench Crusade structures. To my great surprise and pleasure, they included the Brutal Trench Cross as a gift. I decided to do the cross right away. I set it on a trench-style base, surrounding it with Milliput sandbags and lots of candles.
I followed my gifted Brutal Trench Cross by painting another box of Pegasus river sections. I painted them as a dry riverbed as I did with the ones I showed on my last posting. I didn’t post a picture of these since they look just like the ones I posted last week.
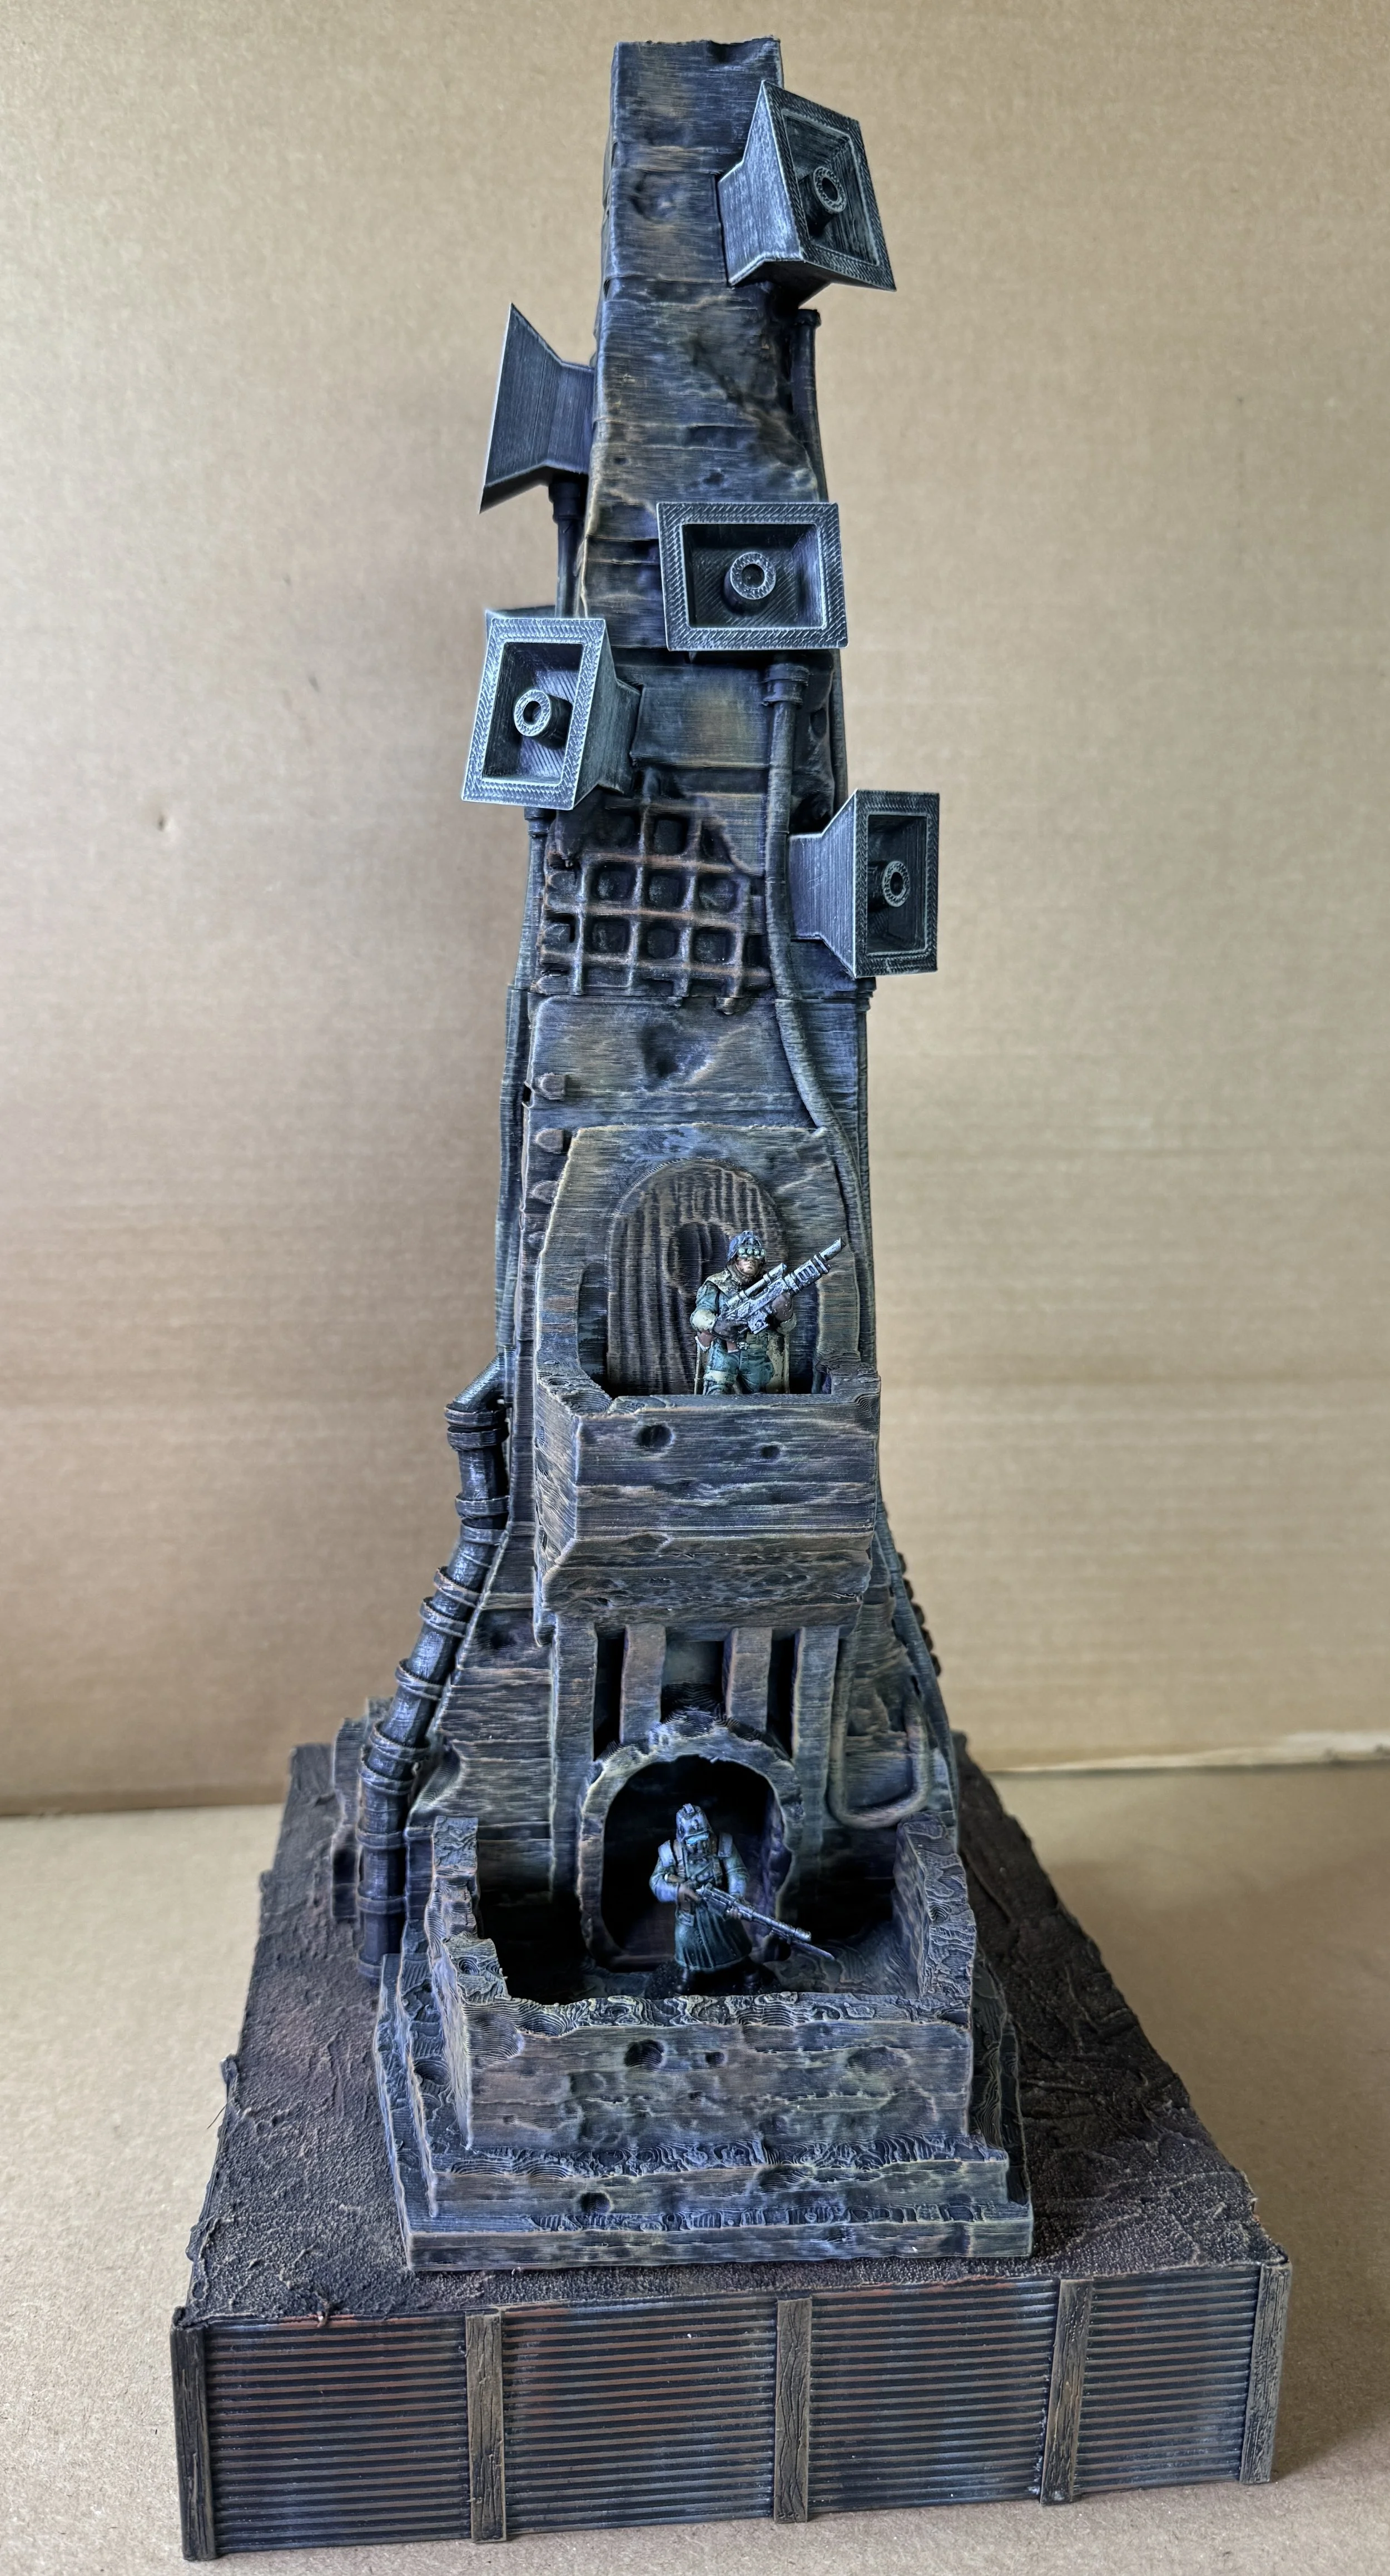
Next on the agenda was the Trench Dice Tower itself. No modification needed with it; just paint and a trench-style base.
A Pillbox Shrine arrived this week, and I decided to get right to work on it. I began by building the trench platform it will sit on. As with all the others I have done this is a core of Duplo blocks covered with Evergreen plastic for detail. In terms of the shrine, it was mostly painting though I did remove the Balkan Cross and replace it with a more traditional religious cross.
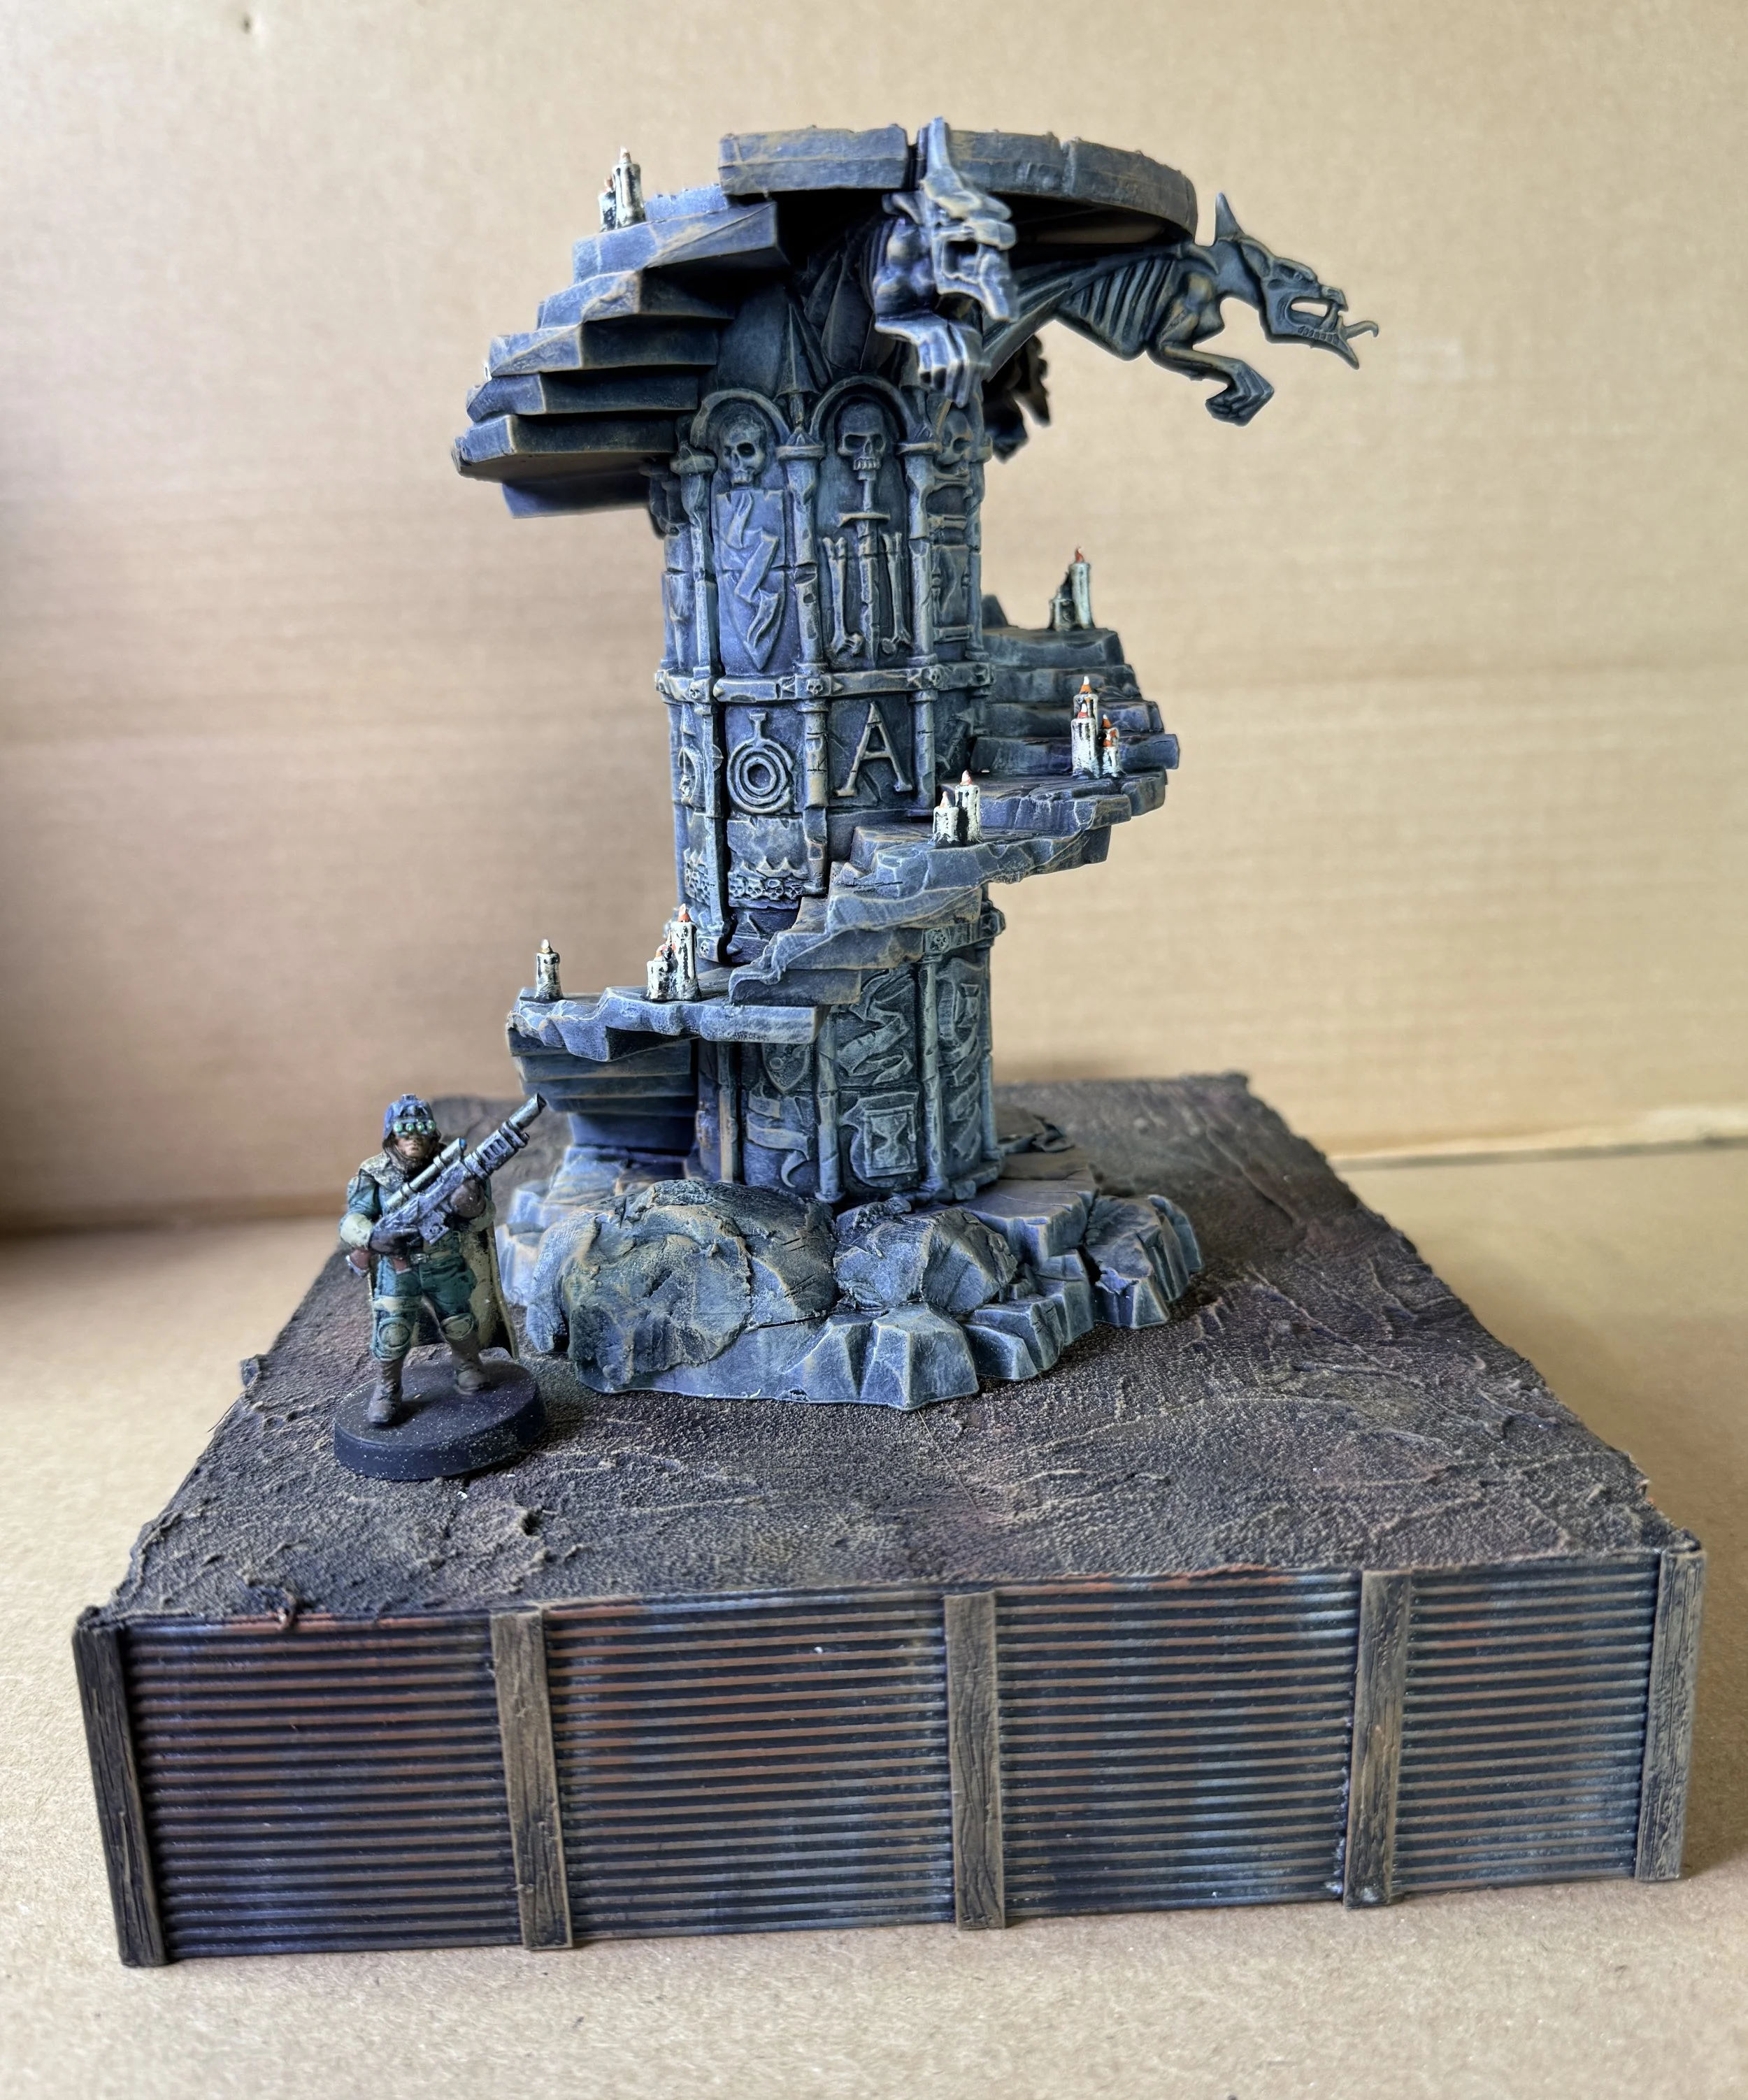
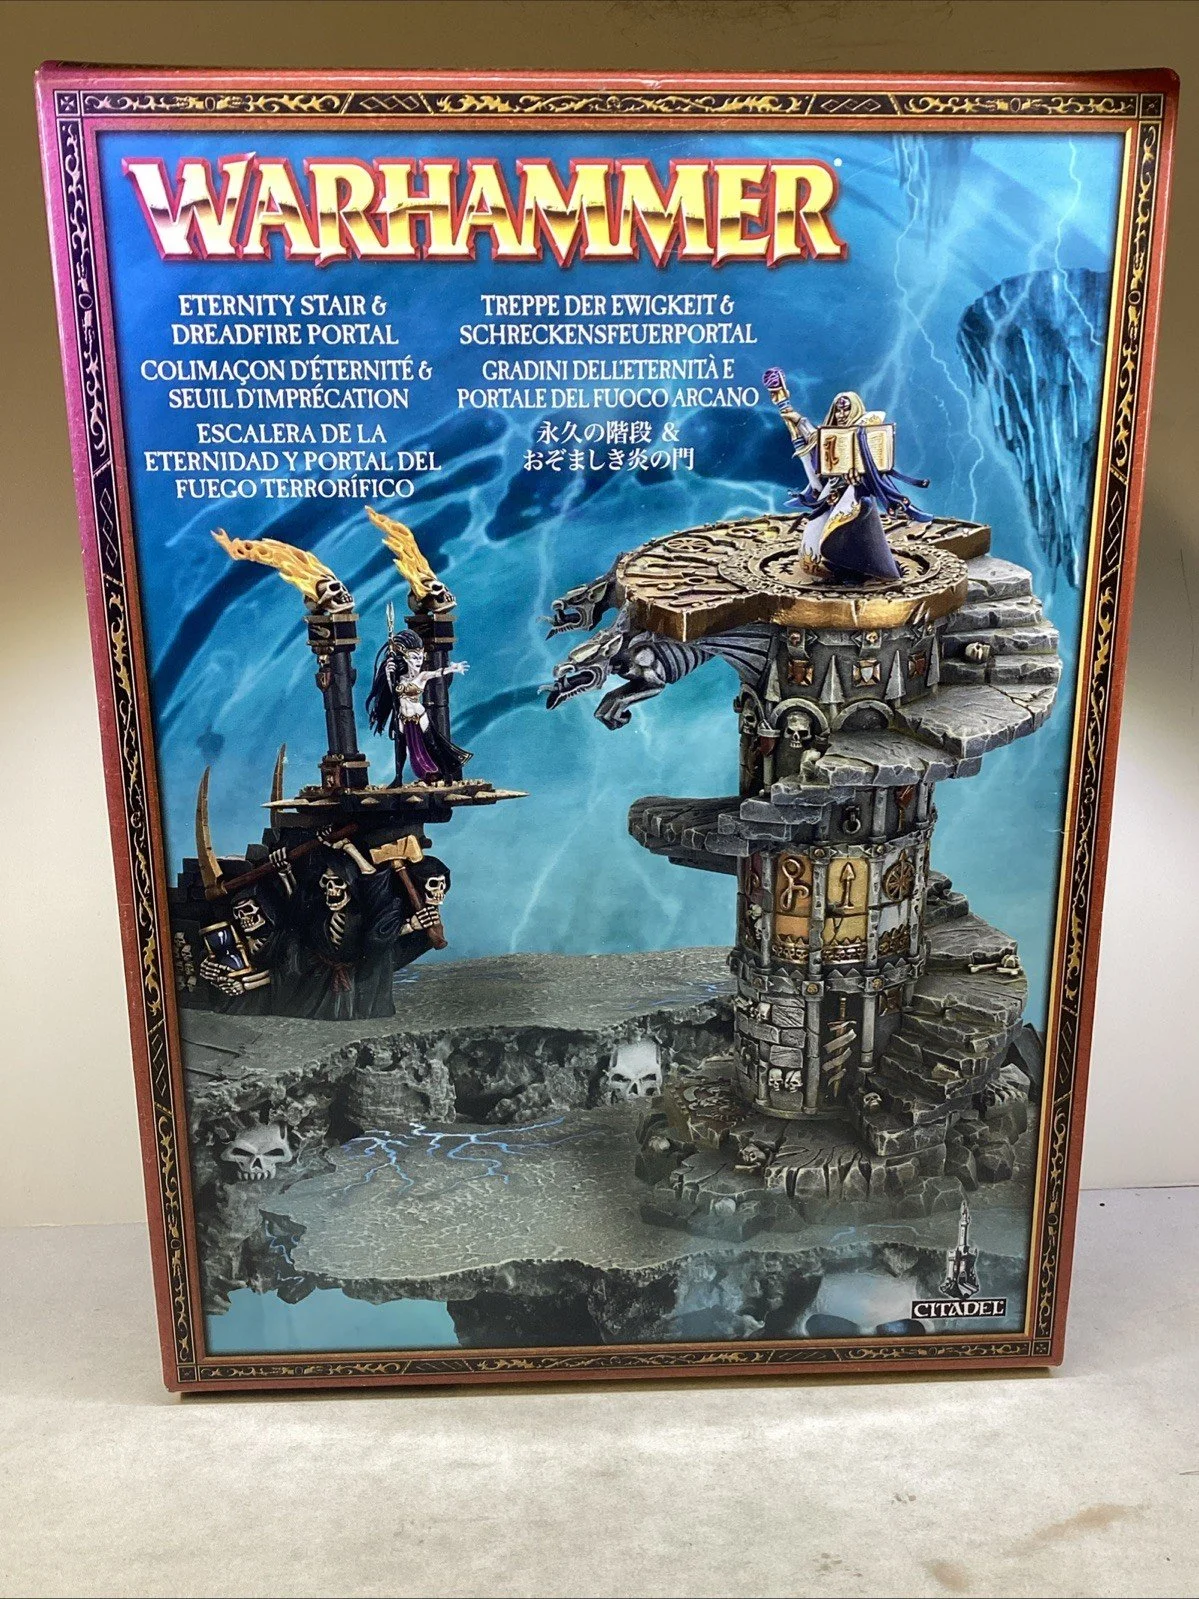
Several years ago, at a Brookhurst Hobbies Bring and Buy event, I purchased GW’s Eternity Stair and Dreadfire Portal. I got the two of them for just $10 which is $10 less than someone is asking for just one of them on eBay. They were poorly painted, but that was easily remedied with new paint jobs. I will definitely be using the Eternity Stair with my Trench Crusade collection, so I added candles to the stairs. I’m pretty sure I’ll be using the DreadFire Portal but I’m not sure yet… it needs a lot of Milliput rock shaping to hide the GW symbols that surround the base.